background image

User Manual of WDAP-C7200AC/WDAP-W7200AC 


-140- 

Appendix B: Troubleshooting 


If you find the AP is working improperly or stop responding to you, please read this troubleshooting first before 

contacting the dealer for help. Some problems can be solved by yourself within a very short time. 


Scenario 

Solution 

The AP is not responding to 

me when I want to access it 

by Web browser. 

a.  Please check the connection of the power cord and the 

Ethernet cable of this AP. All cords and cables should be 
correctly and firmly inserted into the AP. 

b.  If all LEDs on this AP are off, please check the status of 

power adapter, and make sure it is correctly powered. 

c.  You must use the same IP address section which AP 

uses. 

d.  Are you using MAC or IP address filter? Try to connect 

the AP by another computer and see if it works; if not, 
please reset the AP to the factory default settings by 
pressing the ‘reset’ button for over 7 seconds. 

e.  Use the Smart Discovery Tool to see if you can find the 

AP or not. 

f.  If you did a firmware upgrade and this happens, contact 

your dealer of purchase for help. 

g.  If all the solutions above don’t work, contact the dealer 

for help. 

I can’t get connected to the 

Internet. 

a.  Go to ‘Status’ -> ‘Internet Connection’ menu on the router 

connected to the AP, and check Internet connection 
status. 

b.  Please be patient, sometimes Internet is just that slow. 
c.  If you’ve connected a computer to Internet directly 

before, try to do that again, and check if you can get 
connected to Internet with your computer directly 
attached to the device provided by your Internet service 
provider. 

d.  Check PPPoE / L2TP / PPTP user ID and password 

entered in the router’s settings again. 

e.  Call your Internet service provider and check if there’s 

something wrong with their service. 

f.  If you just can’t connect to one or more website, but you 

can still use other internet services, please check 
URL/Keyword filter. 

g.  Try to reset the AP and try again later. 
h.  Reset the device provided by your Internet service 

provider too. 

Summary of Contents for WDAP-C7200AC

Page 1: ......

Page 2: ...imits for a Class B digital device pursuant to Part 15 of FCC Rules These limits are designed to provide reasonable protection against harmful interference in a residential installation This equipment generates uses and can radiate radio frequency energy and if not installed and used in accordance with the instructions may cause harmful interference to radio communications However there is no guar...

Page 3: ...onal Restrictions This device is intended for home and office use in all EU countries and other countries following the EU directive 1999 5 EC without any limitation except for the countries mentioned below Country Restriction Reasons remarks Bulgaria None General authorization required for outdoor use and public service France Outdoor use limited to 10 mW e i r p within the band 2454 2483 5 MHz M...

Page 4: ...Revision User Manual of PLANET 1200Mbps 11ac Dual Band Ceiling mount Wireless Access Point Model WDAP C7200AC WDAP W7200AC Rev 1 1 September 2015 Part No EM WDAP C7200AC_W7200AC_v1 1 2080 E11010 001 II ...

Page 5: ...ling the AP WDAP W7200AC 16 Chapter 4 Quick Installation Guide 20 4 1 Manual Network Setup TCP IP Configuration 20 4 1 1 Configuring the IP Address Manually 20 4 2 Starting Setup in the Web UI 24 Chapter 5 Configuring the AP 25 5 1 Operation Mode 25 5 2 Setup Wizard 27 5 3 TCP IP Settings 34 5 3 1 LAN Settings 34 5 4 WLAN1 5GHz 36 5 4 1 Basic Settings 36 5 4 2 Advanced Settings 52 5 4 3 RF Output ...

Page 6: ...d Settings 106 5 6 9 Password 108 5 6 10 LED Control 109 5 6 11 Logout 109 5 6 12 Reboot 110 Chapter 6 Quick Connection to a Wireless Network 111 6 1 Windows XP Wireless Zero Configuration 111 6 2 Windows 7 WLAN AutoConfig 113 6 3 Mac OS X 10 x 116 6 4 iPhone iPod Touch iPad 120 Appendix A Planet Smart Discovery Utility 123 Appendix B FAQs 124 Q1 How to set up the WDS Repeater Connection 124 Q2 Ho...

Page 7: ...IGURE 4 3 SUCCESSFUL RESULT OF PING COMMAND 22 FIGURE 4 4 FAILED RESULT OF PING COMMAND 23 FIGURE 4 5 LOGIN BY DEFAULT IPADDRESS 24 FIGURE 4 6 LOGIN WINDOW 24 FIGURE 5 1 MAIN MENU 25 FIGURE 5 2 OPERATION MODE 26 FIGURE 5 3 SETUP WIZARD 27 FIGURE 5 4 LAN INTERFACE SETUPTOPOLOGY 27 FIGURE 5 5 WIZARD LAN INTERFACE SETUP 27 FIGURE 5 6 TIME ZONE SETUP TOPOLOGY 28 FIGURE 5 7 WIZARD TIME ZONE SETUP 28 FI...

Page 8: ...GS 5GHZ 59 FIGURE 5 41 WDS SET SECURITY 60 FIGURE 5 42 SITE SURVEY 5GHZ 61 FIGURE 5 43 WPS PBC 5GHZ 1 63 FIGURE 5 44 WPS PBC 5GHZ 2 63 FIGURE 5 45 WPS PIN 5GHZ 1 64 FIGURE 5 46 WPS PIN 5GHZ 2 64 FIGURE 5 47 WPS PIN 5GHZ 3 64 FIGURE 5 48 SCHEDULE 5GHZ 65 FIGURE 5 49 2 4GHZ WIRELESS MAIN MENU 66 FIGURE 5 50 2 4GHZ WIRELESS BASIC SETTINGS AP 67 FIGURE 5 51 2 4GHZ WIRELESS BASIC SETTINGS MULTIPLE AP 6...

Page 9: ... 104 FIGURE 5 87 SYSTEM LOG 105 FIGURE 5 88 UPGRADING FIRMWARE 106 FIGURE 5 89 SAVE RELOAD SETTINGS 107 FIGURE 5 90 PASSWORD SETUP 108 FIGURE 5 91 LED CONTROL 109 FIGURE 5 92 LOGOUT 109 FIGURE 5 93 REBOOT 110 FIGURE 6 1 SYSTEM TRAY WIRELESS NETWORK ICON 111 FIGURE 6 2 CHOOSING A WIRELESS NETWORK 111 FIGURE 6 3 ENTERING THE NETWORK KEY 112 FIGURE 6 4 CHOOSING A WIRELESS NETWORK CONNECTED 112 FIGURE...

Page 10: ...III FIGURE 6 18 WI FI SETTING 120 FIGURE 6 19 WI FI SETTING NOT CONNECTED 121 FIGURE 6 20 TURNING ON WI FI 121 FIGURE 6 21 IPHONE ENTERING THE PASSWORD 122 FIGURE 6 22 IPHONE CONNECTED TO THE NETWORK 122 ...

Page 11: ...nstalling the AP please verify the contents inside the package box Package Contents of WDAP C7200AC WDAP C7200AC Quick Guide Mounting Bracket Mounting Kit Package Contents of WDAP W7200AC WDAP W7200AC Quick Guide 2 4G Antenna x 2 5G Antenna x 2 DIN rail Kit Magnet Kit Wall mounted Kit If there is any item missing or damaged please contact the seller immediately ...

Page 12: ... interference to enhance data throughput The incredible wireless speed makes it ideal for handling multiple HD movie streams high resolution on line games stereo music VoIPs and data streams at the same time stably and smoothly 11ac Innovations Bring Excellent Data Link Speed The WDAP C7200AC and WDAP W7200AC are built in with high power amplifier and 4 highly sensitive antennas which provide stro...

Page 13: ...eaming which are classified as a top priority Multiple Operation Modes for Various Applications The WDAP C7200AC and WDAP W7200AC support AP Client WDS Bridge Repeater and Universal Repeater modes through which it provides more flexibility for users when wireless network is established Compared with general wireless access point the WDAP C7200AC and WDAP W7200AC offer more powerful and flexible ca...

Page 14: ...d AP mode and thus can be centrally managed by PLANET WAPC 1232HP smart AP controller It will certainly benefit the system integrators when the scale of the wireless network gets bigger Furthermore with user friendly Web UI and Planet Smart Discovery supported the WDAP C7200AC and WDAP W7200AC are convenient to be managed and configured remotely in a small business wireless network ...

Page 15: ...ports up to 10 multiple SSIDs 2 4GHz 5GHz to allow users to access different networks through a single AP Supports WMM Wi Fi Multimedia and wireless QoS to enhance the efficiency of multimedia application Supports IAPP Inter Access Point Protocol and wireless roaming to enable clients to roam across different wireless networks Supports 5 level Transmitting Power Control to adapt various environmen...

Page 16: ... x 140 mm W x D x H Weight 300 5g 470 5g Power Requirements 802 3at PoE 48 56V DC input Power Consumption 20W max 20W max Mounting Ceiling Mount Wall Mount Wireless Interface Specifications Standard IEEE 802 11ac Draft 2 0 5GHz IEEE 802 11a n 5GHz IEEE 802 11b g n 2 4GHz Antenna Structure 802 11ac 2T2R MU MIMO 802 11n 2T2R MIMO Modulation DSSS Data Modulation 802 11ac OFDM BPSK QPSK 16QAM 64QAM 25...

Page 17: ...istance will vary in different environments 5GHz 802 11ac VHT20 22dBm 802 11ac VHT40 22dBm 802 11ac VHT80 22dBm 802 11n HT20 22dBm 802 11n HT40 22dBm 802 11a 22dBm Max RF Power 2 4GHz 802 11n 17 2 5dBm 802 11b g 20 2 5dBm 5GHz 802 11ac VHT20 91dBm Nss1 MCS0 64dBm Nss2 MCS8 802 11ac VHT40 89dBm Nss1 MCS0 59dBm Nss2 MCS9 802 11ac VHT80 86dBm Nss1 MCS0 56dBm Nss2 MCS9 802 11n HT20 92dBm MCS0 71dBm MC...

Page 18: ...z wireless 32 5GHz wireless 32 Built in DHCP server supporting static IP address distribution Supports UPnP LAN Supports 802 1d Spanning Tree Web based HTTP management interface SNTP time synchronize Easy firmware upgrade Supports Scheduling Reboot Supports Smart Discovery Utility System Management Supports AP Controller Standards Conformance IEEE Standards IEEE 802 11ac Draft 2 0 2T2R up to 867Mb...

Page 19: ...User Manual of WDAP C7200AC WDAP W7200AC 9 Chapter 2 Hardware Installation 2 1 Product Outlook WDAP C7200AC Dimensions 194 x 49 mm Φ x H Drawing Figure 2 1 WDAP C7200AC Product Drawing ...

Page 20: ...User Manual of WDAP C7200AC WDAP W7200AC 10 WDAP W7200AC Dimensions 148 x 41 x 140 mm W x D x H Drawing Figure 2 2 WDAP W7200AC Product Drawing ...

Page 21: ...e front and rear panels provide a simple interface monitoring the AP Figure 2 2 shows the hardware interface of the WDAP C7200AC WDAP C7200AC Hardware Interface Figure 2 3 WDAP C7200AC Panel Layout WDAP W7200AC Hardware Interface Figure 2 4 WDAP W7200AC Panel Layout ...

Page 22: ...Orange Blinking Detect and identify the LED controlled by S W 1 Position LED on LED blinks continuously 2 Position LED off the LED is off Button Definition Object Description Reset To restore to the factory default setting press and hold the Reset Button over 5 seconds and then release it Port Definition Object Description PoE Port 802 3at PoE 10 100 1000Mbps RJ 45 port auto MDI MDI X Connect PoE ...

Page 23: ...t is recommended to use Internet Explore 7 0 or above to access the AP 3 2 Installing the AP Before installing the AP make sure your PoE switch is connected to the Internet through the broadband service successfully at this moment If there is any problem please contact your local ISP After that please install the AP according to the following steps Don t forget to pull out the power plug and keep ...

Page 24: ...ting bracket put it on the target place by aligning the holes and fix it with the supplied screws Figure 3 2 WDAP C7200AC Installation Diagram 2 Step 3 Plug the RJ45 Ethernet cable into the PoE port of the WDAP C7200AC Figure 3 3 WDAP C7200AC Installation Diagram 3 ...

Page 25: ...e sure the device is mated with two fixed screws Then rotate the device clockwise to lock it in position Figure 3 4 WDAP C7200AC Installation Diagram 4 Step 5 Plug the other end of the Ethernet cable into the PoE switch IEEE 802 3at PoE switch is required Figure 3 5 WDAP C7200AC Installation Diagram 4 ...

Page 26: ...ctors of the WDAP W7200AC that indicates 5GHz on the top panel Figure 3 7 WDAP W7200AC Installation Diagram 2 Step 3 Wall Mount Installation 1 There are 4 holes with 8mm diameter on the wall the distance between the 2 holes is 133mm and the line through them must be kept horizontal 2 Install a conductor pipe inside the board hole and flush the edge of the conductor pipe with the wall surface 3 Scr...

Page 27: ...W7200AC Installation Diagram 3 Step 4 DIN Rail Mounting Installation 1 Screw the DIN rail on the WDAP W7200AC 2 Lightly push the bottom of DIN rail into the track 3 Check whether the DIN rail is tightly on the track Figure 3 9 WDAP W7200AC Installation Diagram 4 ...

Page 28: ... 5 Magnet Installation To install the WDAP W7200AC on a magnetic surface simply follow the diagram below Figure 3 10 WDAP W7200AC Installation Diagram 5 Step 6 Plug the Ethernet cable into the PoE port Figure 3 11 WDAP W7200AC Installation Diagram 6 ...

Page 29: ...User Manual of WDAP C7200AC WDAP W7200AC 19 Step 7 Plug the other end of the Ethernet cable into the PoE switch IEEE 802 3at PoE switch is required Figure 3 12 WDAP W7200AC Installation Diagram 7 ...

Page 30: ...DAP W7200AC by PoE switch through the PoE port In the following sections we ll introduce how to install and configure the TCP IP correctly in Windows 7 And the procedures in other operating systems are similar First make sure your Ethernet Adapter is working and refer to the Ethernet adapter manual if needed 4 1 1 Configuring the IP Address Manually Summary Set up the TCP IP Protocol for your PC C...

Page 31: ... Now click OK to save your settings Now you can run the ping command in the command prompt to verify the network connection between your PC and the AP The following example is in Windows 7 OS Please follow the steps below 1 Click on Start Run 2 Type cmd in the Search box ...

Page 32: ... 168 1 253 and then press Enter If the result displayed is similar to Figure 4 3 it means the connection between your PC and the AP has been established well Figure 4 3 Successful Result of Ping Command If the result displayed is similar to Figure 4 4 it means the connection between your PC and the AP has failed ...

Page 33: ...00AC 23 Figure 4 4 Failed Result of Ping Command If the address is 0 0 0 0 check your adapter installation security settings and the settings on your AP Some firewall software programs may block a DHCP request on newly installed adapters ...

Page 34: ...Login by Default IP Address After a moment a login window will appear Enter admin for the User Name and Password both in lower case letters Then click OK or press the Enter key Figure 4 6 Login Window Default IP Address 192 168 1 253 Default User Name admin Default Password admin If the above screen does not pop up it may mean that your web browser has been set to a proxy Go to Tools menu Internet...

Page 35: ...n if you are not clear about a certain feature you can refer to the Help section at the right side of the screen to read all the related helpful information 5 1 Operation Mode The Operation Mode section guides you to configuring the WDAP C7200AC WDAP W7200AC to Standalone AP or Managed AP When switching the operation mode to Managed AP the administrator will be able to manage the AP by PLANET Wire...

Page 36: ...roller existed in the local network can control this AP Apply Change Click Apply Change to save and apply the settings Reset Click Reset to erase all settings After you configure the settings on the AP Operation Mode page you must click Apply to apply the changes and to save the settings Changing some settings might cause the AP to stop and restart system processes If this happens wireless clients...

Page 37: ...kly Select Setup Wizard on the left side of the screen and by clicking on Next on the Setup Wizard screen shown below you will then name your WDAP C7200AC WDAP W7200AC and set up its security Figure 5 3 Setup Wizard Step 1 LAN Interface Setup Figure 5 4 LAN Interface Setup Topology Figure 5 5 Wizard LAN Interface Setup The page includes the following fields ...

Page 38: ...e Setup Topology Figure 5 7 Wizard Time Zone Setup The page includes the following fields Object Description Enable NTP Client Update Check this box to connect NTP Server and synchronize internet time Automatically Adjust Daylight Saving Check this box and system will adjust the daylight saving automatically Time Zone Select Select the Time Zone from the drop down menu NTP Server Select the NTP Se...

Page 39: ... Service Set Identifier identifies your wireless network Channel Width Select 80MHz if you use 802 11ac select 40MHz if you use 802 11n otherwise 20MHz is for the 802 11a mode Control Sideband It is only valid when you choose a 40MHz channel width Channel Number Indicates the channel setting for the AP Step 4 Wireless 5GHz Security Settings Secure your wireless network by turning on the WPA or WEP...

Page 40: ... can enter key in ASCII or Hex format Key Setting Enter the key whose format is limited by the key format ASCII or Hex Encryption WPA PSK The following picture shows how to set up WPA PSK security You can select WPA TKIP WPA2 AES and Mixed mode Figure 5 11 5GHz Wireless Security Setup WPA Setting The page includes the following fields Object Description Pre shared Key Format Specify the format of ...

Page 41: ...P WDS mode SSID Service Set Identifier identifies your wireless network Channel Width Select 40MHz if you use 802 11n otherwise 20MHz is for the 802 11b g mode Control Sideband It is only valid when you choose a 40MHz channel width Channel Number Indicates the channel setting for the AP Step 6 Wireless 2 4GHz Security Settings Secure your wireless network by turning on the WPA or WEP security feat...

Page 42: ...er can enter key in ASCII or Hex format Key Setting Enter the key whose format is limited by the key format ASCII or Hex Encryption WPA PSK The following picture shows how to set WPA PSK security You can select WPA TKIP WPA2 AES and Mixed mode Figure 5 15 2 4GHz Wireless Security Setup WPA Setting The page includes the following fields Object Description Pre shared Key Format Specify the format of...

Page 43: ...WDAP W7200AC 33 Click Finished to make your wireless configuration effective and finish the Setup Wizard Figure 5 16 Setup Wizard Finished After rebooting please check whether you can access the Internet or not on the Status page ...

Page 44: ... change the setting for IP address subnet mask DHCP etc 5 3 1 LAN Settings On the LAN Settings page you can configure the IP parameters of the LAN on the screen as shown below Figure 5 17 LAN Setting The page includes the following fields Object Description IP Address The default LAN IP address of the WDAP C7200AC WDAP W7200AC is 192 168 1 253 You can change it according to your request ...

Page 45: ...n Name Default is Planet 802 1d Spanning Tree You can enable or disable the Spanning Tree function Clone MAC Address You can input an MAC address here for using clone function UPnP Enable You can enable or disable the UPnP function The UPnP feature allows the devices such as Internet computers to access the local host resources or devices as needed UPnP devices can be automatically discovered by t...

Page 46: ...e 5GHz basic settings for the wireless network on this page After the configuration is done please click Apply Changes to save the settings First of all the wireless AP supports multiple wireless modes for different network applications which include AP Multiple SSIDs Universal Repeater Client WDS AP WDS It is so easy to combine the WDAP C7200AC WDAP W7200AC with the existing wired network The WDA...

Page 47: ...nual of WDAP C7200AC WDAP W7200AC 37 Figure 5 19 5GHz Wireless Basic Settings of AP The page includes the following fields AP Multi SSID Mode Clients Clients SSID 1 5G SSID 2 2 4G Internet WDAP C7200AC AP Mode ...

Page 48: ...n the submenu for the related configuration Furthermore click Multiple AP to enable multiple SSID functions SSID It is the ID of the wireless network User can access the wireless network through it only However if you switch to Client Mode this field becomes the SSID of the AP you want to connect with Default Planet AP 5G Channel Width You can select 20MHz 40MHz or 80MHz Channel Number You can sel...

Page 49: ...er the SSID you want to broadcast in the field below Then please click Security in the submenu for the related settings of the AP you want to connect with Multiple SSID Enabling multiple SSID can broadcast multiple WLAN SSIDs using virtual interfaces You can have different encryption settings for each WLAN and you can restrict what they have access to Choose menu WLAN1 5GHz Basic Settings Multiple...

Page 50: ...z Security page on the AP to set up security settings for each of the SSIDs Universal Repeater This mode allows the AP with its own BSS to relay data to a root AP to which it is associated with WDS disabled The wireless repeater relays signal between its stations and the root AP for greater wireless range 1 Example of how to configure Universal Repeater Mode Please take the following steps To conf...

Page 51: ... simultaneously Click Apply Changes to take effect Figure 5 22 5GHz Universal Repeater 1 Step 2 Go to 5GHz Site Survey page to find the root AP Select the root AP that you want to repeat the signal and then click Next Figure 5 23 5GHz Universal Repeater 2 ...

Page 52: ...curity key Then click Connect Figure 5 24 5GHz Universal Repeater 3 Step 4 Check Add to Wireless Profile and click Reboot Now Figure 5 25 5GHz Universal Repeater 4 Step 5 Go to Management Status page to check whether the state of Repeater interface should be Connected Figure 5 26 5GHz Universal Repeater 5 ...

Page 53: ...igure 5 27 5GHz Wireless Basic Settings Client Client Infrastructure Combine the Wireless Router to the Ethernet devices such as TV game player or HDD and DVD to make them be wireless stations 5G Clients Switch WDAP C7200AC AP Station Client Mode Internet a n ac a n ac ...

Page 54: ...DS please click WDS Settings in the submenu for the related configuration Furthermore click Multiple AP to enable multiple SSID functions Network Type In Infrastructure the wireless LAN serves as a wireless station And the user can use the PC equipped with the WDAP C7200AC WDAP W7200AC to access the wireless network via other access points In ad hoc the wireless LAN will use the ad hoc mode to ope...

Page 55: ...o change this value unless you know what will happen after modification Default is Auto Enable Mac Clone Single Ethernet Client Enable Mac Clone Example of how to configure Client Mode Please take the following steps To configure each wireless parameter please go to the WLAN1 5GHz Basic Settings page Step 1 Go to WLAN1 5GHz Site Survey page and click Site Survey Figure 5 28 Client Survey Step 2 Ch...

Page 56: ...User Manual of WDAP C7200AC WDAP W7200AC 46 Figure 5 29 Client AP List Step 3 Enter the Security Key of the root AP and then click Connect Figure 5 30 Client Security ...

Page 57: ...ient Status WDS Connect this Wireless AP with up to 8 WDS capable wireless APs to expand the scope of network WDS Connect this Wireless AP with up to 8 WDS capable wireless APs to expand the scope of network AP Clients Switch Clients Switch Clients Switch WDAP C7200AC AP WDS Bridge PtMP Mode Clients Clients Switch Switch WDAP C7200AC WDAP C7200AC WDS Bridge PtP Mode ...

Page 58: ...he following fields Object Description Disable Wireless LAN Interface Check the box to disable the wireless function Band Select the desired mode Default is 5GHz A N AC It is strongly recommended that you set the Band to 5GHz A N AC and all of 802 11a 802 11n and 802 11ac wireless stations can connect to the ...

Page 59: ...P Client WDS AP WDS If you select WDS or AP WDS please click WDS Settings in the submenu for the related configuration Furthermore click Multiple AP to enable multiple SSID functions Channel Width You can select 20MHz 40MHz or 80MHz Control Sideband You can select Upper or Lower Channel Number You can select the operating frequency of wireless network Data Rate Set the wireless data transfer rate ...

Page 60: ...reless AP with up to 8 WDS capable wireless APs and connect another AP to provide service for all wireless stations within its coverage Figure 5 33 5GHz Wireless Basic Settings WDS AP WDS Repeater Mode Clients 5G WDS 2 4G AP Internet WDAP C7200AC g n g n a n ac a n ac ...

Page 61: ...ps 2T2R 5 GHz A N 802 11a n mode rate is up to 300Mbps 5 GHz N AC 802 11n ac mode rate is up to 300Mbps or 867Mbps 5 GHz A N AC 802 11a n ac mode rate is up to 54Mbps 300Mbps or 867Mbps Mode There are four kinds of wireless mode selections AP Client WDS AP WDS If you select WDS or AP WDS please click WDS Settings submenu for the related configuration Furthermore click Multiple APs to enable multip...

Page 62: ...f active wireless clients Enable Universal Repeater Mode Acting as AP and client simultaneously Universal Repeater is a technology used to extend wireless coverage To enable Universal Repeater mode check the box and enter the SSID you want to broadcast in the field below Then please click Security in the submenu for the related settings of the AP you want to connect with 5 4 2 Advanced Settings Ch...

Page 63: ...Enabled Protection It is recommended to enable the protection mechanism This mechanism can decrease the rate of data collision between 802 11b and 802 11g wireless stations When the protection mode is enabled the throughput of the AP will be a little lower due to the transmission of heavy frame traffic Default is Disabled Aggregation It is a function where the values of multiple rows are grouped t...

Page 64: ...utput Power 5GHz RF Output Power Control provides the flexibility to control the Wi Fi transmit power to optimize the wireless range Wi Fi power consumption for an Access Point could be reduced to up to 75 from its peak power consumption for serving small to medium size homes while maximum power is boosted for large homes and businesses The WDAP C7200AC WDAP W7200AC supports output power control l...

Page 65: ...ction which includes the root one and the client one Disable No security setup for wireless connection WEP It is based on the IEEE 802 11 standard And the default setting of authentication is Automatic which can select Open System or Shared Key authentication type automatically based on the wireless station s capability and request Furthermore you can select Key Length and enter 10 and 26 Hexadeci...

Page 66: ...r authentication mode based on Personal Pre shared Key please enter at least 8 ASCII characters Passphrase or 64 Hexadecimal characters All of the Cipher Suites support TKIP and AES 802 1x Authentication Enable 802 1x authentication function and then please enter the IP Address Port and Password of the Radius Server 5 4 5 Access Control Choose menu WLAN1 5GHz Access Control to allow or deny the co...

Page 67: ...dress on the list Current Access Control List You can select some MAC addresses and click Delete Selected to delete it To deny a PC at the MAC address of 00 30 4F 00 00 01 for example to connect to your wireless network do as follows Step 1 Select Deny from MAC Address Filter drop down menu Step 2 Enter 00 30 4F 00 00 01 in the MAC address box and click Add Step 3 Click OK to save your settings an...

Page 68: ...re in 2 4GHz which also applies to 5GHz Before configuring the WDS Setting page you have to select the wireless mode to WDS on the WLAN1 5GHz Basic Settings web page Switch Clients 5G WDS 2 4G AP Internet WDAP C7200AC g n g n a n ac a n ac AP Clients Switch Clients Switch Clients Switch WDAP C7200AC AP WDS Bridge PtMP Mode Switch WDS Repeater Mode Clients 5G WDS 2 4G AP Internet WDAP C7200AC g n g...

Page 69: ...gure 5 39 WDS Mode 5GHz Choose menu WLAN1 5GHz WDS Settings to configure WDS to connect the WDAP C7200AC WDAP W7200AC with another AP on this page After the configuration please click Apply Changes to save the settings Figure 5 40 WDS Settings 5GHz ...

Page 70: ... Click Set Security to configure the wireless security parameters of the AP you want to connect via WDS Show Statics Click Show Statics to show the WDS AP Current WDS AP List You can select some MAC addresses of the AP and click Delete Selected to delete it WDS feature can only be implemented between 2 wireless devices that both support the WDS feature Plus channel security settings and security k...

Page 71: ...ient mode and the wireless root interface of Universal Repeater mode Simply enter a Pin code or press the software PBC button or hardware WPS button if any and a secure wireless connection is established PBC If you find the WPS LED blinking for 2 minutes after you press the hardware WPS button on the device it means that PBC encryption method is successfully enabled And an authentication will be p...

Page 72: ...he PBC method you can also use the Pin method to activate the WPS Just enter the Pin number of the client device in the field and click Start Pin The WPS encryption can be implemented only between your Router and another WPS capable device Example of how to establish wireless connection using WPS Please take the following steps Step 1 Choose menu WLAN1 5GHz WPS to configure the setting for WPS Aft...

Page 73: ... within 2 minutes iii Wait for a while until the next screen appears Click OK to complete the WPS configuration B By Pin If the new device supports Wi Fi Protected Setup and the Pin method you can add it to the network by Pin with the following two methods Method One Enter the Pin of your wireless adapter into the configuration utility of the AP i Enter the Pin code of the wireless adapter in the ...

Page 74: ...nishes Method Two Enter the Pin of the AP into the configuration utility of your wireless adapter i Click Start PBC on the WPS page of the AP Get the current Pin code of the AP on WPS page each AP has its unique Pin code Figure 5 47 WPS PIN 5GHz 3 ii For the configuration of the wireless adapter please choose the option that you want to enter the Pin of the AP Registrar in the configuration utilit...

Page 75: ...le This feature is often used for restricting access to all users such as children employees and guests during specific times of the day for parental control or security reasons Choose menu WLAN1 5GHz Schedule to configure the schedule rule of enabling wireless function After the configuration please click Apply Changes to save the settings Figure 5 48 Schedule 5GHz ...

Page 76: ...5 5 1 Basic Settings Choose menu WLAN2 2 4GHz Basic Settings to configure the 2 4GHz basic settings for the wireless network on this page After the configuration is done please click Apply Changes to save the settings First of all the wireless AP supports multiple wireless modes for different network applications which include AP Multiple SSIDs Universal Repeater Client WDS AP WDS It is so easy to...

Page 77: ... 2 4GHz Wireless Basic Settings AP The page includes the following fields Object Description Disable Wireless LAN Interface Check the box to disable the wireless function AP Multi SSID Mode Clients Clients SSID 1 5G SSID 2 2 4G Internet WDAP C7200AC AP Mode ...

Page 78: ... ID of the wireless network User can access the wireless network via the ID only However if you switch to Client Mode this field becomes the SSID of the AP you want to connect with Default Planet AP 2 4G Channel Width You can select 20MHz or 40MHz Channel Number You can select the operating frequency of wireless network Default 11 Broadcast SSID If you enable Broadcast SSID every wireless station ...

Page 79: ...AN and you can restrict what they have access to Choose menu WLAN1 2 4GHz Basic Settings Multiple AP to configure the device as a general wireless access point with multiple SSIDs Figure 5 51 2 4GHz Wireless Basic Settings Multiple APs The device supports up to four multiple Service Set Identifiers You can go back to the Basic Settings page to set the Primary SSID The SSID s factory default settin...

Page 80: ...he wireless repeater relays signal between its stations and the root AP for greater wireless range 2 Example of how to configure Universal Repeater Mode Please take the following steps To configure each wireless parameter please go to the WLAN2 2 4GHz Basic Settings page Step 1 Configure wireless mode to AP and then check Enable Universal Repeater Mode Acting as AP and client simultaneously Click ...

Page 81: ...C WDAP W7200AC 71 Figure 5 53 2 4GHz Universal Repeater 1 Step 2 Go to 2 4GHz Site Survey page to find the root AP Select the root AP that you want to repeat the signal and then click Next Figure 5 54 2 4GHz Universal Repeater 2 ...

Page 82: ...y key Then click Connect Figure 5 55 2 4GHz Universal Repeater 3 Step 4 Check Add to Wireless Profile and click Reboot Now Figure 5 56 2 4GHz Universal Repeater 4 Step 5 Go to the Management Status page to check whether the state of Repeater interface should be Connected Figure 5 57 2 4GHz Universal Repeater 5 ...

Page 83: ... C7200AC WDAP W7200AC 73 Client Infrastructure Combine the Wireless Router to the Ethernet devices such as TV Game player or HDD and DVD to make them be wireless stations Figure 5 58 2 4GHz Wireless Basic Settings Client ...

Page 84: ...AP WDS please click WDS Settings in the submenu for the related configuration Furthermore click Multiple AP to enable multiple SSID functions Network Type In Infrastructure the wireless LAN serves as a wireless station And the user can use the PC equipped with the WDAP C7200AC WDAP W7200AC to access the wireless network via other access points In ad hoc the wireless LAN will use the ad hoc mode to...

Page 85: ...per data transfer rate automatically it s not necessary to change this value unless you know what will happen after modification Default is Auto Enable Mac Clone Single Ethernet Client Enable Mac Clone Example of how to configure Client Mode Please take the following steps To configure each wireless parameter please go to the WLAN2 2 4GHz Basic Settings page Step 1 Go to the WLAN2 2 4GHz Site Surv...

Page 86: ...DAP W7200AC 76 Step 2 Choose the root AP from the list If the root AP is not listed in the table re click Site Survey to update the list Figure 5 60 Client AP List Step 3 Enter the Security Key of the root AP and then click Connect ...

Page 87: ... the connection is established Check the Add to Wireless Profile option and then reboot it Figure 5 62 Client Status WDS Connect this Wireless AP with up to 8 WDS capable wireless APs to expand the scope of network Clients Clients Switch Switch WDAP C7200AC WDAP C7200AC WDS Bridge PtP Mode ...

Page 88: ...User Manual of WDAP C7200AC WDAP W7200AC 78 Figure 5 63 2 4GHz Wireless Basic Settings WDS AP Clients Switch Clients Switch WDAP C7200AC ...

Page 89: ...e rate is up to 11Mbps 54Mbps or 300Mbps Mode There are four kinds of wireless mode selections AP Client WDS AP WDS If you select WDS or AP WDS please click WDS Settings in the submenu for the related configuration Furthermore click Multiple AP to enable multiple SSID function Channel Width You can select 20MHz or 40MHz Control Sideband You can select Upper or Lower Channel Number You can select t...

Page 90: ...User Manual of WDAP C7200AC WDAP W7200AC 80 Figure 5 64 2 4GHz Wireless Basic Settings WDS AP Switch WDS Repeater Mode Clients 5G WDS 2 4G AP Internet WDAP C7200AC g n g n a n ac a n ac ...

Page 91: ...g mode rate is up to 11Mbps or 54Mbps 2 4 GHz G N 802 11g n mode rate is up to 54Mbps or 300Mbps 2 4 GHz B G N 802 11b g n mode rate is up to 11Mbps 54Mbps or 300Mbps Mode There are four kinds of wireless mode selections AP Client WDS AP WDS If you select WDS or AP WDS please click WDS Settings in the submenu for the related configuration Furthermore click Multiple AP to enable multiple SSID funct...

Page 92: ...s Enable Universal Repeater Mode Acting as AP and client simultaneously Universal Repeater is a technology used to extend wireless coverage To enable Universal Repeater Mode check the box and enter the SSID you want to broadcast in the field below Then please click Security in the submenu for the related settings of the AP you want to connect with 5 5 2 Advanced Settings Choose menu WLAN2 2 4GHz A...

Page 93: ...anism This mechanism can decrease the rate of data collision between 802 11b and 802 11g wireless stations When the protection mode is enabled the throughput of the AP will be a little lower due to the transmission of heavy frame traffic Default is Disabled Aggregation It is a function where the values of multiple rows are grouped together Default is Enabled Short GI It is used to set the time tha...

Page 94: ...tput Power 2 4GHz RF Output Power Control provides the flexibility to control the Wi Fi Transmit power to optimize the wireless range Wi Fi power consumption for an Access Point could be reduced to up to 75 from its peak power consumption for serving small to medium size homes while maximum power is boosted for large homes and businesses The WDAP C7200AC WDAP W7200AC supports output power control ...

Page 95: ...ion which includes the root one and the client one Disable No security setup for wireless connection WEP It is based on the IEEE 802 11 standard And the default setting of authentication is Automatic which can select Open System or Shared Key authentication type automatically based on the wireless station s capability and request Furthermore you can select Key Length and enter 10 and 26 Hexadecima...

Page 96: ... mode based on Enterprise RADIUS Server please enter the IP Address Port and Password of the RADIUS Server Authentication Mode Personal Pre shared Key When you select the other authentication mode based on Personal Pre shared Key please enter at least 8 ASCII characters Passphrase or 64 Hexadecimal characters All of the Cipher Suites support TKIP and AES 802 1x Authentication Enable 802 1x authent...

Page 97: ... You can choose to set the Allowed List Denied List or disable this function MAC Address Enter the MAC address you want to allow or deny connection to the WDAP C7200AC WDAP W7200AC in the field Comment You can make some comment on each MAC address on the list Current Access Control List You can select some MAC addresses and click Delete Selected to delete it Wireless Access Control example To deny...

Page 98: ...User Manual of WDAP C7200AC WDAP W7200AC 88 Step 3 Click OK to save your settings and you can add more MAC addresses if you like simply repeat the above steps Figure 5 69 Wireless Access Control Deny ...

Page 99: ...in 2 4GHz which also applies to 2 4GHz Before configuring the WDS Setting page you have to select the wireless mode to WDS on the WLAN2 2 4GHz Basic Settings web page Clients Clients Switch Switch WDAP C7200AC WDAP C7200AC WDS Bridge PtP Mode AP Clients Switch Clients Switch Clients Switch WDAP C7200AC AP WDS Bridge PtMP Mode Switch WDS Repeater Mode Clients 5G WDS 2 4G AP Internet WDAP C7200AC g ...

Page 100: ...gure 5 70 WDS Mode 2 4GHz Choose menu WLAN2 2 4GHz WDS Settings to configure WDS to connect the WDAP C7200AC WDAP W7200AC with another AP on this page After the configuration please Apply Changes to save the settings Figure 5 71 WDS Settings 2 4GHz ...

Page 101: ... Click Set Security to configure the wireless security parameters of the AP you want to connect via WDS Show Statics Click Show Statics to show the WDS AP Current WDS AP List You can select some MAC addresses of the AP and click Delete Selected to delete it WDS feature can only be implemented between 2 wireless devices that both support the WDS feature Plus channel security settings and security k...

Page 102: ...Figure 5 73 Site Survey 2 4GHz 5 5 8 WPS WPS Wi Fi Protected Setup is designed to ease setup of security Wi Fi networks and subsequently network management This Wireless Router supports WPS features for AP mode AP WDS mode Infrastructure Client mode and the wireless root interface of Universal Repeater mode Simply enter a Pin code or press the software PBC button or hardware WPS button if any and ...

Page 103: ...connection via WPS is established or not Self Pin Number It is the Pin number of the WDAP C7200AC WDAP W7200AC here Push Button Configuration Click Start PBC to activate WPS as well in the client device within 2 minutes Client Pin Number In addition to the PBC method you can also use the Pin method to activate the WPS Just enter the Pin number of the client device in the field and click Start Pin ...

Page 104: ...s must be finished within 2 minutes iii Wait for a while until the next screen appears Click OK to complete the WPS configuration B By Pin If the new device supports Wi Fi Protected Setup and the Pin method you can add it to the network by Pin with the following two methods Method One Enter the Pin of your wireless adapter into the configuration utility of the AP i Enter the Pin code of the wirele...

Page 105: ...inishes Method Two Enter the Pin of the AP into the configuration utility of your wireless adapter i Click Start PBC on the WPS page of the AP Get the current Pin code of the AP on WPS page each AP has its unique Pin code Figure 5 78 WPS Pin 2 4GHz 3 ii For the configuration of the wireless adapter please choose the option that you want to enter the Pin of the AP Registrar in the configuration uti...

Page 106: ... This feature is often used for restricting access to all users such as children employees and guests during specific times of the day for parental control or security reasons Choose menu WLAN2 2 4GHz Schedule to configure the schedule rule of enabling wireless function After the configuration please click Apply Changes to save the settings Figure 5 79 Schedule 2 4GHz ...

Page 107: ...ses on how to maintain AP including Restore to Factory Default Setting Backup Restore Firmware Upgrade Reboot Password Change and Syslog Figure 5 80 Management Main Menu 5 6 1 Status You can use this function to realize the instantaneous information of the wireless AP The information displayed here may vary on different configurations Choose menu Management Status to show the current status and so...

Page 108: ...User Manual of WDAP C7200AC WDAP W7200AC 98 Figure 5 81 Status ...

Page 109: ...eless LAN Sent Packets It shows the statistic count of sent packets on the wireless LAN interface Wireless LAN Received Packets It shows the statistic count of received packets on the wireless LAN interface Ethernet WAN Sent Packets It shows the statistic count of sent packets on the Ethernet WAN interface Ethernet WAN Received Packets It shows the statistic count of received packets on the Ethern...

Page 110: ... interface Name An administratively assigned name for this managed node Location The physical location of this node Contact The textual identification of the contact person for this managed node Read Write Community Enter the community name that allows Read Write access to the AP s SNMP information The community name can be considered a group password The default setting is private Read Only Commu...

Page 111: ...ain the GMT time from Internet Choose menu Management NTP Settings to configure the system time You can also maintain the system time by synchronizing with a public time server over the Internet After the configuration please click OK to save the settings The configured time and date settings are lost when the wireless AP is powered off Figure 5 84 Time Zone Settings The page includes the followin...

Page 112: ...e this function is enabled AP will automatically update the current time from NTP server NTP Server User may select prefer NTP sever or input address of NTP server manually If the AP loses power for any reason it cannot keep its clock running and will not have the correct time when it is started again To maintain correct time for schedules and logs either you must enter the correct time after you ...

Page 113: ...disabled which means Every day will auto reboot at the time that you schedule 1 This setting will only take effect when the Internet connection is accessible and the GMT time is configured correctly 2 You must select at least one day when choosing Weekday as your reboot plan 3 When choosing Every day as your reboot plan the Weekday will be grayed out disabled which means Every day will auto reboot...

Page 114: ...User Manual of WDAP C7200AC WDAP W7200AC 104 Figure 5 86 Schedule Reboot Example Step 3 Click Apply Changes to take this function effect ...

Page 115: ...llowing fields Object Description Enable Log Check to enable log function System all Check this option to display all the system logs Wireless Check this option to display only the logs related to wireless module Enable Remote Log Enable this option if you have a syslog server currently running on the LAN and wish to send log messages to it Log Server IP Address Enter the LAN IP address of the Sys...

Page 116: ... press Upload to perform upgrade Please wait till the related information is shown on the screen after upgrade is finished Do not disconnect the wireless AP from your management PC the PC you use to configure the device or power off it during the upgrade process otherwise it may be permanently damaged The wireless AP will restart automatically after the upgrade process completes in several minutes...

Page 117: ...the WDAP C7200AC WDAP W7200AC and then click Upload to reload the configuration back into the WDAP C7200AC WDAP W7200AC Reset Settings to Default Click Reset to reset all settings of the WDAP C7200AC WDAP W7200AC to factory default Factory Default Settings User Name admin Password admin IP Address 192 168 1 253 Subnet Mask 255 255 255 0 Default Gateway 192 168 1 254 DHCP Disabled 5GHz SSID Planet ...

Page 118: ... the user name and password Choose menu Management User Management to change the user name and password which is inputted to access the web UI of the WDAP C7200AC WDAP W7200AC Figure 5 90 Password Setup The page includes the following fields Object Description User Name Enter user name New Password Input password for this user Confirmed Password Confirm password again For the sake of security it i...

Page 119: ...the following fields Object Description Power LED Click On or Off to turn on off the Power LED Position LED The LED to detect and identify the AP 1 Position LED on the position LED is on 2 Position LED blink the position LED blinks continuously 2 Position LED off the position LED is off 5 6 11 Logout To log out the WDAP C7200AC WDAP W7200AC please select Logout from the left side menu Figure 5 92 ...

Page 120: ...User Manual of WDAP C7200AC WDAP W7200AC 110 5 6 12 Reboot To reboot the WDAP C7200AC WDAP W7200AC please select Reboot from the left side menu Figure 5 93 Reboot ...

Page 121: ...ured to default 6 1 Windows XP Wireless Zero Configuration Step 1 Right click on the wireless network icon displayed in the system tray Figure 6 1 System Tray Wireless Network Icon Step 2 Select View Available Wireless Networks Step 3 Highlight and select the wireless network SSID to connect 1 Select SSID default 2 Click the Connect button Figure 6 2 Choosing a Wireless Network ...

Page 122: ... the wireless AP 1 The Wireless Network Connection box will appear 2 Enter the encryption key that is configured in section 5 3 3 3 Click the Connect button Figure 6 3 Entering the Network Key Step 5 Check if Connected is displayed Figure 6 4 Choosing a Wireless Network Connected ...

Page 123: ...onfig service is built in in Windows 7 that can be used to detect and connect to wireless network This built in wireless network connection tool is similar to wireless zero configuration tool in Windows XP Step 1 Right click on the network icon displayed in the system tray Figure 6 5 Network Icon Step 2 Highlight and select the wireless network SSID to connect 1 Select SSID default 2 Click the Con...

Page 124: ...k Connect automatically Step 4 Enter the encryption key of the wireless AP 1 The Connect to a Network box will appear 2 Enter the encryption key that is configured in section 5 3 3 3 Click the OK button Figure 6 7 Typing the Network Key Figure 6 8 Connecting to a Network Step 5 Check if Connected is displayed ...

Page 125: ...User Manual of WDAP C7200AC WDAP W7200AC 115 Figure 6 9 Connected to a Network ...

Page 126: ...fault Step 1 Right click on the network icon displayed in the system tray The AirPort Network Connection menu will appear Figure 6 10 Mac OS Network Icon Step 2 Highlight and select the wireless network SSID to connect 1 Select and SSID default 2 Double click on the selected SSID Figure 6 11 Highlighting and Selecting the Wireless Network Step 4 Enter the encryption key of the wireless AP 1 Enter ...

Page 127: ...Password If you will be connecting to this Wireless AP in the future check Remember this network Step 5 Check if the AirPort is connected to the selected wireless network If Yes then there will be a check symbol in front of the SSID Figure 6 13 Connected to the Network ...

Page 128: ...configure the MAC OS X wireless settings Step 1 Click and open the System Preferences by going to Apple System Preference or Applications Figure 6 14 System Preferences Step 2 Open Network Preference by clicking on the Network icon Figure 6 15 System Preferences Network ...

Page 129: ...ng and select the available wireless network 1 Choose the AirPort on the left menu make sure it is ON 2 Select Network Name default here If this is the first time to connect to the Wireless AP it should show Not network selected Figure 6 16 Selecting the Wireless Network ...

Page 130: ...the following sections the default SSID of the WDAP C7200AC WDAP W7200AC is configured to default Step 1 Tap the Settings icon displayed in the home screen Figure 6 17 iPhone Settings icon Step 2 Check Wi Fi setting and select the available wireless network 1 Tap General Network 2 Tap Wi Fi If this is the first time to connect to the Wireless AP it should show Not Connected Figure 6 18 Wi Fi Setti...

Page 131: ... wireless network SSID in Choose a Network 1 Turn on Wi Fi by tapping Wi Fi 2 Select SSID default Figure 6 20 Turning on Wi Fi Step 4 Enter the encryption key of the Wireless AP 1 The password input screen will be displayed 2 Enter the encryption key that is configured in section 5 3 3 3 Tap the Join button ...

Page 132: ...P W7200AC 122 Figure 6 21 iPhone Entering the Password Step 5 Check if the device is connected to the selected wireless network If Yes then there will be a check symbol in front of the SSID Figure 6 22 iPhone Connected to the Network ...

Page 133: ... guide you to running the Planet Smart Discovery Utility Step 1 Deposit the Planet Smart Discovery Utility in administrator PC Step 2 Run this utility and the following screen appears Step 3 Press Refresh for the current connected devices in the discovery list as shown in the following screen Step 3 Press Connect to Device and then the Web login screen appears The fields in white background can be...

Page 134: ...lease ensure there is no IP conflict in the existing network Otherwise please re configure the WDAP C7200AC using other IP addresses which should be in the same network segment The default IP address of the WDAP C7200AC is 192 168 1 253 Step 1 In the WDAP C7200AC 1 go to WLAN2 2 4GHz Basic Settings to configure wireless mode to WDS and then configure the channel to a fixed one Click Apply Changes ...

Page 135: ...s to configure wireless mode to AP WDS and then configure the channel to a fixed one which must be the same as the root AP Click Apply Changes to take effect The root AP should be the same model WDAP C7200AC in WDS mode otherwise the connection might not be able to be established due to the incompatibility ...

Page 136: ...N2 2 4GHz WDS Settings page to connect the root AP Select Enable WDS and enter the MAC Address of the root AP Then click Set Security to configure the security setting as the same as the root AP After finishing the configuration click Apply Changes to take effect ...

Page 137: ...AC WDAP W7200AC 127 Step 5 After reboot please go to WLAN2 2 4GHz Security page to configure the repeater s security setting for wireless clients Select the encryption method and enter the security key Then click Apply Changes ...

Page 138: ...User Manual of WDAP C7200AC WDAP W7200AC 128 Step 6 In the laptop or PC connected to the WDAP C7200AC 2 by Ethernet cable go to TCP IP settings to modify it to Obtain an IP address automatically ...

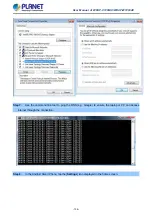
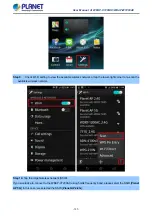
Page 139: ...DAP W7200AC 129 Step 7 Use the command line tool to ping the DNS e g Google to ensure the laptop or PC can access internet through the connection Step 8 In the Android Smart Phone tap the Settings icon displayed in the home screen ...

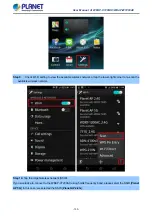
Page 140: ... wireless network or tap the lower right corner to re scan the available wireless network Step 10 Tap the target wireless network SSID If you would like to connect to the WDAP C7200AC using 5GHz frequency band please select the SSID Planet AP 5G in this case we selected the SSID Planet AP 2 4G ...

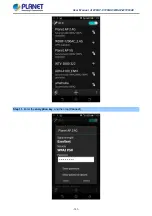
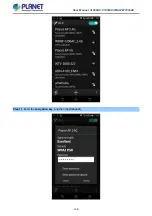
Page 141: ...User Manual of WDAP C7200AC WDAP W7200AC 131 Step 11 Enter the encryption key and then tap Connect ...

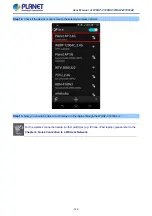
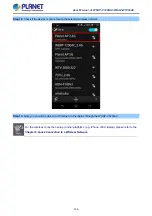
Page 142: ... connected to the selected wireless network Step 13 Now you should be able to surf internet on the laptop through the WDAP C7200AC 2 For the wireless connection setup in other platforms e g iPhone iPad laptop please refer to the Chapter 6 Quick Connection to a Wireless Network ...

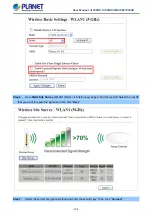
Page 143: ...o let it able to assign IP address to the connected clients 2 Please ensure there is no IP conflict in the existing network Otherwise please re configure the WDAP C7200AC using other IP addresses which should be in the same network segment The default IP address of the WDAP C7200AC is 192 168 1 253 Step 1 In the WDAP C7200AC go to WLAN1 5GHz Basic Settings to configure wireless mode to AP and then...

Page 144: ...34 Step 2 Go to 5GHz Site Survey WLAN1 5GHz Site Survey page to find the root AP Select the root AP that you want to repeat the signal and then click Next Step 3 Select the correct encryption method and enter the security key Then click Connect ...

Page 145: ...file and click Reboot Now Step 5 Go to Management Status page to check whether the state of Repeater interface should be Connected Step 6 In the laptop or PC connected to the WDAP C7200AC by Ethernet cable go to TCP IP settings to modify it to Obtain an IP address automatically ...

Page 146: ...DAP W7200AC 136 Step 7 Use the command line tool to ping the DNS e g Google to ensure the laptop or PC can access internet through the connection Step 8 In the Android Smart Phone tap the Settings icon displayed in the home screen ...

Page 147: ... wireless network or tap the lower right corner to re scan the available wireless network Step 10 Tap the target wireless network SSID If you would like to connect to the WDAP C7200AC using 5GHz frequency band please select the SSID Planet AP 5G in this case we selected the SSID Planet AP 2 4G ...

Page 148: ...User Manual of WDAP C7200AC WDAP W7200AC 138 Step 11 Enter the encryption key and then tap Connect ...

Page 149: ...s connected to the selected wireless network Step 13 Now you should be able to surf internet on the laptop through the WDAP C7200AC For the wireless connection setup in other platforms e g iPhone iPad laptop please refer to the Chapter 6 Quick Connection to a Wireless Network ...

Page 150: ...or over 7 seconds e Use the Smart Discovery Tool to see if you can find the AP or not f If you did a firmware upgrade and this happens contact your dealer of purchase for help g If all the solutions above don t work contact the dealer for help I can t get connected to the Internet a Go to Status Internet Connection menu on the router connected to the AP and check Internet connection status b Pleas...

Page 151: ... s better after that d Try to know what computers do on your local network If someone s transferring big files other people will think Internet is really slow e If this never happens before call you Internet service provider to know if there is something wrong with their network I can t log into the web management interface the password is wrong a Make sure you re connecting to the correct IP addr...

Page 152: ...d States by the Code of Federal Regulations Title 47 Section 15 407 802 11b The 802 11b standard specifies a wireless networking at 11 Mbps using direct sequence spread spectrum DSSS technology and operating in the unlicensed radio spectrum at 2 4GHz and WEP encryption for security 802 11b networks are also referred to as Wi Fi networks 802 11g specification for wireless networking at 54 Mbps usin...

Page 153: ...in a network to communicate with each other all devices must be configured with the same SSID This is typically the configuration parameter for a wireless PC card It corresponds to the ESSID in the wireless Access Point and to the wireless network name WEP Wired Equivalent Privacy A data privacy mechanism based on a 64 bit or 128 bit or 152 bit shared key algorithm as described in the IEEE 802 11 ...

Page 154: ... 11ac Wireless AP spełnia wszystkie istotne wymogi i klauzule zawarte w dokumencie Directive 1999 5 EC Ελληνικά ΜΕ ΤΗΝ ΠΑΡΟΥΣΑ PLANET Technology Corporation ΔΗΛΩΝΕΙ ΟΤΙ ΑΥΤΟ 11ac Wireless APΣΥΜΜΟΡΦΩΝΕΤΑΙ ΠΡΟΣ ΤΙΣ ΟΥΣΙΩΔΕΙΣ ΑΠΑΙΤΗΣΕΙΣ ΚΑΙ ΤΙΣ ΛΟΙΠΕΣ ΣΧΕΤΙΚΕΣ ΔΙΑΤΑΞΕΙΣ ΤΗΣ ΟΔΗΓΙΑΣ 1999 5 ΕΚ Português PLANET Technology Corporation declara que este 11ac Wireless AP está conforme com os requisitos esse...

Page 155: ...2006 95 EC For the evaluation regarding the R TTE the following standards were applied EN 55022 2010 AC 2011 EN 61000 3 2 2006 A1 2009 A2 2009 EN 61000 3 3 2013 EN 55024 2010 EN 61000 4 2 2009 EN 61000 4 3 2006 A1 2008 A2 2010 EN 61000 4 4 2012 EN 61000 4 5 2006 EN 61000 4 6 2009 EN 61000 4 11 2004 EN 300 328 V1 8 1 2012 EN 301 893 V1 7 1 2012 EN 301 489 17 V2 2 1 2012 EN 301 498 1 V1 9 2 2011 EN ...

Reviews: