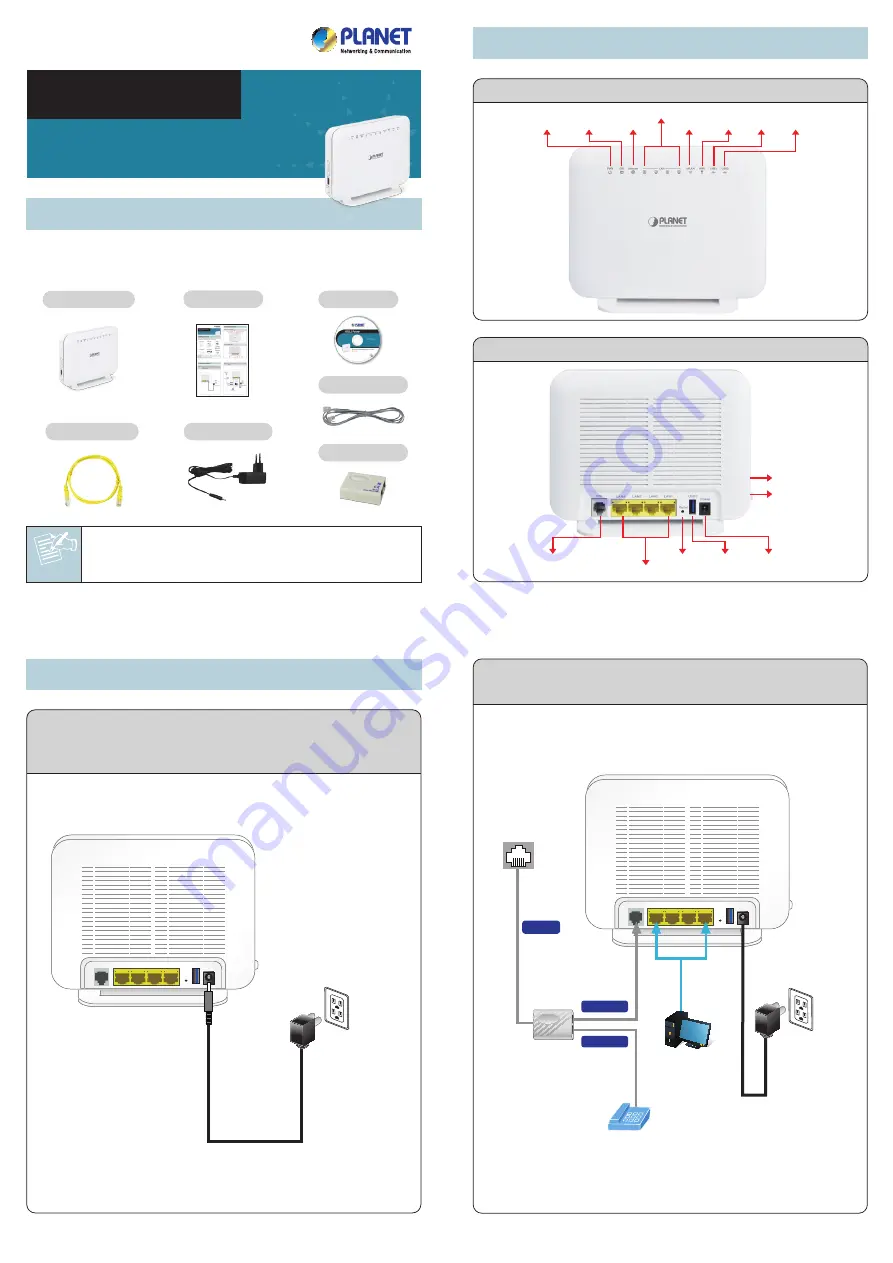
1. Package Contents
Note
– 1 –
– 2 –
– 3 –
– 4 –
– 7 –
– 8 –
– 5 –
– 6 –
Front Panel of VDR-300NU
Button and Ports of VDR-300NU
VDSL2 Router
Quick Guide
CD-ROM
RJ-11 Cable
VDSL Splitter
The above steps introduce simple installations and configurations
for the VDR-300NU. For further configurations of different opera-
tion modes, please refer to the user’s manual in the CD. If you
have further questions, please contact the local dealer or distribu-
tor where you purchased this product.
2011-AC0360-000
Thank you for choosing PLANET VDR-300NU. Before installing the
AP, please verify the contents inside the package box.
If there is any item missing or damaged, please
contact the seller immediately.
STEP 1:
Connect the Power Adapter to VDR-300NU. Check
whether the PWR LED and LAN LED on the front panel
are on accordingly.
STEP 2:
Follow the figure below to connect the network
devices.
VDR-300NU
Quick Installation Guide
802.11n Dual Band Wireless VDSL2 Router
STEPS:
Set your computer to get an IP address from the
Wireless Router:
1. Click
“Start”
button located at lower-left corner of the
screen.
2. Click
“Control Panel”
.
3. Double-click
“Network and Sharing Center”
icon.
4. Click
“Change Adapter Settings”
.
5. Double-click
“Local Area Connection”
icon.
6. Select
“Internet Protocol Version 4 (TCP/IPv4)”
and
click
“Properties”
button.
7. Select
“Obtain an IP address automatically”
and
“Obtain DNS server address automatically”
, and then
click the
“OK”
button twice to save the configuration.
VDSL2 Router with PPPoE:
Follow the steps below to set up connection to
PPPoE
mode.
1. Log in the VDR-300NU’s web-based configuration utility.
2. Click
“WAN Service”
.
3. Click
“Add”
icon.
4. Choose
PTM
, and then press
“Next”
.
5. Select the WAN service type:
“PPPoE”
and click the
“Next”
button.
6. Fill in User Name and Password which are provided by ISP.
7. After setting it up, press
“Apply/Save”
.
If you need more information about WAN service, please refer
to the User’s Manual.
VDSL2 Router with Bridge:
Follow the steps below to set up connection to
Bridge
mode.
1. Log in the VDR-300NU’s web-based configuration utility.
2. Click
“WAN Service”
.
3. Click
“Add”
icon.
4. Choose
PTM
, and then press
“Next”
.
5. Select the WAN service type:
“Bridging”
and click the
“Next”
button.
6. Press
“Apply/Save”
.
If you need more information about WAN service, please refer
to the User’s Manual.
Power Adapter
RJ-45 Cable
DSL
LAN4
LAN3
LAN2
LAN1
Reset
USB2
Power
Power Adapter
Power
DSL
LAN4
LAN3
LAN2
LAN1
Reset
USB2
Power
RJ-11
RJ-45
PC/Laptop
Phone Jack
Splitter
Power Adapter
Power
Telephone
LINE
PHONE
MODEM
Default IP Address:
192.168.1.1
Default User Name:
admin
Default Password:
admin
Default SSID:
VDR-300NU
Default Wireless Security:
Open
Now, you can see the Web management UI of the VDR-300NU.
2. Physical Introduction
4. Web Login
5. Broadband Connection for VDSL
Further Information
3. Hardware Installation
Power
DSL
USB1
WLAN
USB2
Internet
LAN 1~4
WPS
Power
DSL
USB2
USB1
Power
Reset
LAN 1~4


