

53IT-00000142
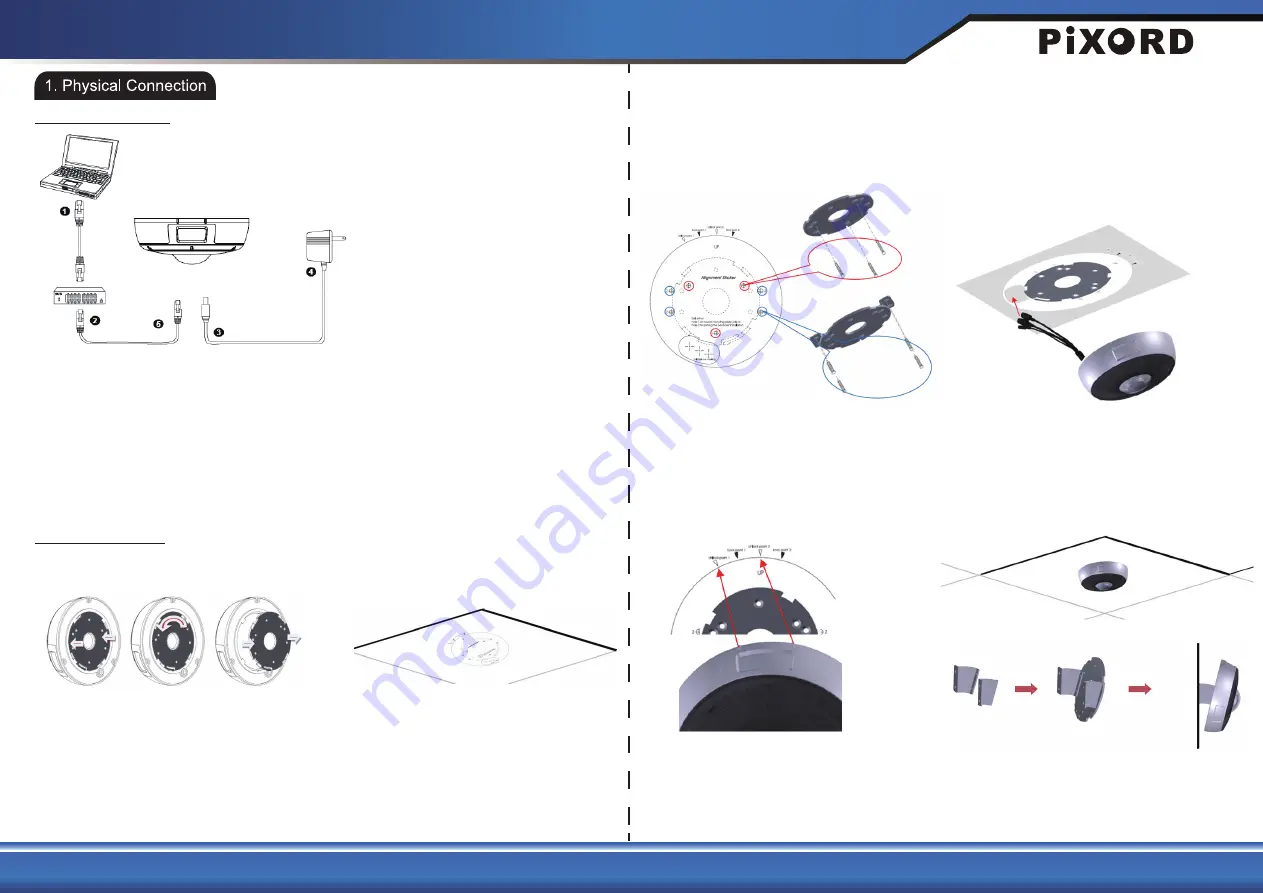
Physical Connection
1. Be sure that your PC or laptop has connected to your local Ethernet network(HUB or Switch).
2. Be sure that IP Camera has connected to your local networking via the LAN port (RJ45) on the extension cable.
(For PoE model, user can use PoE Switch as power supply)
3. Plug the jack of power adaptor into power jack on the extension cable.
4. Ensure the power adaptor specification matches the power system (110V or 220V) and plug the adaptor into the
outlet. (This step is optional if used PoE switch for PoE model)
5. Use
CAM FINDER
software in CD to allocate your camera in networking, and launch browser to start connecting
with PC.
PD771 Quick Installation Guide
Panoramic IR Network Camera
Bracket Installation
2
1
<English>
1. Extract the round mounting plate from the camera
enclosure by pressing then turning it counterclockwise.
2. Attach the provided alignment sticker to the ceiling/
wall where the camera is going to be installed.
3. Drill the screw holes for either
a. round mounting plate or
b. the Z-brackets
4. After screwing the mounting plate on the wall, drill a hole
as indicate on the sticker. Gently get the cable to go through
the hole before installing the camera.
Note: if Z-bracket is applied for the installation, the cabling
hole doesn’t have to be made; the cable can just be
routed behind the camera.
5. Attach the camera by matching the alignment marks
to the unlock points and edge line on the sticker.
Twist the camera clockwise, then 2 alignment marks
should be shifted to the lock points.
After that, the camera will be securely fastened.
6. Installation completed.
Note: Z-type tilt bracket is available as optional accessory
for wall mount installation.


