background image

Installation manual

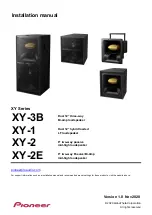
XY Series

XY-3B
XY-1
XY-2
XY-2E

pioneerproaudio.com

For support information such as a installation manual and recommended preset settings for these products, visit the website above.

Version 1.0  Nov 2020

©2020 AlphaTheta Corporation

All rights reserved

8” two-way passive
mid-high loudspeaker

8” two-way Passive/Bi-Amp
mid-high loudspeaker

Dual 12” hybrid loaded
LF loudspeaker

Dual 12” three-way
Bi-amp loudspeaker

Summary of Contents for XY Series

Page 1: ...ation manual and recommended preset settings for these products visit the website above Version 1 0 Nov 2020 2020 AlphaTheta Corporation All rights reserved 8 two way passive mid high loudspeaker 8 two way Passive Bi Amp mid high loudspeaker Dual 12 hybrid loaded LF loudspeaker Dual 12 three way Bi amp loudspeaker ...

Page 2: ...cedures 3 2 1 XY 2 P 10 3 2 2 Vertical Flying Cradle P 13 3 2 3 Variable Angle Bracket P 18 3 2 4 Dual Enclosure Flying Plate Set P 22 3 2 5 Suspension of enclosure using eye bolts P 30 3 2 6 Wheel Board P 32 4 System Configuration 4 1 Connections P 33 4 2 Changing the XY 2E operation mode 5 Specifications 5 1 Spec sheet P 38 5 2 Drawing P 40 http pioneerproaudio com Page 2 43 2018 Pioneer DJ CORP...

Page 3: ...ce a low powered amplifier to produce high sound levels as the amplifier s harmonic distortion will be increased and you may damage the speaker These loudspeakers require properly adjusted signal inputs optimized for each speaker units Otherwise speaker units may deteriorate even if the power is below the power handling capacity The installation technician must follow professional installation tec...

Page 4: ...subwoofer systems can shake other loudspeakers out of place which may present a toppling hazard Do not attempt to use the product with the XY Series grille detached as doing so could result in damage to the product Consult a qualified professional for assistance with removing the grille for maintenance purposes If you notice anything unusual with a speaker or ceiling suspension hardware immediatel...

Page 5: ...hly before proceeding Take every precaution to prevent the product and associated parts from falling as they could cause serious injury if they fell onto a person The XY 2 yoke is equipped with hole for mounting on the ceiling or walls This mounting hole and included special bolt can be used to mount the XY 2 to the bottom of the XY 3B XY 1 XY 2E Make sure to attach a wire for preventing falling p...

Page 6: ...vided with the XY series products so that commercially available poles brackets and other items can be attached Check to make sure that any commercially available mounting hardware used is enough to support the weight of the speaker system If you use any commercially available eyebolt ensure it is the same size as in the list below and have enough strength to withstand the weight of the loudspeake...

Page 7: ...ying Plate Set WARNING When attaching the XY 2 to the speakers do not attach it to anywhere other than the bottom of the enclosure Do not use the bolt other than special bolt included with XY 2 for mounting to the speaker Part list Item Part Name Qty Service Part No Note 1 M10 Special bolt 1 M10 x 41mm P 1 5 6mm hex socket head shoulder bolt 2 Spring Washer 1 M12 3 Flat washer 1 M12 Table 2 1 Full...

Page 8: ...fety factors for suspended systems of this type Small parts such as flat washer spring washer and nut out of the reach of children and infants If accidentally swallowed contact a doctor immediately When you use any commercially available eyebolts please use the eyebolts meeting the following size and specification NOTE only for XY 3B The nuts of the threaded fixing points on XY 3B are structured s...

Page 9: ...pended from the inclined ceiling or wall or it is horizontally suspended the wire or the chain would not be effective to prevent an accidental fall Do not use the double safety hoisting accessory enclosure connection together with the main hoisting accessory connection An appropriate length of wire or chain should be used as second safety feature It is generally recommended that the fall preventio...

Page 10: ... enclosure please select a different hole on the outer yoke to enlarge the distance Be careful not to insert your fingers between the steel arms when you adjust the angle of them XY 2 is not supposed to be used in the following situations which may cause an injury or accident Part list XY 2 Item Part Name Qty Service Part No Note 1 Main Yoke 1 2 Yoke mount 2 3 Flat Washer 2 06D014 M10 4 Spring Was...

Page 11: ...1 A Once the desired angle of the XY 2 is set tighten the socket head bolts on the side of yoke to lock the position in place at 15N m torque Fig 3 2 1 C For preventing to occur the noise from secondary safety wires wire length should be as short as possible Ex Not using lower holes on back of XY 2 Surplus wire length 10cm WARNING When attaching the XY 2 to the speaker do not attach it to anywhere...

Page 12: ... socket head cap bolts For secandary safety ensure a commercially available eyebolt to the mounting point on the bottom of the speaker rear securely fix the eye bolt on the speaker and the hole on the back of XY 2 using secondary safety wire Fig 3 2 1 D Hole for secondary safety feature Commercialy available eye bolt Safety wire Fig 3 2 1 D http pioneerproaudio com Page 12 43 2020 AlphaTheta CORPO...

Page 13: ...y or accident For all the models the following situations are quite dangerous Securely fix the bolts for angle adjustiment of the Vertical Flying Cradle except during the installation work To the ceiling NOTE XY 1 is shown in the illustration Prohibition of connecting speakers using commercially available eyebolts or CP XY1CON1 Only XY 2 available Suspending from sloped non horizontal ceiling Proh...

Page 14: ...en the bolts over 15 N m torque Fig 3 2 2 B The CP XY1VC1 can be attached to the ceiling in one of the following two ways A When the yoke is attached to the speaker and then the speaker is mounted to the ceiling Continue with the installation process from section 3a B When mounting the yoke to the ceiling and then mounting the speakers to the ceiling Continue with the installation process from sec...

Page 15: ... the main mounting holes and the hole for angle adjustment in the yoke F with the mounting points on the side plate Ensure that both the Flat Washer H and the Spring Washer I are used the Flat Washer H should be in contact with the cradle Tighten the bolts over 15 N m torque Fig 3 2 2 C Install the speakers to the ceiling and loosen the angle adjustment screws to adjust the direction of the speake...

Page 16: ... yoke securely fasten the yoke fixing bolt and angle adjustment socket head bolt Fig 3 2 2 H After that remove the temporary fixing bolts Fig 3 2 2 I Attach the two socket head bolt G to the temporary fixing points on the side plate Insert the bolts into the side plate by about 10 mm There is no need to install the Flat washer and Spring washer with the bolts Fig 3 2 2 F Fig 3 2 2 H G Fig 3 2 2 I ...

Page 17: ...g holes on the top of the speaker and secure it to the ceiling with wires Loosen the bolts for securing the bolts for adjusting the angle and adjust the direction of the speaker Once the direction of the speaker is determined tighten the bolts firmly to secure the speaker to the yoke Fig 3 2 2 J Commercially available eyebolt NOTE XY 1 is shown in the illustration Fig 3 2 2 J Fig 3 2 2 K http pion...

Page 18: ...cified speaker Be sure to use the supplied accessory screws Flat washer and spring washer out of the reach of children and infants If acidentally swallowed contact a doctor immediately After mounting the speaker with the cradle never loosen any of its accessory installation screws since the speaker could fall or other accidents could occur Attach two or more wires to a rigging point different from...

Page 19: ...s on the top surface of XY 1 XY 2E Fig 3 2 3 B B C D A Fig 3 2 3 B NOTE XY 1 is shown in the illustration Fig 3 2 3 A Item Part Name Qty Service Part No Note 1 Dual Enclosure Flying Plate 1 2 Rear Plate 1 Disuse 4 M10 socket head bolt 7 M10 x 40 mm P 1 5 8mm hex socket head Included spare 3 5 Spring washer 7 M10 Included spare 3 6 Flat washer 7 M10 Included spare 3 Item Part Name Qty Service Part ...

Page 20: ... to prevent swaying Fig 3 2 2 D When attaching the XY 2 to the speaker do not attach it to anywhere other than the bottom of specified models Make sure to use the included bolt washer and spring washer supplied with XY 2 Do not suspend anything other than an XY 2 to the bottom of the XY 3B XY 1 XY 2E Also do not suspend two or more XY 2s Fig 3 2 3 C To the ceiling Commercially available wire Fig 3...

Page 21: ...ly available eyebolt are secured to mounting point on the rear top of the enclosure to suspend it with wire as a secondary safety feature Fig 3 2 3 E For preventing to occur the noise from secondary safety wires wire length should be as short as possible Fig 3 2 3 E Commercially available eyebolt http pioneerproaudio com Page 21 43 2020 AlphaTheta CORPORATION ...

Page 22: ...rews Flat washer and spring washer out of the reach of children and infants If acidentally swallowed contact a doctor immediately After mounting the speaker with the cradle never loosen any of its accessory installation screws since the speaker could fall or other accidents could occur Attach a wire to a rigging point different from those for installing the cradle to prevent swaying Dual Enclosure...

Page 23: ... Fig 3 2 4 B WARNING The top of each enclosure must be fixed with the proper mounting holes on top plate A as following figure Remove the two screws on the top surface of XY 1 XY 2E from the side where the speaker contacts Fig 3 2 4 A NOTE XY 2E is shown in the illustration A B C D Fig 3 2 4 B Required tools 8mm hex key Required tools 8mm hex key Item Part Name Qty Service Part No Note 1 Dual Encl...

Page 24: ...pplied M10 socket head bolts B align the mounting holes on the Rear plate bottom F with the mounting points of the rear of the enclosures Ensure that both the Spring washer C and Flat washer D are used in between the rear plate F and the M10 socket head bolt B Tighten the bolts at 15N m torque Fig 3 2 4 C WARNING When assembling cluster using the CP XY1DF1 back of the enclosures must be fixed usin...

Page 25: ...ear or underside as a pull back XY 2 can be attached to the bottom of each enclosure WARNING Attach two or more wire to a rigging point different from those for installing the cluster to prevent swaying Fig 3 2 4 D When attaching the XY 2 to the XY 3B XY 1 XY 2E do not attach it to anywhere other than the bottom of the speaker Make sure to use the included bolt washer and spring washer Do not susp...

Page 26: ...m number of these connections is 3 horizontally and 3 vertically An XY 2 can also be connected underneath it Fig 3 2 4 F Be sure to use the supplied accessory screws Flat washer and spring washer out of the reach of children and infants If acidentally swallowed contact a doctor immediately After mounting the speaker with the cradle never loosen any of its accessory installation screws since the sp...

Page 27: ...Qty Service Part No Note 1 Dual Enclosure Flying Plate 1 2 Rear Plate 1 3 M10 socket head bolt 7 M10 x 20mm P 1 5 8mm hex socket head Included spare 1 4 Spring washer 7 M10 Included spare 1 5 Flat washer 7 M10 Included spare 1 Item Part Name Qty Service Part No Note 1 Vertical connection plate 4 2 M10 countersunk bolt 9 M10 x 30mm P 1 5 6 mm hex socket head Included spare 1 3 Rubber pad 5 Required...

Page 28: ... with the top plate of CP XY1DF1 Tighten the bolts at 15N m torque Fig 3 2 4 I Using the supplied M10 socket head bolts B align the mounting holes on the Rear plate F with the mounting points of the rear of the enclosures Ensure that both the Spring washer C and Flat washer D are used in between the rear plates F and the M10 socket head bolt B Tighten the bolts at 15N m torque Fig 3 2 4 K WARNING ...

Page 29: ...of each enclosure WARNING Attach two or more wire to a rigging point different from those for installing the cluster to prevent swaying Fig 3 2 3 M When attaching the XY 2 to the XY 3B XY 1 XY 2E do not attach it to anywhere other than the bottom of the speaker Make sure to use the included bolt washer and spring washer Do not suspend anything other than an XY 2 to the bottom of the XY 3B XY 1 XY ...

Page 30: ... below and have enough strength to withstand the weight of the loudspeaker NOTE only for XY 3B The nuts of the threaded fixing points on XY 3B are structured so that bolts cannot pass through them max threaded length is 15mm Screw the eye bolts into the nuts so that they are engaged within the range of 10 to 15 mm 0 39 to 0 59 in and then tighten the nuts with a spanner while matching the directio...

Page 31: ...XY 1 XY 2E Top Bottom Rear The enclosure can be inclined downward The locations and number of mounting points of each model are listed in the Table 3 2 5 C Center hole is only for combining XY 2 Top Bottom Left Right Rear XY 3B M10 4 on top 1 on bottom N A 4 XY 1 XY 2E M10 4 on top 5 on bottom N A 4 Model Hole size Location Center hole is only for combining XY 2 http pioneerproaudio com Page 31 43...

Page 32: ... lock caster side is on the bottom side of the cabinet The work to raise up and lower down the enclosure for transportation must be performed by two or more persons Also when raising up the enclosure after transportation be sure to lock the lock casters Be sure to lock the lock casters except during transportation Additionally do not place the enclosures in a sloping location When stacking do not ...

Page 33: ...l Ottocanali 12K4 8 1 000 W 4K4 8 450 W 1204 4 400 W 804 2 500 W 2 400 W 2404 2 400 W M14D 2 700 W 360 W 1 400 W M20D 2 1 200 W 600 W 3 000 W M28Q 4 700 W 360 W 1 400 W 4 800 W 3 900 W M50Q 4 1 250 W 750 W 2 500 W M30D 2 1 500 W 900 W K2 K10 2 6 000 W 4 000 W 2 000 W 12 000 W 8 000 W 5 000 W K3 2 2 800 W 2 600 W 1 400 W 5 600 W 5 200 W K6 2 3 600 W 2 500 W 1 300 W 7 200 W 5 000 W T302 2 1 500 W 1 ...

Page 34: ... m 22 m 44 m 68 m 88 m Conductor Cross Sectional Area The XY Series are supplied as standard with Neutrik SpeakON NL4 connectors wired pin 1 1 and 2 2 Pin 2 2 is used for mid high drivers in the XY 3B and in the other models used for only link through It is recommended that the resistance of your cable be less than one tenth of the nominal system impedance Given below are the recommended maximum c...

Page 35: ...ridge tied load 1 2 1 2 OUT2 invertin 1 2 1 2 OUT1 Single ended loads CH A CH B 1 2 1 2 OUT2 invertin 1 2 1 2 OUT1 Bridge tied load LINK CH A CH A 1 2 1 2 CH2 OUT invertin 1 2 1 2 CH1 OUT Single ended loads CH 1 CH 2 OUT1 1 2 Parallel Speaker 1 1 2 Parallel Speaker 1 OUT2 1 2 Parallel Speaker 2 1 2 Parallel Speaker 2 OUT1 1 2 Parallel Speaker 1 1 2 NC OUT2 1 2 NC 1 2 Parallel Speaker 1 OUT1 1 Spea...

Page 36: ...enclosure If wiring is carried out incorrectly it may result in damage to the amplifier and speaker unit The operation mode of the XY 2E can be changed from the Passive mode Initial state to the Bi amp mode When changing the operation mode Remove the MF and HF cables connected to the passive crossover installed in the enclosure Attach the MF and HF cables removed from the passive crossover to the ...

Page 37: ...____________________________________________ 5 1 1 MF unit 2 2 HF unit Attach the door to the enclosure The speaker cable connection and the drive unit driven by the speaker cable correspond to the following 2 White 2 Yellow http pioneerproaudio com Page 37 43 2020 AlphaTheta CORPORATION ...

Page 38: ...x punched steel 15 mm 0 6 birch plywood Impact resistant Black White semi matt textured Nominal Impedance 8 Ω Power Handling AES 5 270 W AES 1080 W Peak 8 Ω 270 W AES 1080 W Peak 4 W 1400 W AES 5600 W Peak 102 dB 4 Ω 1400 W AES 5600 W Peak Product Name XY 2 Loudspeaker Type Frequency Response 3dB 1 235 Hz to 17 kHz 10 dB 150 Hz XY 1 XY 1 W 55 Hz to 400 Hz 10 dB 45 Hz Sensitivity 1W 1m 2 107 dB 235...

Page 39: ...ttom 4 rear 5 left 5 right 2 x Flush handles 1 left 1 right CP XY1VC1 Vertical flying cradle CP XY1DF1 Dual enclosure flying plate CP XY1CON1 Vertical connection plate 2 Neutrik SpeakON NL4MD V 15 mm 0 6 birch plywood Black Impact and weather resistant textured polyurethane paint White Impact resistant textured paint Section 29 0 kg 63 9 lb 530 mm x 578 mm x 540 mm 20 7 x 22 8 x 21 3 Finish Sugges...

Page 40: ...5 Specifications 5 2 Drawing NOTE The nuts of the threaded fixing points on XY 3B are structured so that bolts cannot pass through them max threaded length is 15mm Copyright 2020 AlphaTheta Corporation ...

Page 41: ...5 Specifications 5 2 Drawing Copyright 2020 AlphaTheta Corporation XY 1 A4 1 12 ...

Page 42: ...5 Specifications 5 2 Drawing Copyright 2020 AlphaTheta Corporation ...

Page 43: ...5 Specifications 5 2 Drawing Copyright 2020 AlphaTheta Corporation XY 2E A4 1 12 ...

Reviews: