background image

En

59

10

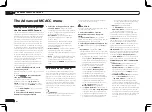
Controlling the rest of your system

5  Repeat steps 3 to 4 to program a 
sequence of up to five commands.

If you press 

RCU SETUP

 before programming is 

completed, commands programmed up to that 
point will be stored.

6  Press RCU SETUP to exit the 
programming mode.

Using multi operations

1  Press MULTI OPERATION.

Release the button after the LED flashes once. 
The LED continues to flash.

2  Within five seconds, press an input 
function button that has been set up with 
a multi operation.

The receiver switches on (if it was in standby) 
and the programmed multi operation is per-
formed automatically.

Using System off

1  Press MULTI OPERATION.

Release the button after the LED flashes once. 
The LED continues to flash.

2  Within five seconds, press 

u

 SOURCE.

The command sequence you programmed will 
run, then all Pioneer components will switch 
off, followed by this receiver (switch of all the 
zones becomes off).

!

  In order to avoid accidently switching off a 

DVD recorder that is currently recording, no 
DVD recorder power off codes are sent.

Erasing the settings for the 

multi-operation

This erases all the settings programmed in the 
remote control for the multi-operation.

1  Press and hold RCU SETUP, then press 
‘8’ for three seconds.

Release the button after the LED flashes once. 
The LED continues to flash.

!

  To cancel the preset setup mode press 

RCU SETUP

.

2  Press the input function button 
containing the program you want to 
cancel or the 

u

 SOURCE button for three 

seconds.

If the LED lights for one second, the erasing has 
been successfully completed.

Resetting the remote control 

settings

Use this procedure to reset all the remote con-
trol’s settings to the factory default.

!

  When preset codes are set, all the signals 

learned in the input function buttons are 
cleared. This function is convenient when you 
want to reset some but not all of input function 
buttons.

1  Press and hold RCU SETUP, then press 
‘0’ for three seconds.

Release the button after the LED flashes once. 
The LED continues to flash.

2  Press and hold the ENTER button for 
three seconds.

If the LED lights for one second, the erasing has 
been successfully completed.

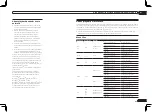
Default preset codes

Input function button

Preset code

DVD

2158

BD

2160

DVR/BDR

2150

HDMI

2159

TV/SAT

0116

CD

5066

TV CTRL

0116

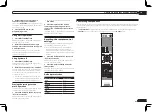
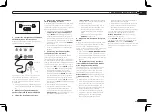
Controlling components

This remote control can control components after entering the proper codes (see 

Setting the remote 

to control other components

 on page 56 for more on this). Use the input function buttons to select 

the component.

!

  The 

TV CONTROL

 buttons on the remote control are dedicated to control the TV assigned to the 

TV CTRL

 button. If you have two TVs, assign the main TV to the 

TV CTRL

 button.

ZONE 2

ZONE 3

LIGHT

RECEIVER

D.ACCESS

CH  LEVEL A.ATT DIMMER

SIGNAL SEL MCACC SLEEP

TV / DTV

MPX

PQLS

PHASE  CTRL

THX

STATUS

PGM

STEREO

iPod CTRL

HOME

MENU

TUNE

TUNE

TOOLS

LIST

CH

TV  CONTROL

INPUT

INPUT  SELECT

iPod

USB

OPTION

TUNER

SIRIUS

ADPT

HMG

SAT

CD

TV

RCU SETUP

SOURCE

RECEIVER MULTI

OPERATION

BDR

BD

DVD

DVR

HDMI

RECEIVER

TV CTRL

MUTE

MASTER

VOLUME

VOL

PRESET

TOP MENU

BAND

GUIDE

T.EDIT

VIDEO

PARAMETER

AUDIO

PARAMETER

ENTER

PRESET

RETURN

CATEGORY

MEMORY

STANDARD

MENU

ADV SURR

AUTO / ALC /

DIRECT

AUDIO

HDMI OUT

INFO

CLASS

ENTER

DISP

HDD

DVD

5

4

6

8

0

7

9

1

3

 / CLR

CH

222

Summary of Contents for VSX-1126-K

Page 1: ...ance claim such as loss or theft Improve product development Your input helps us continue to design products that meet your needs Receive a free Pioneer newsletter Registered customers can opt in to receive a monthly newsletter Receive free tips updates and service bulletins on your new product Register your product on http www pioneerelectronics com US http www pioneerelectronics ca Canada ...

Page 2: ...left unused for a long period of time for example when on vacation D3 4 2 2 2a _A1_En WARNING Handling the cord on this product or cords associated with accessories sold with the product may expose you to chemicals listed on proposition 65 known to the State of California and other governmental entities to cause cancer and birth defect or other reproductive harm D36 P5_B1_En Caution To prevent fir...

Page 3: ...hout annoying blaring or distortion and most importantly without affecting your sensitive hearing Sound can be deceiving Over time your hearing comfort level adapts to higher volumes of sound so what sounds normal can actually be loud and harmful to your hearing Guard against this by setting your equipment at a safe level BEFORE your hearing adapts ESTABLISH A SAFE LEVEL Set your volume control at...

Page 4: ...irect with different input signal formats 90 Glossary 91 Features index 94 Specifications 95 Preset code list 96 Thank you for buying this Pioneer product Please read through these operating instructions so you will know how to operate your model properly After you have finished read ing the instructions put them away in a safe place for future reference Contents 01 Before you start Our philosophy...

Page 5: ...mponents About the audio connection on page 16 About the video converter on page 16 Connecting your TV and playback components on page 17 Connecting AM FM antennas on page 21 Plugging in the receiver on page 25 j 5 Switching the speaker impedance page 26 Only if the impedance of the connected speakers is 6 W to 8 W j 6 Power On j 7 Changing the OSD display language OSD Language page 26 j 8 MCACC s...

Page 6: ...s Do not use different batteries together Before you start Our philosophy Pioneer is dedicated to making your home theater listening experience as close as pos sible to the vision of the moviemakers and mas tering engineer when they created the original soundtrack We do this by focusing on three important steps 1 Designing with carefully selected components so as to transmit the original soundtrac...

Page 7: ... before using this CD ROM Do not use if you are unwilling to consent to the terms of its use Also agree to the License Agreement displayed when installing AVNavigator Terms of Use Copyright to data provided on this CD ROM belongs to PIONEER CORPORATION Unauthorized transfer duplication broadcast public transmission translation sales lending or other such matters that go beyond the scope of persona...

Page 8: ...e main zone Also use this button to set up surround sound 14 MASTER VOLUME Use to set the listening volume 15 MUTE Mutes the sound or restores the sound if it has been muted adjusting the volume also restores the sound 16 LIGHT Press to turn on off the illumination for the buttons The way the buttons light can be selected from four modes page 58 Controls and displays Remote control This section ex...

Page 9: ... the Auto Surround feature is switched on page 37 ALC Lights when the ALC Auto level control mode is selected page 37 STREAM DIRECT Lights when Direct Pure Direct is selected page 38 ADV SURROUND Lights when one of the Advanced Surround modes has been selected page 38 STANDARD Lights when one of the Standard Surround modes is switched on page 37 THX Lights when one of the Home THX modes is selecte...

Page 10: ...witches between AM and FM radio bands page 33 TUNER EDIT Use with TUNE i j PRESET k l and ENTER to memorize and name stations for recall page 33 18 PHONES jack Use to connect headphones When the head phones are connected there is no sound output from the speakers 19 MCACC SETUP MIC jack Use to connect the supplied microphone page 26 20 iPod iPhone iPad USB terminals Use to connect your Apple iPod ...

Page 11: ...OP ANTENNA OUTPUT 5V 150 mA MAX CONTROL IR OUT IN OUT IN 1 IN 2 2 1 12VTRIGGER OUTPUT 12V TOTAL 150 mA MAX VIDEO AUDIO MONITOR OUT HDMI BD IN VIDEO IN 1 IN 2 IN 4 DVD IN 5 DVR BDR IN 6 ASSIGNABLE 1 6 VSX 1126 RS 232C ZONE 2 L R IN IN IN IN DVR BDR OUT OUT TV SAT VIDEO IN CD DVD IN SIRIUS OUT PRE OUT SUBWOOFER 1 2 COMPONENT VIDEO Y PB PR ASSIGNABLE MONITOR OUT DVD IN 1 DVR BDR IN 2 FRONT CENTER SUR...

Page 12: ...ts you to build various surround systems in accordance with the number of speakers you have Be sure to connect speakers to the front left and right channels L and R It is also possible to only connect one of the surround back speakers SB or neither If you have two subwoofers the second subwoofer can be connected to the SUBWOOFER 2 terminal Connecting two subwoofers increases the bass sound to achi...

Page 13: ... place the front speakers 2 m to 3 m 6 ft to 9 ft apart at equal distance from the TV If you re going to place speakers around your CRT TV use shielded speakers or place the speakers at a sufficient distance from your CRT TV If you re using a center speaker place the front speakers at a wider angle If not place them at a narrower angle Place the center speaker above or below the TV so that the sou...

Page 14: ...LE 1 6 LINELEVEL INPUT LINELEVEL INPUT The front height terminals can also be used for the front wide and Speaker B speakers Front height setting Front height right Front height left Front wide setting Front wide right Front wide left Speaker B setting Speaker B right Speaker B left Front right Center Subwoofer 2 Subwoofer 1 Front left The surround back terminals can also be used for ZONE 2 Surrou...

Page 15: ...our speaker manual for more information If your speakers have a removable crossover network make sure you do not remove it for bi amping Doing so may damage your speakers Bi wiring your speakers Your speakers can also be bi wired if they sup port bi amping With these connections the Speaker System setting makes no difference CAUTION Don t connect different speakers from the same terminal in this w...

Page 16: ...HD DTS HD Master Audio DTS HD High Resolution Audio DVD Audio CD SACD DSD signal Video CD Super VCD Synchronized operation with components using the Control with HDMI function see Control with HDMI function on page 47 Note An HDMI connection can only be made with DVI equipped components compatible with both DVI and High Bandwidth Digital Content Protection HDCP If you choose to connect to a DVI co...

Page 17: ...ble If the TV and playback components support the Control with HDMI feature the convenient Control with HDMI functions can be used see Control with HDMI function on page 47 RS 232C ZONE 2 L R IN IN IN IN DVR BDR OUT OUT ZONE 3 OUT TV SAT VIDEO IN CD DVD IN SIRIUS OUT 1 CONTROL OUT 2 PRE OUT SUBWOOFER 1 2 COMPONENT VIDEO Y PB PR ASSIGNABLE MONITOR OUT DVD IN 1 DVR BDR IN 2 HDMI FRONT CENTER SURROUN...

Page 18: ...th no HDMI input This diagram shows connections of a TV with no HDMI input and DVD player or other playback component to the receiver With these connections the picture is not output to the TV even if the DVD player is connected with an HDMI cable Connect the receiver and TV using the same type of video cable as used to connect the receiver and player RS 232C ZONE 2 L R IN IN IN IN DVR BDR OUT OUT...

Page 19: ...e 54 If your HDD DVD recorder BD recorder etc is equipped with an HDMI output terminal we recommend connecting it to the receiver s HDMI DVR BDR IN terminal When doing so also connect the receiver and TV by HDMI see Connecting using HDMI on page 17 Connecting a satellite cable receiver or other set top box Satellite and cable receivers and terrestrial digital TV tuners are all examples of so calle...

Page 20: ...add additional amplifiers to every channel of your system using the pre outs Make the connections shown below to add amplifiers to power your speakers L R IN CD IN SIRIUS OUT 1 CONTROL OUT 2 PRE OUT SUBWOOFER 1 2 FRONT CENTER SURROUND SURR BACK FH FW R CD DVD COAXIAL ASSIGNABLE IN 1 IN 2 DVR BDR TV SAT OPTICAL ASSIGNABLE IN1 IN2 IN3 OUT VIDEO OUTPUT 5 V 0 1 A MAX ADAPTER PORT DC OUTPUT forWIRELESS...

Page 21: ...er can be off while one or both of the sub zones is on and the sub zones can be controlled by the remote or front panel controls Important The explanations for ZONE 3 below only apply to the VSX 1326 Making MULTI ZONE connections It is possible to make these connections if you have a separate TV and speakers for your primary ZONE 2 sub zone and a separate TV and a separate amplifier and speakers f...

Page 22: ...ology enabled devices L R PRE OUT ER 2 SURROUND SURR BACK FH FW CD N 2 DVR BDR TV SAT OPTICAL ASSIGNABLE IN1 IN2 IN3 OUT VIDEO OUTPUT 5 V 0 1 A MAX ADAPTER PORT DC OUTPUT forWIRELESS LAN 10 100 LAN OUTPUT 5V 0 6 A MAX SURROUNDBACK L R L R L Single Single FRONTHEIGHT FRONTWIDE B AC IN Bluetooth ADAPTER 2 Connect a TV monitor to the VIDEO ZONE 2 OUT jack on this receiver L R OUT 2 PRE O UBWOOFER 2 T...

Page 23: ...RECT CONTROL 5V 2 1A USB mass storage device USB keyboard Switch the receiver into standby then connect your USB device to the USB terminal on the front panel of this receiver This receiver does not support a USB hub For instructions on playing the USB device see Playing a USB device on page 31 Connecting an HDMI equipped component to the front panel input Video camera etc USB HDMI 3 INPUT iPod iP...

Page 24: ...DVD COMPONENT VIDEO Y PB PR ASSIGNABLE MONITOR OUT DVD IN 1 DVR BDR IN 2 EXTENSION FRONT R SPEAKERS A FMUNBAL75 AMLOOP ANTENNA OUTPUT 5V 150 mA MAX CONTROL IR OUT IN OUT IN 1 IN 2 2 1 12VTRIGGER OUTPUT 12V TOTAL 150 mA MAX HDMI BD IN VIDEO IN 1 IN 2 IN 4 IN 5 DVD ASSIGNABLE 1 6 IN IR IN OUT CONTROL Closet or shelving unit Pioneer component Non Pioneer component IR receiver 2 Connect the IR IN jack...

Page 25: ...ompany for a replacement Do not use any power cord other than the one supplied with this unit Do not use the supplied power cord for any purpose other than that described below The receiver should be disconnected by removing the mains plug from the wall socket when not in regular use e g when on vacation If you have connected speakers with a 6 W impedance change the impedance setting before turnin...

Page 26: ...a separate speaker system in another room read through Speaker system setting on page 69 and make En 26 04 Basic Setup Basic Setup Switching the speaker impedance We recommend using speakers of 8 W with this system but it is possible to switch the imped ance setting if you plan to use speakers with a 6 W impedance rating 1 Switch the receiver into standby 2 While holding down ENTER on the front pa...

Page 27: ... when using speakers that affect the phase dipole speakers reflective speakers etc Reverse Phase may be displayed even if the speakers are properly connected If Reverse Phase is displayed the speaker s wiring and may be inverted Check the speaker connections If the connections were wrong turn off the power disconnect the power cord then reconnect properly After this perform the Full Auto MCACC pro...

Page 28: ... possible settings on page 28 In this case you need to tell the receiver what equipment is hooked up to which terminal so the buttons on the remote control correspond to the components you ve connected 1 Press on the remote control then press HOME MENU A Graphical User Interface GUI screen appears on your TV Use i j k l and ENTER to navigate through the screens and select menu items Press RETURN t...

Page 29: ... Virtual Height Creates a virtual height channel sound for play back 50 V DEPTH Virtual Depth Plays with a sound field suited for 3D images 50 Other functions INPUT SELECT INPUT SELECTOR Switches the input 30 MASTER VOLUME MUTE Use to set the listening volume 30 LISTENING MODE Only Pioneer recommended modes can be selected 37 PQLS Plays using the PQLS function 48 Operable functions items Descripti...

Page 30: ...ist name album name song name genre or composer similar to using your iPod directly 1 Use i j to select Music from the iPod Top menu Basic playback Playing a source Here are the basic instructions for playing a source such as a DVD disc with your home theater system 1 Switch on your system components and receiver Start by switching on the playback compo nent for example a DVD player your TV and su...

Page 31: ...d USB Loading appears in the GUI screen as this receiver starts recognizing the USB device con nected When the display shows the USB Top menu you re ready to play from the USB device Note If an Over Current message lights in the dis play the power requirements of the USB device are too high for this receiver Try following the points below Switch the receiver off then on again Reconnect the USB dev...

Page 32: ... are not sup ported specifically Pro Lossless Voice Photo files Category Extension JPEG jpg jpeg jpe jif jfif Format Meeting the following conditions Baseline JPEG format including files recorded in Exif DCF format Y Cb Cr 4 4 4 4 2 2 or 4 2 0 Resolution 30 to 8184 pixels vertical 40 to 8184 pixels horizontal Button s What it does p a Displays the next photo content e a Pauses unpauses the slidesh...

Page 33: ...s to select a station preset 4 Press ENTER After pressing ENTER the preset class and number stop blinking and the receiver stores the station Listening to station presets 1 Press TUNER to select the tuner 2 Press CLASS to select the class in which the station is stored Press repeatedly to cycle through classes A to G 3 Press PRESET k l to select the station preset you want You can also use the num...

Page 34: ...in Using the SIRIUS Menu on page 34 Note In order to activate your radio subscription you will need the SIRIUS ID SID which uniquely identifies your tuner The SID may be found on a sticker located on the packaging or on the bottom of the tuner itself The label will have a printed 12 digit SID number When you have located the SID write it down in the space provided near the end of this manual Conta...

Page 35: ...ipped with Bluetooth wireless technology both comply with Bluetooth Specification Ver 2 1 pairing of the two may be possible without the need for inputting a password In this case a passcode may be displayed on this receiver and on the device equipped with Bluetooth wireless technology If this happens check that the same passcode is displayed on this receiver and the device equipped with Bluetooth...

Page 36: ...asic playback of files stored on Bluetooth wireless technology devices Bluetooth wireless technology device should be compatible with AVRCP profile Depending on the Bluetooth wireless technology device you use operation may differ from what is shown in the remote control buttons TV DTV MPX PQLS PHASE CTRL STATUS AUDIO HDD DVD 1 3 2 2 2 THX HDMI OUT 4 While listening to a source set the remote cont...

Page 37: ...o options on page 50 Standard surround sound The following modes provide basic surround sound for stereo and multichannel sources 1 Press to the receiver operation mode 2 While listening to a source press STANDARD STANDARD SURROUND If necessary press repeatedly to select a listen ing mode If the source is Dolby Digital DTS or Dolby Surround encoded the proper decoding format will automatically be ...

Page 38: ...w the source is being processed AUTO SURROUND See Auto playback on page 37 ALC Listening in Auto level control mode page 37 En 38 06 Listening to your system adjust the center image effect see Setting the Audio options on page 50 Neural Surround can be selected for 2 channel signals for which the input signal is PCM 48 kHz or less Dolby Digital DTS or analog 2 channel sources The stereo mode can a...

Page 39: ...rrection measures to make sure your sound source arrives at the listening position in phase preventing unwanted distortion and or coloring of the sound Phase Control technology provides coherent sound reproduction through the use of phase matching for an optimal sound image The default setting is on and we recommend leav ing Phase Control switched on for all sound sources 1 Press to the receiver o...

Page 40: ...aracteristics of the speakers either follow the Full Auto MCACC procedure under Advanced MCACC see Automatically conducting optimum sound tuning Full Auto MCACC on page 26 or set Auto MCACC menu under Auto MCACC under ADVANCED MCACC to Full Band Phase Ctrl Select ALL when you perform the Auto MCACC with Auto MCACC menu Upon calibration of the frequency phase characteristics of the speakers the Ful...

Page 41: ...s controlled by this DMC to play files are called DMRs Digital Media Renderers This receiver supports this DMR function When in the DMR mode such operations as playing and stopping files can be performed from the external controller Volume adjustment and the muting control are also possible The DMR mode is canceled if the remote control unit is operated while in the DMR mode aside from certain but...

Page 42: ...tation selected from the list of Internet radio stations Registering broadcast stations not on the vTuner list from the special Pioneer site With the receiver broadcast stations not included on the list of station distributed by vTuner can be registered and played Check the access code required for registration on the receiver use this access code to access the If not please authorize this receive...

Page 43: ...sic you ll love mixed in with music you already know For details check the website http www pandora com You must have a registered account in order to listen to songs using Pandora Internet Radio Select Pandora then follow the instructions on the screen to make the account settings Also see Checking about the Accounts on page 43 As of April 2011 the Pandora service is only offered in the United St...

Page 44: ...VE REMEDY FAILS OF ITS ESSENTIAL PURPOSE IF ANY APPLICABLE AUTHORITY HOLDS ANY PORTION OF THIS SECTION TO BE UNENFORCEABLE THEN LIABILITY WILL BE LIMITED TO THE MAXIMUM EXTENT PERMITTED BY APPLICABLE LAW 4 Select Rhapsody Sirius or Pandora and press ENTER The contents below can be checked when Rhapsody is selected Set Account Account Info The contents below can be checked when Sirius is selected S...

Page 45: ...ademarks of Microsoft Corporation in the United States and or other countries About playable file formats The Home Media Gallery feature of this receiver supports the following file formats Note that some file formats are not available for playback although they are listed as playable file formats Also the compatibility of file formats varies depending on the type of server Check with your server ...

Page 46: ...ntization bitrate 8 bit 16 bit 24 bit Channel 2 ch Bitrate VBR CBR a MPEG Layer 3 audio decoding technology licensed from Fraunhofer IIS and Thomson multimedia b Only streaming data from servers is concerned so there is no extension En 46 07 Playback with HOME MEDIA GALLERY inputs ...

Page 47: ... on page 47 To get the most out of this function we recommend that you connect your HDMI component not to a TV but rather directly to the HDMI terminal on this receiver VSX 1326 only The Control with HDMI function can be used with a TV connected to the HDMI OUT 1 terminal but not with a TV connected to the HDMI OUT 2 terminal HDMI Setup You must adjust the settings of this receiver as well as the ...

Page 48: ...ntication is performed the HDMI indicator blinks the PQLS effect is enabled and the listening mode is set to AUTO SURROUND if a listening mode other than AUTO SURROUND ALC DIRECT PURE DIRECT OPTIMUM SURR or STEREO is selected En 48 08 Control with HDMI function 8 Select the TV Audio setting you want When a TV supporting the HDMI ARC Audio Return Channel function is connected to the receiver the so...

Page 49: ...onverter such as an HDMI switch can cause operational errors Only connect components Blu ray Disc player etc you intend to use as a source to the HDMI input of this receiver Interrupting a direct connection with other amps or an AV converter such as an HDMI switch can cause operational errors When Control is set to ON HDMI Input in The Input Setup menu on page 28 is automatically set to OFF When t...

Page 50: ...ed for Dolby Digital DTS Dolby Digital Plus Dolby TrueHD DTS HD and DTS HD Master Audio you may need to use this feature when listening to surround sound at low volumes AUTO MAX MID OFF Using other functions Setting the Audio options There are a number of additional sound settings you can make using the AUDIO PARAMETER menu The defaults if not stated are listed in bold Important Note that if a set...

Page 51: ...s you to hear a virtual front height chan nel through your front speakers OFF ON V DEPTH Virtual Depth l When this mode is selected the sound field expands virtually to behind the display resulting in a sound field with the same depth as the 3D picture to achieve a better sense of presence OFF MIN MID MAX a The adjustment can be made only when TONE is set to ON b With the iPod USB HOME MEDIA GALLE...

Page 52: ... the optimum picture quality for the type of monitor that is connected Select PDP for plasma displays LCD for liquid crystal monitors FPJ for front projectors PRO for profes sional monitors If you want to adjust the picture quality settings to your personal tastes select MEMORY PDP LCD FPJ PRO MEMORY YNR d e Reduces noise in the luminance Y signal c 0 to 8 d Default 0 CNR d e Reduces noise in the ...

Page 53: ... Surround back channels are added to the front center and surround channels maximum 5 channels and a maximum of 7 channels are output SP FW ON Front wide channels are added to the front center and surround channels maximum 5 channels and a maximum of 7 channels are output SP OFF No sound is output from the speakers When you select Speaker B you can select from SP A ON Sound is output from the A sp...

Page 54: ...n one station at a time Therefore changing the station in one zone also changes the station in the other zone Please be careful not to change stations when recording a radio broadcast 4 When Speaker System is set to ZONE 2 use the MASTER VOLUME dial to adjust the volume for the sub zone 5 When you re finished press MULTI ZONE CONTROL again to return to the main zone controls You can also press MUL...

Page 55: ...ing down ENTER on the front panel press u STANDBY ON The display shows RESET c NO d 3 Select RESET using PRESET k l then press ENTER on the front panel The display shows RESET OK 4 Press ENTER to confirm OK appears in the display to indicate that the receiver has been reset to the factory default settings Note that all settings will be saved even if the receiver is unplugged Default system setting...

Page 56: ...ponent you want to control When assigning preset codes to TV CONTROL press TV CTRL here Controlling the rest of your system About the Remote Setup menu The Remote Setup mode is set by pressing the number button while pressing RCU SETUP The different items on the Remote Setup menu are described below For their setting procedures refer to the explanations for the respective items Setting What it doe...

Page 57: ...ontrols should be 3 cm 1 inch apart 3 cm 1 inch This receiver s remote control Other remote control 4 Press the corresponding button on the other remote control that is sending teaching the signal to this receiver s remote control If the LED lights for one second and continues to flash the setting has been successfully completed If the LED flashes for five seconds it means the memory is full See E...

Page 58: ...m the receiver to switch on or off This is done automatically With Pioneer components you don t need to program the power to switch off in a shutdown sequence except DVD recorders you for example use the remote control to set up and listen to a CD on the receiver and then use the remote control to rewind a tape in your VCR while you continue to listen to your CD player When direct function is on a...

Page 59: ...been successfully completed Resetting the remote control settings Use this procedure to reset all the remote con trol s settings to the factory default When preset codes are set all the signals learned in the input function buttons are cleared This function is convenient when you want to reset some but not all of input function buttons 1 Press and hold RCU SETUP then press 0 for three seconds Rele...

Page 60: ...Yellow VCR Yellow Blue Blue Blue MENU MENU Blue d d d d d e AUTO SETUP e e e e g FREEZE g g g g m m m m m n n n n n o ANT AV SELECTION o o o p SCREEN SIZE p p p AUDIO AUDIO AUDIO AUDIO AUDIO AUDIO AUDIO DISP DISPLAY DISPLAY DISPLAY DISPLAY DISPLAY INFO CH CH CH OUTPUT RESOLUTION a CH CH CH a Controls for BD En 60 10 Controlling the rest of your system Audio Video components Button s LD CD CD R SAC...

Page 61: ...OURCE POWER ON 1 MOVIE 2 STANDARD 3 DYNAMIC 4 USER1 5 USER2 6 USER3 7 COLOR 8 SHARP 9 GAMMA 0 COLOR CLR SHARP ENTER CLASS COLOR TEMP EXIT INFO i j k l i j k l ENTER ENTER TEST HIDE MENU m HDMI1 d HDMI2 n COMP o VIDEO e S VIDEO g BRIGHT p BRIGHT AUDIO POWER OFF DISP ASPECT CH CONTRAST ...

Page 62: ...e points for which test tones will be analyzed for standing waves This is useful if you want to get a balanced flat calibration for several seating positions in your listening area Place the microphone at the reference point indicated on screen and note that the last microphone placement will be at your main listening position The Advanced MCACC menu Making receiver settings from the Advanced MCAC...

Page 63: ... continue If the speaker is not pointed to the microphone listening position or when using speakers that affect the phase dipole speakers reflective speakers etc Reverse Phase may be displayed even if the speakers are properly connected If Reverse Phase is displayed the speaker s wiring and may be inverted Check the speaker connections If the connections were wrong turn off the power disconnect th...

Page 64: ...Manual MCACC setup You can use the settings in the Manual MCACC setup menu to make detailed adjustments when you re more familiar with the system Before making these settings you should have already completed Automatically conducting optimum sound tuning Full Auto MCACC on page 26 You only need to make these settings once unless you change the placement of your cur rent speaker system or add new s...

Page 65: ...he level down until OVER disappears from the display 3 When you re finished press RETURN You will return to the Manual MCACC setup menu Note Changing the frequency curve of one channel too drastically will affect the overall balance If the speaker balance seems uneven you can raise or lower channel levels using test tones with the TRIM feature Use k l to select TRIM then use i j to raise or lower ...

Page 66: ...lected Reverb Measurement select EQ ON or EQ OFF and then START The following options determine how the reverb characteristics of your listening area are dis played in Reverb View EQ OFF You will see the reverb characteristics of your listening area without the equalization performed by this receiver before calibration EQ ON You will see the reverb characteristics of your listening area with the e...

Page 67: ... to calibrate your system for different listening positions or frequency adjustments for the same listening position This is useful for alternate settings to match the kind of source you re listening to and where you re sitting for example watching movies from a sofa or playing a video game close to the TV From this menu you can copy from one preset to another name presets for easier identifica ti...

Page 68: ...p menu Clearing MCACC presets If you are no longer using one of the MCACC presets stored in memory you can choose to clear the calibration settings of that preset 1 Select MCACC Memory Clear from the Data Management setup menu 2 Select the MCACC preset you want to clear Make sure you don t clear an MCACC preset you re currently using this can t be undone 3 Select OK to confirm and clear the preset...

Page 69: ...nnected page 69 Channel Level Adjusts the overall balance of your speaker system page 70 Speaker Distance Specifies the distance of your speakers from the listening position page 70 X Curve Adjusts the tonal balance of your speaker system for movie soundtracks page 71 THX Audio Setting Specifies whether you are using a THX speaker setup page 71 3 Make the adjustments necessary for each setting pre...

Page 70: ... that this setting applies to all MCACC presets and cannot be set independently If you re using a THX speaker setup set all speakers to SMALL 1 Select Speaker Setting from the Manual SP Setup menu 2 Choose the set of speakers that you want to set then select a speaker size Use k l to select the size and number of each of the following speakers Front Select LARGE if your front speakers reproduce ba...

Page 71: ...menu Make the settings for connecting the receiver to the Internet and using the network functions 1 Press on the remote control then press HOME MENU A Graphical User Interface GUI screen appears on your TV Use i j k l and ENTER to navigate through the screens and select menu items Press RETURN to exit the current menu 2 Select System Setup from the Home Menu 3 Select Network Setup from the System...

Page 72: ... En 72 12 The System Setup and Other Setup menus Primary DNS Server Secondary DNS Server In case there is only one DNS server address provided by your ISP on paper enter it in the Primary DNS Server field In case there are more than two DNS server addresses enter Secondary DNS Server in the other DNS server address field Proxy Hostname Proxy Port This setting is required when you connect this rece...

Page 73: ...the wireless LAN converter settings as necessary When making the connection settings of the wireless LAN converter and access point select Access Point Setting and make the connec tion settings for the wireless LAN converter and access point following the instructions on the screen If you want to set the wireless LAN converter s IP address select WLAN IP Address and input the IP address Checking t...

Page 74: ...ating via the Internet do not disconnect the LAN cable When updating via a USB memory device do not disconnect the USB memory device En 74 12 The System Setup and Other Setup menus Auto Power Down The power can be set to turn off automatically if no operation has been performed for a specific amount of time with no audio or video signals being input to the receiver When using ZONE 2 or ZONE 3 the ...

Page 75: ... found 4 To update select OK The updating screen appears and updating is performed The power turns off automatically once updating is completed Software Update messages Status messages Descriptions NO UPDATE FILE No update file was found on the USB memory device Store the file in the USB memory device s root directory FILE ERROR Try disconnecting then reconnecting the USB device or storing the upd...

Page 76: ...If you think that there is something wrong with this component check the points below Sometimes the trouble may lie in another component Investigate the other components and electrical appliances being used If the trouble cannot be rectified even after exercising the checks listed below ask your nearest Pioneer authorized independent service company to carry out repair work If the unit does not op...

Page 77: ... playback using the listening modes on page 37 Symptom Remedy Sound is produced from analog components but not from digital ones DVD LD CD etc Check that the input signal type is set to DIGITAL see Choosing the input signal on page 39 Make sure that the digital input is assigned correctly for the input jack the component is connected to see The Input Setup menu on page 28 Check the digital output ...

Page 78: ... page 52 to OFF Can t record video Check that the source is not copy protected The video converter is not available when making recordings Check that the same type of video cable is used for connecting both the recorder and the video source the one you want to record to this receiver En 78 13 Additional information Symptom Remedy Everything seems to be set up correctly but the playback sound is od...

Page 79: ... speakers reflective speakers etc it may not be possible to properly identify the polarity Symptom Remedy After using the Auto MCACC Setup the speaker size setting is incorrect There may have been some low frequency noise in the room from an air conditioner motor etc Switch off all other appliances in the room and use Auto MCACC Setup again Depending on a number of factors bass reproduction capabi...

Page 80: ...in the configuration or do not output these frequencies Calibration is performed but due to your speakers low frequency limitations no measurable sound is output for display Display Symptom Remedy The display is dark or off Press DIMMER repeatedly to select a different brightness You can t get DIGITAL to dis play when using SIGNAL SEL Check the digital connections and make sure that the digital in...

Page 81: ...ting connecting the HDMI cable during playback may cause noise or interrupted audio Noisy or distorted picture Sometimes a video deck may output a noisy video signal during scanning for example or the video quality may just be poor with some video game units for example The picture quality may also depend on the settings etc of your display device Switch off the video converter and reconnect the s...

Page 82: ...y device cannot be played back page 31 En 82 13 Additional information Troubleshooting 2 AVNavigator Symptom Causes Remedy AVNavigator does not interact well with the receiver The receiver s power is not turned on Turn the receiver s power on Wait about 60 seconds after the power turns on for network functions to start After this press Detection in AVNavigator to redetect the receiver The receiver...

Page 83: ...ching on this receiver Symptoms Causes Remedies Playback does not start while Connecting continues to be displayed The component is currently disconnected from this receiver or the power supply Check whether the component is properly connected to this receiver or the power supply The PC or Internet radio is not properly operated The corresponding IP address is not properly set Switch on the built ...

Page 84: ...t another channel Firmware Updating The SiriusConnectTM tuner s firmware is being updated Wait for updating to finish En 84 13 Additional information Symptoms Causes Remedies Audio playback is undesirably stopped or disturbed The audio file currently being played back was not recorded in a format playable on this receiver Check whether the audio file was recorded in a format supported by this rece...

Page 85: ...ess set in the wireless LAN converter may not match In the receiver s IP settings set DHCP to ON After the setting is completed turn the receiv er s power off Next turn the receiver s power back on and check whether the wireless LAN converter s settings can be displayed with the receiver If the settings can be displayed change the IP address settings of the receiver and wireless LAN converter as n...

Page 86: ...ngle of elevation to point it to the listening position Set surround speaker 1 so that it is not under the height of the ears Step 3 Adjusting the speaker orientation If the left and right speakers are not pointing in the same direction the tone will not be the same on the right and left and as a result the sound field will not be reproduced properly However if all the speakers are pointed towards...

Page 87: ...shielded type install it away from the TV When installing the center speaker on top of the monitor place it facing slightly downwards towards the listening position Important information regarding the HDMI connection There are cases where you may not be able to route HDMI signals through this receiver this depends on the HDMI equipped component you are connecting check with the manufac turer for H...

Page 88: ...Ltd In a movie theater film soundtracks that have been encoded with Dolby Digital Surround EX technology are able to reproduce an extra channel which has been added during the mixing of the program This channel called Surround Back places sounds behind the listener in addition to the currently available front left front center front right surround right surround left and subwoofer channels This ad...

Page 89: ...t specifically to iPod iPhone or iPad respectively and has been certified by the developer to meet Apple performance standards Apple is not respon sible for the operation of this device or its com pliance with safety and regulatory standards Please note that the use of this accessory with iPod iPhone or iPad may affect wireless performance Apple AirPlay the AirPlay logo iPad iPhone iPod iPod shuff...

Page 90: ...connected Auto Surround ALC and Stream Direct with different input signal formats The following charts show what you will hear with different input signal formats depending on the Stream Direct mode see Using Stream Direct on page 38 you have selected Stereo 2 channel signal formats Input signal format Auto Surround ALC DIRECT PURE DIRECT Surround Back speaker s Connected Dolby Digital Surround 2 ...

Page 91: ...rces DTS Neural Surround DTS Neural Surround can generate 7 1 chan nel surround sound from any matrixed stereo source such as video or TV THX The THX technologies are explained below See http www thx com for more detailed information THX Cinema A mode for playing in a home theater environ ment the sound tracks of theater movies that have been recorded and edited for playback in large spaces such a...

Page 92: ...l property rights of NEMS and BridgeCo Use or distribution of such technology outside of this product is prohibited without a license from NEMS and BridgeCo or an authorized subsidiary aacPlus AAC decoder uses aacPlus developed by Coding Technologies www codingtechnologies com FLAC FLAC Free Lossless Audio Codec is an audio format allows lossless codec Audio is com pressed in FLAC without any loss...

Page 93: ...ons conducting wireless exchange of digital information at rela tively low speeds such as computer mouses and keyboards mobile phones smartphones text and audio information for PDAs etc Pairing Pairing must be done before you start play back of Bluetooth wireless technology content using the Bluetooth ADAPTER Make sure to perform pairing the first time you operate the system or any time pairing da...

Page 94: ...etriever See Setting the Audio options on page 50 ALC Auto Level Control See Auto playback on page 37 Front Stage Surround Advance See Enjoying various types of playback using the listening modes on page 37 Sound Retriever Air See Enjoying various types of playback using the listening modes on page 37 Dialog Enhancement See Setting the Audio options on page 50 Internet radio See Listening to Inter...

Page 95: ...ing maximum resolution Component Video 1080p 1125p Video convert off Digital In Out Section HDMI terminal 19 pin Not DVI HDMI output type 5 V 55 mA USB terminal USB2 0 Full Speed Type A iPod terminal USB and Video Composite SIRIUS antenna cable 8 pin mini DIN cable ADAPTER PORT terminal 5 V 100 mA WIRELESS LAN ADAPTER terminal 5 V 600 mA Integrated Control Section Control SR terminal ø 3 5 Mini ja...

Page 96: ...al 0091 Insignia 0085 0086 Inteq 0099 Janeil 0012 JBL 0101 JC Penney 0000 0004 0005 0006 0010 JCB 0002 Jensen 0004 0006 JVC 0007 0010 0044 5064 Kawasho 0002 0004 0006 KEC 0104 Kenwood 0004 0006 0100 KLH 0106 Kloss Novabeam 0008 0012 KTV 0008 0100 0104 0110 LG 0005 0052 0078 0097 Logik 0001 Luxman 0004 0006 LXI 0000 0006 0101 0102 Magnavox 0004 0006 0019 0020 0037 0042 0100 0101 Majestic 0001 Maran...

Page 97: ...DR HDR If operations are not possible using the preset codes below you may be able to conduct operations with the preset codes for the DVD BD Pioneer 2103 2150 2151 2152 2153 2154 2155 2156 2157 Panasonic 2100 2106 Sharp 2104 2112 Sony 2105 2108 2109 2110 2113 Toshiba 2111 VCR Pioneer 1035 ABS 1017 Adventura 1005 Aiwa 1005 Alienware 1017 American High 1004 Asha 1002 Audio Dynamics 1000 Audiovox 10...

Page 98: ...6 SKY 6042 6059 6030 6031 SM Electronic 6011 Smart 6051 Sonicview 6055 6107 Sony 6062 6063 6030 6143 Star Choice 6032 Star Trak 6032 TechniSat 6033 Thomson 6110 6111 6014 Tivo 6113 6114 6115 6116 Toshiba 6038 6054 6039 6130 TPS 6041 Triasat 6033 Ultrasat 6021 US Digital 6020 USDTV 6020 ViewSat 6048 Voom 6032 Zehnder 6101 Zenith 6042 6069 6037 6125 6127 6129 Satellite Set Top Box SAT PVR Combinatio...

Page 99: ...Marantz 5033 Onkyo 5017 5018 5030 5050 Panasonic 5036 Philips 5022 5032 5044 RCA 5013 5029 Roadstar 5052 Sharp 5051 Sony 5012 5023 5026 5027 5028 5039 TEAC 5015 5016 5034 5035 5037 Technics 5041 Victor 5014 Yamaha 5024 5025 5038 5046 5047 CD R Pioneer 5067 Philips 5054 Yamaha 5055 Cassete Deck Pioneer 5058 5059 5070 Digital Tape Pioneer 5069 MD Pioneer 5068 En ...

Page 100: ...100 13 Additional information En ...

Page 101: ...101 13 Additional information En ...

Page 102: ...102 13 Additional information En ...

Page 103: ...ANTIES OF MERCHANTABILITY AND FITNESS FOR A PARTICULAR PURPOSE TO A PERIOD NOT TO EXCEED THE WARRANTY PERIOD NO WARRANTIES SHALL APPLY AFTER THE WARRANTY PERIOD SOME STATES DO NOT ALLOW LIMITATIONS ON HOW LONG AN IMPLIED WARRANTY LASTS AND SOME STATES DO NOT ALLOW THE EXCLUSIONS OR LIMITATIONS OF INCIDENTAL OR CONSEQUENTIAL DAMAGES SO THE ABOVE LIMITATIONS OR EXCLUSIONS MAY NOT APPLY TO YOU THIS W...

Page 104: ...Kawasaki shi Kanagawa 212 0031 Japan PIONEER ELECTRONICS USA INC P O BOX 1540 Long Beach California 90801 1540 U S A TEL 800 421 1404 PIONEER ELECTRONICS OF CANADA INC 340 Ferrier Street Unit 2 Markham Ontario L3R 2Z5 Canada TEL 1 877 283 5901 905 479 4411 PIONEER EUROPE NV Haven 1087 Keetberglaan 1 B 9120 Melsele Belgium TEL 03 570 05 11 PIONEER ELECTRONICS ASIACENTRE PTE LTD 253 Alexandra Road 0...

Reviews: