Connecting your equipment
03
32
En
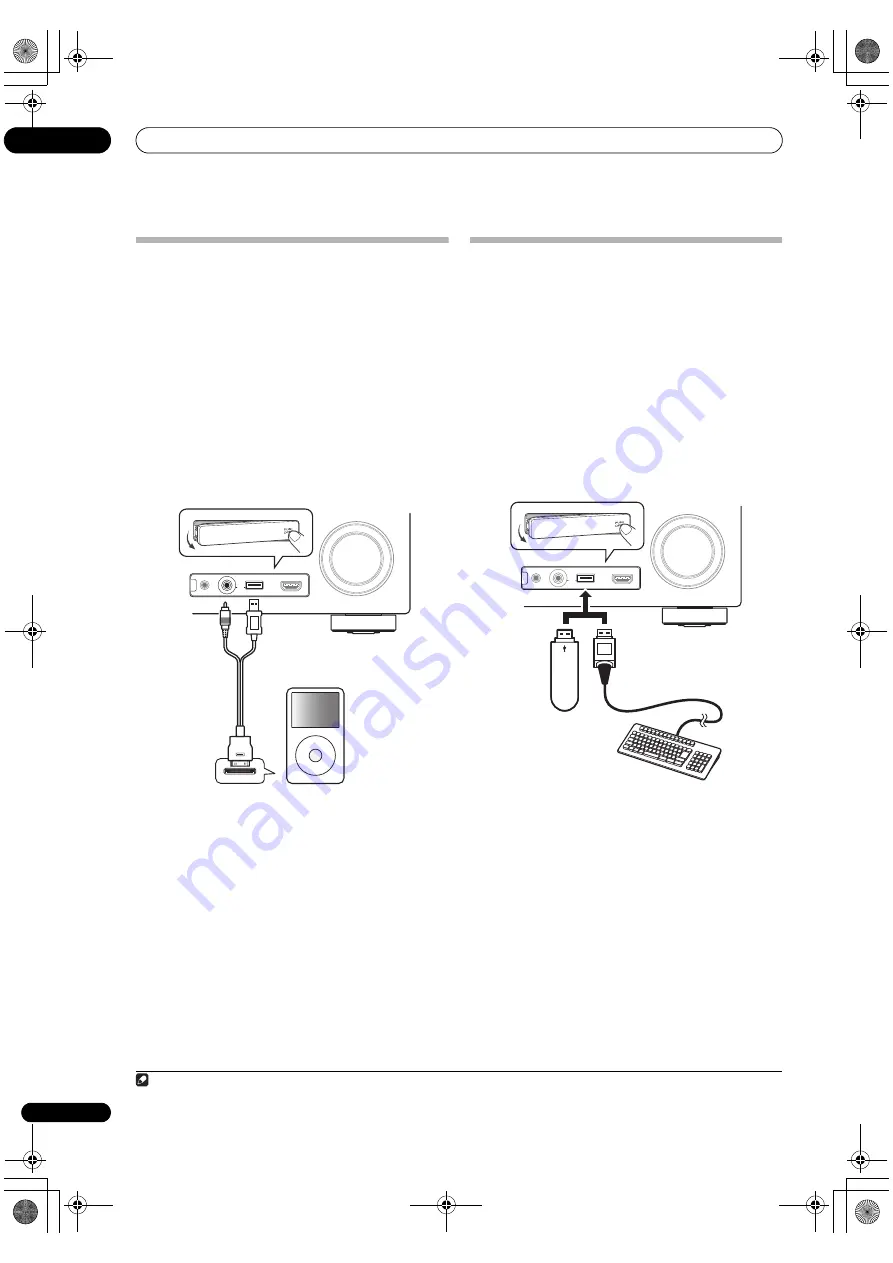
Connecting an iPod
This
r
eceive
r
has a dedicated iPod te
r
minal that will allow
you to cont
r
ol
p
layback of audio content f
r
om you
r
iPod
using the cont
r
ols of this
r
eceive
r
.
•
Switch the receiver into standby then use the
supplied iPod cable to connect your iPod to the iPod/
iPhone/USB terminal on the front panel of this
receiver.
• It is also
p
ossible to connect using the cable included
with the iPod, but in this case it is not
p
ossible to view
p
ictu
r
es via the
r
eceive
r
.
• Fo
r
the cable connection, also
r
efe
r
to the o
p
e
r
ating
inst
r
uctions fo
r
you
r
iPod.
• Fo
r
inst
r
uctions on
p
laying the iPod, see
Playing an
iPod
on
p
age 39.
Connecting a USB device
It is
p
ossible to
p
lay audio and
p
hoto files by connecting
USB devices to this
r
eceive
r
. It is also
p
ossible to connect
a USB keyboa
r
d (US-inte
r
national layout) to the
r
eceive
r
to ente
r
text in the following GUI sc
r
eens.
• Change the in
p
ut name in the
Input Setup
menu
(
p
age 37).
• Add names to
r
adio station
pr
esets (
p
age 43).
• Ente
r
Inte
r
net
r
adio station URLs (
p
age 44).
•
Switch the receiver into standby then connect your
USB device to the USB terminal on the front panel of
this receiver.
1
• Fo
r
inst
r
uctions on
p
laying the USB device, see
Playing a USB device
on
p
age 40.
MENU
MASTER
VOLUME
MCACC SETUP MIC
USB
iPod
iPhone
VIDEO CAMERA
HDMI 5
CONTROL
ON / OFF
iPod
iPod cable
(su
pp
lied)
Note
1 This
r
eceive
r
does not su
pp
o
r
t a USB hub.
MASTER
VOLUME
MCACC SETUP MIC
USB
iPod
iPhone
VIDEO CAMERA
HDMI 5
CONTROL
ON / OFF
USB mass
sto
r
age device
USB keyboa
r
d
VSX-1120_UXJCB.book 32 ページ 2010年3月10日 水曜日 午後2時2分


