6
6
18
Network quick setup guide
By connecting this unit to the network via the LAN interface, you can play back audio files
stored on components on the network, including your computer, and listen to Internet radio
stations.
Connect to the network
•
This section will explain about performing basic network settings.
•
The factory default setting is
DHCP On
.
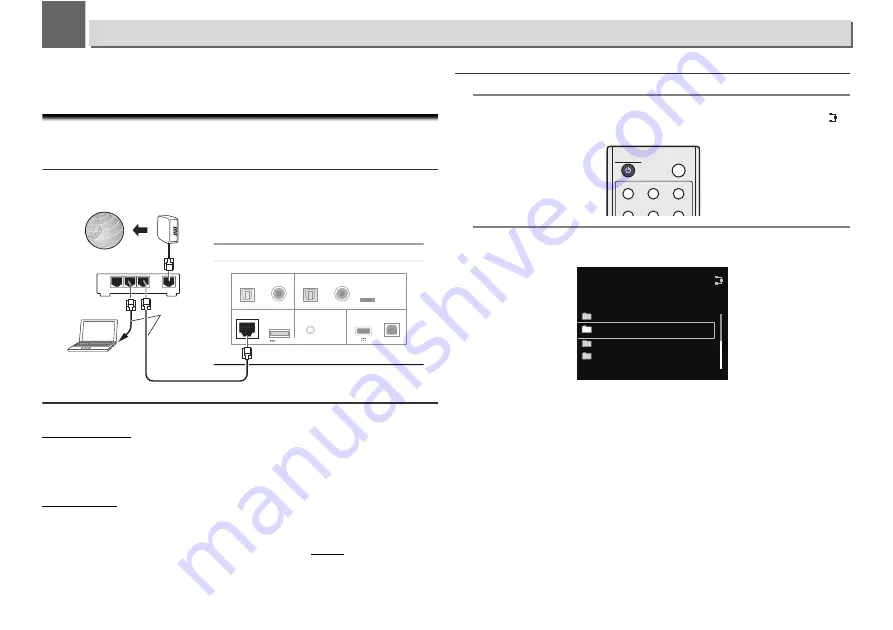
1. Connect a LAN cable
Connect the unit and the router using a LAN cable.
2. Connection settings
Automatic setting
The automatic setting is normally used.
If you are performing network settings for the first time, this is the recommended setting to use.
Connect the LAN cable and you are finished.
Proceed to Step 3, Check connection.
Manual setting
Use this setting when using a fixed IP address.
Use this setting when your router does not have a DHCP server function, or when you are
managing your network device separately.
Turn on the power to this unit and manually set the IP address (page 25).
3. Check connection
1
Press the
STANDBY/ON button.
The power to the unit will be turned on. Confirm that the cabled LAN operation mark is
displayed.
2
Press the NET SERVICE button, and select Internet Radio.
Confirm that the categories are displayed.
•
If “Server Error” is displayed, there is a possibility that the router is not connected to the
internet. Check whether other connected devices, such as a computer, are able to use the
internet. If not, connect the router to the internet. Refer to the router’s user manual for
details on how to do so.
LAN (10/100)
OPTICAL
COAXIAL
1
2
DIGITAL IN
DIGITAL IN
DC OUTPUT
For
USB DAC
(5V
0.6A MAX)
WIRELESS
LAN
DIGITAL OUT
OPTICAL
COAXIAL
CONTROL
OUT
5V 1A
iPod/iPhone
WAN
3
2
1
LAN
Internet
Router
Computer
LAN cable
(commercially
available)
Modem
STANDBY/ON
DISPLAY
DIRECT
A.S.R
A.L.C
Up Sampling
Hi-Bit32
SOUND
Genres
Podcasts By Genre
Podcasts By Location
Countries
Top Menu
Internet Radio


