11
En/Fr
2
Connecting Up
Raccordements
English
Français
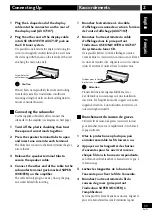
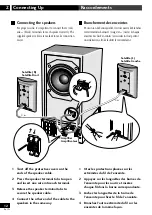
Connecting the subwoofer
Use the supplied subwoofer cable to connect the
subwoofer to the amplifer (see diagram on next page).
1 Twist off the plastic shielding then twist
the exposed wire strands together.
2 Press the speaker terminal tabs to open
and insert one wire into each terminal.
The white wire connects to the black terminal; the gray
wire to the red.
3 Release the speaker terminal tabs to
secure the speaker cable.
4 Connect the other end of the cable to the
subwoofer terminal (jack marked SUPER
WOOFER) on the amplifier.
The cable will only plug in one way; line up the plug
and socket before fully inserting.
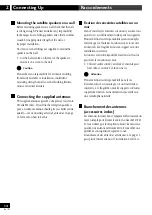
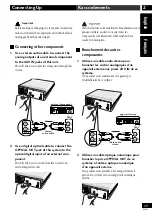
1 Plug the L-shaped end of the display
cable into the connector on the rear of
the display unit (AXX7107).
2 Plug the other end of the display cable
into USE ONLY WITH AXX7107 jack on
the CD tuner system.
It is possible to wall-mount the display unit using two
screws (not supplied) securely fastened to a wall. Line
the screws up with the holes on the rear side of the unit
and hang the unit on the wall.
Screw holes for
wall-mounting
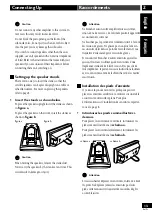
Caution
Pioneer bears no responsibilty for accidents resulting
from faulty assembly or installation, insufficient
mounting strength of walls or other building fixtures,
misuse or natural disasters.
1 Branchez l’extrémité en L du câble
d’affichage au connecteur situé à l’arrière
de l’unité d’affichage (AXX7107).
2 Branchez l’autre extrémité du câble
d’affichage dans la prise portant
l’indication USE ONLY WITH AXX7107
du système de tuner CD.
Il est possible de fixer l’unité d’affichage au mur à
l’aide de deux vis (accessoires non inclus) en veillant à
les visser de manière sûre. Alignez les vis sur les orifices
situés à l’arrière de l’unité et fixez l’unité au mur.
Orifices pour la fixation
de l'unite au mur
Pioneer décline toute responsabilité dans le cas
d'accidents dus à un montage ou à une installation
incorrects, à la fragilité du mur de support ou d'autres
supports de fixation, à une utilisation incorrecte ou à
une catastrophe naturelle.
Branchement du caisson de graves
Utilisez le fil de caisson de graves (accessoire inclus)
pour brancher celui-ci à l’amplificateur (Cf. schéma à
la page suivante).
1 Otez la protection en plastique, puis
enroulez ensemble les fils laissés à nu.
2 Appuyez sur les languettes des bornes
d’enceintes pour les ouvrir et insérez
chaque fil dans la borne correspondante.
Le fil blanc doit être branché à la borne noire; le gris, à
la borne rouge.
3 Lâchez les languettes de la borne de
l’enceinte pour fixer le fil de l’enceinte.
4 Branchez l’autre extrémité du fil du
caisson de graves (prise portant
l’indication SUPER WOOFER) à
l’amplificateur.
Le fil ne peut être branché que dans un sens: alignez la
prise et la borne femelle avant d’introduire la prise.
Attention
Summary of Contents for M-L11
Page 51: ...51 Français ...

