background image

En
g

lis

h

- 11 -

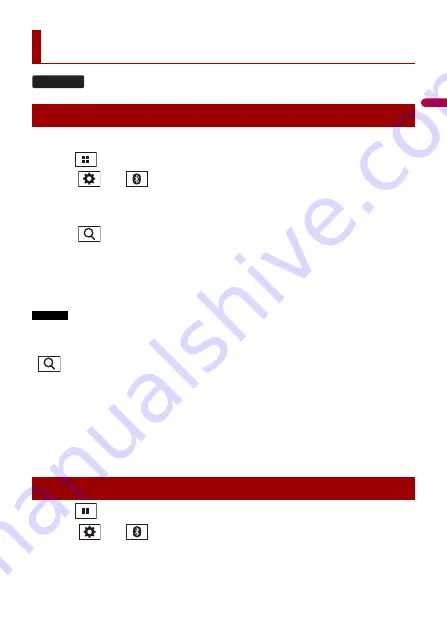
1

Turn on the Bluetooth function on the device.

2

Press .

3

Touch  

then .

The Bluetooth menu screen appears.

4

Touch [Connection].

5

Touch .

The unit starts to search for available devices, then displays them in the device list.

6

Touch the Bluetooth device name.

After the device is successfully registered, a Bluetooth connection is established by the 
system. Once the connection is established, the device name is displayed on the list.

NOTES

If three devices are already paired, [Memory Full] is displayed. Delete a paired device first (page 12).

If your device supports SSP (Secure Simple Pairing), a six-digit number appears on the display of this 
product. Touch [Yes] to pair the device.

 is invalid when the device is already connected, also is invalid during connecting or 

disconnecting.

Before connecting from the Bluetooth device, make sure that the connection of this product and 
other Bluetooth device is disconnected.

TIP

The Bluetooth connection can also be made by detecting this product from the Bluetooth device. 
Before registration, make sure that [Visibility] in the [Bluetooth] menu is set to [On] (page 12). For 
details on Bluetooth device operations, refer to the operating instructions supplied with the Bluetooth 
device.

1

Press .

2

Touch  

then .

Bluetooth

Bluetooth connection

Bluetooth settings

G220BT

Summary of Contents for DMH-G120

Page 1: ...English DMH G220BT DMH G120 RDS AV RECEIVER Operation Manual ...

Page 2: ...ttings 31 Video settings 33 Favourite menu 34 Other functions 35 Appendix 37 Contents Thank you for buying this Pioneer product Please read through these instructions so you will know how to operate your model properly After you have finished reading the instructions keep this document in a safe place for future reference The screen shown in the examples may differ from actual screens which may be...

Page 3: ... not attempt to install or service this product by yourself Installation or servicing of this product by persons without training and experience in electronic equipment and automotive accessories may be dangerous and could expose you to the risk of electric shock injury or other hazards Do not allow this product to come into contact with liquids Electrical shock could result Also damage to the pro...

Page 4: ...ety certain functions are disabled unless the vehicle is stopped and the handbrake is applied Keep this manual handy as a reference for operating procedures and safety information Do not install this product where it may i obstruct the driver s vision ii impair the performance of any of the vehicle s operating systems or safety features including air bags or hazard lamp buttons or iii impair the d...

Page 5: ...r backing into a tight parking spot WARNING SCREEN IMAGE MAY APPEAR REVERSED USE INPUT ONLY FOR REVERSE OR MIRROR IMAGE REAR VIEW CAMERA OTHER USE MAY RESULT IN INJURY OR DAMAGE CAUTION The rear view mode is to use this product as an aid to keep an eye on the trailers or while backing up Do not use this function for entertainment purposes CAUTION To prevent data loss and damage to the storage devi...

Page 6: ...he Pioneer CarStereo Pass is for use only in Germany Do not expose the LCD screen to direct sunlight when this product is not used This may result in LCD screen malfunction due to the resulting high temperatures When using a mobile phone keep the aerial of the mobile phone away from the LCD screen to prevent disruption of the video in the form of spots coloured stripes etc To protect the LCD scree...

Page 7: ... the top menu screen Press and hold to power off To power back on press any button MUTE Press and hold to display off USB port RESET Press to reset the microprocessor page 8 Microphone DMH G220BT The Bluetooth microphone is built in the grill of the product Speak towards the microphone when you make a call NOTE Depending on the usage condition of the vehicle such as the wind from the air condition...

Page 8: ...a pen tip or other pointed tools Settings and recorded contents are reset to the factory settings The remote control is sold separately For details concerning operations see the remote control manual 1 Start the engine to boot up the system The Select Program Language screen appears NOTE From the second time on the screen shown will differ depending on the previous conditions 2 Touch the language ...

Page 9: ...E This function is available only when you stop your vehicle in a safe place and apply the handbrake Returns to the previous screen Close the screen Operating list screens Touching an item on the list allows you to narrow down the options and proceed to the next operation Appears when all characters are not displayed on the display area If you touch the key the rests are scrolled for display NOTE ...

Page 10: ...enu page 34 Hands free phoning page 13 DMH G220BT AV source off If you select you can turn off almost all functions The unit turns on by operating following functions An incoming call is received only for hands free phoning via Bluetooth DMH G220BT A rear view camera image is input when the vehicle is in reverse A button on this unit is pressed The ignition switch is turned off ACC OFF then turned...

Page 11: ...ur device supports SSP Secure Simple Pairing a six digit number appears on the display of this product Touch Yes to pair the device is invalid when the device is already connected also is invalid during connecting or disconnecting Before connecting from the Bluetooth device make sure that the connection of this product and other Bluetooth device is disconnected TIP The Bluetooth connection can als...

Page 12: ...NOTE Connect the Bluetooth device manually in the following cases Two or more Bluetooth devices are registered and you want to manually select the device to be used You want to reconnect a disconnected Bluetooth device Connection cannot be established automatically for some reason Auto Connect On Off Select On to connect the last connected Bluetooth device automatically NOTE If two Bluetooth devic...

Page 13: ...played Name of the current mobile phone List number of the current mobile phone Reception status of the current mobile phone Battery status of the current mobile phone Initial searches the phone book Touch the list area to stop initial search Using preset dial list page 14 Using phone book Select a contact from the phone book Touch the desired name on the list then select the phone number TIPS The...

Page 14: ...creen appears and dialling starts Deleting a phone number 1 Press then touch 2 Touch then 3 Touch Yes 1 Touch to answer the call Touch to end the call TIPS Touch while getting a call waiting switch to the talking person Touch while getting a call waiting to reject the call 1 Press then touch and Using the preset dial lists Receiving a phone call Phone settings Menu Item Description Auto Answer On ...

Page 15: ... phone for detailed instructions When phone book transfer does not work disconnect your phone and then perform pairing again from your phone to this product Making and receiving calls You may hear a noise in the following situations When you answer the phone using the button on the phone When the person on the other end of the line hangs up the phone If the person on the other end of the line cann...

Page 16: ...ted to this product the available operations with this product may be limited to the following two levels A2DP Advanced Audio Distribution Profile Only playing back songs on your audio player is possible A2DP and AVRCP Audio Video Remote Control Profile Playing back pausing selecting songs etc are possible Depending on the Bluetooth device connected to this product the available operations with th...

Page 17: ...ng an auxiliary device Bluetooth audio AUX DMH G220BT 1 Press 2 Touch the source icon When you select the AV source is turned off 1 Touch on the AV Source screen Basic operation Track number indicator Sets a repeat play range Plays files in random order Switches the devices AV source Supported AV source Selecting a source Source on the AV source selection screen Source on the source list ...

Page 18: ...he connection method Connecting via Bluetooth page 18 Connecting via USB page 18 DMH G220BT Compatible smartphones Compatibility with all smartphones is not guaranteed For details about smartphone compatibility with this product refer to the information on our website The following sources are available when a smartphone is connected to the unit via Bluetooth Bluetooth audio 1 Connect a smartphone...

Page 19: ...hannel stored to a key from memory Stores the current broadcast frequency to a key Displays the preset channel list Select an item on the list 1 to 6 to switch to the preset channel Selects the FM1 FM2 FM3 MW or LW band Performs BSM best stations memory function page 20 Manual tuning Seek tuning or non stop seek tuning Releasing the key in a few seconds skips to the nearest station from the curren...

Page 20: ... 1 Press 2 Touch then The system setting screen appears 3 Touch AV Source Settings 4 Touch Radio settings The menu items vary according to the source Storing the strongest broadcast frequencies BSM To cancel the storage process Radio settings Menu Item Description Local Off FM Level1 Level2 Level3 Level4 MW LW Level1 Level2 Local seek tuning allows you to only tune into radio stations with suffici...

Page 21: ...or the same PI Programme Identification code broadcast station from all frequency bands automatically when the broadcasting station contains RDS data NOTE Even if you set to Off the PI search is automatically performed when the tuner cannot get a good reception TA Interrupt On Off Receives the traffic announcement from the last selected frequency interrupting the other sources News Interrupt On Of...

Page 22: ...able page 21 TIP If the USB is already set select USB as the playing source TIP You can set the screen size for the video and image files page 35 Description of Audio source screen TIP When you touch text information all information is displayed by scrolling only when the handbrake is applied Unplugging a USB storage device Starting procedure Basic operation Audio source Sets a repeat play range f...

Page 23: ...ents You can play a file on the list by touching it When you touch the memory select icon while connecting an Android device it switches between internal memory and external memory Selects the previous folder or the next folder Switches the current music information display Video source Performs frame by frame playback Performs slow motion playback Sets a repeat play range for all files the curren...

Page 24: ...older on the list shows its contents You can play a file on the list by touching it Still image source Selects the previous folder or the next folder Rotates the displayed picture 90 clockwise Sets a repeat play range for all files the current folder Plays all files in the current repeat play range or does not play them in random order Switches the following media file types Music Compressed audio...

Page 25: ...tion of AUX screen TIPS Touch anywhere on the screen the touch panel keys appear You can set the screen size for the video image page 35 You can adjust various settings in the main menu 1 Press 2 Touch 3 Touch one of the following categories then select the options System settings page 26 Theme settings page 31 Starting procedure Basic operation Switches between the video input and audio input Set...

Page 26: ...e also allows you to check what is behind you while driving Camera for Camera View mode Camera View can be displayed at all times Note that with this setting the camera image is not resized to fit and that a portion of what is seen by the camera is not viewable To display the camera image touch Camera on the AV source selection screen page 17 NOTE To set the rear view camera as the camera for Came...

Page 27: ...Back Camera Input Off On Setting rear view camera activation Camera Polarity Setting the polarity of the rear view camera Battery The polarity of the connected lead is positive Ground The polarity of the connected lead is negative NOTE This function is available when Back Camera Input is set to On Safe Mode Menu Item Description Safe Mode On Off Set the safe mode that regulate operating some funct...

Page 28: ...ehicle in a safe place and apply the handbrake Restore Settings Menu Item Description Restore Settings Touch Restore to restore the settings to the default settings CAUTION Do not turn off the engine while restoring the settings NOTES This setting is available only when you stop your vehicle in a safe place and apply the handbrake The source is turned off and the Bluetooth connection is disconnect...

Page 29: ...d hold the adjustment is cancelled 6 Press and hold The adjustment results are saved Dimmer Settings Menu Item Description Dimmer Trigger Setting the dimmer brightness Auto Switches the dimmer to on or off automatically according to your vehicle s headlight turning on or off Manual Switches the dimmer to on or off manually Time Switches the dimmer to on or off at the time you adjusted Day Night Se...

Page 30: ...ursor for off time setting is placed on the left end and the cursor for on time setting is placed on the right end the dimmer available time is 0 hours When the cursor for on time setting is placed on the left end and the cursor for off time setting is placed on the right end the dimmer available time is 24 hours NOTES The time display of the dimmer duration adjusting bar depends on the clock disp...

Page 31: ...e AV Select the wall paper from the preset items in this product The wall paper can be set from selections for the top menu screen and AV operation screen Preset Display Select the desired preset background display off Hides the background display Theme Select the theme colour Audio settings Menu Item Description Graphic EQ Super Bass Powerful Natural Vocal Flat Custom1 Custom2 Select or customise...

Page 32: ...ed to the value of the touched point NOTES Settings are based on the FM tuner volume level which remains unchanged This function is not available when the FM tuner is selected as the AV source Subwoofer On Off Select enable or disable subwoofer output from this product Speaker Level Front Left Front Right Rear Left Rear Right Subwoofer Listening Position Adjust the speaker output level of the list...

Page 33: ...pensates for deficiencies in the low frequency and high frequency ranges at low volume NOTE This function is not available while you make or receive a call using the hands free function DMH G220BT Adjusting the LPF cutoff frequency value Switches the subwoofer phase between normal and reverse position LPF Switches the LPF setting to On or Off Video settings Time Per Photo Slide Menu Item Descripti...

Page 34: ...he star icon in the menu column again 1 Press then touch 2 Touch 3 To select touch the menu item To remove touch and hold the favourite menu column The selected menu item is removed from the Favourites screen Video Signal Setting Menu Item Description AUX Auto PAL NTSC PAL M PAL N SECAM Select the suitable video signal setting when you connect this product to an AUX equipment Camera Auto PAL NTSC ...

Page 35: ...ate Changing the wide screen mode Screen display mode key Full Displays 16 9 images on the full screen without changing the ratio NOTE Enlarges and displays images of USB sources keeping the ratio of the original source image Zoom Displays the images enlarging them vertically Normal Displays images without changing the 4 3 aspect ratio NOTES For USB sources 4 3 aspect ratio may not be displayed De...

Page 36: ...r different The video image will appear coarser when viewed in Zoom mode NOTE Image files can be set to either Normal or Trimming in wide screen mode You can restore settings or recorded content to the default settings from Restore Settings in the System menu page 28 Restoring this product to the default settings ...

Page 37: ...fter re entering the range for service The connection between the mobile phone and this product cannot be established Perform the connection process Of the two mobile phones connected to this product at the same time if the first phone is dialling ringing or a call is in progress dialling cannot be performed on the second phone When the operation on the first of the two mobile phones is completed ...

Page 38: ...storage device or files may not be played back properly The text information of some audio and video files may not be correctly displayed File extensions must be used properly There may be a slight delay when starting playback of files on an USB storage device with complex folder hierarchies Operations may vary depending on the kind of an USB storage device It may not be possible to play some musi...

Page 39: ...e associated with the DivX file The character strings before the extension must be exactly the same However if there is only one DivX file and one subtitle file in a single folder the files are associated even if the file names are not the same The subtitle file must be stored in the same folder as the DivX file Up to 255 subtitle files may be used Any more subtitle files will not be recognised Up...

Page 40: ...96 112 128 144 160 192 224 256 320 kbps CBR VBR Sampling frequency 8 11 025 12 16 22 05 24 32 44 1 48 64 88 2 96 kHz DivX compatibility This product is not compatible with the following DivX Ultra format DivX files without video data DivX files encoded with LPCM Linear PCM audio codec If a file contains more than 4 GB playback stops before the end Some special operations may be prohibited because ...

Page 41: ...ce can play DivX Home Theater video files up to 576p including avi divx Download free software at www divx com to create play and cast digital videos AAC is short for Advanced Audio Coding and refers to an audio compression technology standard used with MPEG 2 and MPEG 4 Several applications can be used to encode AAC files but file formats and extensions differ depending on the application which i...

Page 42: ...es When removing dust from or cleaning the LCD screen first turn this product off and then wipe the screen with a soft dry cloth When wiping the LCD screen take care not to scratch the surface Do not use harsh or abrasive chemical cleaners A light emitting diode is used inside the display to illuminate the LCD screen At low temperatures using the LED backlight may increase image lag and degrade th...

Page 43: ...ed Max current supply 0 5 A USB Class MSC Mass Storage Class MTP Media Transfer Protocol File system FAT16 FAT32 USB audio MP3 decoding format MPEG 1 2 2 5 Audio Layer 3 WMA decoding format Ver 7 7 1 8 9 9 1 9 2 2 ch audio Windows Media Player AAC decoding format MPEG 4 AAC iTunes encoded only Ver 10 6 and earlier WAV signal format Linear PCM wav Sampling frequency Linear PCM 16 kHz 22 05 kHz 24 k...

Page 44: ...e 531 kHz to 1 602 kHz 9 kHz Usable sensitivity 28 μV S N 20 dB Signal to noise ratio 62 dB IEC A network LW tuner Frequency range 153 kHz to 281 kHz Usable sensitivity 30 μV S N 20 dB Signal to noise ratio 62 dB IEC A network NOTE Specifications and design are subject to possible modifications without notice due to improvements ...

Page 45: ... 2019 PIONEER CORPORATION All rights reserved OPM_DMHG220BTEW5_EG_A EW ...

Reviews: