background image

3

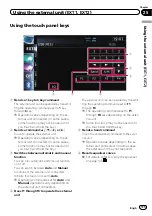
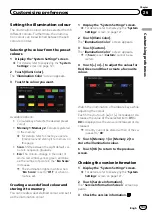
Touch [Home].

The

Select Search Method

screen appears.

#

Touch [

Phone#

].

When you have already registered your home,
you can edit your home number.

4

Search for a location.

=

For details, refer to

Searching for and select-

ing a location

on page 29.

After searching for a point, the map of the se-
lected position is displayed.

5

Touch [OK].

The location is registered, and then the

Set

Home

screen appears.

6

Touch [OK].

The registration is completed.

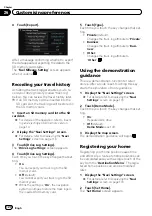
Correcting the current location

Touch the screen to adjust the current position
and direction of the vehicle displayed on the
map.

1

Display the

Navi Settings

screen.

=

For details, refer to

Displaying the

Navi

Settings

screen

on page 116.

2

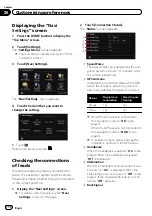
Touch [Modify Current Location].

3

Scroll to the position where you want

to set, then touch [OK].

4

Touch the arrow key on the screen to

set the direction, then touch [OK].

Changing the eco-function
setting

You can change the eco-function setting.

1

Display the

Navi Settings

screen.

=

For details, refer to

Displaying the

Navi

Settings

screen

on page 116.

2

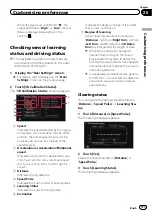
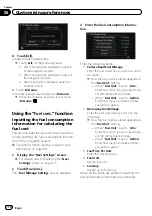
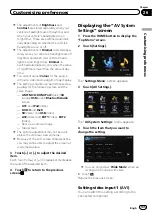
Touch [Eco Settings].

The

Eco Settings

screen appears.

3

Touch each item.

Eco Score

!

On

(default):

Displays

Eco Score

.

!

Off

:

Hides

Eco Score

.

=

For details, refer to

Displaying

Eco Graph

on page 27.

Eco Drive Level

!

On

(default):

After you arrive the destination, a message
appears and a beep sounds if the level of

Eco Drive Level

have increased or de-

creased.

!

Off

:

No message appears and no sound beeps
when the vehicle reaches the destination.

=

For details, refer to

Displaying Eco Drive

Level guidance

on page 28.

Rapid Start Warning

!

On

:

A message appears and a sound beeps
when the vehicle experiences a sudden
start.

!

Off

(default):

No message appears and no sound beeps
when the vehicle experiences a sudden
start.

=

For details, refer to

Sudden start alert

on

page 28.

Clear Eco Record

Fuel consumption data are cleared.

4

Touch [OK].

The settings are completed.

Engb

121

Chapter

26

Customising

pr
eferences

Customising preferences

Summary of Contents for AVIC-F200BT

Page 1: ...GATION AV SYSTEM AVIC F20BT Be sure to read Important Information for the User first Important Information for the User includes the important information that you must understand before using this navigation system English ...

Page 2: ...ging and unplugging a USB storage device 15 Plugging in a USB storage device 15 Unplugging a USB storage device 15 Connecting and disconnecting an iPod 15 Connecting your iPod 15 Disconnecting your iPod 16 Flow from startup to termination 16 On first time startup 16 Regular startup 17 How to use the navigation menu screens Screen switching overview 18 What you can do on each menu 19 Shortcut Menu ...

Page 3: ...ng waypoints 42 Cancelling the route guidance 42 Registering and editing locations Storing a location in Favourites 43 Registering a location by Favourites 43 Registering a location by scroll mode 43 Editing registered locations 43 Editing the entry in the Favourites list 43 Editing your home 44 Sorting the entry in the Favourites list 44 Deleting the entry from the Favourites list 45 Exporting an...

Page 4: ...g the radio FM Starting procedure 63 Reading the screen 63 Using the touch panel keys 64 Storing and recalling broadcast frequencies 65 Using radio text 65 Using the Function menu 66 Storing the strongest broadcast frequencies 66 Tuning in strong signals 66 Limiting stations to regional programming 67 Searching for an RDS station by PTY information 67 Receiving traffic announcements 67 Tuning into...

Page 5: ...SB or SD Starting procedure 94 Reading the screen 94 Using the touch panel keys Music 96 Using the Function menu 97 Playing video files from USB or SD Starting procedure 98 Reading the screen 98 Using the touch panel keys Video 99 Searching for a specific scene and starting playback from a specified time 100 Using the Function menu 100 Using an iPod iPod Starting procedure 101 Reading the screen 1...

Page 6: ... night 126 Changing the road colour 126 Changing the setting of navigation interruption screen 127 Selecting the Quick Access menu 127 Displaying the System Settings screen 127 Customising the regional settings 128 Setting the Volume for Guidance and Phone 130 Changing the preinstalled splash screen 131 Changing to the splash screen stored in the SD memory card 131 Setting for rear view camera 131...

Page 7: ... errors 159 When positioning by GPS is impossible 159 Conditions likely to cause noticeable positioning errors 160 Route setting information 161 Route search specifications 161 Handling and care of discs 162 Built in drive and care 162 Ambient conditions for playing a disc 163 Playable discs 163 DVD Video and CD 163 AVCHD recorded discs 163 Playing DualDisc 163 Dolby Digital 164 DTS sound 164 Deta...

Page 8: ...een or AV Source screen Touch panel keys that are available on the screen are described in bold in brackets e g Destination Settings Extra information alternatives and other notes are presented in the following for mat e g p If the home location has not been stored yet set the location first Descriptions of separate operations to be performed on the same screen are indi cated with at the beginning...

Page 9: ...ay audio or audio on demand applica tions An independent licence for such use is required For details please visit http www mp3licensing com iPod compatibility This product supports only the following iPod models and iPod software versions Others may not work correctly iPod nano first generation Ver 1 3 1 iPod nano second generation Ver 1 1 3 iPod nano third generation Ver 1 1 3 iPod nano fourth g...

Page 10: ...e battery is disconnected or discharged the memory will be erased and must be repro grammed p Some data remains Be sure to read Return ing the navigation system to the default or factory settings first For detailed information about the items which would be erased refer to Return ing the navigation system to the default or factory settings on page 146 Data subject to erasure The information is era...

Page 11: ...s using the buttons 7 6 5 4 3 2 1 AVIC F20BT with the LCD panel closed 9 8 AVIC F20BT with the LCD panel open 1 button Press the button to hear the next gui dance Press and hold the button to switch the AV source to mute To cancel the muting press and hold it again Engb 11 Chapter 02 Basic operation Basic operation ...

Page 12: ...s of the operation refer to In serting and ejecting a disc on this page 9 SD card slot For more detailed information refer to In serting and ejecting an SD memory card on the next page Adjusting the LCD panel angle WARNING When opening closing and adjusting the angle of the LCD panel be careful not to get your fin gers caught CAUTION Do not open or close the LCD panel by force This may cause malfu...

Page 13: ...he disc is ejected 3 Remove the disc and press the h but ton The LCD panel closes Inserting and ejecting an SD memory card WARNING Ejecting an SD memory card during data transfer can damage the SD memory card Be sure to eject the SD memory card by following the proce dure described in this manual CAUTION If data loss or corruption occurs on the storage device for any reason it is usually not possi...

Page 14: ...utton The LCD panel closes p If data related to map data such as custo mised POI data is stored on the SD mem ory card the navigation system restarts Ejecting an SD memory card 1 Press the h button The Monitor Setup screen appears 2 Touch Eject SD The LCD panel opens p Touch Yes if the message indicating that the flap opens after the navigation system restarts appears The navigation system restart...

Page 15: ... Compatibility with all USB storage devices is not guaranteed This navigation system may not achieve op timum performance with some USB sto rage devices p Connection via a USB hub is not possible Unplugging a USB storage device Pull out the USB storage device after checking that no data is being accessed Connecting and disconnecting an iPod CAUTION To prevent data loss and damage to the sto rage d...

Page 16: ...tect the LCD screen from damage be sure to touch the touch panel keys with your finger only and gently touch the screen 2 Turn off the vehicle engine to termi nate the system The navigation system is also turned off On first time startup When you use the navigation system for the first time select the language that you want to use 1 Start the engine to boot up the system After a short pause the sp...

Page 17: ...hown will differ depending on the previous conditions p When there is no route the disclaimer ap pears after the navigation system reboots Read the disclaimer carefully checking its details and then touch OK if you agree to the conditions p If the anti theft function is activated you must enter your password Read the disclaimer carefully checking its details and then touch OK if you agree to the c...

Page 18: ...Screen switching overview 2 5 6 1 1 3 4 Engb 18 Chapter 03 How to use the navigation menu screens ...

Page 19: ...gs 6 Map screen Press the MODE button to display the naviga tion map screen Shortcut Menu Registering your favourite menu items in shortcuts allows you to quickly jump to the re gistered menu screen by a simple touch on the Shortcut Menu screen Selecting the shortcut p Up to 15 menu items can be registered in shortcuts 1 Press the HOME button repeatedly to display the Shortcut Menu screen p When y...

Page 20: ...acters Operating the on screen keyboard 1 4 3 5 7 6 2 8 1 Screen title The screen title appears 2 Text box Displays the characters that are entered If there is no text in the box an informative guide with text appears 3 Keyboard Touch the keys to enter the characters 4 Returns the previous screen 5 Keys Switches the on screen keyboard layout 6 Sym Others 0 9 You can enter other characters of alpha...

Page 21: ...e 124 3 Distance to the guidance point Shows the distance to the next guidance point p Touching this item enables you to hear the next guidance again 4 Second Manoeuvre Arrow Shows the turning direction after next and the distance to there For details refer to Displaying man oeuvres on page 124 5 Zoom in Zoom out Touching displays touch panel keys for changing the map scale and the map orienta tio...

Page 22: ...ext waypoint or cursor is indicated with a straight line f Bluetooth connection icon This icon shows whether the device featuring Bluetooth technology is connected or not You can select between display and non display For details refer to Displaying the Blue tooth connection icon on page 123 g Multi Info window Each touch of Multi Info window changes the display information Distance to the destina...

Page 23: ...g able route on the map only the arrival gui dance for the destination or a waypoint is available Please review and obey all local traf fic rules along the highlighted route For your safety Operating the map screen Changing the scale of the map You can change the map scale between 25 metres and 2 000 kilometres 25 yards and 1 000 miles 1 Display the map screen 2 Touch on the map screen and with th...

Page 24: ... varies depending on the position p The scrolling increment depends on your dragging length Touch The map returns to the current position p Pressing MODE button returns the map to the current position Setting the Quick Access menu Quick Access menu allows you to perform various tasks such as route calculation for the location indicated by the cursor or registering a location in Favourites faster t...

Page 25: ...ess menu Switching the view mode Various types of screen displays can be se lected for navigation guidance 1 Display the Map Settings screen For details refer to Displaying the Map Settings screen on page 122 2 Touch View Mode The View Mode screen appears 3 Touch the type that you want to set You can select the following types 2D View default Displays a normal map 2D map 3D View Displays a map wit...

Page 26: ...refer to Setting for rear view camera on page 131 Eco Graph Displays a graph for eco driving on the left side of the screen and the map on the right side of the screen For details refer to Displaying Eco Graph on the next page Engb 26 Chapter 04 How to use the map ...

Page 27: ...date The Eco Score is updated every 5 min utes p This is not displayed when Eco Score is set to Off or when no route is set For details of the operation refer to Changing the eco function setting on page 121 2 Best Score Displays the best score to date p This is not displayed when Eco Score is set to Off or when no route is set For details of the operation refer to Changing the eco function settin...

Page 28: ...riven in an environmentally friendly way The points of Eco Drive Level change ac cording to Eco Score when the vehicle reaches the destination When a certain num ber of points is reached the level increases and a message appears 1 1 Tree icon As the level increases a tree icon changes from a young tree to a big tree p This is not displayed when Eco Drive Level is set to Off For details of the oper...

Page 29: ... your route 1 Park your vehicle in a safe place and apply the handbrake j 2 Display the Top Menu screen For details of the operations refer to Screen switching overview on page 18 j 3 Select the method of searching for your destination j 4 Enter the information about your destina tion to calculate route j 5 Confirm the location on the map For details refer to Setting a route to your destination on...

Page 30: ... results some steps may be skipped 1 Display the Destination Menu screen For details of the operations refer to Screen switching overview on page 18 2 Touch Address 3 Touch the key next to Country to dis play the country list 4 Touch one of the items on the list to set the country as search area The screen returns to the previous screen 5 Touch Street 6 Enter the street name and then touch OK The ...

Page 31: ... Touch the key next to Country to dis play the country list 4 Touch one of the items on the list to set the country as search area The screen returns to the previous screen 5 Touch City 6 Enter the city name and then touch OK The Select City screen appears 7 Touch the desired city name Touch The representative location of the city appears on the map screen 8 Enter the street name and then touch OK...

Page 32: ...he searched location appears on the map screen 10 Enter the house number and then touch OK The House Number Selection screen ap pears 11 Touch the desired house number range The searched location appears on the map screen For the subsequent operations refer to Set ting a route to your destination on page 38 Searching for a name by entering multiple keywords You can search for a name such as a city...

Page 33: ...ntering the POI Name Searching for POIs by preset categories You can search for POIs with a single touch from the preset category 1 Display the Destination Menu screen For details of the operations refer to Screen switching overview on page 18 2 Touch POI 3 Touch the desired category Preset categories The POI List screen appears 4 Touch the POI you want The searched location appears on the map scr...

Page 34: ...d into several categories 4 Touch the category you want The POI List screen appears p If there are more detailed categories within the selected category repeat this step as many times as necessary 5 Touch the POI you want The searched location appears on the map screen For the subsequent operations refer to Set ting a route to your destination on page 38 Searching for POIs around the destination p...

Page 35: ...h the category you want POIs are divided into several categories 8 Touch the POI you want The searched location appears on the map screen For the subsequent operations refer to Set ting a route to your destination on page 38 Selecting destination from Favourites Storing locations you visit frequently saves time and effort Selecting an item from the list provides an easy way to specify the position...

Page 36: ...ou searched for recently The places that you have set as destination or waypoint in the past are automatically stored in History p If no location is stored in Destination His tory you cannot select History If you perform a route calculation you can select History p History can store up to 100 locations If the entries reach the maximum the new entry overwrites the oldest one 1 Display the Destinati...

Page 37: ...le touch North 0 5 0 1 0 and 5 5 Touch OK The searched location appears on the map screen For the subsequent operations refer to Set ting a route to your destination on the next page Engb 37 Chapter 06 Searching for and selecting a location Searching for and selecting a location ...

Page 38: ...to your destination 2 Distance to the destination 3 Estimated fuel cost to your destination For details refer to Inputting the fuel consumption information for calculating the fuel cost on page 118 4 Route calculation condition Touch The message confirming whether to cancel the calculated route appears Touch Yes to cancel the calculated route and then the map screen appears 2 3 1 4 1 Multiple Rout...

Page 39: ...ing the Route Overview screen on this page 2 Touch Options 3 Touch the desired items to change the route calculation conditions and then touch OK The route is recalculated and the Route con firmation screen appears Items that users can operate Settings marked with an asterisk show that these are default or factory settings Route Condition This setting controls how the route should be calculated by...

Page 40: ... you want to set your route to avoid raised draw bridges select On On Calculates a route while avoiding streets or bridges with traffic restrictions during a cer tain time Off Calculates a route while ignoring traffic re strictions p The system may calculate a route that in cludes streets or bridges that are subject to traffic restrictions during a certain time even if On is selected CAUTION If th...

Page 41: ...s List screen The route is recalculated and the Route con firmation screen appears p If you set waypoints you cannot display multiple routes Deleting a waypoint You can delete waypoints from the route and then recalculate the route You can delete successive waypoints 1 Display the Route Overview screen For details refer to Displaying the Route Overview screen on page 39 2 Touch Waypoints The Waypo...

Page 42: ...e Waypoints List screen The route is recalculated and the Route con firmation screen appears 7 Touch OK The map of the current position appears Cancelling the route guidance If you no longer need to travel to your destina tion follow the steps below to cancel the route guidance 1 Display the Destination Menu screen For details of the operations refer to Screen switching overview on page 18 2 Touch...

Page 43: ...When the map of the location you want to register is displayed touch OK The location is registered and then the Edit Favourite screen appears For details refer to Editing the entry in the Favourites list on this page 6 Touch OK The registration is completed Registering a location by scroll mode 1 Touch and drag the screen to scroll the map to the position that you want to regis ter 2 Touch to disp...

Page 44: ...erations refer to Screen switching overview on page 18 2 Touch Favourites p Home location is displayed on the top of the list 3 Touch next to the home location The Edit Favourite screen appears 4 Touch the item that you want to change the setting Touch Phone To dial the number touch Call Touch Modify Location You can change the registered location by scrol ling the map p For home information Name ...

Page 45: ...deleted Touch No Cancels the deletion Exporting and importing Favourites items Exporting Favourites items Exporting the Favourites data to an SD memory card for editing is possible by using the utility programme navgate FEEDS which is available separately on your PC p If there is previous data in the SD memory card the data is overwritten with new data when current data is exported 1 Insert an SD ...

Page 46: ...ppears 5 Touch The message confirming whether to replace the stored items appears 6 Touch Yes Data import starts After importing the data is finished the Fa vourites screen appears Deleting the entry from the History list Items in History can be deleted All entries in History can be deleted at once 1 Display the Destination Menu screen For details of the operations refer to Screen switching overvi...

Page 47: ...uetooth devices You need to register your devices featuring Bluetooth wireless technology when you con nect it for the first time A total of 5 devices can be registered Three registration methods are available Searching for nearby Bluetooth devices Searching for a specified Bluetooth device Pairing from your Bluetooth devices p If you try to register more than 5 devices the system will ask you to ...

Page 48: ...ly registered the Bluetooth connection is established from the navigation system Pairing from your Bluetooth devices You can register the Bluetooth device by set ting the navigation system to standby mode and requesting connection from the Bluetooth device 1 Activate the Bluetooth wireless tech nology on your devices For some Bluetooth devices no specific action is necessary to activate Bluetooth ...

Page 49: ...enu screen For details of the operations refer to Screen switching overview on page 18 3 Touch Bluetooth Settings The Bluetooth Settings screen appears 4 Touch Registration The Nearby Device List screen appears 5 Touch Select specific devices The Select specific devices screen appears 6 Touch the Bluetooth device name to be connected The system searches for devices featuring Bluetooth technology t...

Page 50: ...screen For details of the operations refer to Screen switching overview on page 18 2 Touch Bluetooth Settings The Bluetooth Settings screen appears 3 Touch Registration A message prompting you to delete a regis tered device appears 4 Touch OK The Delete from Connection List screen appears 5 Touch the Bluetooth device name that you want to delete The registration is cancelled Connecting a registere...

Page 51: ...yer Handsfree Connects the device as the hands free phone Connection starts When a connection is successfully estab lished a connection complete message ap pears and the map screen returns by touching OK p To cancel the connection to your device touch Cancel p If connection fails check whether your de vice is waiting for a connection and then retry Setting for priority connecting The selected devi...

Page 52: ...ring and connecting a Bluetooth device on page 47 1 Press the HOME button to display the Top Menu screen 2 Touch Phone The Phone Menu screen appears 2 1 3 45 1 Name of connected mobile phone 2 Network name of the mobile phone com pany 3 Strength of the Bluetooth connection be tween the navigation system and the device 4 Reception status of the mobile phone 5 Battery status of the mobile phone Maki...

Page 53: ...h by the names registered in the Contacts List screen 4 Switch the page of the list to display the desired entry Touch alphabet tabs Makes the screen jump to the beginning of the page including the entry whose names start with any of selected letters or numbers Touching ABCDE also displays the page in cluding the entry whose names start with primary symbols or numbers Touching Others displays the ...

Page 54: ...not make a call to locations or POIs that have no phone number data 1 Display the Destination Menu screen For details of the operations refer to Screen switching overview on page 18 2 Touch POI The POI Search screen appears 3 Search for the POI The POI List screen appears For details of the operation refer to Search ing for Points of Interest POI on page 33 4 Touch next to the POI that you want to...

Page 55: ...volume Touch to reject an incoming call p The rejected call is recorded in the missed call history list For details refer to Dialling from the history on page 53 2 Touch to end the call The call ends p If the voice on the other end of the call is too quiet to hear you can adjust the volume of the received voice For details refer to Setting the Volume for Guidance and Phone on page 130 p You may he...

Page 56: ...registered Bluetooth device on page 50 2 Touch Contacts Transfer on the Phone Menu screen 3 Check that the following screen is dis played and operate your mobile phone to transfer the phone book entries After transferring the data is finished a mes sage asking whether you want to transfer more data appears Touch Yes to continue the transfer 4 Touch No The transferred data is imported to the naviga...

Page 57: ...The Set Password screen appears 4 Touch any key to enter the password you want to set and then touch OK Stopping Bluetooth wave transmission You can stop transmission of electric waves by turning off the Bluetooth function If you do not use the Bluetooth wireless technology we recommend selecting Off 1 Display the Settings Menu screen For details of the operations refer to Screen switching overvie...

Page 58: ... on page 18 2 Touch Bluetooth Settings The Bluetooth Settings screen appears 3 Touch Refuse All Calls Touching Refuse All Calls switches between On and Off p If both Refuse All Calls and Auto An swer Preference are activated Refuse All Calls takes priority and all incoming calls are automatically rejected p If Refuse All Calls is set to On rejected incoming calls will not be stored in the missed c...

Page 59: ...ystem and your mobile phone must be 10 metres or less when sending and receiving voice and data via Bluetooth technology However the actual transmis sion distance may be shorter than the esti mated distance depending on the usage environment With some mobile phones the ring sound may not be output from the speakers If private mode is selected on the mobile phone hands free phoning may be dis abled...

Page 60: ...tory If calls are made by operating your mobile phone no history data will be recorded in the navigation system Phone book transfers If there are more than 1 000 phone book en tries on your mobile phone all entries may not be downloaded completely With some mobile phones it may not be possible to transfer all items in the phone book at one time In this case transfer items one by one from your mobi...

Page 61: ...n icons appear 2 Tap the icon of the source you want to select The operation screen of the selected source appears p The icon currently selected is high lighted Operating list screens e g iPod list screen This describes the operations when a list screen is displayed p For displaying the list screen refer to the description of the corresponding source Switching between the AV operation screen and t...

Page 62: ... p Flicking a list item enables you to quickly scroll through the list To stop scrolling gently touch the list 2 Tap the item p The item currently selected is highlighted Returning to the previous display Touch to return to the previous screen Engb 62 Chapter 12 Basic operations of the AV source ...

Page 63: ...een selected 2 Band indicator Shows which band the radio is tuned to FM1 to FM3 3 Programme service name indicator Shows the programme service name station name of the current station 4 Signal level indicator 5 Frequency indicator 6 STEREO indicator Shows that the frequency selected is being broadcast in stereo 7 TEXT indicator Shows when radio text is received 8 NEWS indicator Shows the status of...

Page 64: ...he preset channel you want to select and tap the channel p The lower key and the upper key appear only when the preset channel is se lected 3 Searches for an RDS station by PTY infor mation For details refer to Searching for an RDS station by PTY information on page 67 4 Recalls equaliser curves For details refer to Using the equaliser on page 139 5 Displays the Function menu For details refer to ...

Page 65: ...trans mitted by RDS stations such as station infor mation the title of the currently broadcast song and the name of the artist p The tuner automatically memorises the three latest radio text broadcasts received replacing text from the least recent recep tion with new text when it is received p When no radio text is received No Text is displayed Viewing the three latest radio text You can display t...

Page 66: ...cast fre quencies under the preset tuning keys P1 to P6 and once stored there you can tune in to these frequencies with the touch of a key 1 Touch on the FM screen 2 Touch BSM 3 Touch Start to begin a search BSM begins to flash While BSM is flashing the six strongest broadcast frequencies will be stored under the preset tuning keys P1 to P6 in order of their signal strength When this is complete B...

Page 67: ...adcasting the type of pro gramme you searched for Not Found is displayed for about two seconds and then the tuner returns to the original station Receiving traffic announcements TA traffic announcement standby lets you re ceive traffic announcements automatically no matter what source you are listening to TA can be activated for both a TP station a sta tion that broadcasts traffic information or a...

Page 68: ...t a different station is found Activating the Auto PI seek for preset stations When preset stations cannot be recalled as when travelling long distances the unit can be set to perform PI Seek during preset recall p The default setting for Auto PI Seek is off For details refer to Switching Auto PI seek on page 138 Using news programme interruption When a news programme is broadcast from a PTY code ...

Page 69: ...ational music Oldies Oldies music golden oldies Folk Mus Folk music Classics L Class Light classical music Classic Serious classical music Others Educate Educational programmes Drama All radio plays and serials Culture National or regional culture Science Nature science and technology Varied Light entertainment Children Children s Social Social affairs Religion Religion affairs or services Phone I...

Page 70: ...el keys on the screen to control the radio For details refer to Using the touch panel keys on the next page Reading the screen 1 3 2 5 4 6 7 8 1 Source icon Shows which source has been selected 2 Signal level indicator 3 Frequency indicator 4 NEWS indicator Shows the status of news programmes 5 TRFC indicator Shows the status of traffic announcements 6 Current time 7 Frequency indicator Shows the ...

Page 71: ...he keys up or down to dis play the preset channel you want to select and tap the channel p The lower key and the upper key appear only when the preset channel is se lected 3 Recalls equaliser curves For details refer to Using the equaliser on page 139 4 Displays the Function menu For details refer to Using the Function menu on the next page 5 Switches between the AV operation screen and the preset...

Page 72: ...nder the preset tuning keys P1 to P6 and once stored there you can tune in to these frequencies with the touch of a key 1 Touch on the AM screen 2 Touch BSM 3 Touch Start to begin a search BSM begins to flash While BSM is flashing the six strongest broadcast frequencies will be stored under the preset tuning keys P1 to P6 in order of their signal strength When this is complete BSM stops flashing p...

Page 73: ...each track in the current repeat play range for about 10 sec onds Playing tracks in random order Indicator Meaning Does not play tracks in ran dom order Plays all tracks in the current disc in random order Setting a repeat play range Indicator Meaning Repeats the current disc Repeats just the current track 2 Current track information Artist name Shows the artist name of the track cur rently playin...

Page 74: ... starts playback Tapping the lower key during random play back skips to the next track Tapping the upper key jumps to the start of the current track 5 Recalls equaliser curves For details refer to Using the equaliser on page 139 6 Displays the Function menu For details refer to Using the Function menu on the next page 7 Playback and Pause Touching f switches between playback and pause 8 Selects a ...

Page 75: ... lets you hear the first 10 seconds of each track on the CD When you find the track you want touch Scan to turn scan play off p After scanning is finished normal play back of the tracks will begin again p If you turn the scan play on when the re peat play range is set to Track the re peat play range changes to Disc automatically 4 Uses Sound Retriever function Sound Retriever function automaticall...

Page 76: ...r Indicates the current playback condition Scanning folders and files Indicator Meaning Cancels the scan play Plays the first audio files of each folder for about 10 sec onds when the repeat range is set to Disc Plays the beginning of each audio file in the current folder for about 10 seconds when the repeat range is set to Folder Playing files in random order Indicator Meaning Does not play track...

Page 77: ...s 4 TRFC indicator Shows the status of traffic announcements 5 Current time 6 File information File number indicator File name indicator File type indicator Shows the type of audio file 7 Source icon Shows which source has been selected Engb 77 Chapter 16 Playing music files on ROM Playing music files on ROM ...

Page 78: ...ts a file to play Scrolling the keys up or down displays files and tapping a file starts playback Tapping the lower key during random play back skips to the next file Tapping the upper key jumps to the start of the current file 5 Recalls equaliser curves For details refer to Using the equaliser on page 139 6 Displays the Function menu For details refer to Using the Function menu on the next page 7...

Page 79: ...h of Random turns it on or off When the random play is turned on the files in the current repeat play range are randomly played p If you turn the random play on when the repeat play range is set to Track the repeat play range changes to Folder automatically 3 Scans folders and files Scan play lets you hear the first 10 seconds of each file Scan play is performed in the current repeat play range Ea...

Page 80: ... 8 a b 1 Title number indicator Shows the title number currently playing 2 Audio track indicator Shows the audio track number and audio lan guage currently selected 3 Chapter number indicator Shows the chapter number currently playing 4 Audio channel indicator Shows the current audio channel type such as Mch Multi channel 5 Subtitle number indicator Shows the subtitle number currently selected 6 S...

Page 81: ...the instructions pro vided with the disc 3 Stops playback 4 Hides the touch panel keys and informa tion of the current video Touching Hide shows only the current video To display the touch panel keys and informa tion of the current video touch the screen 5 Skips forward or backward Touching p skips to the start of the next chapter Touching o once skips to the start of the current chapter Touching ...

Page 82: ... five seconds g Frame by frame playback or slow motion playback For details refer to Frame by frame play back on page 84 For details refer to Slow motion playback on page 84 h Changes the viewing angle Multi angle Each touch of Angle switches between view ing angles p During playback of a scene shot from multiple angles the angle icon is displayed Turn the angle icon display on or off using the DV...

Page 83: ...s function when you need to enter a numerical command during DVD play back 1 Touch Search 2 Touch 10Key 3 Touch 0 to 9 to input the desired number 4 While the input number is displayed touch Enter Operating the DVD menu You can operate the DVD menu by touching the menu item on the screen directly p This function can be used when the key is displayed on the lower right corner of the LCD screen p Th...

Page 84: ... slow motion playback begins p To return to normal playback touch f 2 Touch q or r to adjust playback speed during slow motion playback Each time you touch q or r it changes the speed in four steps in the following order 1 16 f 1 8 f 1 4 f 1 2 p There is no sound during slow motion play back p With some discs images may be unclear during slow motion playback p Reversed slow motion playback is not ...

Page 85: ...t and right L Left R Right Mix Mixing left and right p This function is not available when disc playback has been stopped 3 DVD setup adjustments For details refer to Displaying DVD DivX Setup menu on page 90 Engb 85 Chapter 17 Playing a DVD Video Playing a DVD Video ...

Page 86: ... 1 5 234 8 7 9 b a 1 Folder number indicator Shows the folder number currently playing 2 Audio track indicator Shows the audio track number currently se lected 3 File number indicator Shows the file number currently playing 4 Audio channel indicator Shows the current audio channel type such as Mch Multi channel 5 Subtitle number indicator Shows the subtitle number currently selected 6 NEWS indicat...

Page 87: ...st which lets you see the list of file names or folder names on a disc p A dash is displayed if there is no cor responding information Tapping a folder on the list shows its content You can play a file on the list by tapping it For details refer to Operating list screens e g iPod list screen on page 61 The contents of the folder in which the cur rently playing file is located are displayed Engb 87...

Page 88: ...vX DivX video files b Searches for a desired scene and starts playback from a specified time For details refer to Starting playback from a specified time on the next page c Changes audio tracks Multi audio Each touch of Audio switches between audio tracks d Changes the subtitle Multi subtitle Each touch of S Title switches between the subtitle languages recorded on the disc e Fast reverse or forwa...

Page 89: ...een The Function menu appears 1 2 1 Changes the repeat range Each touch of Repeat changes the setting as follows Disc Plays throughout the current disc File Repeats just the current file Folder Repeats just the current folder p If you select another folder during repeat play the repeat play range changes to Disc p If you perform fast reverse or fast for ward during File the repeat play range chang...

Page 90: ...hown Input the four digit code of the desired language then touch Enter For details refer to Language code chart for DVDs on page 93 p If the selected language is not recorded on the disc the default language specified on the disc is output and displayed p You can also switch the subtitle and audio language by touching S Title or Audio during playback p Even if you use S Title or Audio to switch t...

Page 91: ...nction register your code number If you do not register a code number parental lock will not operate 1 Display the DVD DivX Setup screen For details refer to Displaying DVD DivX Setup menu on the previous page 2 Touch Parental Level 3 Touch 0 to 9 to input a four digit code number 4 While the input number is displayed touch Enter The code number is registered and you can now set the level 5 Touch ...

Page 92: ...to display DivX exter nal subtitles or not p If no DivX external subtitle files exist the original DivX subtitles are displayed even when Custom is selected 1 Display the DVD DivX Setup screen For details refer to Displaying DVD DivX Setup menu on page 90 2 Touch Subtitle File Touching Subtitle File switches this setting between Original and Custom p Up to 42 characters can be displayed on one lin...

Page 93: ...ln 1214 Lingala sv 1922 Swedish da 0401 Danish lo 1215 Lao sw 1923 Swahili de 0405 German lt 1220 Lithuanian ta 2001 Tamil dz 0426 Dzongkha lv 1222 Latvian te 2005 Telugu ee 0505 Ewe mg 1307 Malagasy tg 2007 Tajik el 0512 Greek mi 1309 Maori th 2008 Thai en 0514 English mk 1311 Macedonian ti 2009 Tigrinya eo 0515 Esperanto ml 1312 Malayalam tk 2011 Turkmen es 0519 Spanish mn 1314 Mongolian tl 2012...

Page 94: ... the left edge of the screen to display the USB or SD screen 4 Use the touch panel keys on the screen to control the external storage device USB SD For details refer to Using the touch panel keys Music on page 96 Reading the screen 7 1 4 3 2 5 6 p This unit may not achieve optimum perfor mance with some external storage devices p You can playback the files on a USB sto rage device compliant with M...

Page 95: ...e of the track currently playing when available p If the title of a track is not available the file name appears Play time Shows the elapsed playing time within the current file p is displayed if there is no corre sponding information 3 NEWS indicator Shows the status of news programmes 4 TRFC indicator Shows the status of traffic announcements 5 Current time 6 File information File number indicat...

Page 96: ...r key during random play back skips to the next file Tapping the upper key jumps to the start of the current file 5 Recalls equaliser curves For details refer to Using the equaliser on page 139 6 Displays the Function menu For details refer to Using the Function menu on the next page 7 Playback and Pause Touching f switches between playback and pause 8 Selects a file from the list Touching the key...

Page 97: ...changes to Folder 2 Plays files in random order Random play lets you playback files in ran dom order within the current repeat range Each touch of Random turns it on or off p If you turn the random play on when the repeat play range is set to Track the repeat play range changes to Folder automatically 3 Scans folders and files Scan play lets you hear the first 10 seconds of each file Scan play is ...

Page 98: ...of the screen to display the USB or SD screen 4 Touch the screen to display the touch panel keys 5 Use the touch panel keys on the screen to control the external storage device USB SD For details refer to Using the touch panel keys Video on the next page Reading the screen a 9 4 1 5 2 3 6 7 8 p This unit may not achieve optimum perfor mance with some external storage devices p You can playback the...

Page 99: ...everse or fast forward p There is no sound on fast reverse or for ward p You can also perform these operations by using the TRK button 4 Hides the touch panel keys and informa tion of the current video Touching Hide shows only the current video To display the touch panel keys and informa tion of the current video touch the screen 5 Playback and Pause Touching f switches between playback and pause ...

Page 100: ...lay the USB or SD screen For details of the operations refer to Dis playing the AV operation screen on page 61 2 Touch the screen to display the touch panel keys 3 Touch The Function menu appears p If the touch panel keys are not shown touch anywhere on the screen to display them 1 2 1 Changes the repeat range Each touch of Repeat changes the setting as follows Media Repeats all video files in the...

Page 101: ...iPod For details of the operation refer to Using the touch panel keys on page 103 Reading the screen Music 9 8 1 5 4 2 6 7 Video 9 3 4 1 3 5 6 1 Playback condition indicator Indicates the current playback condition Setting the shuffle play for music Indicator Meaning Cancels the shuffle play Plays back songs in random order within the selected list Selects an album randomly and then plays back all...

Page 102: ...cator Shows the file name currently playing Play time indicator Shows the elapsed playing time within the current file 4 NEWS indicator Shows the status of news programmes 5 TRFC indicator Shows the status of traffic announcements 6 Current time 7 Song episode information Song number indicator Shows the number of the song and the total number of songs in the selected list Song title episode indica...

Page 103: ...usic on page 107 2 Sets a repeat play range The repeat play range can be changed by touching only one key For details refer to Sets repeat play on page 107 3 Plays a playlist using MusicSphere Touching the key displays the MusicSphere screen and a playlist created with the PC ap plication MusicSphere can be played For details refer to Playing Music Sphere on page 107 Engb 103 Chapter 22 Using an i...

Page 104: ...n your iPod p If iPod fifth generation is connected the following settings are automatically changed when the operation screen is switched to the screen to operate video files Repeat is set to All Shuffle is set to Off p Touching Video or Music on the list screens enables you to perform the equivalent operation Displays the top category menu Touching the key displays the top category menu for song...

Page 105: ...rrowing down a song or video with the list Tapping an item on list allows you to search for a song or video and play it in your iPod 1 Display a list screen For details refer to Displays the genre list on the previous page For details refer to Displays the song list on the previous page For details refer to Displays the album list on the previous page For details refer to Displays the artist list ...

Page 106: ...archy 5 On the song episode or video list tap the song episode or video you want to play p After you select the song episode or video using this function touching displays the list previously selected Operating the functions from your iPod You can control the functions by using iPod it self while iPod is connected to the navigation system Sound can be heard from the car s speakers and operation ca...

Page 107: ... starts playback p To change the playlist to be displayed rotate the sphere by dragging the keys up down left or right 2 Switches to the AV operation screen Using the Function menu p If Change Control Mode is set to iPod only the setting of Change Control Mode is available Touch on the iPod screen The Function menu appears 1 2 3 4 6 5 1 Sets repeat play There are two repeat play types for play bac...

Page 108: ...o play p This setting is available only during the video operation 5 Plays songs related to the currently playing song You can play songs related to the currently playing song using of the following lists Link Artists Songs related to the cur rently playing artist will be played in the album order Link Albums Songs related to the cur rently playing album will be played Link Genre Songs related to ...

Page 109: ...n the song play back p Even if you switch to another source while listening to a song on your Bluetooth audio player the playback of song continues to elapse p Depending on the Bluetooth audio player you connected to this navigation system operations on this navigation system to control the player may differ from those ex plained in this manual p When you are talking on a mobile phone connected to...

Page 110: ...file number currently playing when available p In the following cases file information will only be displayed after a file starts or resumes playing You connect the Bluetooth audio player compatible with AVRCP1 3 and operate the player to start play ing You select another file when play back is paused 3 NEWS indicator Shows the status of news programmes 4 TRFC indicator Shows the status of traffic...

Page 111: ... this page 3 Playback and Pause Touching d or e switches between play back and pause 4 Connects the Bluetooth audio player Touching Connect displays the connection standby screen and the navigation system waits for the Bluetooth wireless connection re quest 5 Recalls equaliser curves For details refer to Using the equaliser on page 139 6 Displays the Function menu For details refer to Using the Fu...

Page 112: ...f you skip the file forward or backward when the repeat play range in Track the repeat play range changes to All 2 Plays files in random order Random play lets you playback files in ran dom order within the current repeat range Each touch of Random turns it on or off Engb 112 Chapter 23 Using the Bluetooth audio player ...

Page 113: ...or details of the operations refer to Dis playing the AV operation screen on page 61 3 Tap AV1 on the left edge of the screen The image is displayed on the screen 4 Touch the screen to display the touch panel keys Using AV2 You can display the video image output by the equipment connected to video input 2 1 Touch AV2 Input on the AV System Settings menu For details refer to Setting video input 2 A...

Page 114: ... tion manual p Operation varies depending on the external unit connected In some cases the exter nal unit may not respond Starting procedure 1 Display the AV operation screen For details of the operations refer to Dis playing the AV operation screen on page 61 2 Tap EXT1 or EXT2 on the left edge of the screen to select the external unit 3 Use the touch panel keys on the screen to control the exter...

Page 115: ...Auto and Manual functions of the external unit connected Initially this function is set to Auto p Operating commands set for Auto and Manual operations vary depending on the external unit connected 4 Uses F1 through F4 to operate the external unit The external unit can be operated by transmit ting the operating commands set to F1 through F4 p The operating commands set to F1 through F4 vary depend...

Page 116: ...ulse value detected by the navi gation system is shown 0 is shown while the vehicle is stationary 2 GPS Antenna Indicates the connection status of the GPS aerial the reception sensitivity and from how many satellites the signal is received Colour Signal com munication Used in posi tioning Orange Yes Yes Yellow Yes No p When the GPS aerial is connected to this navigation system OK is dis played Whe...

Page 117: ...ving distance 4 Speed Pulse Indicates the total number of speed pulses 5 Learning Status Indicates the current driving mode 6 Inclination Indicates the degree of slope of the street that you are currently on 7 Degree of learning Sensor learning situations for distance Distance right turn Right Turn left turn Left Turn and 3D detection 3D Detec tion are indicated by the length of bars p When tyres ...

Page 118: ...s The Fuel Mileage Setting screen appears 3 Enter the fuel consumption informa tion Enter the following items Surface Road Fuel Mileage Enter the fuel cost when you drive on ordin ary roads p How the fuel cost is entered depends on the Fuel Unit setting When Fuel Unit is set to Litre Enter how much fuel you need to tra vel 100 kilometres 60 miles When Fuel Unit is set to Gallon Enter how many kilo...

Page 119: ...nforma tion Enter the following items Distance Enter the distance travelled since the pre vious fuelling p The distance is entered automatically only when the distance travelled since the previous fuelling is recorded Fuel Pumped Enter the amount of fuel pumped Fuel Price Per Unit Enter the fuel unit price When all the items are entered the fuel con sumption is displayed next to Fuel cons 5 Touch ...

Page 120: ...navigation system continues to store the track logs in the inserted SD memory card 5 Touch Type Each time you touch the key changes that set ting Private default Changes the track log attribute to Private Business Changes the track log attribute to Busi ness Other Changes the track log attribute to Other Using the demonstration guidance This is a demonstration function for retail stores After a ro...

Page 121: ... setting You can change the eco function setting 1 Display the Navi Settings screen For details refer to Displaying the Navi Settings screen on page 116 2 Touch Eco Settings The Eco Settings screen appears 3 Touch each item Eco Score On default Displays Eco Score Off Hides Eco Score For details refer to Displaying Eco Graph on page 27 Eco Drive Level On default After you arrive the destination a m...

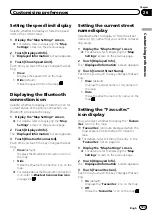
Page 122: ...s setting enables switching to an enlarged map around the point where your vehicle is approaching an intersection entrance exit of motorway or a junction 1 Display the Map Settings screen For details refer to Displaying the Map Settings screen on this page 2 Touch Displayed Info The Displayed Information screen appears 3 Touch Close Up View Each time you touch the key changes that set ting On defa...

Page 123: ...fer to Bluetooth connection icon on page 22 Setting the current street name display Selects whether to display or hide the street name or city name that your vehicle is travel ling along 1 Display the Map Settings screen For details refer to Displaying the Map Settings screen on the previous page 2 Touch Displayed Info The Displayed Information screen appears 3 Touch Current Street Name Each time ...

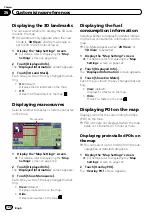
Page 124: ...ault Displays manoeuvres on the map Hide Hides manoeuvres on the map Displaying the fuel consumption information Selects whether to display Eco Meter indicat ing the fuel consumption information on the map p Eco Meter appears when 2D View or 3D View is selected 1 Display the Map Settings screen For details refer to Displaying the Map Settings screen on page 122 2 Touch Displayed Info The Displayed...

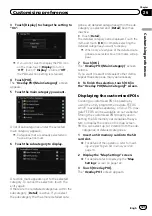
Page 125: ...ories you want to display p When only a few types of the detailed cate gories are selected blue tick marks will ap pear 7 Touch OK The Overlay POI Main Category screen returns If you want to select or deselect other items repeat these steps as many as necessary 8 To finish the selection touch OK in the Overlay POI Main Category screen Displaying the customised POIs Creating a customised POI is pos...

Page 126: ...olour 1 Display the Map Settings screen For details refer to Displaying the Map Settings screen on page 122 2 Touch Day Night Display Each time you touch the key changes that set ting Automatic default You can change the colours of a map be tween daytime and nighttime according to whether the vehicle lights are on or off Day The map is always displayed with daytime colours p To use this function w...

Page 127: ... show that these are default or factory settings Registration Register information on the location indi cated by the cursor to Favourites For details refer to Registering a location by scroll mode on page 43 Vicinity Search Find POIs Points Of Interest in the vicinity of the cursor For details refer to Searching for a nearby POI on page 34 Overlay POI Displays icons for surrounding facilities POI ...

Page 128: ...e language list is displayed 4 Touch the desired language After the language is selected the previous screen returns 5 Touch Voice Language The Voice Language Selection screen ap pears 6 Touch the desired language After the language is selected the previous screen returns 7 Touch OK on the Regional Settings screen A message confirming whether to restart the navigation system appears 8 Touch OK The...

Page 129: ...ings The Regional Settings screen appears 3 Touch Time The Time Settings screen appears 4 To set the time difference touch or The time difference between the time origin ally set in the navigation system Moscow Standard Time and the current location of your vehicle is shown If necessary adjust the time difference Touching or changes the time difference display in half hour incre ments The time dif...

Page 130: ...Guidance and Phone The sound volume for the navigation can be set You can separately set the volume of the route guidance and the beep sound 1 Display the System Settings screen For details refer to Displaying the System Settings screen on page 127 2 Touch Volume The Volume Settings screen appears 3 Touch or to set their volume On this screen you can operate the following items Guidance This setti...

Page 131: ...se images cannot be guaranteed com pletely If your original image data is de leted insert the SD memory card again and re import the original image p The maximum number of images includ ing the images in the built in memory that can be imported and displayed on the list is 200 1 Create a folder named Pictures on the top most directory of the SD memory card and store the picture files in this folde...

Page 132: ...era Settings screen appears 3 Touch Camera change the setting to On p You can only switch to Rear View if this setting is On 4 Touch Polarity to select an appropriate setting for polarity Each time you touch Polarity switches be tween the following polarity Battery When the polarity of the con nected lead is positive while the gearstick is in the REVERSE R position GND When the polarity of the con...

Page 133: ...lour and storing it to memory You can create a user defined colour and set it as the illumination colour 1 Display the System Settings screen For details refer to Displaying the System Settings screen on page 127 2 Touch Illumi Color The Illumination Color screen appears 3 Touch Custom The Illumination Color screen appears p If Scan is set Custom cannot be se lected 4 Touch or to adjust the values...

Page 134: ...iPod is selected the following re striction is applied to Rear display The video image and sound are output only when the appropriate setting on AV1 Input is iPod p When AV is selected the following re strictions are applied to Rear display The video image and sound are output only when AV1 AV2 has both video and sound The video image and sound are output only when the appropriate setting on AV1 I...

Page 135: ... iPod Video DVD V and DivX SD Video and USB Video AV2 Video and EXT1 Video EXT2 Video Rear view camera image Map screen p The picture adjustment may not be avail able with some rear view cameras p Because of the LCD screen characteristics you may not be able to adjust the screen at low temperatures 3 Touch or to adjust the desired item Each touch of or increases or decreases the level of the desir...

Page 136: ...Mode Each touch of Wide Mode changes the set ting as follows Full full A 4 3 picture is enlarged in the horizontal direction only enabling you to enjoy a 4 3 TV picture normal picture without any omissions Cinema cinema A picture is enlarged by the same propor tion as Full or Zoom in the horizontal direc tion and by an intermediate proportion between Full and Zoom in the vertical di rection ideal ...

Page 137: ...the AV System Settings screen For details refer to Displaying the AV Sys tem Settings screen on page 135 2 Touch Mute Each touch of Mute changes the settings as follows Guide Tel The volume is muted or attenu ated according to the following conditions When the navigation outputs the gui dance voice When you use a mobile phone via Blue tooth technology dialling talking in coming call Tel The volume...

Page 138: ...while AF or TA is on p The tuning step remains at 50 kHz during manual tuning Displaying your DivX VOD registration code In order to play DivX VOD video on demand content on this navigation system you first need to register the unit with your DivX VOD content provider You do this by generating a DivX VOD registration code which you submit to your provider p This feature is available when the selec...

Page 139: ...7 3 Touch a or b to adjust front rear speaker balance Each time you touch a or b the front rear speaker balance moves towards the front or the rear Front 15 to Rear 15 is displayed as the front rear speaker balance moves from front to rear Setting Front and Rear to 0 is correct when using a two speaker system 4 Touch c or d to adjust left right speaker balance Each time you touch c or d the left r...

Page 140: ...fect of the preset equali ser curves The following equaliser curves can be ad justed SuperBass Powerful Natural Vocal 1 Display the AV Sound Settings screen For details refer to Displaying the AV Sound Settings screen on page 138 2 Touch EQ 3 Touch the equaliser you want 4 Touch or next to Nuance p The level can be adjusted in the range of 6 to 6 p If Natural is selected the level can be ad justed...

Page 141: ... loudness Loudness compensates for deficiencies in the low and high sound ranges at low volume 1 Display the AV Sound Settings screen For details refer to Displaying the AV Sound Settings screen on page 138 2 Touch Loudness Each time you touch Loudness the level is selected in the following order Off Low Mid High Using subwoofer output The navigation system is equipped with a sub woofer output mec...

Page 142: ...ed 1 Compare the FM tuner volume level with the level of the source you wish to ad just 2 Display the AV Sound Settings screen For details refer to Displaying the AV Sound Settings screen on page 138 3 Touch SLA 4 Touch or to adjust the source vo lume 8dB to 8dB is displayed as the source volume is increased or decreased The following AV sources are set to the same source level adjustment volume a...

Page 143: ...rately to the navigation system 1 Use navgate FEEDS to replicate the set tings and store them on an SD memory card 2 Insert an SD memory card into the SD card slot For details of the operation refer to Insert ing and ejecting an SD memory card on page 13 3 Press the HOME button to display the Top Menu screen 4 Touch Settings The Settings Menu screen appears 5 Touch Setting Replicator A message con...

Page 144: ...creen By turning off the backlight of the LCD screen you can turn off the screen display without turning off the voice guidance 1 Press the HOME button to display the Top Menu screen 2 Touch Settings The Settings Menu screen appears 3 Touch Screen Off The screen is turned off p Touch anywhere on the screen to turn it back on Engb 144 Chapter 26 Customising preferences ...

Page 145: ...nd then enter the new one Entering the password On the password input screen you must enter the current password If you enter an incorrect password three times the screen is locked and operations using touch panel keys are dis abled 1 Enter the password 2 Touch OK The message The unit has been locked be cause an invalid password was entered three times Turn ACC off and on and enter your password a...

Page 146: ... the vehicle battery This transforms the system into the same state as when the navigation system is unin stalled Method 2 Restore Factory Settings This clears some items in the Navi Settings menu For details refer to Restore Factory Set tings on page 148 Method 3 Touch Clear user information on the Select Items to Reset screen For details refer to Displaying the Select Items to Reset screen on pa...

Page 147: ... Method 2 Method 3 Method 4 Map function View mode and scale setting on the map 1 1 Direction of the map 1 1 Last cursor position on the map screen 1 1 1 Route Setting Current route 1 1 1 Guidance state of the current route 1 1 Vehicle position information 1 1 Options 1 1 1 Others Keyboard 1 1 1 Learnt data used in Learning Route 1 1 1 Destination Point registered in Favourites 1 History 1 Map Set...

Page 148: ...ystem Settings screen For details refer to Displaying the System Settings screen on page 127 2 Touch Restore Factory Settings The message confirming whether to restore the settings appears 3 Touch Yes Displaying the Select Items to Reset screen p Be sure to read Setting items to be deleted before you perform this operation 1 Park your vehicle in a safe place and apply the handbrake 2 Turn the igni...

Page 149: ... causing reduced positioning accu racy Check the GPS signal reception and the position of the GPS aerial if necessary Obstacles are blocking signals from the satellites The quality of signals from the GPS satellites is poor causing reduced positioning accu racy Check the GPS signal reception and the position of the GPS aerial if necessary or con tinue driving until reception improves Keep the aeri...

Page 150: ...obstruc tions Then park your vehicle in a safe place turn off the navigation system and turn the power to the navigation system back on The map colour does not switch automatically between daytime and nighttime Day Night Display is set to Day Check Day Night Display setting and make sure Automatic is selected Page 126 The orange white lead is not con nected Check the connection The screen is too b...

Page 151: ...ys are touched or a different key responds The touch panel keys deviate from the actual positions that respond to your touch for some reason Perform touch panel calibration Page 132 The external storage device USB SD cannot be used The USB storage device has been removed immediately after plugging it Park your vehicle in a safe place and turn off the engine Turn the ignition key back to Acc off Th...

Page 152: ... aspect ratio The aspect setting is incorrect for the display Select the appropriate setting for that image Page 136 Page 90 A parental lock message is dis played and DVD playback is not possible Parental lock is on Turn parental lock off or change the level Page 91 Parental lock for DVD playback cannot be cancelled The code number is incorrect Input the correct code number Page 91 Playback is not...

Page 153: ...e entering the range for service The connection between the mobile phone and the navigation system cannot be established now Perform the connection process If the screen becomes frozen Park your vehicle in a safe place and turn off the engine Turn the ignition key back to Acc off Then start the engine again and turn the power to the navigation system back on Engb 153 Appendix Appendix Appendix ...

Page 154: ...ountain and the route calculation is impossible Set a destination and waypoint s on roads Reset the destination after you drive the ve hicle to any road Route to destination cannot be calculated The destination or waypoint s are in an isolated island etc without a ferry and the route calculation is im possible If there is no road con nected to your starting point or destination this message will a...

Page 155: ...ne exists in the sur roundings when the system searches for connectable mobile phones featuring Bluetooth wireless technology Activate the target phone s Bluetooth wire less technology Check whether your mobile phone is acti vated and whether the distance to your mo bile phone is not too far Registration failed The mobile phone s Bluetooth wire less technology is turned off during the registration...

Page 156: ...e navigation system is out of the normal operat ing range Wait until the unit s temperature returns to within normal operating limits Error not defined ERROR FF FF Undefined error Set the ACC to off and then set it to on again Tracks that cannot be played back will be skipped FILE SKIPPED Files that are protected by digital rights management DRM The protected files are skipped Cannot play back all...

Page 157: ...d The connected USB storage device consumes more than 500 mA maxi mum allowable current Disconnect the USB storage device and do not use it Turn the ignition switch to off then to ACC or on and then connect the compliant USB storage device The USB interface cable for iPod is short circuited Confirm that USB interface cable for iPod or USB cable is not caught in something or da maged Authorization ...

Page 158: ...ith connect ing the speed pulse the system will become more accurate than no connection of speed pulse So you connect the speed pulse without fail to get the accuracy of positioning p The position of the speed detection circuit vary depending on the vehicle model For details consult your authorised Pioneer dealer or an installation professional p Some types of vehicles may not output a speed signa...

Page 159: ... be received from more than two GPS satellites In some driving conditions signals from GPS satellites may not reach your vehicle In this case it is impossible for the system to use GPS positioning In tunnels or en closed parking garages Under elevated roads or similar structures When driving among high build ings When driving through a dense forest or tall trees If a car phone or mobile phone is u...

Page 160: ...yed on the map screen If you make a shallow turn If there is a parallel road If there is another road very nearby such as in the case of an elevated motorway If you take a recently opened road that is not on the map If you drive in zigzags If the road has a series of hairpin bends If there is a loop or similar road configura tion If you take a ferry If you are driving on a long straight road or a ...

Page 161: ... other obstacles block the GPS signals for a considerable period If you drive very slowly or in a start and stop manner as in a traffic jam If you join the road after driving around a large car park When you drive around a roundabout When starting driving immediately after starting the engine Route setting information Route search specifications Your navigation system sets a route to your destinat...

Page 162: ...at guidance may direct you off a motorway and then back on again In some cases the route may require you to travel in the opposite direction to your current heading In such cases you are in structed to turn around so please turn around safely by following the actual traffic rules In some cases a route may begin on the opposite side of a railway or river from your actual current location If this ha...

Page 163: ...on the disc surface as a result of mechanical wear ambient conditions for use or handling of the disc This is not a sign of the malfunction of this product Consider it to be normal wear and tear Playable discs DVD Video and CD DVD and CD discs that display the logos shown below generally can be played on this built in DVD drive DVD Video CD p is a trademark of DVD Format Logo Licensing Corporation...

Page 164: ...iscs that have incompatible re gion numbers cannot be played on this DVD drive The region number of the player can be found on this product s chassis DVD R DVD RW DVD R DL Dual Layer discs Unfinalised discs which have been re corded with the Video format video mode cannot be played back Discs which have been recorded with the Video Recording format VR mode cannot be played back DVD R DL Dual Layer...

Page 165: ...he USB storage device fall onto the floor where it may become jammed under the brake or accelerator pedal There may be a slight delay when starting playback of audio files encoded with image data Some USB storage devices connected to this navigation system may generate noise on the radio Do not connect anything other than the USB memory device The sequence of audio files on USB mem ory For USB mem...
Page 166: ... as the DivX file Up to 255 subtitle files may be used Any more subtitle files will not be recognised Up to 64 characters can be used for the name of the subtitle file including the ex tension If more than 64 characters are used for the file name the subtitle file may not be recognised The character code for the subtitle file should comply with ISO 8859 1 Using char acters other than ISO 8859 1 ma...

Page 167: ...k time of audio file stored in the external storage device USB SD 7 5 h 450 minutes MP3 compatibility Media CD R RW DVD R RW R DL USB storage de vice SD memory card File extension mp3 Bit rate 8 kbps to 320 kbps CBR VBR Sampling frequency 16 kHz to 48 kHz 32 kHz 44 1 kHz 48 kHz for emphasis 8 kHz to 48 kHz ID3 tag ID3 tag Ver 1 0 1 1 2 2 2 3 ID3 tag Ver 1 0 1 1 2 2 2 3 2 4 Notes Ver 2 x of ID3 tag...

Page 168: ...tension WAV files on the CD R RW DVD R RW R DL cannot be played wav Format Linear PCM LPCM IMA ADPCM Sampling frequency LPCM 16 kHz to 48 kHz IMA ADPCM 22 05 kHz and 44 1 kHz Quantisation bits LPCM 8 bits and 16 bits MS ADPCM 4 bits Note The sampling frequency shown in the display may be rounded AAC compatibility Media CD R RW DVD R RW R DL USB storage de vice SD memory card File extension m4a Bit...

Page 169: ...mum file size 4 GB Notes The navigation system is not compatible with the following DivX Ultra format DivX files without video data DivX files encoded with LPCM Linear PCM audio codec Depending on the file information composition such as the number of audio streams there may be a slight delay in the start of playback on discs If a file contains more than 4 GB playback stops before the end Some spe...

Page 170: ...The navigation system may not operate cor rectly depending on the application used to encode WMA files Depending on the version of Windows Media Player used to encode WMA files album names and other text information may not be correctly displayed There may be a slight delay when starting playback of audio files encoded with image data The navigation system is not compatible with packet write data ...

Page 171: ... and other devices Bluetooth oper ates in 2 4 GHz frequency range and transmits voice and data at speeds up to 1 megabit per second Bluetooth was launched by a special interest group SIG comprising Ericsson Inc Intel Corp Nokia Corp Toshiba and IBM in 1998 and it is currently developed by nearly 2 000 companies worldwide The Bluetoothâ word mark and logos are re gistered trademarks owned by Blueto...

Page 172: ... AAC is short for Advanced Audio Coding and refers to an audio compression technology standard used with MPEG 2 and MPEG 4 Sev eral applications can be used to encode AAC files but file formats and extensions differ de pending on the application which is used to encode This unit plays back AAC files en coded by iTunes version 7 7 Detailed information regarding connectable iPods CAUTION Pioneer acc...

Page 173: ...s strongly on it as this may damage it Do not push the LCD screen with excessive force as this may scratch it Never touch the LCD screen with anything besides your finger when operating the Touch panel functions The LCD screen can scratch easily Liquid crystal display LCD screen If the LCD screen is near the vent of an air conditioner make sure that air from the air conditioner is not blowing on i...

Page 174: ... of the LCD screen Image quality will improve with an increase in temperature The product lifetime of the LED backlight is more than 10 000 hours However it may decrease if used in high temperatures If the LED backlight reaches the end of its product lifetime the screen will become dimmer and the image will no longer be visible In that case please consult your dealer or the nearest authorised Pion...

Page 175: ...l or Motel Spell Name 33 Near Me 34 Near Destination 34 Around City 35 navgate FEEDS 36 Favourites 35 43 History 36 46 Cancel Route 42 Coordinates 36 Route Overview 39 Phone Menu Page Dial Pad 52 Call Home 53 Contacts 53 Contacts Transfer 55 Received Calls 53 Dialled Calls 53 Missed Calls 53 Engb 175 Appendix Appendix Appendix ...

Page 176: ...8 Map Settings 122 Bluetooth Settings 57 Setting Replicator 143 Safe Mode 143 Navi Settings menu Page Connection Status 116 3D Calibration Status 117 Fuel cons 118 Drive Log Settings 120 Demo Mode 120 Set Home 120 Modify Current Location 121 Eco Settings 121 Engb 176 Appendix Appendix ...

Page 177: ...33 Service Information 133 Restore Factory Settings 148 Map Settings menu Page Displayed Info Close Up View 122 Show Speed Limit 123 Bluetooth Connected 123 Current Street Name 123 Favourites Icon 123 3D Land Mark 124 Show Manoeuvre 124 Show Eco Meter 124 Quick Access Selection 127 Overlay POI 124 View Mode 25 Day Night Display 126 AV Guide Mode 127 Road Colour 126 Engb 177 Appendix Appendix Appen...

Page 178: ...nput 136 Wide Mode 136 Mute 137 Mute Level 137 Rear SP 137 DivX VOD 138 Auto PI 138 FM Step 138 AV Sound Settings menu Page FAD BAL Balance 139 EQ 139 Loudness 141 Sub Woofer 141 HPF 142 SLA 142 Bass Booster 142 Staging 142 Engb 178 Appendix Appendix ...

Page 179: ... menu Page Connection 50 Registration 47 Device Name 57 Password 57 Bluetooth On Off 57 Echo Cancel 57 Auto Answer Preference 58 Refuse All Calls 58 Clear Memory 58 Firmware update 59 Engb 179 Appendix Appendix Appendix ...

Page 180: ...our cur rent location is shown on the map by a red tri angle mark Destination A location you choose as the end point of your journey DivX DivX is a popular media technology created by DivX Inc DivX media files contain highly com pressed video with high visual quality that maintains a relatively small file size DivX files can also include advanced media features like menus subtitles and alternate a...

Page 181: ...n standard established by a working group MPEG of the ISO Interna tional Organization for Standardization MP3 is able to compress audio data to about 1 10th the size of a conventional disc MPEG This stands for Moving Pictures Experts Group and is an international video image compression standard Multi angle With regular TV programmes although multi ple cameras are used to simultaneously shoot scen...

Page 182: ...tion It is highlighted in bright colour on the map Title DVD Video discs have a high data capacity en abling recording of multiple videos on a sin gle disc If for example one disc contains three separate videos they are divided into title 1 title 2 and title 3 This lets you enjoy the convenience of title search and other func tions Track log Your navigation system logs routes that you al ready pas...

Page 183: ...60 C Power off 20 C to 80 C Angle adjustment 0 to 22 Audio Maximum power output 50 W 4 50 W 2 ch 4 W 70 W 1 ch 2 W for subwoofer Continuous power output 22 W 4 50 Hz to 15 kHz 5 THD 4 W LOAD Both Channels Driven Load impedance 4 W 4 W to 8 W 2 W for 1 ch allowable Preout output level max 4 0 V Preout impedance 100 W Equaliser 7 Band Graphic Equaliser Frequency 50 Hz 125 Hz 315 Hz 800 Hz 2 kHz 5 kH...

Page 184: ...ystem FAT16 FAT32 Decoding format MP3 WMA AAC WAVE H 264 MPEG4 WMV Bluetooth Version Bluetooth 2 0 EDR Output power 4 dBm Max Power class 2 FM tuner Frequency range 87 5 MHz to 108 0 MHz Usable sensitivity 9 dBf 0 8 µV 75 W mono S N 30 dB Signal to noise ratio 72 dB IEC A network Distortion 0 3 at 65 dBf 1 kHz stereo 0 1 at 65 dBf 1 kHz mono Frequency response 30 Hz to 15 000 Hz 3 dB Stereo separa...

Page 185: ...Engb 185 ...

Page 186: ...Engb 186 ...

Page 187: ...Engb 187 ...

Page 188: ...CTRONICS USA INC P O Box 1540 Long Beach California 90801 1540 U S A TEL 800 421 1404 PIONEER EUROPE NV Haven 1087 Keetberglaan 1 B 9120 Melsele Belgium Belgique TEL 0 3 570 05 11 Published by Pioneer Corporation Copyright 2010 by Pioneer Corporation All rights reserved CRB3233 A UW KYTZX 10B00000 ...

Reviews: