background image

- 22 -

En
g

lis

h

To use this function you need to connect your mobile phone to this product via 
Bluetooth in advance (page 21).

 CAUTION

For your safety, avoid talking on the phone as much as possible while driving.

1

Press .

2

Touch .

The phone menu screen appears.

3

Touch one of the call icons on the phone menu screen.

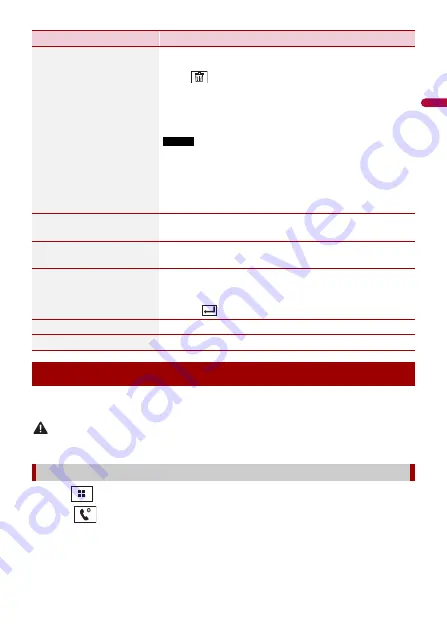
Menu Item

Description

[Connection]

Connect, disconnect, or delete registered Bluetooth device 
manually.
Touch 

 to delete registered device.

To connect a registered Bluetooth device manually, touch 
the name of the device.
To disconnect the device, touch the name of the connected 
device in the list.

NOTE

Connect the Bluetooth device manually in the following cases:

Two or more Bluetooth devices are registered, and you want to 
manually select the device to be used.

You want to reconnect a disconnected Bluetooth device.

Connection cannot be established automatically for some 
reason.

[Auto Connect]

[On] [Off]

Select [On] to connect the last connected Bluetooth device 
automatically.

[Visibility]

[On] [Off]

Select [On] to make this product visible to the other device.

[PIN Code Input]

Change the PIN code for Bluetooth connection.
The default PIN code is “0000”.

1

Touch [0] to [9] to input the pin code (up to 8 digits).

2

Touch .

[Device Information]

Displaying the device name and address of this product.

[Bluetooth Memory Clear]

Touch [Clear] then [OK] to clear the Bluetooth memory.

Hands-free phoning

Making a phone call

Summary of Contents for AVH-Z9200DAB

Page 1: ...English AVH Z9200DAB DVD RDS AV RECEIVER Operation Manual ...

Page 2: ...e 31 Supported AV source 31 Displaying the AV operation screen 31 Selecting a source 32 Changing the display order of source 32 Adjusting the range of favourite source icons area 33 Setup for iPod iPhone or smartphone 34 iPod iPhone 34 Smartphone Android device 35 Digital Radio 36 Digital Radio tuner operations 36 Starting procedure 36 Basic operation 37 DAB settings 38 Radio 40 Starting procedure...

Page 3: ...te control panel 78 Settings 79 Displaying the setting screen 79 System settings 79 Theme settings 88 Audio settings 91 Video settings 97 Favourite menu 101 Creating a shortcut 101 Selecting a shortcut 101 Removing a shortcut 101 Other functions 102 Setting the time and date 102 Changing the wide screen mode 102 Selecting the video for the rear display 103 Setting the anti theft function 104 Resto...

Page 4: ...English 4 Specifications 123 ...

Page 5: ...t in your vehicle Please comply with all applicable laws and regulations regarding the use installation and operation of this product If you want to dispose this product do not mix it with general household waste There is a separate collection system for used electronic products in accordance with legislation that requires proper treatment recovery and recycling CAUTION This product is a Class 1 l...

Page 6: ...ct or any other abnormal signs on the LCD screen turn off the power immediately and consult your dealer or the nearest authorised Pioneer Service Station Using this product in this condition may result in permanent damage to the system Do not disassemble or modify this product as there are high voltage components inside which may cause an electric shock Be sure to consult your dealer or the neares...

Page 7: ...D MAY VIOLATE APPLICABLE LAW AND MAY RESULT IN SERIOUS INJURY OR DAMAGE Do not take any steps to tamper with or disable the handbrake interlock system which is in place for your protection Tampering with or disabling the handbrake interlock system could result in serious injury or death To avoid the risk of damage and injury and the potential violation of applicable laws this product is not for us...

Page 8: ...tion for entertainment purposes CAUTION Keep the SD memory card out of the reach of small children to prevent them from accidentally swallowing it To prevent data loss and damage to the storage device never remove it from this product while data is being transferred If data loss or corruption occurs on the storage device for any reason it is usually not possible to recover the data Pioneer accepts...

Page 9: ...en to prevent disruption of the video in the form of spots coloured stripes etc To protect the LCD screen from damage be sure to touch the touch panel keys only with your finger and do so gently If the battery is disconnected or discharged the memory will be erased and must be reprogrammed The information will be erased by disconnecting the yellow lead from the battery or removing the battery itse...

Page 10: ...TE To activate the camera view mode with this button set Back Camera Input to On or AV Input to Camera page 80 Press to display the top menu screen Press and hold to power off To power back on press any button Press to display the menu bar page 17 Press and hold to mute or unmute Press to display the top menu screen or back to previous screen Press and hold to turn off the display ...

Page 11: ...ront panel with care when removing or attaching it Avoid subjecting the front panel to excessive shock Keep the front panel out of direct sunlight and high temperatures If removed replace the front panel on the product before starting up your vehicle 1 Press 2 Touch 3 Slide the dial at the bottom of the front panel to the right and lift up the front panel while pushing down on the dial Press to ac...

Page 12: ...keeping 1 Slide the front panel into the top of the product and push it into place Slide the inserter on the front panel into the insertion slot on top of the unit and push it into place 2 Push on the bottom of the front panel until it clicks into place Attaching the front panel ...

Page 13: ...English 13 ...

Page 14: ...uch or to adjust the angle of the LCD panel 3 Touch Returns to the previous screen CAUTION Pressing the RESET button resets settings and recorded contents to the factory settings Do not perform this operation when a device is connected to this product Some of the settings and recorded contents will not be reset The microprocessor must be reset under the following conditions Prior to using this pro...

Page 15: ...ystem with front and rear speakers and subwoofers Network Mode 3 way system with a high range speaker middle range speaker and subwoofer low range speaker for reproduction of high middle and low frequencies bands WARNING Do not use the unit in Standard Mode when a speaker system for 3 way Network Mode is connected to the unit This may cause damage to the speakers 5 Touch The DAB ANTENNA POWER SETT...

Page 16: ...he screen Switching the speaker mode Using the touch panel Common touch panel keys Operating list screens Touching an item on the list allows you to narrow down the options and proceed to the next operation Appears when all characters are not displayed on the display area If you touch the key the rests are scrolled for display NOTE This function is available only when you stop your vehicle in a sa...

Page 17: ...ck point by dragging the key The playback time corresponding to the position of the key is displayed while dragging the key Operating the menu bar Switches the dimmer duration by day or night Switches between playback and pause Skips files forwards or backwards Performs fast reverse or fast forwards Displays setting menu screen page 79 Closes the menu bar Switching the operation panel ...

Page 18: ...mber of characters equivalent to the number of touches Enters the characters in the text box Deletes the input text to the left of the cursor one letter at a time Touching and holding the key deletes the letters to the left of the cursor in rapid succession Confirms the entry and proceeds to the next step Enters a space Switches between alphabet and numbers symbols Switches between capital and low...

Page 19: ... in the following cases An incoming call is received only for hands free phoning via Bluetooth A rear view camera image is input when the vehicle is in reverse A button on this unit is pressed The ignition switch is turned off ACC OFF then turned on ACC ON AV Device source operation key Displays the current source TIP When the last source is displayed behind the key you can switch the source by to...

Page 20: ...eps 1 Touch and hold appears at the top right of the favourite application key 2 Drag to the desired position To finish the adjusting touch any place of the display except for the favourite application key You can also switch the mobile device to be connected with the following steps 1 Touch 2 Touch 3 Select desired device then follow the instruction Touch for the first wireless connection with th...

Page 21: ...first page 22 If your device supports SSP Secure Simple Pairing a six digit number appears on the display of this product Touch Yes to pair the device If a PIN code input is required enter a PIN code The default PIN code is 0000 TIP The Bluetooth connection can also be made by detecting this product from the Bluetooth device Before registration make sure that Visibility in the Bluetooth menu is se...

Page 22: ... list NOTE Connect the Bluetooth device manually in the following cases Two or more Bluetooth devices are registered and you want to manually select the device to be used You want to reconnect a disconnected Bluetooth device Connection cannot be established automatically for some reason Auto Connect On Off Select On to connect the last connected Bluetooth device automatically Visibility On Off Sel...

Page 23: ...from the phone book Touch the desired name on the list then select the phone number TIPS The contacts on your phone will be automatically transferred to this product Update the phone book manually NOTE Visibility of the Bluetooth screen should be on page 22 Using call history Make a phone call from the received call dialled call or missed call Direct phone number input Enter the number keys to ent...

Page 24: ...ial screen appears and dialling starts Deleting a phone number 1 Press 2 Touch 3 Touch 4 Touch 5 Touch Yes 1 Touch to answer the call Touch to end the call TIPS Touch while getting a call waiting switch to the talking person Touch while getting a call waiting to reject the call You can use the voice recognition function of iPhone or smartphone NOTES When an iPhone running iOS 6 1 or higher is used...

Page 25: ...minimised on the AV operation screen AV sources cannot be selected even if the dial confirmation screen is minimised while talking on the phone or receiving an incoming call 1 Press 2 Touch then During a conversation you can switch to private mode talk directly on your mobile phone 1 Touch or to turn private mode on or off Minimising the dial confirmation screen Phone settings Menu Item Descriptio...

Page 26: ...situations When you answer the phone using the button on the phone When the person on the other end of the line hangs up the phone If the person on the other end of the line cannot hear the conversation due to an echo decrease the volume level for hands free phoning With some mobile phones even after you press the accept button on the mobile phone when a call comes in hands free phoning may not be...

Page 27: ...sing selecting songs etc are possible Depending on the Bluetooth device connected to this product the available operations with this product may be limited or differ from the descriptions in this manual While you are listening to songs on your Bluetooth device refrain from operating the phone function as much as possible If you try operating the signal may cause noise for song playback When you ar...

Page 28: ... By pressing then touch and hold or you can also perform fast reverse or fast forwards Selects a file or folder from the list to playback NOTE This function is available only when the AVRCP version of the Bluetooth device is 1 4 or higher Switches among the Bluetooth devices when the devices are connected to this product via Bluetooth Sets a repeat play range Plays files in random order ...

Page 29: ... with the dislayed network name in Device Information from the mobile device 1 Press 2 Touch then 3 Touch Wi Fi Settings NOTE This setting is available only when you stop your vehicle in a safe place and apply the handbrake The menu items vary according to the source Wi Fi Wi Fi connection Wi Fi settings Menu Item Description Wi Fi ON OFF Switches Wi Fi connection on or off Device Information Disp...

Page 30: ...audio playback screen appears NOTES Wi Fi Audio is displayed as Android Auto when the Android Auto is in use Wi Fi Audio is displayed as Apple CarPlay when the Apple CarPlay is in use Wi Fi audio screen Example Apple CarPlay Wi Fi audio with Apple CarPlay operation is same as the iPod source function For details of the operation refer to the iPod operation page 56 Wi Fi audio Basic operation ...

Page 31: ... CD The following sources can be played back or used by connecting an auxiliary device USB SD iPod Bluetooth audio Wi Fi audio Apple CarPlay Android Auto AV input AV AUX HDMI Wireless Mirroring 1 Press then touch the AV operation key The AV operation screen appears AV source Supported AV source Displaying the AV operation screen Displays the source list ...

Page 32: ...your vehicle in a safe place and apply the handbrake 1 Press then touch 2 Touch and hold the source icon and drag the icon to the desired position 1 Press then touch the AV operation key 2 Touch 3 Touch 4 Drag the source key to the desired position Recalls equaliser curves page 91 Selecting a source Source on the AV source selection screen Source on the source list Changing the display order of so...

Page 33: ...lace and apply the handbrake 1 Press 2 Touch and hold appears at the top left of the favourite source icons 3 Drag to the desired position To finish the adjusting touch any place of the display except for the favourite source icons area Adjusting the range of favourite source icons area ...

Page 34: ...only when a hands free telephone is not used The setting will change after the following processes are automatically executed The source is turned off WebLink Apple CarPlay or Android Auto is exited The smartphone connection USB and Bluetooth is disconnected Compatible iPod iPhone models iPhone 7 iPhone 7 Plus iPhone SE iPhone 6s iPhone 6s Plus iPhone 6 iPhone 6 Plus iPhone 5s iPhone 5c iPhone 5 i...

Page 35: ...ith all smartphones is not guaranteed For details about smartphone compatibility with this product refer to the information on our website 1 Press 2 Touch then 3 Touch Smartphone related Settings 4 Touch Smartphone Setup 5 Touch Others 6 Touch Android Auto to use Android Auto Touch WebLink to use WebLink The available function icons are displayed 7 Touch OK Smartphone Android device ...

Page 36: ...ore services to be broadcast Interference free reception Some stations perform broadcast testing When some ensembles support the same service component switches to another ensemble that has better reception automatically 1 Press then touch 2 Touch Digital Radio The Digital Radio screen appears NOTE The service list will be automatically updated when the Digital Radio function is started for the fi...

Page 37: ... there are multiple services in the same frequency switches the services one by one Seek tuning Skips to the nearest ensemble Stores recent broadcasts to memory automatically time shift mode Pause or listen to the stored broadcasts again by touching Touch to resume the live broadcast NOTES Stored broadcast is overwritten by the latest broadcast If the duration that a selection is paused exceeds th...

Page 38: ...rogramme type information Station Group ensemble label Displays the ensemble list TIP If you touch Update Stations you can update station list information manually NOTES Station list information is automatically updated when you start to use this source When there is any changes in the current station group station list information automatically updated DAB settings Menu Item Description TA Interr...

Page 39: ...pports the similar service component If no alternative service component can be found or reception remains poor this function will automatically switch to a similar FM broadcast NOTES This setting is available only when Service Follow is set to On Only available in areas where SOFT LINK function is supported The broadcast content of the switched channel may differ from the content of the original ...

Page 40: ...urrent broadcast frequency to a key Displays the preset channel list Select an item on the list 1 to 6 to switch to the preset channel Selects the FM1 FM2 FM3 MW or LW band Manual tuning Seek tuning or non stop seek tuning Releasing the key in a few seconds skips to the nearest station from the current frequency Keep holding the key for long seconds to perform performs non stop seek tuning ...

Page 41: ...l list display key 2 Touch to begin search While the message is displayed the six strongest broadcast frequencies will be stored under the preset channel keys in the order of their signal strength 1 Touch Cancel 1 Press 2 Touch then The system setting screen appears 3 Touch AV Source Settings 4 Touch Radio Settings The menu items vary according to the source Storing the strongest broadcast frequen...

Page 42: ...station contains RDS data NOTE Even if you set to Off the PI search is automatically performed when the tuner cannot get a good reception TA Interrupt 2 Receives the traffic announcement from the last selected frequency interrupting the other sources TIP The selected setting also applies to TA Interrupt under DAB Settings DAB RDS TA Receives current traffic information for DAB and RDS DAB has prio...

Page 43: ...sc into the disc loading slot The source changes and then playback will start NOTE If the disc is already set select Disc as the playing source 1 Press 2 Touch to open the LCD panel 3 Remove the disc and press TIPS By pressing then touch or you can also skip files chapters forwards or backwards By pressing then touch and hold or you can also perform fast reverse or fast forwards If a Video CD with...

Page 44: ... Audio source Switches between playback and pause Skips files forwards or backwards Selects a track from the list Touch a track on the list to play back Sets a repeat play for the current disc the current track Plays or does not play tracks in random order ...

Page 45: ... anywhere on the screen Performs fast reverse or fast forwards Touch again to change the playback speed Stops playback Performs frame by frame playback Performs slow motion playback Each time you touch it changes the speed in four steps in the following order 1 16 1 8 1 4 1 2 Displays the DVD menu NOTE This function may not work properly with some DVD disc content In that case use touch panel keys...

Page 46: ...DVD Videos you can select Title Chapter or 10Key For Video CDs you can select Track or 10key Skips files chapters forwards or backwards Performs fast reverse or fast forwards Selects the audio output from L R Left Right Mix This function is available for Video CDs and DVDs recorded with LPCM audio Changes the viewing angle Multi angle This function is available for DVDs featuring multi angle recor...

Page 47: ...y the menu differs depending on the disc TIP If you touch you can operate the DVD menu directly Resumes playback Bookmark This function is available for DVD Video You can memorise one point as a Bookmark for a disc up to five discs To clear the bookmark on the disc touch and hold this key Returns and begins playback from the specified point This function is available for DVD Video and Video CDs fe...

Page 48: ...ransfer can damage the SD memory card Be sure to eject the SD memory card by the procedure described in this manual Do not press when an SD memory card is not fully inserted Doing so may damage the card Do not press before an SD memory card has been completely removed Doing so may damage the card 1 Press 2 Touch to open the LCD panel 3 Insert a disc into the disc loading slot The source changes an...

Page 49: ...Press 2 Touch to open the LCD panel 3 Press the middle of the SD memory card gently until it clicks 4 Pull the SD memory card out straight 5 Press 1 Pull out the plug from the USB port of the USB cable 2 Plug a USB storage device into the USB cable NOTES This product may not achieve optimum performance with some USB storage devices Connection via a USB hub is not possible A USB cable is required f...

Page 50: ...3 Touch USB or SD Playback is performed in order of folder numbers Folders are skipped if they contain no playable files NOTES For details on inserting SD card see on Inserting an SD memory card page 48 For details on plugging USB storage device see on Plugging a USB storage device page 49 TIPS By pressing then touch or you can also skip files chapters forwards or backwards By pressing then touch ...

Page 51: ... SD only Switches between playback and pause Switches the following media file types Music Compressed audio files Video Compressed video files Photo Image files Skips files forwards or backwards Switches the current music information display Selects a file from the list Touch a file on the list to playback TIP Touching a folder on the list shows its contents You can play a file on the list by touc...

Page 52: ... the desired category to display the file list 4 Touch the item Refine the item until the desired song title or file name is displayed on the list 5 Touch the desired song title or file name to play back If the selection made with Music Browse has been cancelled you can switch to Music Browse mode again by touching the Tag tab on the file folder list screen and touching the desired track Selects t...

Page 53: ... is in motion To view video images stop in a safe place and apply the handbrake Video source screen Example USB Video source Hides the touch panel keys To display the keys again touch anywhere on the screen Switches between playback and pause Switches the following media file types Music Compressed audio files Video Compressed video files Photo Image files Performs fast reverse or fast forwards To...

Page 54: ...med Still image screen Sets a repeat play range for all files the current folder the current file Switches the audio subtitle language Selects a file from the list Touch a file on the list to playback TIP Touching a folder on the list shows its contents You can play a file on the list by touching it Skips files forwards or backwards Performs fast reverse or fast forwards Still image source Hides t...

Page 55: ...elects the previous folder or the next folder Rotates the displayed picture 90 clockwise Sets a repeat play range for all files the current folder Plays all files in the current repeat play range or does not play them in random order Selects a file from the list Touch a file on the list to playback TIP Touching a folder on the list shows its contents You can play a file on the list by touching it ...

Page 56: ... connecting an iPhone or iPod touch quit all applications before connecting the device 1 Connect your iPod via USB 2 Press then touch 3 Touch iPod NOTE For details on USB connection refer to the Installation Manual TIPS By pressing then touch or you can also skip files forwards or backwards By pressing then touch and hold or you can also perform fast reverse or fast forwards NOTE Skipping backward...

Page 57: ... a song from the list Touch the category then the title of the list to playback of the selected list TIPS If you use English as the system language the alphabet search function is available Touch the initial search bar to use this function When you touch Apple Music Radio station in the list screen Apple Music Radio screen appears page 58 NOTES Depending on the generation or version of the iPod so...

Page 58: ...tion with an iPhone 7 iPhone 7 Plus iPhone SE iPhone 6s iPhone 6s Plus iPhone 6 iPhone 6 Plus iPhone 5s iPhone 5c iPhone 5 or iPod touch 5th and 6th generation 1 Touch 2 Touch Radio Changes the audiobook speed Normal Fast Slow NOTE The audiobook speed icon may not change depending on the connected iPod iPhone Sets a repeat play range for all in the selected list the current song Plays songs within...

Page 59: ...h Play More Like This to play back songs similar to the current song Touch Play Less Like This to set it not to play back the current song again Touch Add to iTunes Wish List to add the current song to the iTunes wish list NOTE This function may not be used depending on your Apple Music account status Skips tracks forwards ...

Page 60: ...parked No feature should be used unless it is safe to do so under the driving conditions you are experiencing Important Pioneer is not liable for any issues that may arise from incorrect or flawed app based content The content and functionality of the supported applications are the responsibility of the App providers In WebLink functionality through the product is limited while driving with availa...

Page 61: ...pp is launched NOTE The video playback capability depends on the connected Android device 1 Unlock your smartphone and connect it to this product via USB Refer to the Installation Manual 2 Press 3 Touch 4 Touch WebLink 5 Touch desired icon in the tab The WebLink app is launched Displays the main menu of the WebLink source screen For iPhone users For smartphone Android users ...

Page 62: ...k 2 Press VOL The audio mix menu will be displayed on the screen Android iOS Using the audio mix function Touch to mute Touch again to cancel mute Sets whether to switch the sound mix function on or off Left tab The audio mix function is enabled mix on and the App volume is displayed Right tab The audio mix function is disabled mix off This is not displayed on the AV operation screen Adjusts the a...

Page 63: ...ntry or region For details about Apple CarPlay visit the following site http www apple com ios carplay The content and functionality of the supported applications are the responsibility of the App providers In Apple CarPlay usage is limited while driving with availability of functions and content determined by the App providers Apple CarPlay allows access to applications other than those listed th...

Page 64: ...n in the tab The application screen appears Before using Apple CarPlay wirelessly connect the device to this product via Bluetooth and turn on Apple CarPlay in the Bluetooth setting menu of the device page 21 1 Turn on the Wi Fi function on the device 2 Press 3 Touch The device search screen appears Touch then skip to step 4 since the device list screen appears if Apple CarPlay had previously been...

Page 65: ...e Apple CarPlayis turned on only a Bluetooth audio connection will be possible for devices other than the device connected via Apple CarPlay Hands free phoning via Bluetooth wireless technology is not available while Apple CarPlay is on If Apple CarPlay is turned on during a call on a mobile phone other than an Apple CarPlay compatible device the Bluetooth connection will be terminated after the c...

Page 66: ...ountry or region For details about Android Auto please refer to the Google support site http support google com androidauto The content and functionality of the supported applications are the responsibility of the App providers In Android Auto usage is limited while driving with availability of functions and content determined by the App providers Android Auto allows access to applications other t...

Page 67: ... in the tab A Bluetooth connection with the Android Auto compatible device is automatically established and a Bluetooth connection with any other devices are terminated Before using Android Auto wirelessly connect the device to this product via Bluetooth page 21 1 Turn on the Wi Fi function on the device 2 Press 3 Touch The device search screen appears Touch then skip to step 4 since the device li...

Page 68: ...er than the Android Auto compatible device the Bluetooth connection will switch to the Android Auto compatible device after the call You can adjust the guidance volume separately from the main sound volume when Android Auto is used 1 While Android Auto is activated press VOL The volume menu will be displayed on the screen NOTE The volume menu is displayed for four seconds If the menu disappears pr...

Page 69: ... Auto will launch automatically only when an Android Auto compatible device is correctly connected to this product 1 Press 2 Touch then 3 Touch Smartphone related Settings 4 Touch Android Auto Auto launch to switch On or Off ...

Page 70: ... High Speed HDMI Cable sold separately is required for connection For details refer to the Installation Manual 1 Press then touch 2 Touch HDMI The HDMI source screen appears HDMI source screen HDMI Starting procedure Basic operation Hides the touch panel keys To display the keys again touch anywhere on the screen TIP You can set the screen size for the video image page 102 ...

Page 71: ...o images stop in a safe place and apply the handbrake NOTES A Mini jack AV cable sold separately is required for connection For details refer to the Installation Manual You can set the screen size for the video image page 102 1 Press 2 Touch then 3 Touch Input Output Settings 4 Confirm that AUX Input is turned on 5 Press then touch 6 Touch AUX The AUX screen appears AUX Starting procedure ...

Page 72: ...X screen Basic operation Hides the touch panel keys To display the keys again touch anywhere on the screen TIP You can set the screen size for the video image page 102 Switches between the video input and audio input ...

Page 73: ...ehicle is in motion To view video images stop in a safe place and apply the handbrake 1 Press 2 Touch then 3 Touch Input Output Settings 4 Touch AV Input 5 Touch Source for AV source or Camera for camera 6 Press then touch 7 Touch AV for AV source or Camera View for camera The image is displayed on the screen NOTE If Source is selected 2nd Camera Input is automatically set to Off page 81 AV input ...

Page 74: ... 74 English AV source screen Basic operation Hides the touch panel keys To display the keys again touch anywhere on the screen ...

Page 75: ...ply the handbrake 1 Press 2 Touch then 3 Touch Wi Fi Settings 4 Confirm that Wi Fi is turned on 5 Press then touch 6 Touch Mirroring A connection is configured then the instruction message appears on the display NOTES When Apple CarPlay or Android Auto with wireless connection is activated the connection swtiching confirmation screen appears Touch OK to proceed to Wireless Mirroring When the Wi Fi...

Page 76: ...NOTES The screen shown in the example may differ from the connected mobile device If the Android device is not ready for Miracast UIBC you cannot perform touch operation Basic operation Displays Full screen Disconnect Disconnects Wireless Mirroring ...

Page 77: ...eck operations For details about vehicle models that are compatible with Vehicle Bus adapters refer to the information on our website Functions and displays vary depending on the vehicle model For details of the functions available according to the model refer to the information on our website Parking Assist screen Vehicle equipment information Using the Vehicle Bus adapter Switches the display to...

Page 78: ...sor on your vehicle The Parking Assist screen appears When you operate the climate control panel of the vehicle the screen switches automatically to the A C Control screen NOTES The settings of the climate control panel operated before this product is started are not displayed on the screen Any climate control panel settings of the vehicle that are turned off are not displayed on the screen If the...

Page 79: ... The menu items vary according to the source Settings Displaying the setting screen System settings AV Source Settings Menu Item Description Radio Settings page 41 DAB Settings page 38 Bluetooth Audio On Off Setting Bluetooth audio source activation Smartphone related Settings Menu Item Description Smartphone Setup Setting the connected mobile device page 34 Driving Position Right Left Setting the...

Page 80: ...source selection screen page 32 NOTES To set the rear view camera as the camera for Camera View mode set Back Camera Input to On page 81 When using the 2nd camera set AV Input to Camera page 73 When the camera view of both the rear view camera and 2nd camera are available the key to switch the display appears Touch this key to switch the display between the rear view image and 2nd camera image And...

Page 81: ...nised NOTES To set the rear view camera as the camera for Camera View mode set Back Camera Input to On page 81 When using the second camera set AV Input to Camera or 2nd Camera Input to On both settings are synchronised page 81 TIP You can also turn this function on by touching Camera View on the AV source selection screen or in the source list Back Camera Input Off On Setting the second camera ac...

Page 82: ...CC OFF The range projected by the rear view camera is limited Also the vehicle width and distance guidelines displayed on the rear view camera image may differ from the actual vehicle width and distance The guidelines are straight lines The image quality may deteriorate depending on the usage environment such as at night or in dark surroundings NOTE Using packing tape or similar tape place marking...

Page 83: ...apply the handbrake Demo Mode Menu Item Description Demo Mode On Off Setting the demo mode System Language Menu Item Description System Language Select the system language NOTES If the embedded language and the selected language setting are not the same the text information may not display properly Some characters may not be displayed properly Climate Reverse Menu Item Description Climate Reverse ...

Page 84: ... is available when the source is turned off Theme Settings Restore to default Theme settings Bluetooth Settings Restore to default Bluetooth settings Beep Tone Menu Item Description Beep Tone On Off Select Off to disable the beep sound when the button is pressed or the screen is touched Touch Panel Calibration Menu Item Description Touch Panel Calibration 1 Touch two corners of the screen along th...

Page 85: ... can use this function when Dimmer Trigger is set to Manual Day Turns the dimmer function to off Night Turns the dimmer function to on Dimmer Duration Adjust the time that the dimmer is turned on or off by dragging the cursors or touching or You can use this function when Dimmer Trigger is set to Time TIPS Each touch of or moves the cursor backwards or forwards in the 15 minute width When the curs...

Page 86: ...le with some rear view cameras The setting contents can be memorised separately Menu Item Description Brightness 24 to 24 Adjust the black intensity Contrast 24 to 24 Adjust the contrast Colour 24 to 24 Adjust the colour saturation Hue 24 to 24 Adjust the tone of colour which colour is emphasised red or green Dimmer Level 1 to 48 Adjust the brightness of the display Temperature 3 to 3 Adjust the c...

Page 87: ...t page 49 4 Turn the source off page 32 5 Display the System setting screen page 79 6 Touch System Information 7 Touch Firmware Update 8 Touch Continue Follow the on screen instructions to finish updating the firmware NOTE If an error message appears on the screen touch the display and perform the above steps again 3D Calibration Status Check the sensor learning status such as the degree of learni...

Page 88: ...re than three satellites are received the current location can be measured Installation Indicates whether the installation position of this product is correct or not If installed correctly OK appears When this product is installed at an extreme angle exceeding the limitation of the installing angle NOK Inst Angle is displayed If the installation of this product is continually changed and it is not...

Page 89: ... pixels 4 000 pixels or smaller off Hides the background display Illumination Select an illumination colour from the colour list or create a defined colour Coloured Keys Select the desired preset colour custom Displays the screen to customise the illumination colour To customise the defined colour touch then touch or to adjust the brightness and the level of red green and blue to create favourite ...

Page 90: ...ice USB port 2 This setting is available only when you stop your vehicle in a safe place and apply the handbrake Exporting Theme settings 1 Set the external storage device page 48 2 Press 3 Touch then 4 Touch Export 5 Touch the item you want export Illumination Theme Splash Screen Select All 6 Touch Export Splash Screen Select the splash screen from the preinstalled image in this product or extern...

Page 91: ...modified each stored curve will be overwritten If you trail your finger across the bars of multiple equaliser bands the equaliser curve settings will be set to the value of the touched point on each bar If the preset equaliser curve other than Custom1 or Custom2 is modified the curve setting will be overwritten in Custom1 Fader Balance Touch or to adjust the front rear speaker balance Set Front an...

Page 92: ... Off is selected the subwoofer adjustment is not available in Speaker Level Time Alignment and Crossover Speaker Level Listening position 1 2 Off Front Left Front Right Front All Standard Mode 3 Front Left Front Right Rear Left Rear Right Subwoofer Network Mode 3 High Left High Right Mid Left Mid Right Subwoofer Speaker output level 24 to 10 Adjust the speaker output level of the listening positio...

Page 93: ... Left or Front Right Auto EQ On Off Set the auto adjusted equaliser to suit the vehicle s acoustics To use this function the Auto EQ measurement must be done in advance page 95 A EQ TA Measurement Measures and adjusts the vehicles acoustics equaliser and time alignment automatically to suit the vehicle interior page 95 Save Settings Save to recall the following current sound settings by touching O...

Page 94: ...ar Speaker Output Rear Subwoofer Select the rear speaker output NOTES This function is available when Standard Mode is selected as the speaker mode If Subwoofer is selected the rear speaker adjustment is not available in Speaker Level Time Alignment and Crossover Loudness Off Low Mid High Compensates for deficiencies in the low frequency and high frequency ranges at low volume Automatic Level Cont...

Page 95: ...nnected to a power amp with input level control Auto EQ may be impossible if the power amp s input level is set below the standard level When this product is connected to a power amp with an LPF low pass filter turn the LPF off before performing Auto EQ Also set the cutoff frequency for the built in LPF of an active subwoofer to the highest frequency The distance has been calculated by a computer ...

Page 96: ...ent sold separately with this product Plug the microphone into the Auto EQ microphone input jack on this product page 10 NOTE Use an extension cable sold separately if the cord of the microphone sold separately is not long enough 10Touch Front Left or Front Right to select the current listening position 11Touch Start A 10 second countdown starts NOTE The Bluetooth connection is disconnected before...

Page 97: ...he graph line to set the cutoff position 6 Drag the lowest point of the graph to set the cutoff slope The following items can also be set The menu items vary according to the source This setting is available only when Disc is selected as the source Adjusting the cutoff frequency value Switches the subwoofer phase between normal and reverse position LPF HPF Switches the LPF HPF setting to On or Off...

Page 98: ...de screen display or 4 3 regular display We recommend use of this function only when you want to fit the aspect ratio to the rear display NOTES When playing discs that do not have a panscan system the disc is played back with Letter Box even if you select the Pan Scan setting Confirm whether the disc package bears the mark The TV aspect ratio cannot be changed for some discs For details refer to t...

Page 99: ...with discs that do not feature a recorded parental lock level With some discs parental lock operates to skip certain scenes only after which normal playback resumes For details refer to the disc s instructions When you set a parental lock level and then play a disc featuring parental lock code number input indications may be displayed In this case playback will begin when the correct code number i...

Page 100: ...de Menu Item Description Time Per Photo Slide 5sec 10sec 15sec Manual Select the interval of image file slideshows on this product Video Signal Setting Menu Item Description AV Auto PAL NTSC PAL M PAL N SECAM Select the suitable video signal setting when you connect this product to an AV equipment AUX Auto PAL NTSC PAL M PAL N SECAM Select the suitable video signal setting when you connect this pr...

Page 101: ... menu item The star icon for the selected menu is filled in TIP To cancel the registration touch the star icon in the menu column again 1 Press then touch 2 Touch 3 Touch the menu item 1 Press then touch 2 Touch 3 Touch and hold the favourite menu column The selected menu item is removed from the Favorites screen TIP You can also remove a shortcut by touching and holding the registered menu column...

Page 102: ...You can set the screen mode for AV screen and image files 1 Touch the screen display mode key 2 Touch the desired mode Other functions Setting the time and date Changing the wide screen mode Screen display mode key Full A 4 3 picture is enlarged in the horizontal direction only enabling you to enjoy an image without any omissions Zoom A 4 3 picture is enlarged in the same proportion both verticall...

Page 103: ...display when Android Auto is activated in Smartphone Setup 1 Press then touch 2 Touch Rear 3 Touch the source you want to show on the rear display Trimming An image is displayed across the entire screen with the horizontal to vertical ratio left as is If the screen ratio differs from the image the image may be displayed partly cut off either at the top bottom or sides NOTE Trimming is for image fi...

Page 104: ...ouch Set Password 5 Enter the password 5 to 16 characters can be entered for a password 6 Touch Go 7 Enter a password hint SD The video and sound of the SD memory cards are output to the rear display NOTE Compatible file types are MPEG 4 H 264 WMV MKV and FLV only AV The video and or sound of the AV input source are output to the rear display NOTE The video image and sound are output only when AV ...

Page 105: ...assword hint can be deleted 1 Press 2 Touch then 3 Touch 1 followed by 2 and then touch 3 page 104 4 Touch Clear Password 5 Touch Yes 6 Touch OK 7 Enter the current password 8 Touch Go A message indicating that the security setting is cancelled appears You can restore settings or recorded content to the default settings from Restore Settings in the System menu page 83 Deleting the password Restori...

Page 106: ...aded disc is a type this product cannot play Check what type of disc it is The screen is covered by a caution message and the video cannot be shown The handbrake lead is not connected or the handbrake is not applied Connect the handbrake lead correctly and apply the handbrake The handbrake interlock is activated Park your vehicle in a safe place and apply the handbrake No video output from the con...

Page 107: ...d and dark during playback The disc features a signal to prohibit copying Some discs may have this Since this product is compatible with the copy guard analogue copy protect system the picture may suffer from horizontal stripes or other imperfections when a disc with that kind of protection signal is viewed on some displays This is not a malfunction iPod cannot be operated The iPod is frozen Recon...

Page 108: ...nected device when you use the Android Auto function this problem occurs when the reverse gear polarity setting of this product is incorrect Check the polarity and re select the correct setting When problems occur with this product an error message appears on the display Refer to the table below to identify the problem then take the suggested corrective action If the error persists record the erro...

Page 109: ...he inserted disc contains DRM protected files The protected files are skipped Protect All the files on the inserted disc are embedded with DRM Replace the disc This DivX rental has expired The inserted disc contains expired DivX VOD content Select a file that can be played Video resolution not supported Files that cannot be played on this product are included in the file Select a file that can be ...

Page 110: ... SD Formatter for formatting SD memory cards Check USB The USB connector or USB cable has short circuited Check that the USB connector or USB cable is not caught in something or damaged The connected USB storage device consumes more than maximum allowable current Disconnect the USB storage device and do not use it Turn the ignition switch to OFF then to ACC or ON and then connect a compliant USB s...

Page 111: ...Attempting to connect to Apple CarPlay Communication failed and the system is trying to connect Wait for a while Then perform the actions below if the error message is still displayed Restart the iPhone Disconnect the cable from the iPhone and then connect the iPhone again after a few seconds Turn the ignition switch to OFF and then to ON If the error message is still displayed after performing th...

Page 112: ...serting and ejecting may not be possible Using such discs may result in damage to this equipment Do not attach labels write on or apply chemicals to the surface of the discs Do not attach commercially available labels or other materials to the discs To clean a disc wipe it with a soft cloth moving outward from the centre Condensation may temporarily impair the built in drive s performance Playback...

Page 113: ...e manufacturer for more detailed information about DualDiscs This product will down mix Dolby Digital signals internally and the sound will be output in stereo Manufactured under license from Dolby Laboratories Dolby Dolby Audio and the double D symbol are trademarks of Dolby Laboratories Common notes about disc compatibility Certain functions of this product may not be available for some discs Co...

Page 114: ...splayed File extensions must be used properly There may be a slight delay when starting playback of files on an external storage device USB SD storage device with complex folder hierarchies Operations may vary depending on the kind of an external storage device USB SD storage device It may not be possible to play some music files from SD or USB because of file characteristics file format recorded ...

Page 115: ...d with the same character string as the DivX file before the extension are associated with the DivX file The character strings before the extension must be exactly the same However if there is only one DivX file and one subtitle file in a single folder the files are associated even if the file names are not the same The subtitle file must be stored in the same folder as the DivX file Up to 255 sub...

Page 116: ...of audio file stored in the disc 60 h Maximum playback time of audio file stored on an external storage device USB SD 7 5 h 450 minutes This product assigns folder numbers The user cannot assign folder numbers CD R RW DVD R R SL R DL DVD RW USB storage device SD memory card MP3 compatibility Ver 2 x of ID3 tag is prioritised when both Ver 1 x and Ver 2 x exist This product is not compatible with t...

Page 117: ... DivX files Files with high transfer rates may not be played back correctly The standard transfer rate is 4 Mbps for CDs and 10 08 Mbps for DVDs DivX files on the external storage device USB SD cannot be played CD R RW DVD R R SL R DL DVD RW Audio and video files compatibility USB SD Files may not be able to be played back depending on the bit rate Only USB storage devices can play back VOB files ...

Page 118: ... Compatible video codec MPEG4 H 264 Xvid Maximum resolution 1 920 x 1 080 Maximum frame rate 30 fps Compatible video codec MPEG4 H 264 H 263 Maximum resolution 1 920 x 1 080 Maximum frame rate 30 fps Compatible video codec H 264 Maximum resolution 1 920 x 1 080 Maximum frame rate 30 fps Compatible video codec H 264 Maximum resolution 1 920 x 1 080 Maximum frame rate 30 fps Compatible video codec W...

Page 119: ...S OF MERCHANTABILITY AND FITNESS FOR A PARTICULAR PURPOSE ARE DISCLAIMED IN NO EVENT SHALL THE FOUNDATION OR CONTRIBUTORS BE LIABLE FOR ANY DIRECT INDIRECT INCIDENTAL SPECIAL EXEMPLARY OR CONSEQUENTIAL DAMAGES INCLUDING BUT NOT LIMITED TO PROCUREMENT OF SUBSTITUTE GOODS OR SERVICES LOSS OF USE DATA OR PROFITS OR BUSINESS INTERRUPTION HOWEVER CAUSED AND ON ANY THEORY OF LIABILITY WHETHER IN CONTRAC...

Page 120: ...details refer to the iPod manuals Use of the Made for Apple badge means that an accessory has been designed to connect specifically to the Apple product s identified in the badge and has been certified by the developer to meet Apple performance standards Apple is not responsible for the operation of this device or its compliance with safety and regulatory standards Please note that the use of this...

Page 121: ...ll depend on the availability of cellular and or Wi Fi network coverage for the purpose of allowing your smartphone to connect to the Internet Service availability may be geographically limited to the region Consult the connected content service provider for additional information Ability of this product to access connected content is subject to change without notice and could be affected by any o...

Page 122: ...e nor imply any right to use this product in any commercial i e revenue generating real time broadcasting terrestrial satellite cable and or any other media broadcasting streaming via internet intranets and or other networks or in other electronic content distribution systems such as pay audio or audio on demand applications An independent license for such use is required For details please visit ...

Page 123: ...e aerial of the mobile phone away from the LCD screen to prevent disruption of the video in the form of disturbances such as spots or coloured stripes When removing dust from or cleaning the LCD screen first turn this product off and then wipe the screen with a soft dry cloth When wiping the LCD screen take care not to scratch the surface Do not use harsh or abrasive chemical cleaners A light emit...

Page 124: ...0 Hz 125 Hz 160 Hz 200 Hz 250 Hz Slope 6 dB oct 12 dB oct 18 dB oct 24 dB oct OFF Subwoofer LPF Frequency 25 Hz 31 5 Hz 40 Hz 50 Hz 63 Hz 80 Hz 100 Hz 125 Hz 160 Hz 200 Hz 250 Hz Slope 6 dB oct 12 dB oct 18 dB oct 24 dB oct 30 dB oct 36 dB oct OFF Gain 10 dB to 24 dB 1 dB step Phase Normal Reverse Time alignment 0 to 140 step 2 5 cm step Bass boost Gain 12 dB to 0 dB 2 dB step Speaker level 10 dB ...

Page 125: ...ormat MPEG 4 AAC iTunes encoded only m4a Ver 11 and earlier DivX decoding format Home Theater Ver 3 11 4 x 5 x 6 x avi divx MPEG video decoding format MPEG1 mpg mpeg dat MPEG 2 PS mpg mpeg MPEG4 part 2 visual MS MPEG4 Ver 3 avi USB USB standard spec USB 1 1 USB 2 0 high speed Max current supply 1 6 A USB Class MSC Mass Storage Class iPod Audio Class HID Class File system FAT16 FAT32 NTFS USB audio...

Page 126: ... dBm Max Power class 2 Frequency band 2 400 MHz to 2 483 5 MHz FM tuner Frequency range 87 5 MHz to 108 MHz Usable sensitivity 11 dBf 1 0 μV 75 Ω mono S N 30 dB Signal to noise ratio 72 dB IEC A network MW tuner Frequency range 531 kHz to 1 602 kHz 9 kHz Usable sensitivity 28 μV S N 20 dB Signal to noise ratio 62 dB IEC A network LW tuner Frequency range 153 kHz to 281 kHz Usable sensitivity 30 μV...

Page 127: ...MHz Sensitivity 140 dBm typ Frequency Approx once per second GPS aerial Aerial Micro strip flat aerial right handed helical polarization Aerial cable 3 55 m Dimensions W H D 33 mm 14 7 mm 36 mm Weight 73 7 g NOTE Specifications and design are subject to possible modifications without notice due to improvements ...

Page 128: ... 2019 PIONEER CORPORATION All rights reserved OPM_AVHZ9200DABEU5_engb_A EU ...

Reviews: