


Installation
Operating Manual PSEN ml sa 1.1/2.1/2.2, PSEN ml DHM
1005457-EN-02
| 45
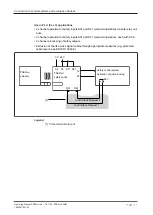
[2]
[1]
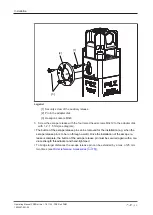
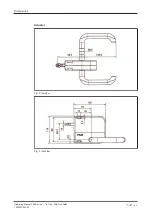
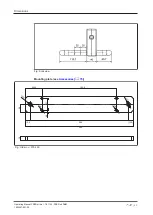
Legend
[1] Holes for one-way screws
[2] Holes for mounting screws
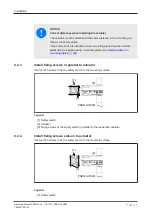
1. Use two screws to fix the actuator in place.
2. Align the actuator to the safety switch.
The distance between the safety switch and actuator must be 5 mm + max. 1 mm.
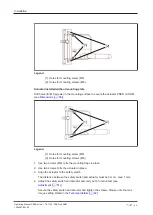
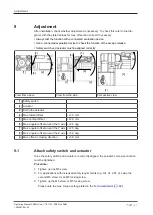
3. Adjust the safety switch and actuator and carry out a function test (see
Secure the safety switch and actuator and tighten the screws. Please note the max.
.
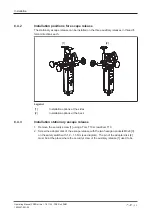
4. Install the yellow/red PSEN ml DHM handle using the M5x20 mm fixing screws
provided and secure the screw connections using a medium-strength threadlocker.
If you need to extend the handle with the PSEN ml DHM extension, use M5x45 mm or
M5x70 mm fixing screws.
5. Apply the grip insert to the handle.
Use the red PSEN ml DHM handle with red grip insert for an escape release.
Use the yellow PSEN ml DHM handle with yellow grip insert for other applications.
To bridge larger distances the rotary handle can be further offset by 25 mm a maximum
of twice (see
8.3.3
Install actuator on sliding gate
The mounting flaps PSEN ml DHM mounting flap must be used to prevent lengthwise dis-
placement.
Note that washers must be used when fastening M8 screws.
Actuator installed on mounting plate:
Drill holes (for M8 screws) in the mounting surface to secure the PSEN ml DHM mounting
plate (see