background image

Phrozen Shuffle 2019 / Shuffle Lite User Guide


Thank you for purchasing Phrozen products! 

 
CONTENTS 


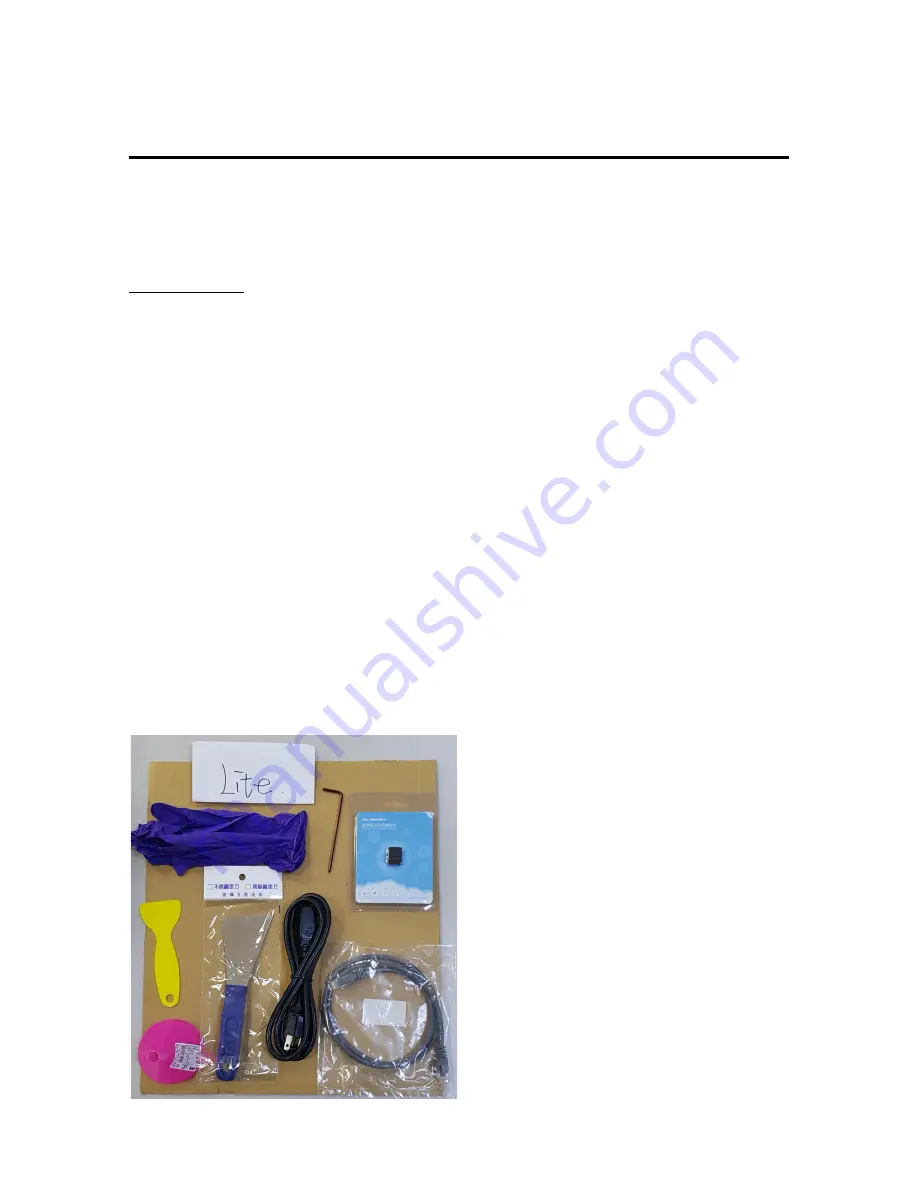
Phrozen Shuffle 2019/Lite  Printer * 1 pc 


Resin Vat with Cover and Preinstalled FEP film *1 set 


Phrozen Printing Toolkits Box 

o


Plastic Scraper * 1 pc 

o


Metal Scraper  * 1 pc 

o


Funnel * 1 pc 

o


Gloves * 1 set 

o


AC Power Cord * 1 pc 


If you have any missing component or problems, please contact the


Phrozen team directly


Summary of Contents for Shuffle 2019

Page 1: ...ozen Shuffle 2019 Lite Printer 1 pc Resin Vat with Cover and Preinstalled FEP film 1 set Phrozen Printing Toolkits Box o Plastic Scraper 1 pc o Metal Scraper 1 pc o Funnel 1 pc o Gloves 1 set o AC Pow...

Page 2: ...BEFORE YOU START Plug in AC Power Cord and turn on the button...

Page 3: ...Phrozen OS will be ready in 45 secs...

Page 4: ...to make your 3D prints successfully printed with good quality please do start your printing process after a proper Z axis calibration Step 1 Take off the resin vat and make sure no objects on the LCD...

Page 5: ...Step 4 Click Z AXIS button to start the calibration process Step 5 Click the manual dot icon at the right side...

Page 6: ...Step 6 Loosen 4 screws on both sides of the build platform Tips Gently pull the build platform to see if it s moveable and well loosened...

Page 7: ...Step 7 Click NEXT kindly wait the build platform down to the BOTTOM Step 8 Tighten the screws with slightly pressing the build platform to make sure the A4 paper is still and IMMOVABLE...

Page 8: ...Step 9 Click DONE kindly wait the build platform back to the top...

Page 9: ...e the printing file in your USB has been sliced to phz or zip format Tips Please name your printing file with ONLY EN ALPHABET Step 2 Insert your USB into the socket at the back of the printer Step 3...

Page 10: ...Step 5 Choose your printing file to start uploading process Step 6 The file will be displayed on the PLATES screen...

Page 11: ...the preview screen please double check the file you are going to print and click Step 8 Before starting to print please make sure that there is no object around the stage and resin tank to avoid the L...

Page 12: ...earest medical unit asap for further help Tip 4 KEEP THE RESIN SAFELY AWAY FROM CHILDREN Tip 5 Please shake the resin properly before using it Tip 6 Kindly keep the resin capacity below 1 2 height of...

Page 13: ...Shutdown Step 1 Touch the screen operation click SETUP Step 2 After clicking follow the instruction below Step 3 Setup Shutdown Please turn off the Power Switch...

Page 14: ...re 405nm UV light Tips Phrozen Cure https reurl cc NaEQQq 2 Tidy Up Your 3D Printer a Safely shutdown your Phrozen 3D printer Tip ALWAYS SHUTDOWN YOUR 3D PRINTER FIRST before you clean the build platf...

Page 15: ...plastic scraper will be the helpful toolkits to store your resins Tip 2 Always keep new resin and used resin stored in separated container Step 2 Clean your resin vat by Phrozen Wash IPA 95 alcohol u...

Page 16: ...PZSlice Pro Software Operation 1 Basic setting Step 1 Machine type Step 2 Select layer thickness advice 50um Step 3 select Apply Step 4 Choose language...

Page 17: ...2 Import file Step 1 Select the upper left file icon Step 2 Choose the file to import Mobile window The middle mouse button can move the screen and the right mouse button can rotate the screen in 3D...

Page 18: ...3 Hollow setup Step 1 Select the icon Support mode Step 2 Choose advanced function Step 3 Adjust the height of the base to 1mm Step 4 Hollow out...

Page 19: ...4 Adjust the support type to the bracket type Step 1 Generate all Step2 Support type...

Page 20: ...support function Internal support function for example the model itself has a base the automatic support is the support between the base and the platform if the inner support is selected the following...

Page 21: ...ct point mode at this time can manually add the support by pressing the left mouse button at the color change of the model After clicking the left button to select the contact point to be removed Step...

Page 22: ...6 Simulation check support slice After selecting the moving direction of the model slice left click and hold the middle square to move left and right to view the simulated slice...

Page 23: ...file Step2 Check if the parameters are correct Step3 The model name can be changed at this time It is suggested to name it in short English Step4 The storage location is preset and cannot be changed...

Page 24: ...hefilename Pleasedonotusenon Englishnameforthefilename After selecting the output the software will slice and there is a progress bar at the bottom right If the file is too large the progress bar will...

Page 25: ...Printers are now on the built in list in ChituBox Download now to try it NOW for free https www chitubox com download html 1 After the CHITUBOX software is supported the STL file is exported and then...

Page 26: ...inter to the internet via Ethernet Cable or WiFi Step 2 Input the IP address showed at the top of Phrozen OS display on your web browser Step 3 Click PLATES of the navigation bar Step 4 Select your pr...

Page 27: ...on your web browser Step 3 Click PROFILE of the navigation bar Step 4 Add new resin profile by inputting name and profile setting Tip 1 Check Phrozen Resin profiles of all models here https reurl cc 0...

Page 28: ...076 ext 15 Sales Department After sale Service sales phrozen3d com Online After sale Service www facebook com Phrozen3DP Official Facebook Group EN www facebook com groups 775284745970028 JP https www...

Reviews: