background image

53

E

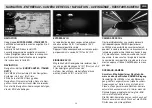
REPRODUCCIÓN     DVD-CD-USB-SD CARD

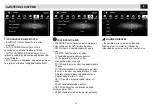
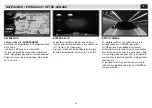
REPRODUCCION VIDEO
Tocar la pantalla para que aparezca el menú 

cuando la película se está reproduciendo.


   Para pasar al segundo menú.

        Stop a la reproducción.


 Para video precedente o siguiente.

       Para iniciar o interrumpir la reproducción.

   /   Para la reproducción rápida adelante/atrás.


Equalizador.

Presionar en  alto a la izquierda para volver  al 

menú principal.

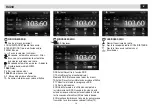
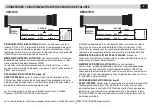
REPRODUCCION VIDEO
 

  Para volver al primer menú.

     Para cambiar el idioma audio.

      Para cambiar el idioma de los sub títulos.


   Repetición de pista video.


  Reproducción casual.

     Listado de reproducción

      Selecciona el  número de la  canción  


que  se desea reproducir.


Equalizador.

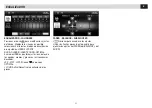
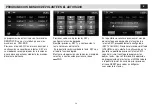
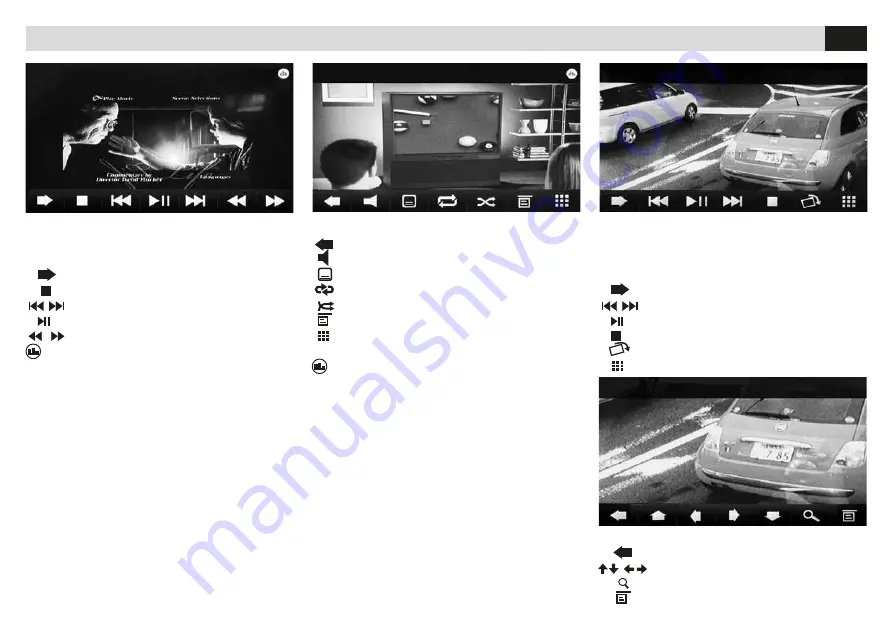
REPRODUCCION IMÁGENES    
Seleccionar el archivo deseado para visualizar la 

imagen. Para que aparezca el menú presionar  la 

parte inferior  de la pantalla.


   Para pasar en el segundo menú.


 Imágenes precedentes o siguientes.

       Para iniciar o interrumpir la reproducción.


Stop a la reproducción.


  Para girar la imagen.

       Selecciona el número de la imagen.

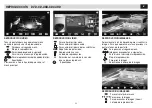
REPRODUCCION IMÁGENES    
     

  Para volver al primer menú .

 Para mover la imagen. 


Para desanchar la imagen (zoom). 

         Listado de reproducción.

Summary of Contents for VM 056

Page 1: ...ANUALE ISTRUZIONI INSTRUCTIONS MANUAL NOTICE DE MONTAGE ET D EMPLOI GEBRAUCHSANWEISUNGEN MANUAL DE INSTRUCCIONES VM 056 6 2 TFT LCD 2 DIN NAVIGATION DVD RECEIVER ENGLISH ITALIANO FRANÇAIS DEUTSCH ESPAÑOL ...

Page 2: ...ns l appareil car ils peuvent provoquer des mauvais fonctionnements des courts circuits éviter aussi l exposition risquée aux rayons laser si présents Allumer l appareil seulement lorsque la tempéra ture interne du véhicule est dans la norme Tenir le volume à un niveau permettant d écouter les sons en provenance de l extérieur du véhicule Klaxon sirène etc Ne brancher aucun câble dans des endroits...

Page 3: ...LOW BLU BLUE ROSSO RED ROSSO RED BIANCO WHITE BIANCO WHITE ROSSO RED BIANCO WHITE USCITA VIDEO DESTRO RIGHT SINISTRA LEFT INGRESSO VIDEO VIDEO INPUT USCITA SUB WOOFER SUB WOOFER OUTPUT ANTERIORE DESTRO FRONT RIGHT ANTERIORE SINISTRA FRONT LEFT POSTERIORE DESTRO REAR RIGHT POSTERIORE SINISTRA REAR LEFT INGRESSO A V 2 INPUT A V 2 VIDEO OUT AV IN AV IN AV IN SUB WOOFER FRONT R FRONT L REAR R REAR L U...

Page 4: ...IONE POWER SUPPLY BATT ACC GND ILLUMI AMP ANT Remote Durante l avviamento dell auto il VM056 potrebbe spegnersi per poi riaccendersi Per evitare questo inconveniente collegare lo stabilizzatore di tensione 5 146 The VM038 could turn out and turn on again when the ignition key gets activated You can avoid such inconvenience by connecting the tension stabilizer 5 146 12V Battery Positive 12V Injecti...

Page 5: ...udio 7 Luminosità schermo 8 Slot micro SD Card multimedia 9 A V AUX IN 1 10 Porta micro USB 11 Slot SD Card per navigazione 1 IR Sensor 2 CD port 3 Eject Disc 4 Reset 5 Main Menu 6 ON OFF Volume Audio Muting 7 Screen Brightness 8 Port for Multimedia micro SD 9 A V AUX IN 1 10 Port for micro USB 11 Port for Navigation SD Card 4 1 2 3 5 6 7 8 9 10 11 ...

Page 6: ...sistema 26 Attiva Disattiva volume 27 GOTO Salto traccia capitolo 28 Invia Riceve chiamata 29 Aggancia Rifiuta chiamata 30 RANDOM Riproduzione casuale 31 Cancella numeri digitati 1 HOME Main Menu 2 EJECT Eject Disc 3 TUNER Radio Band 4 DISC Disc 5 Track or Chapter before Autom Stations Research 6 BAND Radio Band 7 ZOOM Zoom for DVD mode List of Musical Files fmusicali 8 Screen Setup 9 EQ Equalizer...

Page 7: ...sa al Menù successivo 14 20 Data e orario Equalizzatore Passa al Menù precedente 14 20 Data e orario Equalizzatore Go to previous Menu 14 20 Data e orario Equalizzatore When you switch on the car radio the Main Menu will appear With the icons on the screen you can choose the Source and the requested Functions Go to next Menu 14 20 Date and Time Equalizer ...

Page 8: ...ziona area di appartenenza RADIO RANGE Seleziona stazioni nazionali BLACKOUT Attiva spegnimento automatico schermo dopo 10 20 secondi di inattività DIMMER Regola la luminosità dello schermo BEEP Attiva Disattiva suono tasti CALIBRAZIONE La calibrazione avviene toc cando lo schermo secondo la sequenza indicata GENERAL SETUP REGION Select Area RADIO RANGE Select National Stations BLACKOUT Activate a...

Page 9: ...REPLY Activate Deactivate automatic phone answering after three times ringing ACC Set coupling code necessary for the phone Factory code 0000 IMPOSTAZIONI DI SISTEMA SYSTEM SETUP REGOLAZIONE DATA E ORA Posizionarsi sulla voce da modificare ed effettuare le modifiche IMPOSTAZIONI LINGUA OSD Cambia la lingua dei menù di sistema DVD AUDIO Indica la lingua principale dei DVD SOTTOTITOLI DVD Seleziona ...

Page 10: ...PASSWORD Activate Deactivate password for DVD restriction Youth protection RATING Set protection level for DVD Youth protection KID SAFE Acceptable for Children G Acceptable for the general Public PG For Children under the direct supervision of an Adult PG 13 Inadequate for Children aged less than 13 PG R For Parents forbidding Children aged less than 17 R Children aged less than 17 should watch u...

Page 11: ...ormation Announcements FUNZIONI RADIO RADIO FUNCTIONS RDS Opzioni Options FUNZIONI RADIO RDS Attiva Disattiva la funzione RDS CT Attiva Disattiva il controllo dell orologio tramite RDS Non funziona in tutte le aree TA Attiva Disattiva le informazioni sul traffico PTY Mostra la lista dei programmi RDS VOL Regolazione volume EON abilita la radio all utilizzo completo delle informazioni RDS Quando la...

Page 12: ...JAZZ TECHNO OPTIMAL L icona riporta in OPTIMAL LOUD Attiva Disattiva esaltazione basse frequenze FADER BILANCIAMENTO SUB WOOFER Premere per accedere alle regolazioni Utilizzare le frecce presenti sullo schermo per le regolazioni del FADER del BILANCIAMENTO e del SUB W FADER BALANCE SUBWOOFER Press to enter Setup functions Use arrows appearing on the screen to set FADER BALANCE and Subwoofer EQUALI...

Page 13: ...age LANGUAGE Change Subtitles Language REPEAT Set Repetition of Title Track Chapter Folder PIC Change Screen Settings Back to Menu before FUNZIONI DVD Con l inserimento di un DVD appare il menu titoli del filmato Avviare la riproduzione confermando con il tasto OK del telecomando o premendo sullo schermo nel punto indicato dal DVD EQ Equalizzatore Traccia capitolo precedente o successivo Avvia o m...

Page 14: ...SHUFFLERandom Reproduction Start Interrupt Reproduction GOTO Introduce Track number for Reproduction EQ Equalizer Recompact Menu FUNZIONI USB SDCARD All inserimento del supporto USB SD verrà visua lizzato il contenuto sullo schermo Se sono presenti brani musicali la riproduzione partirà automaticamente Selezionare il tipo di file da riprodurre tramite l icona relativa MUSICA VIDEO IMMAGINI TUTTI I...

Page 15: ...IPRODUZIONE VIDEO Toccare lo schermo per fare apparire il menù quando il filmato è in riproduzione Passa al secondo menù Stop alla riproduzione Traccia video precedente o successivo Avvia o mette in pausa la riproduzione Riproduzione veloce avanti indietro Equalizzatore Premere in alto a sinistra per tornare al menù principale VIDEO PLAYBACK If you touch the screen while film is being shown the Me...

Page 16: ... Select the requested file to visualize related Picture To get the Menu on the screen touch the bottom border of the screen To procede to the second menu Previous next picture To Start Interrupt Reproduction Stop playback To rotate the Picture To digit number of pictures to be reproduced RIPRODUZIONE IMMAGINI Torna al primo menù Per muovere l immagine Ingradisce l immagine zoom Torna all elenco fi...

Page 17: ... Attivare nelle impostazioni blueto oth del telefono la connessione automatica del dispositivo VM056 Ricerca dal VM056 Premere l icona e selezionare il telefono da accoppiare una volta terminata la ricerca Digitare il codice PIN 0000 sul telefono Ad accoppiamento avvenuto comparirà il nome del telefono Attivare nelle impostazioni bluetooth del telefono la connessione automatica del dispositivo VM0...

Page 18: ...th visualizzando il numero del chiamante e il nominativo se la rubrica è sincro nizzata Premere per rispondere o per rifiutare la chiamata ANSWERING A PHONE CALL When phone call arrives screen switches to Bluetooth mode and visualizes the caller s phone number and name if phone list has previously been synchronized Press to answer or reject the Call STARTING A PHONE CALL Select Bluetooth from the ...

Page 19: ...table Maps EUROPE NV980 ITALY NV970 VM056 is compatible with navigation types iGo 8 and iGo Primo Introduce SD card into the GPS port Start navigation program by using the Navigation icon available on the Main Menu Now follow the iGo Navigations Manual supplied with the SD card INGRESSI AV IN E possibile visualizzare la riproduzione di due sorgenti esterne collegate agli ingressi AV IN 1 frontale ...

Page 20: ...selezione del nuovo modello di radio SYNCHRONIZING THE CAN BUS LINE Effect connections with Interfaces 4 070 or 4 073 When Interface receives current supply LED will flash Red and a self learning program will automatically start synchronizing the Steering wheel and Services commands with the related correct CAN BUS protocol MEMORIZING CAR RADIO PROFILE When synchronization has taken place Led will...

Page 21: ...ente poi velocemente a questo punto togliere la pressione dal tasto PRG L avvenuto RESET sarà confermato con un solo lampeggio di colore rosso del LED The VM056 is fitted with Resistive Steering wheel Commands In case of incompatibility use interfaces 4 083 4 085 To connect to the Original car connecters stick to the schemes shown on the Interface Connections Manual MEMORIZING THE STEERING WHEEL K...

Page 22: ...ose KEYS and attribute the various KEYS to the requested functions Exemple press KEY1 and then Volume The screen will show KEY with related type of function Repeat this procure for every single steering wheel command and to finish press PAIR icon Sullo schermo verrà richiesto di premere il co mando sul volante corrispondente alla funzione del tasto KEY1 precedentemente abbinato KEY1 VOLUME Premere...

Page 23: ...SS ROUGE ROT BLANCHE WEISS SORTIE VIDEO VIDEO AUSGANG DROIT RECHTS GAUCHE LINKS ENTRÉES VIDÉO EINGANG VIDEO SORTIE SUB WOOFER AUSGANG SUB WOOFER ANTÉRIEURE DROITE FRONT RECHTS ANTÉRIEURE GAUCHE FRONT LINKS POSTÉRIEURE DROITE HECK RECHTS POSTÉRIEURE GAUCHE HECK LINKS ENTRÉES AV EINGANG AV VIDEO OUT AV IN AV IN AV IN SUB WOOFER FRONT R FRONT L REAR R REAR L SORTIES PRE AMPLIFIEES PRE AMP AUSGÄNGE EN...

Page 24: ...5 146 anschließt 12V Batterie Plus 12V Zündplus Masse Beleuchtung Dimmer Aktivierung der Elektro Antenne KEY A KEY B KEY GND BRAKE REVERSE Ligne A Commandes au volant Ligne B Commandes au volant Masse Commandes au volant Frein de stationnement branchement obligatoire Activation caméra de recul A Leitung der Lenkrad Steuerungen B Leitung der Lenkrad Steuerungen Masse für die Lenkrad Steuerungen Han...

Page 25: ...ung für Multimedia Micro SD 9 A V AUX IN 1 10 Mikro USB Öffnung 11 Öffnung für Navigations SD 4 1 2 3 5 6 7 8 9 10 11 1 Senseur IR 2 Fente insertion disque 3 Expulsion disque 4 Reset 5 Menu principal 6 Allumage Extinction Volume Audio mis à zéro 7 Luminosité écran 8 Slot micro Carte SD multimédia 9 A V AUX IN 1 10 Port micro USB 11 Slot Carte SD pour navigation ...

Page 26: ...lume 27 GOTO Saute trace chapitre 28 Lance Reçoit l appel 29 Décroche Refuse l appel 30 RANDOM Reproduction Casuelle 31 Efface numéros tapés 1 HOME Hauptmenü 2 EJECT CD Auswurf 3 TUNER Radio Frequenzband 4 DISC CD 5 Stück Kapitel davor Autom Sender Suche 6 BAND Radio Frequenzband 7 ZOOM Zoom im DVD Modus Liste der Musik Dateien 8 Bildschirm Einstellungen 9 EQ Equalizer 10 Läufer im Menü verwenden ...

Page 27: ... suivant 14 20 Date et horaire Egaliseur Retourne au Menu précédent 14 20 Date et Horaire Egaliseur Zurück zum vorhergehenden Menü 14 20 Datum und Uhrzeit Equalizer Beim Einschalten des Geräts erscheint das Haupt MENÜ Mit den Ikonen auf dem Bildschirm wählt man die gewünschte Quelle und Funktionen Zum nächsten Menü übergehen 14 20 Datum und Uhrzeit Equalizer ...

Page 28: ... GENERAUX REGION Sélectionne la zone d appartenance RADIO RANGE Sélectionne les stations nationaux BLACKOUT Active l extinction automatique de l écran après 10 20 secondes d inactivité DIMMER Règle la luminosité de l écran BEEP Active Désactive le son des touches CALIBRAGE Le calibrage se fait en touchant l écran selon la séquence indiquée ALLGEMEINE EINSTELLUNGEN REGION Wahl der Zugehörigkeits Zo...

Page 29: ...lungs Codenummer fürs Mobil Tele fon festlegen Fabrik Code Nr 0000 REGLAGES DE SYSTEME SYSTEM EINSTELLUNGEN REGLAGES LANGUE OSD Change la langue des menus de système DVD AUDIO Indique la langue principale des DVD SOUS TITRES DVD Sélectionne la langue MENÙ DVD Sélectionne la langue principale des menus dans les DVD SPRACHE EINSTELLEN OSD Sprache der System Menüs einstellen DVD AUDIO DVD Hauptsprach...

Page 30: ...D EINSTELLUNGEN PASSWORD Passwort aktivieren deaktivieren zwecks DVD Besichtigungs Einschränkung Jugendschutz RATING Jugendschutz Stufe wählen KID SAFE Passend für Kinder G Passend für das allgemeine Publikum PG Kinder nur unter Anwesenheit von Er wachsenen PG 13 Unter 13 Jahren NICHT geeignet PG R Rat an Erwachsene u Eltern Jugendliche unter 17 möglichst fernhalten R Unter 17 Jahren nur unter Anw...

Page 31: ...EN RDS Options Optionen RDS Active Désactive la fonction RDS CT Active Désactive le contrôle de l horloge à travers RDS Ne fonctionne pas dans toutes les FUNZIONI RADIO RADIO FUNCTIONS RDS Aktivierung Deaktivierung der RDS Funktion CT Aktivierung Deaktivierung der Uhrzeit Kontrolle mittels RDS nicht überall verfügbar TA Aktivierung Deaktivierung der Verkehrs Infor mationen PTY Liste der RDS Progra...

Page 32: ...AL L icône reporte sur OPTIMAL LOUD Active Désactive l exaltation des basses fréquences FADER EQUILIBRAGE SUB WOOFER Appuyer pour accéder aux réglages Utiliser les flèches que vous trouvez sur l écran pour les réglages du FADER de l ÉQUILIBRAGE et du SUB W FADER BALANCE SUB WOOFER Drücken um die Funktionen zu betreten Pfeiltasten auf dem Bildschirm verwenden um FADER BALANCE und SUBWOOFER einzuste...

Page 33: ...Change la langue des sous titres REPEATprogramme répétition titre trace cha pitre dossier PIC Modifie les réglages de l écran Retourne au menu précédent FONCTIONS DVD Avec l insertion d un DVD le menu titre des films apparaît Lancer la reproduction en validant avec la touche OK de la télécommande ou en appuyant sur l écran le point indiqué par le DVD EQ Egaliseur Trace chapitre précédent ou suivan...

Page 34: ...SHUFFLE Wahllose Wiedergabe Wiedergabe starten unterbrechen GOTO Stück Nummer zur Wiedergabe angeben EQ Equalizer Menü kompaktieren FONCTIONS USB SD CARD Lorsqu un support USB SD est inséré le contenu est visible sur l écran Si le support contient des chansons la reproduc tion est automatique Sélectionner le type de fichier à reproduire à travers l icône correspondante MUSIQUE VIDEO IMAGES TOUS LE...

Page 35: ...uccessif Pour lancer ou interrompre la reproduction Reproduction rapide avance revient Egaliseur Appuyer en haut à gauche pour retourner au menu principal VIDEO WIEDERGABE Bildschirm antasten wenn man während der Film Wiedergabe das Menü einblenden will Sprung zum 2 Menü Stoppen Sie die Wiedergabe Stück Kapitel davor danach Wiedergabe starten stoppen Um schnell Vorwärts Rückwärts zu gehen Equalize...

Page 36: ...EDERGABE Bild erscheint nachdem die gewünschte Datei gewählt wurde Den unteren Bildschirm Rand anta sten um das Menü erscheinen zu lassen Sprung zum 2 Menü Stück Kapitel davor danach Wiedergabe starten stoppen Stoppen Sie die Wiedergabe Bild drehen Bild zur Wiedergabe wählen REPRODUCTION DES IMAGES Pour retourner au premier menu Pour bouger l image Pour agrandir l image Zoom Revenir à la liste des...

Page 37: ...ion aktivieren Dann neue Vorrichtungen suchen Aus der betreffenden Liste die Vorrichtung VM056 wählen Auf Anfrage das Passwort 0000 eingeben Sobald die Koppelung erfolgt ist erscheint der Name des Mobil Telefons Innerhalb der Bluetooth Einstellungen des Mobil Telefons die automatische Verbindung des VM056 aktivieren Suche mittels VM056 Auf die Ikone drücken anzukoppendes Mobil Telefon suchen und b...

Page 38: ...rücken um den Anruf in Empfang zu nehmen Oder um den Anruf zurückzuweisen ANRUF STARTEN Aus dem Haupt Menü Buetooth wählen Die gewünschte Ikone auf dem Bildschirm anklicken um aus der betreffenden Telefonliste eine Nummer zu wählen Verpasste Anrufe Erhaltene Anrufe Gestartete Anrufe Telefon Liste diese muss man vorher synchronisiert haben Anruf starten durch Nummern Tasten Ikone drücken um Anruf z...

Page 39: ...auf Wunsch ausweisen durch Druck auf die CAME RA Ikone aus dem Haupt Menü NAVIGATION Code mappe EUROPE NV980 ITALIE NV970 Le VM056 est compatible avec la navigation iGo 8 et iGo Primo Insérer la Carte SD dans la slot GPS Lancer le programme de navigation moyennant l icône Navigation présente dans le menu princi pal Suivre la notice d utilisation de la navigation iGo incluse dans la Carte SD NAVIGA...

Page 40: ...YNCRONISIERUNG Anschlüsse mit der Interface 4 070 oder 4 073 herstellen Interface an den Strom anschließen so dass das Led ROT blinken wird Ein selbst lernendes Programm wird nun die Synchronisierung und Wahl des CAN BUS Protokolls für Lenkradsteuerungen und Betriebsfunktionen automa tisch vornehmen EINSPEICHERUNG DES AUTORADIO PROFILS Sobald die Synchronisierung beendet ist beginnt das Led GRÜN z...

Page 41: ...telle angelangt die PRG Taste loslassen Bei erfolgtem RESET blinkt das LED nur 1 Mal ROT Le VM056 est intégré des commandes au volant Résistives En cas d incompatibilité utiliser les interfaces 4 083 4 085 Pour les branchements aux connecteurs originaux de la voiture suivre les schémas présents sur les instructions de connexion des interfaces MEMORISATION DES TOUCHES SUR LE VOLANT Faire les branch...

Page 42: ... die gewünschte Funktion damit verbinden Beispiel KEY1 drücken dann Volume Auf dem Bildschirm erscheint demzufolge KEY daneben die zugeschriebene Funktion Diesen Vorgang für jede einzelne Lenkrad Steue rung vornehmen und auf die Ikone PAIR drücken Sur l écran il sera demandé d appuyer la com mande sur le volant correspondante à la fonction de la touche KEY1 précédemment associé KEY1 VOLUME Appuyer...

Page 43: ...1 AMARILLO AMARILLO AZUL ROJO ROJO BLANCO BLANCO ROJO BLANCO SALIDA VIDEO DERECHO IZQUIERDO ENTRADA VIDEO SALIDA SUB WOOFER ANTERIOR DERECHO ANTERIOR IZQUIERDO POSTERIOR DERECHO POSTERIOR IZQUIERDO ENTRADA A V 2 VIDEO OUT AV IN AV IN AV IN SUB WOOFER FRONT R FRONT L REAR R REAR L SALIDAS PRE AMP ENTRADA ANTERIOR A V GPS ...

Page 44: ...IOR DERECHO POSTERIOR IZQUIERDO FRONT R FRONT R FRONT L FRONT L REAR R REAR R REAR L REAR L SALIDAS ALTAVOCES ALIMENTACION BATT ACC GND ILLUMI AMP ANT Remote En algunos coches durante el arranque del motor el VM056 podría apagarse y después encenderse Para evitar esta molestias conectar el temporizador de encendido art 5 146 KEY A KEY B KEY GND BRAKE REVERSE Línea A Mandos de volante Línea B Mando...

Page 45: ... disco 3 Expulsión disco 4 Reset 5 Menú principal 6 Encendido Apagado Volumen Mute Audio 7 Brillo pantalla 8 Ranura micro SD Card multimedia 9 A V AUX IN 1 10 Puerto micro USB 11 Ranura SD Card para la navegación 4 1 2 3 5 6 7 8 9 10 11 ...

Page 46: ...PBC en los VCD 13 Teclado numérico 14 REPEAT Repite reproducción 15 SRC Cambio fuente 16 POWER Encendido Apagado 17 BT Bluetooth 18 MAP Navegación 19 Inicia Interrumpe reproducción 20 Pista o capitulo siguiente Búsqueda automática emisoras 21 Selecciona Angulo de visión Rotación imágenes Lista archivos 22 Subtítulos DVD Lista imagen 23 AUDIO Idioma audio DVD 24 VOL Volumen 25 SETUP Ajustes del sis...

Page 47: ... aparece en el menú principal Con los iconos que aparecen en pantalla para seleccionar la fuente o la función deseada Pasa al Menú siguiente 14 20 Fecha y horario Ecualizador Pasa al Menú precedente 14 20 Fecha y horario Ecualizador ...

Page 48: ...de 10 20 segundos de inactividad DIMMER Ajusta el brillo de la pantalla BEEP Activa Desactiva el sonido del teclado CALIBRACIÓN La calibración se obtiene tocando la pantalla según la secuencia indicada Presionar el icono Setup en la pantalla del menú principal para modificar los siguientes ajustes generales video sonido fecha y horario idio ma Bluetooth DVD volumen fuentes AJUSTES DEL SISTEMA CONF...

Page 49: ...para la visión KID SAFE Aceptable para los niños G Aceptable para el público en general PG Se permite la visión a los niños acompañados por un adulto PG 13 No apto para los niños con edad inferior a 13 años PG R Recomendado a los padres para restringir la visión a los niños con edad inferior a 17 años R Se recomienda la presencia de adultos con niños en edad inferior a 17 años NC 17 No apto a niño...

Page 50: ... RDS Opciones RDS Activa Desactiva la función RDS CT Activa Desactiva el control del reloj Mediante RDS No funciona en todas las áreas TA Activa Desactiva las informaciones sobre el tráfico PTY Muestra la lista de los programas RDS VOL Ajuste del volumen EON Habilita la radio a la utilización completa de las informaciones RDS Cuando la función no está activada viene constantemente controlada la li...

Page 51: ...T POP ROCK CLASSIC JAZZ TECHNO OPTIMAL En modo USER es posible ajustar los niveles de los agudos medios y graves en las frecuencias deseadas LPF MPF HPF El icono se pone en OPTIMAL LOUD Activa Desactiva la exaltación de los graves FADER BALANCE SUB WOOFER Presionar para acceder a los ajustes Utilizar las flechas presente en la pantalla para ejecutar los ajustes del FADER del BALANCE y del SUB W ...

Page 52: ...tancia o presionando en la pantalla en el punto indicado por el DVD EQ Ecualizador Pista capitulo precedente o siguiente Inicia o pone en pausa la reproducción Pasa al menú extendido Selecciona pista o capitulo por reproducir Vuelve al menú principal REPRODUCCIÓN MUSICA Extiende el menú LIST Vuelve al listado de los archivos Canción siguiente precedente REPRODUCCIÓN MUSICA REPEAT Repite canción ca...

Page 53: ...dioma audio Para cambiar el idioma de los sub títulos Repetición de pista video Reproducción casual Listado de reproducción Selecciona el número de la canción que se desea reproducir Equalizador REPRODUCCION IMÁGENES Seleccionar el archivo deseado para visualizar la imagen Para que aparezca el menú presionar la parte inferior de la pantalla Para pasar en el segundo menú Imágenes precedentes o sigu...

Page 54: ...mática del dispositivo VM056 Búsqueda desde el VM056 Presionar el icono y seleccionar el teléfono que se desea acoplar una vez terminada la búsqueda Digitar el código PIN 0000 en el teléfono Una vez acoplado aparecerá el nombre del teléfono Activar en los ajustes Bluetooth del teléfono la conexión automática del dispositivo VM056 CONFIGURACCIÓN BLUETOOTH EFE CTUAR UNA LLAMADA Seleccionar Bluetooth...

Page 55: ...incronizado en los contactos Presionar para contestar o rechazar la llamada REPRODUCCION MUSICA BLUETOOTH Si el teléfono conectado soporta el perfil AD2P es posible escuchar los temas musicales Si el dispositivo soporta AVRCP será posible controlar los temas musicales directamente desde la pantalla táctil Pista precedente siguiente Inicia interrumpe la reproducción EQ Ecualizador ...

Page 56: ...quier momento la retro cámara presionando el icono CAMERA en el menú principal NAVEGACION Código cartografía EUROPA NV980 El VM056 es compatible con la navegación iGo 8 e iGo Primo Introducir la SD card en la ranura GPS Iniciar el programa de navegación mediante el icono Navigation presente en el menú principal Seguir el manual de la navegación iGo incluido en la sd card ENTRADA AV IN Es posible v...

Page 57: ...LANCO MARRÓN VERDE ROSA GRIS NARANJA BLANCO MARRÓN KEY A KEY B KEY GND El VM056 está dotado de la función para controlar los mandos de volante Resistivos En el caso de incompatibilidad utilizar los interfaces 4 083 4 085 Para las conexiones a los conectores originales de los coches hacer referencia a los esquemas presentes en el manual de instalación del 4 083 MEMORIZACIÓN DE LAS TECLAS DEL VOLANT...

Page 58: ...cla KEY con al lado la función elegida Efectuar esta operación con todos los mando de volante y a continuación presionar el icono PAIR En la pantalla se solicitará presionar el mando de volante que corresponde a la función de la tecla KEY1 precedentemente configurado KEY1 VOLUME Presionar el mando solicitado VOLUME en el volante A continuación en la pantalla se pedirá de presionar la tecla KEY2 se...

Page 59: ...intonizzatore Radio Tuner FM AM RDS EON PLL 18 Stazioni memorizzabili in FM e 12 in AM Memory for 18 FM 12 AM stations Memorizzazione dell ultima posizione Last position memory function Vivavoce Bluetooth Microfono Esterno Handsfree with External Microphone Supporto iPhone 5 A2DP Gestione Rubrica IPhone 5 A2DP Support Phonebook Download Tolleranza d inclinazione Degrees inclination tolerance 30 Co...

Page 60: ...ltito con i rifiuti domestici Si ricorda che le pile accumulatori devono essere rimosse dall apparecchiatura prima che questa sia conferita come rifiuto Per rimuovere le pile accumulatori fare riferimento alle specifiche indicazioni del costruttore L utente dovrà pertanto conferire gratuitamente l apparecchiatura e la pila giunta a fine vita agli idonei centri comunali di raccolta differenziata de...

Reviews: