Initial operation
7
3 Initial operation
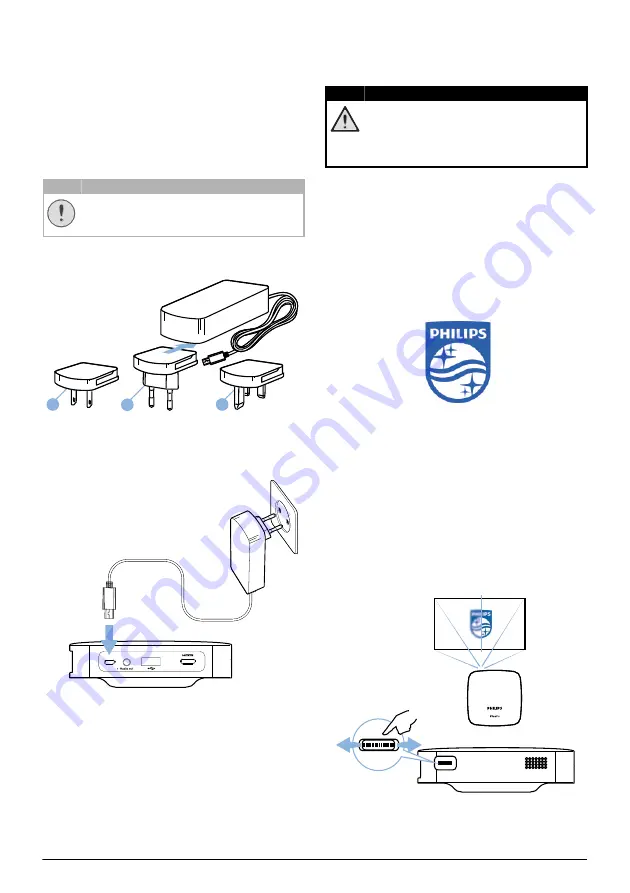
Setting up the device
Place the projector on a flat surface in front of
the projection surface.
Connecting power supply
Always use the
B
button to turn on and
off the projector.
1
Slide the appropriate plug (EU, UK, US) onto
the power adapter.
US
UK
EU
2 Connect one end of the power cable to the
DC IN
socket on the rear side of your device
(
1
).
3 Plug the power cable to outlet in the wall (
2
).
a
b
Charging the battery
The projector is built with an embedded battery
for mobile use. The battery will be charged only
when the device is not in use (Power off).
Before using the first time, charge the projector
for
five
hours.
The blue charging LED blinks during charging. If
the projector is fully charged the LED stops
blinking.
Risk of explosion with incorrect type of
batteries!
Do not try to replace the battery your-
self.
Initial installation
Turning on the projector
1
To turn on (and off) the device, press the
B
button for
eight
seconds till the initial
screen appears.
2 Turn the projector towards a suitable projec-
tion surface or wall. Note that the distance to
the projection surface must be a minimum of
0.5 metres and a maximum of approx.
3 metres. Make sure the projector is in a
secure position.
The distance between the projector and the
screen determines the actual size of the
image.
3 Use the focus wheel on the left side to adjust
the image sharpness.
CAUTION!
DANGER!
Summary of Contents for PicoPix PPX5110
Page 15: ...14 Philips PPX5110 7 Enter a password and press Submit ...
Page 37: ...14 Philips PPX5110 7 Geben Sie ein Passwort ein und drücken Sie Submit ...
Page 60: ...14 Philips PPX5110 7 Introduzca una clave y pulse Submit Enviar ...
Page 82: ...14 Philips PPX5110 7 Entrez un mot de passe et pressez Submit ...
Page 104: ...14 Philips PPX5110 7 Adja meg a jelszót és nyomja meg a Submit gombot ...
Page 126: ...14 Philips PPX5110 7 Inserire una password e premere Submit ...
Page 148: ...14 Philips PPX5110 7 Geef wachtwoord in en druk op Verzenden Submit ...
Page 170: ...14 Philips PPX5110 7 Wprowadzić hasło i nacisnąć Submit wyślij ...
Page 193: ...14 Philips PPX5110 7 Insira uma palavra passe e prima Submit enviar ...


