background image

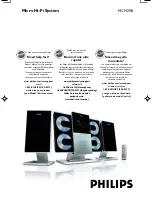
Micro Hi-Fi System

MCM298

Thank you for choosing Philips.

Need help fast? 

Philips vous remercie de 

votre confiance.

Besoin d'une aide 

rapide? 

Gracias por escoger Philips

Necesita ayuda 

inmediata? 

Read your Quick Use Guide and/or

Owner's Manual first for quick tips

 that make using your Philips product 

more enjoyable.

If you have read your instructions 

and still need assistance,

you may access our online help at 

www.philips.com/usasupport

or call

1-888-PHILIPS (744-5477) 

while with your product.

(and Model / Serial number)

Les Guide d'utilisation rapide et Manuel de 

l'utilisateur regorgent d'astuces destinées à 

simplifier l'utilisation de votre produit Philips.

Toutefois, si vous ne parvenez pas à résoudre 

votre probléme, vous pouvez accéder à 

notre aide en ligne à l'adresse 

www.philips.com/usasupport

ou formez le

1-800-661-6162 (Francophone)

1-888-PHILIPS (744-5477) (English speaking)

Veillez à avoir votre produit à

portée de main.

(et model / serial nombre)

Lea primero la Guía de uso rápido o el

Manual del usuario, en donde encontrará

consejos que le ayudarán a disfrutar 

plenamente de su producto Philips.

Si después de leerlo aún necesita ayuda,

consulte nuestro servicio de 

asistencia en línea en 

www.philips.com/usasupport

o llame al teléfono

1-888-PHILIPS (744-5477)

y tenga a mano el producto.

(y número de model / serial)

pg001-027_MCM298_37_Eng

2006.7.3, 14:46

1

Summary of Contents for MCM298/37

Page 1: ...l de l utilisateur regorgent d astuces destinées à simplifier l utilisation de votre produit Philips Toutefois si vous ne parvenez pas à résoudre votre probléme vous pouvez accéder à notre aide en ligne à l adresse www philips com usasupport ou formez le 1 800 661 6162 Francophone 1 888 PHILIPS 744 5477 English speaking Veillez à avoir votre produit à portée de main et model serial nombre Lea prim...

Page 2: ...tes dans le Règlement sur le Brouillage Radioélectrique édicté par le Ministère des Communications du Canada CAUTION Use of controls or adjustments or performance of procedures other than herein may result in hazardous radiation exposure or other unsafe operation ATTENTION L utilisation des commandes ou réglages ou le non respect des procédures ci incluses peuvent se traduire par une exposition da...

Page 3: ...3 3 5 7 4 0 9 9 9 8 2 7 7 9 1 3 6 7 ...

Page 4: ...4 1 2 3 4 9 0 5 8 7 6 6 7 ...

Page 5: ...5 ...

Page 6: ...6 IMPORTANT SAFETY INSTRUCTIONS Class II equipment symbol This symbol indicates that the unit has a double insulation system Clean only with dry cloth materials ...

Page 7: ...7 English Français Español Index English 8 Français 30 Español 53 ...

Page 8: ...15 Switching the system to Eco Power Standby mode 15 Power Saving Automatic Standby 15 Adjusting volume and sound 15 Dimming the display screen 15 CD MP3 CD Operation Discs for playback 16 About MP3 disc 16 Loading a disc 16 Basic playback controls 17 18 Different play modes SHUFFLE and REPEAT 18 Programming track numbers 18 Erasing the programme 18 Radio Reception Tuning to radio stations 19 Prog...

Page 9: ... in your system Allow at least 10 cm 4 inches clearance from the rear and the top of the unit and 5 cm 2 inches from each side The ventilation should not be impeded by covering the ventilation openings with items such as newspapers table cloths curtains etc Do not expose the system batteries or discs to excessive moisture rain sand or heat sources caused by heating equipment or direct sunlight No ...

Page 10: ...overheating of the system a safety circuit has been built in Therefore your system may switch to Standby mode automatically under extreme conditions If this happens let the system cool down before reusing it not available for all versions B Antennas Connection Connect the supplied AM loop antenna and FM antenna to the respective terminals Adjust the position of the antenna for optimal reception AM...

Page 11: ...t the system onto wall please refer to Appendix and the attached Wall Mounting Instructions Preparations 1 Align the side marked PRESS4 of the larger size stand with the slots at the bottom of the main set 2 Push the stand down into the slots until you hear a click 3 Attach the two smaller size stands to the speakers in the same way 4 Place the main set and speakers upright on the desktop with the...

Page 12: ... the Player 1 Aim the Remote Control directly at the remote sensor IR on the front panel 2 Do not put any objects between the Remote Control and the system while operating the system CAUTION Remove batteries if they are exhausted or if the Remote Control is not being used for a long time Do not use old and new or different types of batteries in combination Batteries contain chemical substances so ...

Page 13: ...layback 0 PROGRAM for CD MP3 CD programmes tracks and reviews the program forTUNER programs tuner stations SOURCE selects the respective sound source for CD TUNER FM AM AUX CLOCK TIMER sets the clock or timer function n connects headphones Controls on the remote illustrations on page 4 1 STANDBY ON B switches the system on or to Eco Power standby normal standby with clock display 2 Source selectio...

Page 14: ...r this version Numeric Keypad 0 9 for CD MP3 CD selects a track for playback directly PROGRAM for CD MP3 CD programs tracks and reviews the program forTUNER programs tuner stations DIM turns on or off the dim function for the display screen SLEEP activates deactivates or selects the sleeper time TIMER ON OFF activates deactivates the timer function TIMER sets the timer function CLOCK sets the cloc...

Page 15: ...e sound settings last selected mode source and tuner presets will be retained in the player s memory Power Saving Automatic Standby As a power saving feature the system automatically switches to Standby 30 minutes after a CD has reached the end and no control is operated Adjusting volume and sound 1 Press VOLUME VOL on the remote to decrease or increase the volume Display shows the volume levelVOL...

Page 16: ...n any of the four disc trays NO DISCwill be displayed TOC READ is displayed as the CD player scans the contents of a disc and then the total number of tracks and playing time or the total number of albums and tracks for MP3 disc are shown IMPORTANT This system is designed for regular discs Therefore do not use any accessories such as disc stabiliser rings or disc treatment sheets etc as offered on...

Page 17: ...s will only be displayed once when selected To view again press the DISPLAY button repeatedly to display ALBUM and TITLE alternatively Text display during playback In CD mode Press DISPLAY to see the following information Current track number and elapsed playback time of the current track Current track number and remaining playback time of the current track Current track number and total remaining...

Page 18: ...ray refer to Loading discs 2 Press DISC 1 2 3 4 CD 1 2 3 4 on the remote to select a disc 3 Press PROGRAM to start programming PROG starts flashing 4 Press TITLE í ë í ë on the remote repeatedly to select the desired track For MP3 disc press ALBUM à á ALBUM PRESET on the remote and TITLE í ë í ë on the remote to select the desired album and title for programming 5 Press PROGRAM to store the track ...

Page 19: ...emote briefly and repeatedly until you have found optimal reception Programming radio stations You can store up to a total of 40 radio stations in the memory for each band Automatic programming Automatic programming will start with a chosen preset number From this preset number upwards former programmed radio stations will be overridden 1 Press TITLE í ë ALBUM PRESET on the remote to select the pr...

Page 20: ...r from 1 to 40 to this station 4 Press PROGRAM again to confirm the setting The preset number and the frequency of the preset station are shown 5 Repeat the above four steps to store other stations You can override a preset station by storing another frequency in its place Tuning to preset radio stations Press TITLE í ë ALBUM PRESET on the remote until the desired preset station is displayed Radio...

Page 21: ...setting The system can switch on to CD orTUNER mode automatically at a preset time serving as an alarm to wake you up IMPORTANT Before setting the timer ensure that the clock is set correctly 1 Press and hold CLOCK TIMER on the front panel of the system for more than two seconds or press TIMER on the remote to select timer mode The last timer setting starts flashing The selected source will be lig...

Page 22: ...ivate theTIMER Press TIMER ON OFF on the remote control will appear on the display Sleep timer setting The sleep timer enables the system to switch to standby mode automatically at a preset time 1 Press SLEEP on the remote control repeatedly to select a preset time The selections are as follows time in minutes 15 30 45 60 OFF 15 2 When you reach the desired length of time stop pressing SLEEP is sh...

Page 23: ...ications AMPLIFIER Output power 2 x 15 W RMS 2 x 30 MPO 2 x 10W FTC 1 Signal to noise ratio 62 dBA Frequency response 63 16000 Hz 3 dB Input sensitivity AUX 600mV Impedance loudspeakers 4 Ω Impedance headphones 32 Ω 1000 Ω 0 5W 1 4 Ω 120 12 5 kHz 10 THD CD PLAYER Frequency range 65 16000 Hz Signal to noise ratio 65 dBA Total harmonic distortion 3 Frequency response 63 12500 Hz 3 dB TUNER FM wave r...

Page 24: ...alised CD RW or a correct MP3 CD format disc If the signal is too weak adjust the antenna or connect an external antenna for better reception Increase the distance between the Micro HiFi System and yourTV or VCR Remove and reconnect the AC power plug and switch on the system again Adjust the volume Disconnect the headphones Check that the speakers are connected correctly Check if the stripped spea...

Page 25: ...the qualified wall mounting person only Ask a qualified person to help you with the wall mounting which includes drilling holes on the wall and mounting the set onto wall What s in the supplied mounting kit 1 x template 6 x screws and dowels 2 x speaker brackets What else you ll need Drilling tools e g an electric drill Preparation 1 Find a suitable location for mounting and complete necessary rea...

Page 26: ...brackets on the wall where you want to hang the speakers one by one Drill 2 holes slightly undersized for each bracket to ensure a firm fit 2 Secure each bracket on the wall using 2 dowels and 2 screws supplied 3 Detach the speaker stands in the same way as you do the main unit stand 4 Hang the speakers on the brackets securely Appendix ...

Page 27: ...27 ...

Reviews: