background image

1

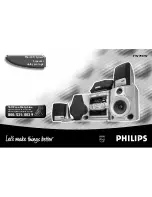
Mini HiFi System

5 speaker

dolby pro logic

FW798W

Toll Free Help Line

Ligne d'assistance en service libre
Linea de ayuada telefónica sin cargo

800-531-0039

Summary of Contents for FW798W

Page 1: ...1 Mini HiFi System 5 speaker dolby pro logic FW798W Toll Free Help Line Ligne d assistance en service libre Linea de ayuada telefónica sin cargo 800 531 0039 ...

Page 2: ...r as the owner of your model t This bolt of lightning indicates uninsulated material within your unit may cause an electrical shock For the safety of everyone in your household please do not remove product covering s The exclamation point calls attention to features for which you should read the enclosed literature closely to prevent operating and maintenance problems WARNING TO PREVENT FIRE OR SH...

Page 3: ...ll the information and special offers for which you qualify plus easy access to accessories from our convenient home shopping network And most importantly you can count on our uncompromising commitment to your total satisfaction All of this is our way of saying welcome and thanks for investing in a Philips product Sincerely Robert Minkhorst President and Chief Executive Officer P S Remember to get...

Page 4: ...arato AVISO RIESGO DE CHOQUE ELÉCTRICO NO ABRIR Atención Para reducir el riesgo de choque elécrico no quite la tapa o el panel posterior En su interior no hay piezas que el usuario pueda reparar Para servicio dirijase a personal calificado WARNING To reduce the risk of fire or electric shock do not expose this appliance to rain or moisture CAUTION Use of controls or adjustments or performance of p...

Page 5: ...5 English Français Español CLASS 1 LASER PRODUCT English 6 Français 36 Español 66 INDEX ...

Page 6: ...tion means of an appliance is not defeated CAUTION To prevent electric shock match the wide blade of this plug to the wide slot and fully insert Do not use this polarized plug with an extension cord receptacle or other outlet unless the blades can be fully inserted to prevent blade exposure 12 Power Cord Protection Power supply cords should be routed so that they are not likely to be walked on or ...

Page 7: ...specifies that the cable ground shall be connected to the grounding system of the building as close to the point of cable entry as practical Ground Clamp Electric Service Equipment Antenna Discharge Unit NEC Section 810 20 Grounding Conductors NEC Section 810 21 Ground Clamps Antenna Lead in Wire Power Service Grounding Electrode System NEC Art 250 Part H Example of Antenna Grounding as per NEC Na...

Page 8: ... may be a delay if the appropriate spare parts and technical manual s are not readily available MAKE SUREYOU KEEP Please keep your sales receipt or other document showing proof of purchase Attach it to this owner s manual and keep both nearby Also keep the original box and packing material in case you need to return your product BEFORE REQUESTING SERVICE Please check your owner s manual before req...

Page 9: ...n a very damp room moisture may condense on the lens of the CD unit inside the system Should this occur the CD player will not operate normally Leave the power on for about one hour with no disc in the system until normal playback is possible Electrostatic discharge may cause unexpected problems See whether these problems disappear if you unplug the AC power cord and plug it in again after a few s...

Page 10: ...M loop antenna far away from the system and adjust its position for the best reception B FM Wire Antenna Connection Connect the supplied FM wire antenna to the FM ANTENNA 300 Ω terminal Adjust the position of the FM antenna for the best reception Outdoor Antenna For better FM stereo reception connect an outdoor FM antenna to the FM ANTENNA 300 Ω terminal using a 300 Ω dipole wire C Speakers Connec...

Page 11: ...io equipment with digital input When connecting the cinch cable make sure it is fully inserted J Connecting other equipment to your system You can connect the audio left and right OUT terminals of a TV VCR Laser Disc player DVD player or CD Recorder to the AUX CDR IN terminals at the rear of the system K AC Power Supply After all other connections have been made connect the AC power cord to the sy...

Page 12: ...used near the system 1 2 meters may interfere with the transmission You have to switch off the active surround speaker before setting the transmitting channel Active surround speakers POWER ON OFF MAINS 1 3 5 7 8 9 10 11 12 8 z GREEN LIGHT If this is on the active speaker is on 9 y RED LIGHT If this is on the active speaker is in standby mode Note If both lights are off the active speaker is switc...

Page 13: ... of the different speakers Follow those instructions to get the most out of your new speakers Setting the input sensitivity A B C Depending on which sound source you use the signals delivered have different strengths If the red light on the front of the transmitter unit starts to blink the incoming signal is too strong This will cause distortions Set the A B C switch to adjust the input sensitivit...

Page 14: ...rom the pair of Left and Right speakers and a Center speaker The surround sound is reproduced by two speakers placed at the rear of the listening area Although the surround sound is monaural single source a pair of speakers is necessary to produce the correct diffused sound This Pro Logic decoder enables you to decode the following modes Dolby Surround Center Phantom Dolby 3 Stereo or normal Stere...

Page 15: ... only requires the left and right speakers Press DPL to select the Stereo mode The message STEREO will be displayed The DPL display panel will light up DOLBY PRO LOGIC S S L R C PRO LOGIC S S L R C PRO LOGIC S S L R C PRO LOGIC S S L R C PRO LOGIC DPL M BALANCE L R 7 Adjust the sound of all the speakers until they are equal When you are satisfied with the setting press TEST TONE again to switch of...

Page 16: ...NDBY ON SIDE A B A REV TUNER AUX PRESET STOP CLEAR SEARCH TUNING PLAY PAUSE PREV NEXT D C 3C H A N G E R MINI HIFI SYSTEM CD1 2 3 CDR FM AM TAPE 1 2 TIMER FRONT 60Hz 500Hz 250Hz 1KHz 2KHz 4KHz 8KHz VOLUME SHUFFLE PROGRAM 2 2 1 3 L R Å á à ë í É Ç TAPE 1 2 AUX TUNER TV CD DBB IS VEC DSC PROGRAM REPEAT SHUFFLE DPL TEST TONE MUTE BALANCE CENTER REAR SIDE PAUSE SLEEP TIMER CD DIRECT VOLUME TV VOL TV V...

Page 17: ...monstration mode PLAY É PAUSEÅ SIDE A B for CD to start or interrupt playback for TAPE to start playback SIDE When playing in Tape 2 mode to change side CONTROLS PREV í NEXT ë PRESET 4 3 for CD to skip to the beginning of the current previous or next track for TUNER to select a preset station in memory VOLUME to adjust the volume DYNAMIC BASS BOOST DBB to select a bass boost level or to switch off...

Page 18: ...stration will remain off until it is switched on again To start the demonstration mode Press and hold STOP CLEAR Ç on the system only for five seconds when the system is in standby mode The demonstration will begin CONTROLS OPERATING THE SYSTEM FM STEREO BACK HSD REPEAT REC LW MW AM T A NEWS SOUND NAVIGATION INCREDIBLE SURROUND DIGITAL SOUND CONTROL DYNAMIC BASS BOOST TAPE CD PROG NEWS RDS DOLBY B...

Page 19: ...er Disc player DVD player or CD Recorder to the AUX CDR IN terminals Sound Control VOLUME ADJUSTMENT Adjust VOLUME to increase or decrease the sound level For Personal Listening Connect the headphones plug to the n socket at the front of the system The speakers will be muted INCREDIBLE SURROUND Normal stereo sound is determined by the distance between the front speakers When Incredible Surround is...

Page 20: ...ound setting level is reached The digital sound setting level will increase or decrease between level 1 and 5 Note For neutral setting select CLASSIC and switch off DBB DYNAMIC BASS BOOST DBB There are three DBB settings to enhance the bass response Press DBB briefly to select a bass boost level The respective DBB level is being encircled and lit BEAT PUNCH or BLAST will be displayed To switch off...

Page 21: ...er two discs while the third inner disc is stopped or is playing 1 Press DISC CHANGE The CD carousel slides out 2 Replace the discs in the left and right disc trays If you press DISC CHANGE again during playback the CD will stop playing The CD carousel will rotate until the inner tray is rotated out and is ready for loading 3 Press OPEN CLOSE to close the CD compartment Warning 1 This system is de...

Page 22: ...Press STOP CLEAR Ç once to end programming The total number of tracks programmed and total playing time appear on the display Notes If the total playing time is more than 99 59 or if one of the programmed tracks has a number greater than 30 then appears in the display instead of the total playing time Note If you press any of the CD DIRECT PLAY buttons the system will play the selected disc or tra...

Page 23: ...peatedly until the display shows the desired frequency and or when the best reception has been obtained Shuffle only on remote control In shuffle mode the system plays all the available discs and their tracks in random order Shuffle may be used also when tracks are programmed To shuffle all the discs and tracks 1 Press SHUFFLE SHUFFLE will be displayed The SHUFFLE flag the disc and the track selec...

Page 24: ... starting automatic programming only the preset numbers 10 to 40 will be programmed Manual programming 1 Press TUNER FM AM 2 Press TUNER FM AM again to select the desired waveband FM or AM 3 Press PROGRAM for less than one second The PROGRAM flag starts flashing The next available preset number will be displayed for selection 4 Press TUNING à or á to tune to the desired frequency If you wish to st...

Page 25: ... SIDE A B again to switch playback between side A and B The BACK or FRONT flag appears on the display depending on the side selected 3b For Tape Deck 2 only Press A REV to select the different type of playback mode see auto reverse playback 4 Press Ç to end playback Note To change side before playback begins use the SIDE button on the remote control Auto Reverse Playback only on tape deck 2 Press ...

Page 26: ... for selection TAPE AUX CDR During playback Press and hold à or á until the desired passage is located During searching the sound is reduced to a low volume When you release à or á the tape continues playing Notes During rewinding or fast forwarding of a tape it is also possible to select another source e g CD TUNER or AUX Before use check and tighten slack tape with a pencil Slack tape may get ja...

Page 27: ...IC BASS BOOST TAPE CD PROG NEWS RDS DOLBY B NR DUB HSD REC SIDE A B A REV TUNER AUX PRESET STOP CLEAR SEARCH TUNING PLAY PAUSE PREV NEXT MINI HIFI SYSTEM CD1 2 3 CDR FM AM TAPE 1 2 FRONT 60Hz 500Hz 250Hz 1KHz 2KHz 4KHz 8KHz VOLUME REC SHUFFLE PROGRAM S S L R C PRO LOGIC CLOCK TIMER STANDBY ON SWITCH OFF DOLBY PRO LOGIC WHEN RECORDING Recording from other sources only on tape deck 2 1 Press TAPE TA...

Page 28: ...e mode the sound is reduced to a low volume You can listen to another source while dubbing RECORDING CD Synchro Start Recording 1 Load a blank tape into tape deck 2 and a disc into a disc tray 2 Press CD to select CD mode You can program the tracks in the order you want them to be recorded see Programming Tracks If you do not the tracks are recorded according to the order on the selected disc 3 Pr...

Page 29: ...ck will begin with the first track of the last selected disc If the CD trays are empty the TUNER will be selected instead If the source selected is TAPE and if the preset time is reached during high speed dubbing the TUNER will be selected instead SHUFFLE PROGRAM FM STEREO BACK HSD REPEAT REC LW MW AM T A NEWS SOUND NAVIGATION INCREDIBLE SURROUND DIGITAL SOUND CONTROL DYNAMIC BASS BOOST TAPE CD PR...

Page 30: ...s sufficent for cleaning the speaker cabinet Do not use cleaning agents containing alcohol spirits ammonia or abrasives Do not leave the speakers for a long time in direct sunlight or other places where high temperatures can occur Do not expose the speakers to humidity or rain To switch off the TIMER 1 Press CLOCK TIMER for more than two seconds 2 Press Ç on the system to cancel the timer The time...

Page 31: ...cy response 40 20 000 Hz 3 dB Input sensitivity AUX CDR In 450 mV Output Speakers Left Right 6 Ω Center Speaker 6 Ω Surround Speakers 3 Ω Headphones 32 Ω 1000 Ω Subwoofer Out 1 5 V 2dB 22 000 Ω Line Out 500 mV 2dB 22 000 Ω Digital Out IEC 958 44 1 kHz Surround Out wireless 350 mV 1 6 Ω 60 Hz 12 5 kHz 10 THD CD PLAYER Number of programmable tracks 40 Frequency response 40 20 000 Hz Signal to noise ...

Page 32: ...ecord playback head Use demagnetizing tape General System does not react when any button is pressed Electrostatic discharge Press STANDBY ON to switch the system off Remove the AC power plug from the wall outlet then reconnect the power plug and switch on the system again No or poor sound Volume is not turned up Adjust the volume The headphones are connected Disconnect the headphones Speakers are ...

Page 33: ...nsmitter and the active speakers are not switched to the same number Set the CHANNEL slides on the transmitter and on both active speakers to the same number Transmitter is connected to the wrong terminal on the appliance Connect the transmitter to the correct terminal on the appliance SURR MULTI switch of the transmitter is in the wrong position Set the SURR MULTI switch to the SURR position The ...

Reviews: