background image

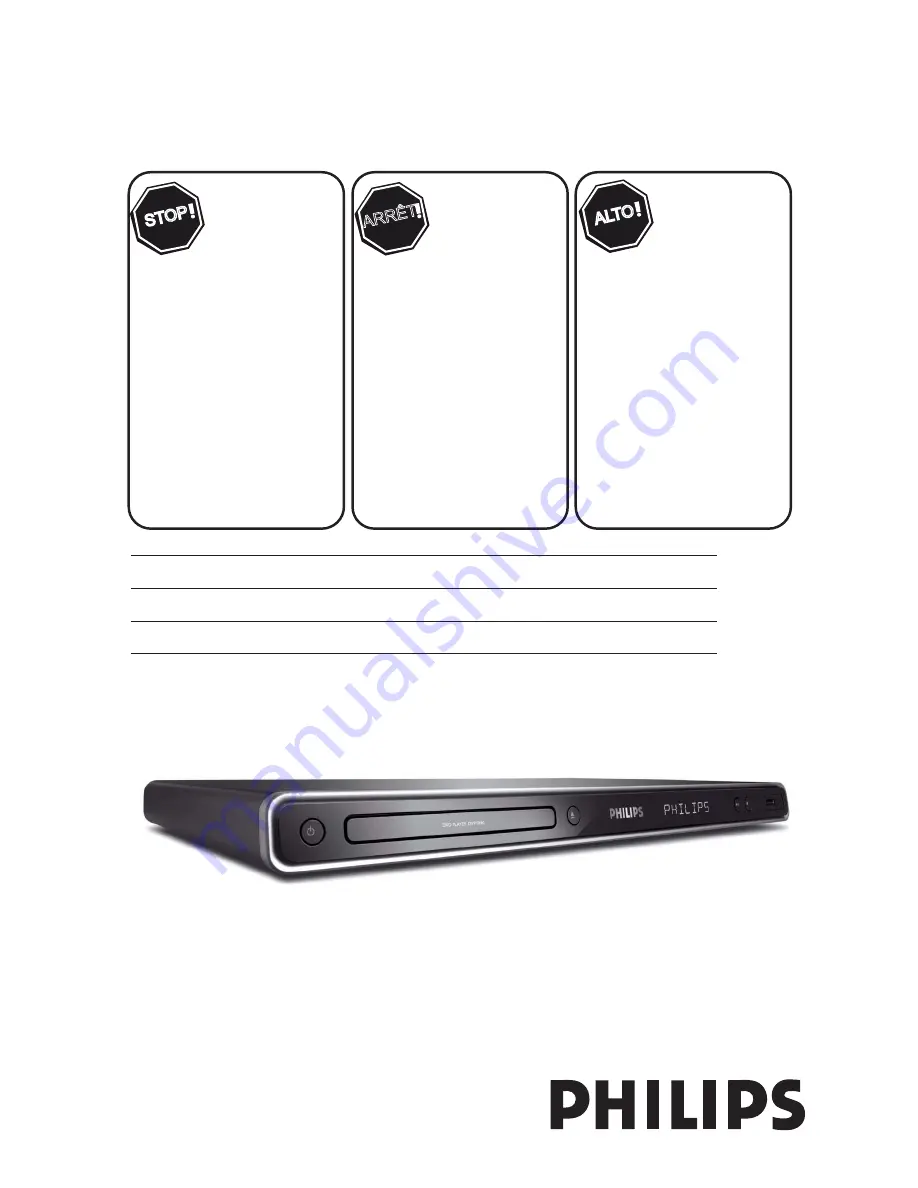
DVP5990
DVP5992

Thank you for choosing Philips.

Need help fast?

Read your Quick Start Guide and/or

User Manual first for quick tips

that make using your Philips product

more enjoyable.

Register your product and 

get support at

www.philips.com/welcome

or call

1 866 771 4018

while with your product

(and Model / Serial number)

STOP

Philips vous remercie de

votre confiance.

Besoin d'une aide

rapide?

Le Guide rapide de début et

Manuel de l'utilisateur regorgent

d'astuces destinées à simplifier

l'utilisation de votre produit Philips.

ou formez le

1 800 661 6162 (Francophone)

1 866 771 4018 (English speaking)

Veillez à avoir votre produit à

portée de main

(et model / serial nombre)

ARRÊ

T

Gracias por escoger Philips

Necesita ayuda

inmediata?

Lea primero la Guía rápida del 

comienzo o el Manual del usuario,
en donde encontrará consejos que

le ayudarán a disfrutar plenamente

de su producto Philips.

o llame al teléfono

1 866 771 4018

y tenga a mano el producto

(y número de model / serial)

ALTO

Enregistrez votre produit et 

accédez à l'assistance sur 

www.philips.com/welcome

Visite 

www.philips.com/welcome 

para registrar su producto y 

obtener información de 

contacto y asistencia.

Register your product and get support at

www.philips.com/welcome

EN

DVD Video Player

      6

FR_CA

Lecteur de DVD

    58

ES_LA

Reproductor de video DVD

   112

Summary of Contents for DVP5990

Page 1: ...2 Francophone 1 866 771 4018 English speaking Veillez à avoir votre produit à portée de main et model serial nombre ARRÊT Gracias por escoger Philips Necesita ayuda inmediata Lea primero la Guía rápida del comienzo o el Manual del usuario en donde encontrará consejos que le ayudarán a disfrutar plenamente de su producto Philips o llame al teléfono 1 866 771 4018 y tenga a mano el producto y número...

Page 2: ...is locat ed on the rear of the cabinet Retain this information for future reference Model No __________________________ Serial No ________________________ Know these safetysymbols This bolt of lightning indicates unin sulated material within your unit may cause an electrical shock For the safety of everyone in your household please do not remove product covering The exclamation point calls atten t...

Page 3: ...l Zc bdk c i Z XVgi VeeVgVijh XdbW cVi dc id Vkd Y c_jgn gdb i e dkZg Jceaj i h VeeVgVijh Yjg c a ic c hidgbh dg l Zc jcjhZY dg adc eZg dYh d i bZ GZ Zg Vaa hZgk X c id fjVa ÃZY hZgk XZ eZghdccZa HZgk X c h gZfj gZY l Zc i Z VeeVgVijh Vh WZZc YVbV ZY c Vcn lVn hjX Vh edlZg hjeean XdgY dg eaj h YVbV ZY a fj Y Vh WZZc he aaZY dg dW_ZXih VkZ VaaZc cid i Z VeeVgVijh i Z VeeVgVijh Vh WZZc ZmedhZY id gV...

Page 4: ...N DANGER Invisible laser radiation when open AVOID DIRECT EXPOSURE TO BEAM or CAUTION Use of controls or adjustments or performance of procedures other than herein may result in hazardous radiation exposure or other unsafe operation ATTENTION L utilisation des commandes ou réglages ou le non respect des procédures ciincluses peuvent se traduire par une exposition dangereuse à l irradiation ATENCIÓ...

Page 5: ...authorized by Macrovision Corporation Reserve engineering or disassembly is prohibited NOTE This equipment has been tested and found to comply with the limits for a Class B digital device pursuant to Part 15 of the FCC Rules These limits are designed to provide reasonable protection against harmful interference in a residential installation This equipment generates uses and can radiate radio frequ...

Page 6: ... Connecting to an Analog Stereo System 17 Connecting to a Digital AV Amplifier Receiver 17 Basic Setup Getting Started 18 21 Finding the correct viewing channel 18 Setting language preferences 18 19 On screen display OSD language 18 Audio Subtitle and Disc Menu language for DVD playback 19 Setting up Progressive Scan feature 20 Setting the EasyLink control 21 Disc Playback Disc Operations 22 33 Pl...

Page 7: ...w function 31 Zooming 31 Flip Rotate picture 31 Playing a MP3 WMA WMV disc 32 Playing music and photo files simultaneously 33 USB Playback USB Operation 34 Create MP3 Create MP3 files 35 Creating audio CD to MP3 format 35 Setup Options Setup Menu Options 36 47 Accessing the setup menu 36 General Setup Page 37 38 Audio Setup Page 39 41 Video Setup Page 42 45 Preference Page 46 47 Others Software up...

Page 8: ...ng Never place any object or items that can damage this unit e g liquid filled objects lighted candles Copyright notice The making of unauthorised copies of copy protected material including computer programmes files broadcasts and sound recordings may be an infringement of copyrights and constitute a criminal offence This unit should not be used for such purposes Accessories supplied 1 remote con...

Page 9: ... the disc tray d Display panel Shows information about the current status of the unit e IR Sensor Point the remote control towards this sensor f V Play Pause Starts pauses playback g Ç Stop Stops playback h USB jack Input for USB flash drive or digital camera Not all brands and models of digital cameras are supported 4 3 1 2 6 7 5 8 ...

Page 10: ...on the TV REPEAT A B Repeat a specific section of a disc d DISPLAY Displays the current status or disc information e Selects movement direction in the menu Press up down for a slow backward or forward search Press left right for fast backward or forward search f SETUP Enters or exits the disc setup menu g V Play Pause Starts or pauses playback hÇ Stop Stops playback i AUDIO CREATE MP3 Selects an a...

Page 11: ... next title chapter track Press and hold this button for fast backward or forward search n USB Switches to USB mode and shows the content of the USB device o VOL Adjusts the TV volume Mute Mutes or restores the volume CH Selects the next or previous TV channel or external input source Video In channel etc These buttons can only be used with Philips TVs p Numeric keypad 0 9 Selects a track or title...

Page 12: ...ol directly at the remote sensor IR on the front panel Note Never place any objects between the remote control and this unit while operating E Select the desired function for example V CAUTION Remove batteries if they are exhausted or if the remote control is not to be used for a long time Never mix batteries old and new or carbon and alkaline etc Batteries contain chemical substances they should ...

Page 13: ...feature for detailed progressive feature setup Basic Connections Step 1 Connecting to television This connection enables you to view the video playback from this unit You only need to choose one of the options below to make the video connection For a standard TV follow option 1 For a progressive scan TV follow option 2 For a HDMI TV follow option 3 For TV with only a single antenna input jack foll...

Page 14: ...g HDMI TV HDCP compliant DVI TV Notes This unit is EasyLink compatible It enables connected EasyLink compatible devices to control each other over HDMI see Setup Menu Options Video Setup HDMI Setup EasyLink for details For HDCP compliant or DVI TV you need a HDMI DVI adaptor cable not supplied to connect the DVI input jack from your TV to the HDMI OUT jack on this unit Helpful Hint The HDMI DVI ca...

Page 15: ...ulator B Connect a RF coaxial cable not supplied from the ANTENNA OUT or TO TV jack on the RF modulator to the antenna input jack on your TV C Connect the Antenna or Cable TV service signal not supplied to the antenna or RF input jack on the RF modulator not supplied It may have been connected to your TV previously Disconnect it from the TV Helpful Hint See your electronics retailer for details ab...

Page 16: ...connected properly plug the AC power cord into the power outlet Never make or change any connections with the power turned on Helpful Hint Refer to the type plate at the rear or bottom of the product for identification and supply ratings Basic Connections continued ...

Page 17: ... Audio Setup Page for optimum audio settings Optional Connections Connecting to a Digital AV Amplifier Receiver You can connect this unit to an AV amplifier receiver in order to enjoy quality sound A Connect a coaxial cable not supplied from the COAXIAL DIGITAL OUT jack on this unit to the digital coaxial input jack of the connected device B For video connection see Basic Connections Step 1 Connec...

Page 18: ...for this unit output Refer to the device user manual for detail Getting Started Setting language preferences The language options are different depending on your country or region It may not correspond to the illustrations shown on the user manual On screen display OSD language Select this to change the language of the On screen display menu of this unit The menu language will remain once you have...

Page 19: ...btitle Chinese Disc Menu French Parental Spanish PBC Portuguese Mp3 Jpeg Nav Polish Password Italian Preference Page Audio Select this to change disc sound track language Subtitle Select this to change the subtitle language Disc Menu Select this to change the language of the disc menu Getting Started continued D Use keys to select a language and press OK to confirm If the language you want is not ...

Page 20: ...rogressive Picture Setting Closed Caption HD JPEG HDMI Setup On Off Video Setup Page E Read the notification message on the TV and confirm your action by selecting the OK in the menu and press OK There will be no picture on your TV at this state until you have turned on the progressive scan mode on your TV F Turn on your TV progressive scan mode refer to your TVs user manual A message appears on t...

Page 21: ...ture select Off To disable System Standby feature select Decline E To exit press SETUP One touch control Notes To enable one touch play function a video disc must be placed in the disc compartment before operation Philips does not guarantee 100 interoperability with all HDMI CEC compliant devices One touch play Press 2 It turns on this unit and start disc play Your TV automatically turns on and sw...

Page 22: ...les on CD R W DVD R W The file extensions has to be AVI MPG or MP4 DivX Certified DivX Ultra Certified Q pel accurate motion compensation Global Motion Compensation GMC playback Region codes for DVD discs DVD discs and players are designed with regional restrictions Before playing a disc make sure the disc is for the same region as your unit The region code for this unit is indicated at the rear p...

Page 23: ...his unit Some discs cannot be played on this unit due to the configuration and characteristics of the disc or due to the condition of recording and authoring software that was used Disc Operations continued Basic playback controls Pausing playback During playback press V To resume playback press V Selecting another track chapter title Press or use the numeric keypad 0 9 to enter a track chapter ti...

Page 24: ...AT on the remote control repeatedly to choose a repeat play mode DVD Chapter repeat current chapter Title repeat current title All repeat entire disc Shuffle random playback Off exit repeat mode VCD SVCD CD Track repeat current track All repeat entire disc Shuffle random playback not applicable for CD Off exit repeat mode JPEG WMA WMV MP3 DivX Single current file once Repeat One repeat current fil...

Page 25: ...e disc To select a playback feature Use keys or numeric keypad 0 9 on the remote control then press OK to start playback To access or exit the menu Press DISC MENU on the remote control Repeating a specific section A B A While playing a disc press REPEAT A B at the start point B Press REPEAT A B again to end the section The section will now repeat continuously C Press REPEAT A B again to resume no...

Page 26: ...hanging subtitle language This operation works only on DVDs with multiple subtitle languages You can change to your desired language during playback Press SUBTITLE repeatedly to select different subtitle languages Playback Control VCD SVCD Playback Control PBC playback allows you to play Video CDs or SVCDs interactively following the menu on the display For VCDs with PBC feature version 2 0 only a...

Page 27: ...ation and press OK to access C Use the numeric keypad 0 9 to input the number time or use keys to make the selection D Press OK to confirm Playback changes to the selected operation Selecting title chapter track This option allows you to skip to a specific title chapter track in the current disc A Move to Title Chapter or Track option in the display menu and press B Use the numeric keypad 0 9 to i...

Page 28: ...different angles A Move to Angle in the display menu and press B Use the numeric keypad 0 9 to input a valid number Playback changes to the selected angle Helpful Hint You can also press ANGLE on the remote control repeatedly to switch to different angles Disc Operations continued Preview function VCD SVCD DVD This function allows you to preview the contents of a VCD SVCD DVD disc A Move to Previe...

Page 29: ...ayback press DISPLAY repeatedly to toggle between different input options Display Descriptions Disc Go To Time search within the disc Track Go To Time search within a track Select Track Select a track number B Use the numeric keypad 0 9 to enter the time where playback should start minutes seconds Playback skips to the selected time Disc Operations continued ...

Page 30: ...l Hints Subtitle files with the following file name extensions srt smi sub ssa txt are supported but do not appear on the file navigation menu The subtitle file name sub has to be saved under the same file name as the movie avi in the same folder Advance features of the DivX Ultra Features Descriptions XSUB subtitles allow multiple language subtitles selection for movie Interactive video menus pro...

Page 31: ...nit can only display digital camera pictures according to the JPEG EXIF format typically used by almost all digital cameras It cannot display Motion JPEG or pictures in formats other than JPEG or sound clips associated with pictures Preview function A During playback press DISPLAY 12 thumbnail pictures will be displayed on the TV B Press to display pictures on the previous next page C Use keys to ...

Page 32: ...ile in the current folder Press N repeatedly to fast backward forward search on the file To select another folder from current disc use keys to navigate back to the root menu D To stop playback press Y Helpful Hints The unit can only support WMV 9 Main Profile Low Level with file extension wmv It does not support playback of Advanced Profile and DRM protected video files You can set to display or ...

Page 33: ...from the disc menu and press OK to start playback C During MP3 WMA playback use keys to select a JPEG file from the disc menu and press OK Slideshow begins and continues till the end of the photo folder or album D To stop simultaneous playback press Y twice Helpful Hints Some files on Kodak or JPEG disc may be distorted during playback due to the configuration and characteristics of the disc Durin...

Page 34: ...ck For more playback information see Playing a DivX disc Playing a JPEG photo disc slide show or Playing a MP3 WMA WMV disc for details E Press Y to stop playback F Press on the remote control to exit from the menu and switch to disc mode You can remove the USB device now Helpful Hints The USB jack does not support the connection of other USB devices except to a USB flash drive The unit can only s...

Page 35: ...Fast Fast speed Bitrate Select a creating bitrate Default setting is 128 kbps CRT ID3 Create ID3 information Yes ID3 information is included in the MP3 file No No ID3 information Device The created MP3 files will save in this USB device F Move to the TRACK menu and use keys to select the track that you want to create then press OK To select all tracks move to Select all in the menu and press OK To...

Page 36: ...are provided in the following pages If the option in the menu is grayed out that means the setting is not available or cannot be changed in the current state E To exit press SETUP Setup Menu Options General Setup Page Disc Lock OSD Language Sleep Lip Sync Volume DivX R VOD Code Auto Standby See General Setup Page on this chapter Analog Output Digital Audio Setup Audio Setup Page HDMI Audio Sound M...

Page 37: ...word Unlock All discs can be played Select the menu language for this unit s on screen display The sleep timer enables this unit to switch to standby mode automatically after the selected a preset time 15 30 45 60 Mins Select the preset minutes for switching this unit to standby mode automatically Off Turn off the sleep mode This feature allows you to adjust the audio delay times if the video play...

Page 38: ... unit to standby mode when it is not in use for a period of time On Switched to 1ow power standby mode when playback has paused or stopped for more than 15 minutes Off Switch off the auto standby mode Philips provides you with the DivX VOD Video On Demand registration code that allows you to rent or purchase videos from DivX VOD service at http www divx com vod All the downloaded videos from DivX ...

Page 39: ...ed device can only output stereo audio through two speakers V SURR For virtual surround sound effects This setting is only required if you have connected the audio output of this unit to an amplifier receiver using the digital output jack Digital Output Off Disable digital audio output Select this if you are using the analog audio jacks to connect this unit to a TV or Stereo system All The connect...

Page 40: ...ing rate the better the sound quality This setting is only required if you are using the HDMI OUT jack to connect your TV or other display device On Enable audio output through HDMI connection Off Disable HDMI audio output In this case an alternative audio connection is required from this unit to your TV Select the type of preset digital sound effect that can match the disc s content or optimize t...

Page 41: ...ion 88 2 kHz X2 Convert the sampling rate of the CDs to twice as high as the original rate 176 4 kHz X4 Convert the sampling rate of the CDs to four times as high as the original rate Note CD upsampling is only possible when playback the music CD in stereo mode This mode optimizes playback of sound at low volume High volume outputs will be softened and low volume outputs will be enhanced to an aud...

Page 42: ...top and bottom 16 9 For wide screen TV frame ratio 16 9 Before enabling the progressive scan feature you must ensure that your TV can accept progressive signals a progressive scan TV is required and that you have connected this unit to your TV using the Y Pb Pr See Getting Started Setting up Progressive Scan feature for details On Turn on progressive scan mode Read the instructions on the TV and c...

Page 43: ...ure is only available if the disc contains of special video signal data It shows sound effects on the screen if your TV supports this feature such as phone ringing and footsteps On Turn on closed caption feature Off Turn off closed caption feature HD JPEG allows you to enjoy untouched and uncompressed pictures at it s original resolution This feature is only applicable if you have connected this u...

Page 44: ...rted by your HDMI DVI TV a black screen will appear In this case wait for 5 seconds for auto recovery or use the composite yellow video cable to connect this unit and your TV Turn on your TV to the correct input channel for the composite video and adjust the resolution setting to 480p 576p Wide Screen Format Select a suitable screen display 4 3 Pillar Box Display the 4 3 picture disc on the wide s...

Page 45: ...operability with all HDMI CEC compliant devices Auto Wake Up TV Press STANDBY button to turn on both your TV and this unit and start video disc play if a video disc is found in the disc tray Your TV automatically switches to the correct video channel To disable this feature select Off System Standby Press STANDBY POWER button to turn off this unit and all the HDMI CEC compliant devices To disable ...

Page 46: ...remote control to enter your six digit password and press OK Notes The ratings are country dependent 1 is considered material that is least offensive and 8 is most offensive To disable parental controls and allow all discs to play select 8 Some DVDs are not encoded with a rating though the movie rating may be printed on the disc cover The rating level feature does not prohibit playback of such dis...

Page 47: ...emote control to enter your existing six digit password at Old Password Note When doing this for the first time or if you forget your existing password enter 136900 3 Enter the new six digit password at New Password 4 Enter the new six digit password again at Confirm PWD 5 Press OK to confirm and exit Select the font type that supports the recorded DivX subtitle Standard Display a standard list of...

Page 48: ...s website A Press çto open the disc tray B Press numeric keypad 55 on the remote control C Write down the file name D Go to www philips com support to check the latest software version available for this unit E If the latest software version is higher than the software version of this unit download it and store onto a CD R F Load the CD R to this unit for upgrade operation Note Never unplug or tur...

Page 49: ...cture distortion may appear This is not a malfunction The disc is dirty Clean the disc Check the audio connections to the connected audio device Make sure that the connected audio device is turned on to the correct input source Set the digital output setting correctly based on the device you connected to this unit See Audio Setup Page Digital Audio Setup for details Problem Solution No power No pi...

Page 50: ...th the playback side facing inwards The DVD R DVD RW CD R must be finalized Make sure the disc is not scratched or warped Check if the disc is defective by trying another disc The disc is of a different region code You may need to enter the password in order to unlock the disc for playback Moisture may have condensed inside this unit Remove the disc and leave this unit turned on for about an hour ...

Page 51: ... not possible to output or copy controlled DVD Audio sources from the HDMI connection Make sure that the audio output setting is not turned off See Setup Menu Options Audio Setup Page HDMI Audio for details HDMI connection can only be made to HDMI equipped devices with HDCP High Bandwidth Digital Content Protection If you wish to connect to a DVI connector equipped with HDCP you need a separate ad...

Page 52: ...ital audio formats such as liquid audio RM RealMedia WAV or non audio files like doc txt pdf are not supported Try to play the problem DivX files on a computer If they do not work the source file appears to be corrupted Try to download the file again from a different source or if you have created the file yourself save it with the correct settings The USB flash drive format is not compatible with ...

Page 53: ... rate fs 32 44 1 48 kHz Analog Sound Stereo Dolby Surround compatible downmix from Dolby Digital multi channel sound AUDIO PERFORMANCE DA Converter 24 bit 192 kHz DVD fs 96 kHz 4 Hz 44 kHz fs 48 kHz 4 Hz 22 kHz SVCD fs 48 kHz 4 Hz 22 kHz fs 44 1kHz 4 Hz 20 kHz CD VCD fs 44 1kHz 4 Hz 20 kHz Signal Noise 1kHz 90 dB Dynamic range 1kHz 80 dB Crosstalk 1kHz 70 dB Distortion noise 1kHz 65 dB MPEG MP3 MP...

Page 54: ...ding MPEG 4 based video compression technology developed by DivX Networks Inc that can shrink digital video to sizes small enough to be transported over the internet while maintaining high visual quality Dolby Digital A surround sound system developed by Dolby Laboratories containing up to six channels of digital audio front left and right surround left and right center and subwoofer EasyLink Phil...

Page 55: ...an The progressive scan displays twice the number of frames per second than in an ordinary TV system It offers higher picture resolution and quality Region code A system allowing discs to be played only in the region designated This unit will only play discs that have compatible region codes You can find the region code of your unit by looking at the product label Some discs are compatible with mo...

Page 56: ...ot apply a to damage caused by accident abuse misuse neglect misapplication or non Philips product b to damage caused by service performed by anyone other than Philips or Philips Authorized Service Location c to a product or a part that has been modified without the written permission of Philips or d if any Philips serial number has been removed or defaced or e product accessories or consumables s...

Page 57: ...7585 Lao 7679 Latina 7665 Latvian 7686 Letzeburgesch 7666 Limburgan Limburger 7673 Lingala 7678 Lithuanian 7684 Luxembourgish 7666 Macedonian 7775 Malagasy 7771 Magyar 7285 Malayalam 7776 Maltese 7784 Manx 7186 Maori 7773 Marathi 7782 Marshallese 7772 Moldavian 7779 Mongolian 7778 Nauru 7865 Navaho Navajo 7886 Ndebele North 7868 Ndebele South 7882 Ndonga 7871 Nederlands 7876 Nepali 7869 Norsk 7879...

Page 58: ...P F USA Inc PO Box 672768 Marietta GA 30006 Meet Philips at the Internet http www philips com welcome Printed in China Sgptt 0910 F7 3 RC1 DVP5990 DVP5992 Français c a h Español CLASS 1 LASER PRODUCT 2009 Koninklijke Philips Electronics N V P F USA Inc PO Box 672768 Marietta GA 30006 ...

Reviews: