background image

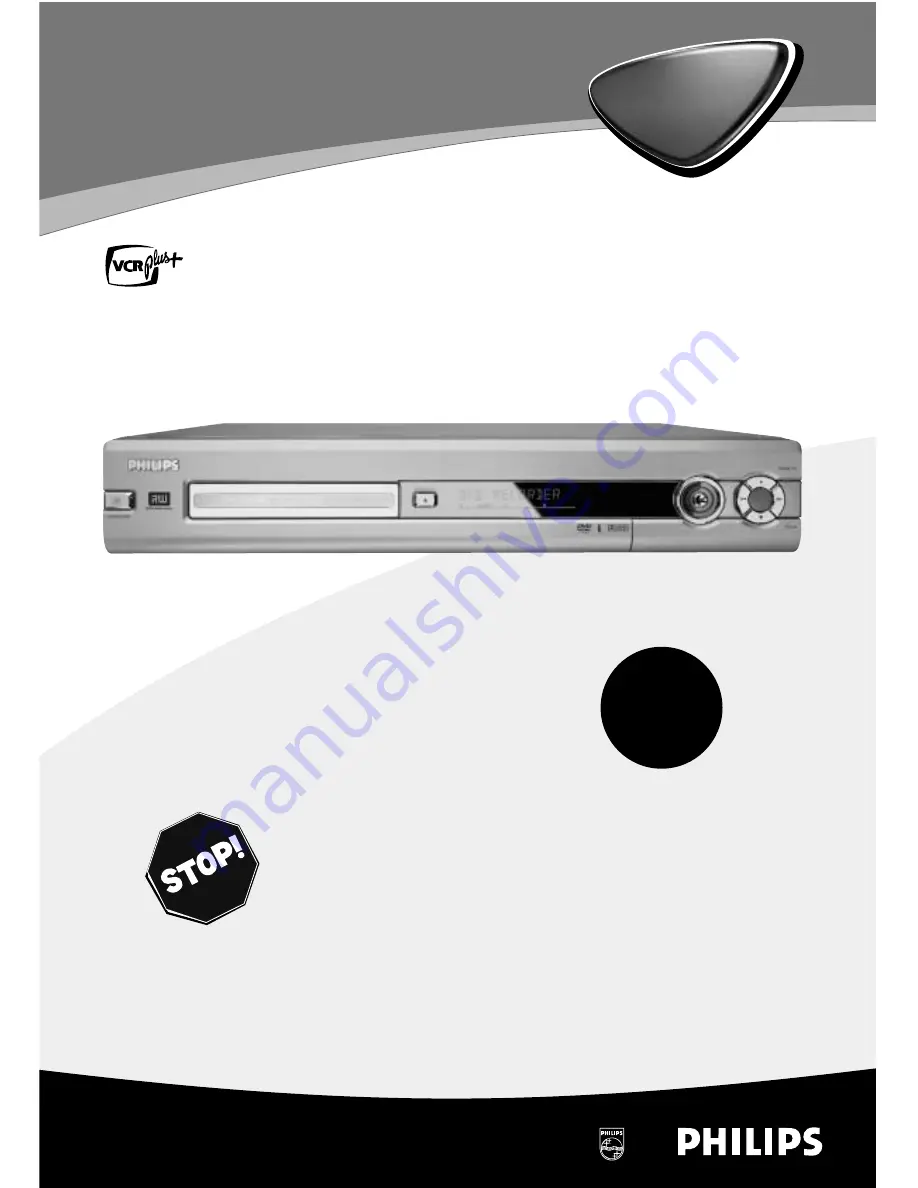
DVDR75

Digital Video Disc Recorder

Owner's Manual

Important!

Return your

Warranty

Registration Card

within 10 days.
See why inside.

®

N

EED

H

ELP

? C

ALL US

!

P

HILIPS REPRESENTATIVES ARE READY TO HELP YOU WITH ANY QUESTIONS ABOUT

YOUR NEW PRODUCT

. W

E CAN GUIDE YOU THROUGH

C

ONNECTIONS

, F

IRST

-

TIME

S

ETUP

,

AND ANY OF THE

F

EATURES

. W

E WANT YOU TO START ENJOYING YOUR

NEW PRODUCT RIGHT AWAY

.

C

ALL US BEFORE YOU CONSIDER

RETURNING THE PRODUCT

.

1-800-531-0039

O

R VISIT US ON THE WEB AT WWW

.

PHILIPS

.

COM

Summary of Contents for DVDR75/001

Page 1: ... CALL US PHILIPS REPRESENTATIVES ARE READY TO HELP YOU WITH ANY QUESTIONS ABOUT YOUR NEW PRODUCT WE CAN GUIDE YOU THROUGH CONNECTIONS FIRST TIME SETUP AND ANY OF THE FEATURES WE WANT YOU TO START ENJOYING YOUR NEW PRODUCT RIGHT AWAY CALL US BEFORE YOU CONSIDER RETURNING THE PRODUCT 1 800 531 0039 OR VISIT US ON THE WEB AT WWW PHILIPS COM ...

Page 2: ...ber to get the most from your PHILIPS prod uct you must return your Warranty Registration Card within 10 days So please mail it to us right now Know these safetysymbols This bolt of lightning indicates uninsulated material within your unit may cause an electrical shock For the safety of everyone in your house hold please do not remove product covering The exclamation point calls attention to featu...

Page 3: ...le 36 Still Picture Frame by Frame Play Sound 37 Slow Motion Searching 38 Time Search Scan 39 Repeat Repeat A B 40 Recording Options One Touch Recording 41 Timer Recording 42 VCR Plus Timer Recording 43 Erasing Timer Recordings 44 Error Messages 45 Record One Channel Watch Another 46 Title Settings Menu 47 Append Recording Chapter Markers 48 Record Settings 49 Editing Editing Disc Information Scre...

Page 4: ...ning the equipment off and on try to cor rect the interference by one or more of the following measures 1 Reorient or relocate the receiving antenna 2 Increase the separation between the equipment and the receiver 3 Connect the equipment into an outlet on a circuit different from that to which the receiver is connected 4 Consult the dealer or an experienced radio TV technician for help WARNING Thi...

Page 5: ...ire to an antenna discharge unit size of grounding conductors location of antenna discharge unit connection to grounding electrodes and requirements for the grounding electrode See figure at right 15 Lightning For added protection for this product during a lightning storm or when it is left unattended and unused for long periods of time unplug it from the wall outlet and dis connect the antenna or...

Page 6: ...ve the local regulations regarding the disposal of packaging materials exhausted batteries and old equipment Safety Information Do not expose the Recorder to excessive moisture rain sand or heat sources Place the DVD Recorder on a firm flat surface Keep the Recorder away from domestic heating equipment and direct sunlight When placing the Recorder in a cabinet allow about one inch of space all aro...

Page 7: ...r is compatible with NTSC and PAL Make sure the Discs you play were recorded in NTSC or PAL The color system of the DVD may appear on the DVD or its case However when playing a PAL Disc the Recorder must be connected to a PAL compatible TV using either the S VIDEO Y C or COMPONENT VIDEO Y PB PR jacks of the Recorder The Recorder s VIDEO CVBS jack does not send a clear PAL signal If a PAL Disc is c...

Page 8: ...se menus and not all DVDs have menus But if the DVD has a menu access it by pressing the DISC MENU button on the remote control See page 34 DVD Recorder Menus Some instructions explain how to use the Recorder s System Menu or Menu Bars to set up features of the Recorder or the Disc You get to the System Menu by pressing SYSTEM MENU on the remote control See page 30 Even if a feature is set up in t...

Page 9: ...to the correct Video In channel or channel 3 This is channel 3 if you connect the Recorder directly to a TV only as shown on page 10 Otherwise Video In channels may be called AUX or AUXILIARY IN AUDIO VIDEO or A V IN EXT1 or EXT2 or External In etc These channels often are near TV channel zero 0 Or your TV remote con trol may have a button or switch that lets you choose the Video In channel direct...

Page 10: ...hilips DVD background picture or the Initial Setup screen on the TV The Initial Setup screen will appear the first time you turn on the Recorder Go to page 18 to continue You may need to use channel 4 at your TV instead While IS TV ON C03 appears on the Recorder s display panel press and hold the Number 4 button on the Recorder s remote control After several seconds the display will change to IS T...

Page 11: ...ellite Receiver s output channel if you used an RF coaxial cable to connect the Cable Box Satellite Receiver to the DVD Recorder Set the Recorder to EXT 2 if you used those jacks on the Recorder to connect to the Cable Box Satellite Receiver 6 Turn on theTV and the Cable Box Satellite Receiver Set theTV to channel 3 to receive the picture from the Recorder if you used the RF coaxial cable as shown...

Page 12: ...r Connect the power cords of the Recorder and theTV to a power outlet 6 Press STANDBY ON y y on the front of the Recorder to turn it on If IS TV ON CO3 appears on the display panel you need to turn on your TV and set it to the correct ComponentVideo In channel See next step This is part of the Initial Setup of the Recorder You cannot see the Initial Setup screens until you turn on the TV and have ...

Page 13: ...pears on the display panel you need to turn on your TV and set it to the S Video In channel See next step This is part of the Initial Setup of the DVD Recorder You cannot see the Initial Setup screens until you turn on the TV and have it on the correct S Video In channel 7 Turn on theTV power Set theTV to the S Video In channel This is not channel 3 or 4 when you are using S Video Your TV remote m...

Page 14: ... TV s Antenna In jack may be labelled RF In Antenna In or 75 ohm Check your TV manual for details 5 Connect the supplied power cord to the MAINS AC Power jack on the rear of the DVD Recorder Connect the power cords of the Recorder and theTV to a power outlet 6 Press STANDBY ON y y on the front of the Recorder to turn it on If IS TV ON CO3 appears on the display panel you need to turn on your TV an...

Page 15: ...l for details 5 Connect the supplied power cord to the MAINS AC Power jack on the rear of the DVD Recorder Connect the power cords of the Recorder Stereo andTV to a power outlet 6 Turn on the Stereo and set it to the correct Audio In channel or sound source Refer to the Stereo owner s manual 7 Press STANDBY ON y y on the front of the Recorder to turn it on If IS TV ON CO3 appears on the display pa...

Page 16: ...r of the DVD Recorder Connect the power cords of the Recorder Stereo andTV to a power outlet 6 Turn on the Stereo power and set your Stereo to the correct Digital Audio In channel or sound source Refer to the Stereo owner s manual 7 Press STANDBY ON y y on the front of the Recorder to turn it on If IS TV ON CO3 appears on the display panel you need to turn on your TV and set it to the correctVideo...

Page 17: ... a connection from pages 10 16 2 To access the AUDIO VIDEO IN jacks on the front of the Recorder flip down the door that covers the jacks 3 Connect a video cable to the VIDEO OUT jack of your Camcorder and to the yellow CAM 1 VIDEO IN jack on the front of the DVD Recorder Use an RCA style video cable which is usually marked with yellow One video cable is supplied with the Recorder 4 Connect audio ...

Page 18: ...s INSTALL RECORDER FIRST will show on the display panel If the setup screens do not appear your Recorder has been set up previously You can change setup items later See the pages listed at each step below for each feature 1 Press STANDBYy y to turn on the Recorder 2 The Menu Language screen will appear first Press CH 8 or CH 9 to choose English Espanol or Francais then press the OK button The DVD ...

Page 19: ...If you have connected an Antenna or Cable TV signal to the Recorder s ANTENNA jack press OK If you have not connected the Antenna or Cable TV signal take a moment now to do so After the Antenna Cable TV signal is con nected press OK See pages 10 16 To reset TV channels later or to add delete new channel choices later see page 26 7 Searching for TV channels will appear along with a scale showing ch...

Page 20: ...u want to play then press OK If the Disc is blank the display will show EMPTY DISC 5 To stop play at any time press STOP C If Auto resume is On DVD play will resume at the same point the next time you play the DVD To play the DVD from its beginning restart play from the DVD s Disc menu If Auto resume is Off Resume will appear in the top left corner when you play the DVD later While Resume appears ...

Page 21: ...CAM channel Choose the output channel of your Cable Box Satellite Receiver or the jacks to which you connected the Cable Box Satellite Receiver Then change TV channels at the Cable Box Satellite Receiver See page 11 6 Press REC OTR I to record the selected channel Recording will begin after a few seconds The Disc has to prepare for recording A red light will encircle the Record I button on the fro...

Page 22: ...ct a different audio language during DVD play Multiple languages must be available on the DVD See page 35 STOP C Button Press to stop Disc play or recording Press and hold the STOP C button for three seconds to open or close the Recorder s disc tray STANDBY y y Button Press to turn on or off the power of the DVD Recorder PLAY MODE Button Press during Disc play to choose a Repeat Shuffle or Scan mo...

Page 23: ...ty of the recording and the amount length of time you can record on a Disc See page 49 Number Buttons Press to select numbered items in a menu See page 20 Press during play to select a Chapter within the currentTitle orTrack for play See page 34 Press to select aTV channel while in Monitor mode CLEAR Button Press to delete the last entry of informa tion into a menu Press to clear a timer recording...

Page 24: ...page 21 Display Panel Information about the current status of the Recorder or Discs appears here This may include the current time the elapsed playing time of a Disc or the current TV channel Remote sensor The sensor receives signals from the remote Point the remote here not at your TV when using the remote control to operate the DVD Recorder CAM Camera jacks DV digital video S VIDEO VIDEO and AUD...

Page 25: ...acks Do not touch the inner pins of the jacks Electrostatic dis charge may damage the unit permanently You only need one audio and one video connection to a TV You might not use all the jacks Helpful Hints IN EXT 1 jacks Use these jacks to receive picture and sound from other equipment AUDIO L R left right Connect audio cables here and to the AUDIO OUT jacks of other equipment See page 17 COMPONEN...

Page 26: ...want to add or delete then press or to choose Add or Delete for that channel Press OK to store your choice Stored will appear briefly in the lower left corner of the menu Repeat step 6 as often as necessary to add or delete all the channels you want 7 Press SYSTEM MENU repeatedly to remove all the menus when you are finished 1 2 3 4 5 6 7 8 0 9 MONITOR TV DVD T C PLAY MODE REC MODE SELECT OK DISC ...

Page 27: ...o enter the cor responding Channel number from your TV guide list If you use the Number buttons enter the channel number as a three digit number For example for channel 18 press 0 1 8 Refer to the list from your local newspaper or TV guide for the VCR Plus channels and corresponding TV channel numbers for your area These are the numbers you will enter as the Channel number as you complete the char...

Page 28: ...ly to choose your time zone then press OK The menu will pause while storing the setting If you want the Recorder to use the time zone from which your PBS station broadcasts choose Auto If your PBS station broadcasts from a different time zone than the one in which you live be sure to select your time zone 8 Press SYSTEM MENU repeatedly to remove the menus Press STANDBY y y to turn off the Recorder...

Page 29: ... choose the current year Press OK The menu will pause while storing the setting 8 Press CH 9 to choose Month then press or to choose the current month Press OK The menu will pause while storing the setting 9 Press CH 9 to choose Date then press or to choose the current date Press OK The menu will pause while storing the setting 10Press CH 9 to choose Daylight Saving then press or to choose On or O...

Page 30: ...o Language If the current DVD has multiple audio soundtracks choose one here For example some DVDs let you play the movie in other languages or hear a director s commentary during playback Check the Disc case for details See page 35 Subtitle Language If the current Disc has subtitles select a language here See page 35 Angle Select to choose a different camera angle if available during DVD play See...

Page 31: ...tedly See page 40 Repeat Title The current Title will play repeatedly See page 40 Repeat Chapter The current Chapter will play repeatedly See page 40 Repeat A Point A for Repeat A B play back has been entered See page 40 Repeat A B A segment of the Disc will play repeatedly See page 40 Angle Multiple angles are available See page 36 Locked The current Disc is Locked and cannot play See pages 54 58...

Page 32: ...CH 8 or CH 9 to move to other recordings Press STOP C to move directly to the first recording on the Disc Disc Bar The Disc Bar appears at the right of the Index Picture Screen This overviews all recordings on the Disc as well as any empty spaces On the Disc Bar the Disc Pointer indicates your current position on the Disc You can press and hold the Next G button to scroll through the Disc Bar Movi...

Page 33: ... Press MONITOR to go into Monitor mode and view TV channels or play video from other equipment Current TV channel No signal Channel is not Copy protected signal receivable or no equipment is connected to the designated jack Timer Information box Displays the start time or date of the next scheduled timer recording and appears in the Index Picture Screen You cannot remove it from the Index Picture ...

Page 34: ...set up all the features you want or until play begins 1 2 3 4 5 6 7 8 0 9 MONITOR TV DVD T C PLAY MODE REC MODE SELECT OK DISC SYSTEM MENU CH CH TIMER FSS RETURN CLEAR TV VOLUME PLAY STANDBY Chapter Track Selection 1 Press Next G during play to go to the next Track Chapter Press Previous j once to return to the beginning of the current Track Chapter Press Previous j repeatedly to step back to prev...

Page 35: ...e different languages available Or press CH 8 or CH 9 repeatedly to see the different languages The language you select will be audible in a few seconds the Menu Bar will disappear The languages or options may be abbreviated For example French may be Fr See your Disc case for details on available audio fea tures and explanations W X Y Z a 1 2 1en 1en K L no off L F RW play 0 29 40 0 00 07 s B W X ...

Page 36: ...reen pan press OK Then press CH 8 CH 9 or to move the picture 5 Press OK again to see the still zoomed picture without the Menu Bar 6 To return to regular play press PLAY 7 Press SYSTEM MENU to remove the Menu Bar again Camera Angle Some DVDs include scenes recorded from different angles To watch seg ments from a different angle follow these steps 1 During play press SYSTEM MENU so Menu Bar 1 appe...

Page 37: ...MENU so Menu Bar 1 appears at the top of the TV screen 2 Press repeatedly to select d in Menu Bar 2 3 Press CH 8 or CH 9 to select st stereo or sur Dolby Surround Select st stereo to hear stereo sound This will work with equip ment that has right and left audio jacks usually red and white Select sur Dolby Surround if your audio equipment is compatible with Dolby Surround If it is usually a Dolby P...

Page 38: ...top playback 1 2 3 4 5 6 7 8 0 9 I I MONITOR TV DVD T C PLAY MODE REC MODE SELECT OK DISC SYSTEM MENU CH CH TIMER FSS RETURN CLEAR TV VOLUME PLAY STOP AUDIO PAUSE REC OTR STANDBY 38 Slow Motion Searching Slow Motion To use the Menu Bar for slow motion follow these steps 1 During Disc play press SYSTEM MENU so Menu Bar 1 appears at the top of the TV screen 2 Press repeatedly to select H Slow motion...

Page 39: ...er or Disc If it is not play will not begin after you press OK at step 5 Instead a space in the time edit box will blink Or play may begin at the wrong time Refer to the Status box to see the time available then enter a correct time 5 Press OK After a few seconds play will resume at the point you selected 6 Press SYSTEM MENU to remove the Menu Bar Scan Scanning plays the first 10 seconds of each C...

Page 40: ... CH CH TIMER FSS RETURN CLEAR TV VOLUME PLAY STANDBY 1 2 3 4 5 6 7 8 0 9 I I MONITOR TV DVD T C PLAY MODE REC MODE SELECT OK DISC SYSTEM MENU CH CH TIMER FSS RETURN CLEAR TV VOLUME PLAY STOP AUDIO PAUSE REC OTR STANDBY Repeat A B You also may set the DVD Recorder to play only a specific portion of a Title Chapter or Track repeatedly Follow these steps 1 Press PLAY to start Disc play 2 When the Dis...

Page 41: ...old REC OTR I for about two seconds or until SAFE REC appears on the Recorder s display panel Then press REC OTR I repeatedly to choose the time length you want for your recording If you press REC OTR I only once or press and hold REC OTR I one time and immediately start Safe Record the Recorder will record the current channel or source until the end of the Disc is reached The Recorder will turn o...

Page 42: ...bottom of the screen This is a reminder to turn off the DVD Recorder so the recording can occur 10PressTIMER to remove the menu 11Put a recordable DVD RW or DVD R in the Recorder Press STANDBY y y to turn off the Recorder For the timer recording the Recorder will turn itself on record then turn itself off when finished A red light will encircle the Record I button on the Recorder during recording ...

Page 43: ...on seems correct and com plete press OK Stored will appear at the bottom of the screen briefly The Timer menu will reappear 5 Press TIMER to remove the menu 6 Put a recordable DVD RW or DVD R in the Recorder Press STANDBY y y to turn off the Recorder at least five minutes before the timer recording is set to begin The Recorder must be off in order for the timer recording to occur If you plan to pl...

Page 44: ...pear at the bottom of the screen briefly then the Timer List will reappear If you decide not to erase the timer recording press the TIMER button The Timer List will reappear 6 Press TIMER repeatedly to remove the menus 1 2 3 4 5 6 7 8 0 9 I I MONITOR TV DVD T C PLAY MODE REC MODE SELECT OK DISC SYSTEM MENU CH CH TIMER FSS RETURN CLEAR TV VOLUME PLAY STOP AUDIO PAUSE REC OTR STANDBY 2 3 5 4 1 6 Pre...

Page 45: ...ecording You can only use daily programming for recordings that will occur Monday Tuesday Wednesday Thursday or Friday Clock not set You cannot access the Timer menu if the clock is not set See pages 28 29 to set the clock This message also may appear if you turn on the Recorder while the PBS channel is downloading the time Turn off the Recorder for a few minutes to let the download finish Data er...

Page 46: ...at the TV See page 23 4 To return to the recording use the TV remote control to reselect the TV channel at which you usually view the DVD Recorder This may be a Video In channel or channel 3 or 4 depending on how you connected the DVD Recorder to the TV The channel being recorded will appear on the TV screen 5 Press TV DVD on the Recorder s remote control to return the Recorder to DVD position DVD...

Page 47: ...rm that you really want to erase the entire Title Press OK again to start erasing the Title Erasing title will appear during erasure When erasing is complete the Index Picture Screen will reappear If you do not want to erase the Title press to return to the Title Settings menu instead 5 Press to return to the Index Picture Screen if necessary 1 2 3 4 5 6 7 8 0 9 I I MONITOR TV DVD T C PLAY MODE RE...

Page 48: ... STOP C to stop recording 1 2 3 4 5 6 7 8 0 9 I I MONITOR TV DVD T C PLAY MODE REC MODE SELECT OK DISC SYSTEM MENU CH CH TIMER FSS RETURN CLEAR TV VOLUME PLAY STOP AUDIO PAUSE REC OTR STANDBY 5 4 2 3 6 1 4 Chapter Markers Chapter Markers let you move easily through recordings by pressing Next G or Previous j to select the next marker during play This lets you access specific points on a DVD RW DVD...

Page 49: ... choose Stndrd Standard or Sport then press OK Select Sport to improve recording of images that move quickly Otherwise choose Stndrd These settings are available when using M3 M4 or M6 as the Record mode 5 Press SYSTEM MENU repeatedly to remove the menus 1 2 3 4 5 6 7 8 0 9 I I MONITOR TV DVD T C PLAY MODE REC MODE SELECT OK DISC SYSTEM MENU CH CH TIMER FSS RETURN CLEAR TV VOLUME PLAY STOP AUDIO P...

Page 50: ...ress OK again to begin erasing If you decide not to erase the Disc press Erasing disc appears until erasing is com plete When the Disc is erased the Index Picture Screen will reap pear showing the free space on the Disc Make edits compatible DVD RW only Press OK This will take XX and Press OK to confirm will appear to indicate how long the action will take Press OK again Working and a progress per...

Page 51: ...m ple if you do not want to watch certain scenes for example com mercials insert Chapter markers at the beginning and end of the scene then hide that segment by choosing Hidden The picture may freeze briefly between scenes during playback but you will not see the hidden content If you select Delete chapter marker press OK Deleting marker will appear This deletes the Chapter marker at the begin nin...

Page 52: ...ant it before you finalize it 1 Press SYSTEM MENU Press to select in the top left corner of the menu bar at the top of the TV screen 2 Press CH 9 repeatedly to select in the second screen then press 3 Press CH 9 repeatedly to select Finalize disc Finalize disc appears in the menu only when an unfinalized DVD R is in the Recorder 4 Press OK Finalizing will appear in the menu The process may take a ...

Page 53: ...ayback Control Some Video CDs have interactive menus that customize play If the Video CD has Playback Control PBC follow these steps to turn it on or off 1 Press SYSTEM MENU Press to select in the top left corner of the Menu Bar at the top of the TV screen 2 Press CH 9 repeatedly to select in the second screen then press 3 Press CH 9 repeatedly to select PBC then press It appears in the menu only ...

Page 54: ... same code exactly twice This will set your code for the first time 4 Press CH 9 repeatedly to select Change code then press 5 Press four Number buttons to enter the new four digit code Then enter it again exactly to confirm it The Access control menu will reappear 6 Press SYSTEM MENU to remove the menu 1 2 3 4 5 6 7 8 0 9 I I MONITOR TV DVD T C PLAY MODE REC MODE SELECT OK DISC SYSTEM MENU CH CH ...

Page 55: ...u chose Locked unauthorized or Locked Discs will not play unless you enter your four digit code 6 Press SYSTEM MENU to remove the menus 1 2 3 4 5 6 7 8 0 9 I I MONITOR TV DVD T C PLAY MODE REC MODE SELECT OK DISC SYSTEM MENU CH CH TIMER FSS RETURN CLEAR TV VOLUME PLAY STOP AUDIO PAUSE REC OTR STANDBY W X Y Z a 1 2 1en off no off s Child lock LB Access control Parental level Auto resume Change coun...

Page 56: ... select Play once or Play always Then press the Number buttons to enter your four digit code If you select Play Once the Disc will play one time If you stop play back open the Disc tray or turn off the Recorder s power the Access Control screen will reappear when you try to play the Disc again If you select Play Always the Disc will play even if you turn off the DVD Recorder open the disc tray or ...

Page 57: ...e entire Disc will play Choose a rating between 1 8 and scenes with the same rating or lower will play Higher rated scenes will not play unless an alterna tive scene is available on the Disc The alternative must have the same rating or a lower one If no suitable alternative is found play will stop Enter the four digit code to play the Disc 6 Press SYSTEM MENU to remove the menus W X Y Z a 1 2 1en ...

Page 58: ...of the menu bar at the top of the TV screen 2 Press CH 9 repeatedly to select in the second screen then press Access control will be highlighted 3 Press again then press the Number buttons to enter your four digit code Child lock will be highlighted 4 Press CH 9repeatedly to select Change country Press 5 Press CH 8 or CH 9to select the country for which the Disc is coded then press OK 6 Press SYST...

Page 59: ...hoose Demo mode if you want the Recorder s features to scroll across the display panel when the power is off Or choose Off if you want the time to appear on the display panel when the power is off If you selected Display press CH 8 or CH 9 to choose Bright Dimmed or Off then press OK This adjusts the bright ness of the display panel text on the front of the Recorder Choose the brightness you prefe...

Page 60: ...lack level shift press CH 8 or CH 9 to select On or Off then press OK Set Black level shift to On to improve the color contrast and brighten the picture of NTSC Discs If you selectedVideo shift press or to center the pic ture horizontally on your TV screen or shift the video When you are satisfied with the position of the picture press OK If you selectedVideo output press SELECT repeatedly to choo...

Page 61: ...ct G then press 3 Digital output will be selected Press 4 Press CH 8 or CH 9 to select Off PCM only or All then press OK Select All if you connected the Recorder s Coaxial DIGITAL AUDIO OUT jack to a Stereo that has a built in multi channel decoder See page 16 Select Off if you did not use the Coaxial DIGITAL AUDIO OUT jack Select PCM only if you used the Recorder s Coaxial DIGITAL AUDIO OUT jack ...

Page 62: ...llow the steps below to choose the Analog Output setting that is most compatible with your Stereo or TV 1 Press SYSTEM MENU Press to select in the top left corner of the menu bar at the top of the TV screen 2 Press CH 9 repeatedly to select G then press 3 Press CH 9 to select Analog output then press 4 Press CH 8 or CH 9 to select Stereo or Surround then press OK Select Stereo to hear sound from t...

Page 63: ...tereo or second audio SAP will appear on the display panel when this fea ture is active and available When you play the recording you can play only in the audio you recorded For example if you recorded in SAP you can play the record ing only in SAP If you selected Subtitle press CH 8 or CH 9 to choose the language in which you want the Subtitles then press OK The subtitles will be in that language...

Page 64: ...e 5 Press SYSTEM MENU to remove the menus W X Y Z a 1 2 1en off no off Remote control Remote control used s DVD Player L DVD Recorder Night Mode Turn on Night Mode to improve the sound during low volume playback 1 Press SYSTEM MENU Press to select in the top left corner of the menu bar at the top of the TV screen 2 Press CH 9 repeatedly to select G then press 3 Press CH 9 repeatedly to select Nigh...

Page 65: ...D Recordable These Discs can be recorded and finalized only once DVD RW DVD ReWritable These Discs can be recorded on repeatedly Index Picture Screen A screen that gives an overview of a DVD RW or DVD R An Index Picture represents each recording Letterbox Widescreen format a TV aspect ratio setting 4 3 Displays the video in full width with black bars at the top and bottom of the TV screen This for...

Page 66: ...VD Recorder to the Stereo s PHONO IN jack Do not connect the Recorder s Coaxial DIGITAL AUDIO OUT jack to an analog jack red or white on the Stereo No sound Check the audio connections See pages 9 16 Remember you only need one audio connection See page 9 to see what connection best suits your situation Make sure cables are connected firmly to all equipment Select another channel sound source or Au...

Page 67: ...ir a recording will not occur Check the Disc If the Disc is bad scratched warped etc or if the Recorder cannot read the Disc you cannot record NO DISC may appear on the display A timer recording may not occur if the power fails during the time the recording was supposed to occur If you adjust the clock after you set a timer recording reset the timer recording Another DVD Player shows the Index Pic...

Page 68: ...counter will reach zero 0 when the test is finished 3 Momentarily FAIL or PASS will appear on the display panel If FAIL appears your Recorder needs repair Contact the Philips Customer Care Center for the Authorized Service Center nearest you If PASS appears the Recorder apparently has no failure The problem may be incorrect inter pretation of the operating instructions a wrong Disc in use or incor...

Page 69: ...0 7 Vpp into 75 Ohm PR 0 7 Vpp into 75 Ohm CABINET Dimensions w x h x d 17 x 3 x 13 inches Net weight 8 8 lbs AUDIO FORMAT Compressed digital Play Recording Dolby Digital AC 3 Multi channel 2 channel 16 bit fs 48 kHz DTS Multi channel MPEG1 2 channel MPEG2 Multi channel Uncompressed digital SPDIF Sony Philips Digital Interface PCM 2 channel 16 20 24 bit fs 48 96 kHz AUDIO PERFORMANCE DA Converter ...

Page 70: ...ribute the product the local Philips ser vice organization will attempt to provide service although there may be a delay if the appropriate spare parts and tech nical manual s are not readily available MAKE SUREYOU KEEP Please keep your sales receipt or other document showing proof of purchase Attach it to the owner s manual and keep both nearby Also keep the original box and packing material in c...

Page 71: ...rs 30 menu language 18 63 menus 8 monitor button 21 22 41 name 47 new index picture 51 next G button 23 34 38 night mode 64 ntsc 7 number buttons 23 ok button 22 on screen symbols 31 one touch recording 41 open close A button 24 pal 7 panscan 60 parental level 57 pause k button 23 37 pbc 53 pbs channel 28 pc connections 17 pcm only 61 picture settings 60 play always 56 play button 20 23 24 play fu...

Page 72: ...IB8451E001 3139 246 1336 1 This owner s manual is made of recyclable materials Remember to recycle ...

Reviews: