background image

Getting Started

DigiTrak XT Recorder Instructions for Use

1-11

Step Two — Entering the Patient’s Name (Optional)

To enter patient information

1

With the dual dock connected to the PC, insert the recorder into the dual dock.

2

Launch the Holter program.

3

Click 

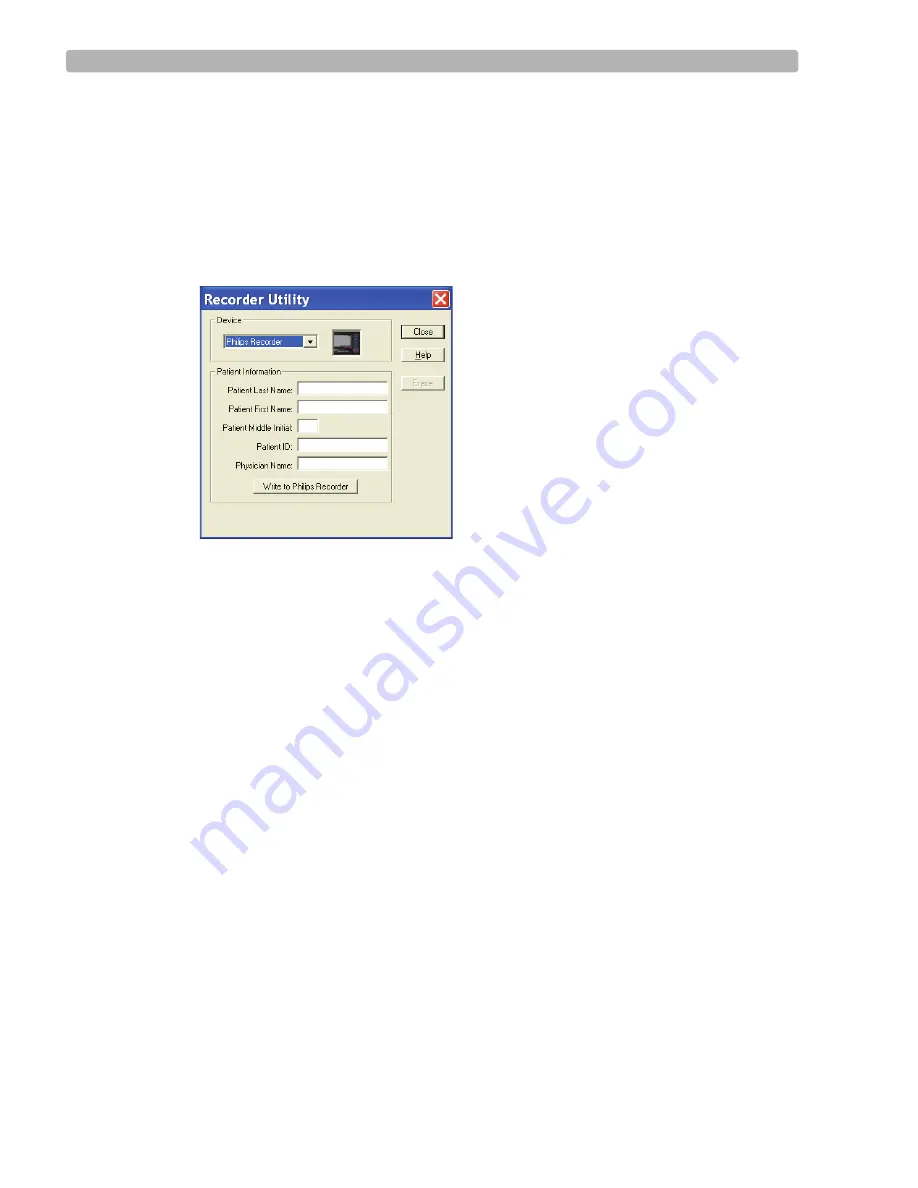
Tools > Recorder Utility

.

The Recorder Utility screen appears.

4

Select 

Philips Recorders

 as the type.

5

Enter the patient information (last name, first name, ID, and so on).

6

Click 

Write to Philips Recorders

.

After several seconds the data is written to the recorder. 

N O T E

All patient information is displayed on the recorder if you entered it using the Holter 2.9 software. 
Although previous versions of software store the patient information and display it on the report, only 
the patient name is displayed on the recorder screen.

7

Remove the recorder from the dual dock.

Summary of Contents for DigiTrak XT

Page 1: ...DigiTrak XT Recorder INSTRUCTIONS FOR USE ...

Page 2: ...d in accordance with the instructions for use Limitations of Warranty The foregoing warranty shall not apply to defects resulting from Improper or inadequate maintenance by buyer Buyer supplied software or interfacing Unauthorized modification or misuse Operation outside of the environmental specifications for the product Improper site preparation Improper maintenance Excluded from this warranty a...

Page 3: ...Recorder Display 1 7 Using the Belt Clip 1 8 Getting Started 1 8 Setting the Recorder Date and Time First Time Use only 1 8 Step One Connecting the Recorder to the Dual Dock 1 9 Step Two Entering the Patient s Name Optional 1 11 Step Three Preparing the Patient 1 12 Before You Begin 1 12 Step Four Checking the Lead Status and ECG Signal Quality 1 14 During a Recording 1 15 Step Five Removing and S...

Page 4: ...or Use Chapter 2 Service and Specifications Service Maintenance 2 1 Cleaning 2 1 Troubleshooting 2 2 Calling for Service 2 4 Supplies Parts 2 7 Replacing the Battery Door 2 8 Specifications 2 9 Appendix A Electromagnetic Compatibility EMC A 1 Index ...

Page 5: ...oad and analyze the recorded ECG data Indications for Use The DigiTrak XT Holter recorder is intended for patients requiring ambulatory Holter monitoring CAUTION The DigiTrak XT recorder is not intended for use on infants weighing under 10 kilograms 22 pounds as required by IEC 60601 2 47 2001 Such monitoring is most frequently used for the indications below Evaluation of symptoms suggesting arrhy...

Page 6: ...B equipment contains adequate protection against electrical shock particularly regarding the allowable leakage current and the reliability of protective earth connection when present Dispose of in accordance with the requirements of your country Date of manufacture China ROHS SN Serial number REF Not shown catalogue number is DigiTrak XT The 5 digit Global Medical Device Nomenclature GMDN code adj...

Page 7: ...The DigiTrak XT recorder should not be immersed in water The patient should be instructed not to wear the recorder in the shower or bath The DigiTrak XT recorder supports an Early Out feature that allows a trained individual to stop a recording before the selected recording time has elapsed Failure to follow this procedure may result in the loss of all recorded ECG data This product consists of de...

Page 8: ...t in use Delete patient data from the recorder after it has been downloaded to Holter See Deleting Patient Information on page 1 19 for instructions Conventions This book uses the following text conventions WARNING Warning statements describe conditions or actions that can result in personal injury or loss of life CAUTION Caution statements describe conditions or actions that can result in damage ...

Page 9: ...upportability enhancements featuring easy removal and replacement procedures Security enhancements featuring soft encryption of data Encryption is the conversion of data into a form that cannot be understood by unauthorized people Decrypting is the process of converting encrypted data back into its original form so that it can be understood This chapter provides the following information System Re...

Page 10: ... Patient Event Marker 1 18 Stopping a Recording Early Out 1 19 Deleting Patient Information 1 19 System Requirements Your Holter software must be at Version 2 9 or later in order to perform multi day scans greater than 48 hours See the Philips Holter Installation and Configuration Guide or the Philips Holter Instructions for Use for a complete list of system requirements Using the DigiTrak XT with...

Page 11: ...t yet have an InCenter user ID register by clicking the link Click here for access to software updates and documentation for cardiology products on the right side of the page A user ID and password will be sent to the email address you provide enabling access to documentation updates as well as free software updates when available Accessing Documentation at the Philips Website Documentation for ma...

Page 12: ...inted with the DigiTrak XT The DigiTrak XT s buttons and connections are carefully organized to facilitate ease of use Front View Reference Letter Description A Belt clip B Recorder screen C Up arrow D Enter Event button E Down arrow F Right arrow G Left arrow H Patient cable C D E F G H A B ...

Page 13: ...rak XT Recorder Instructions for Use 1 5 Back View Reference Letter Description A Battery door B Battery compartment C Model number D Recorder configuration label E Patient cable F Service tag G Serial number H Recorder tether slot A B C D E F G H ...

Page 14: ...n and you can adjust the threshold for pacemaker spike detection Settings Determines the following recorder settings Record Time 24 48 72 96 168 hr Pacer Detector ON or OFF The default for pacer detect is OFF It must be turned ON for each procedure in which it will be used or saved as part of the default settings Language English Spanish German French Italian Portuguese Swedish Dutch Contrast 20 9...

Page 15: ...ion Start After configuring or reviewing all the settings select the start screen and press Enter This will start the recording During recording the recorder displays the current time and time remaining to record Table 1 1 DigiTrak XT recorder functions continued Screen Description Button Description Left arrow Moves from one tab to the next and changes values within a field Right arrow Moves from...

Page 16: ...n effect any custom settings are lost In addition the previous ECG recording is erased Setting the Recorder Date and Time First Time Use only To set the recorder date and time NOTE Use an alkaline battery for recordings up to 96 hours Use a lithium battery for recordings over 96 hours 1 Make sure a fresh AAA battery is in the recorder NOTE The recorder enters sleep mode after 20 seconds of no acti...

Page 17: ...Ensure the dual dock is connected to the Holter computer before proceeding To connect the dual dock to the Holter computer X Plug the USB connector from the dual dock into an available USB port on the computer To connect the recorder to the dual dock 1 Remove the battery from the recorder 2 Remove the belt clip or pouch from the recorder if attached CAUTION Do not insert the recorder at a high ang...

Page 18: ...ily snap into place remove the recorder and try installing it again USB connected appears on the recorder display when the recorder is properly connected and the Preloading message appears in the bottom right of the Holter application window if there is data on the recorder The dual dock is now operational and you are ready to enter or download data ...

Page 19: ...ppears 4 Select Philips Recorders as the type 5 Enter the patient information last name first name ID and so on 6 Click Write to Philips Recorders After several seconds the data is written to the recorder NOTE All patient information is displayed on the recorder if you entered it using the Holter 2 9 software Although previous versions of software store the patient information and display it on th...

Page 20: ...hieving good electrode to skin contact If necessary clip hair at the electrode sites or shave sites if needed Clean and abrade the skin at the electrode site Wash skin thoroughly with soap and water Dry the electrode sites briskly to increase capillary blood flow in the tissues and to remove oil and skin cells 2 Attach the leads to the electrodes before placing them on the patient 3 Apply the elec...

Page 21: ...intercostal space midsternum A Black Same level as E and I left mid axillary line S Red Top of sternum manubrium I White Same level as E and A right mid axillary line Ground Green Center of sternum or any convenient location Raw Channel Description Channel 1 E to S Similar to MC V1 anterior view of the heart Channel 2 A to S Similar to MC V6 a lateral view of the heart useful for ST measurements C...

Page 22: ...rder connector Press firmly to be sure it is seated properly 3 Press any button to enter the menus If you entered patient information it is displayed Otherwise the Leads Status tab appears NOTE All patient information is displayed on the recorder if you entered it using the Holter 2 9 software Although previous versions of software store the patient information and display it on the report only th...

Page 23: ...Proceed to Settings and select Pacer Detector if applicable 11 Use the arrow buttons to select the Start tab and press Enter to start the recording NOTE If you do not start the recording the DigiTrak XT automatically starts recording after 30 minutes provided there are no lead errors During a Recording During a recording the DigiTrak XT displays the date current time and the time remaining for the...

Page 24: ...the recorder to the Holter system as described on page 1 9 Be sure to remove the battery from the recorder The text Preloading appears in the lower right hand corner of the PC screen CAUTION Do not disconnect the recorder whenever the Preloading message is flashing To cancel the Preloading sequence double click the Preloading message and select Abort If you accidentally unplug the recorder during ...

Page 25: ...setting as part of the default settings Pacemaker Threshold The DigiTrak XT recorder allows the user to adjust the threshold for pacemaker spike detection The purpose of this feature is to raise or lower the threshold of the recorder detection in order to eliminate spikes from a rate modulated pacemaker or lower the threshold to allow for better detection of bipolar pacemakers NOTE Adjusting the t...

Page 26: ...ction channel and there are pacer pulses in the ECG channel increase the sensitivity of the pacemaker threshold indicator 7 Use the arrow buttons to select the Start tab and press Enter to start the recording when you are satisfied that the correct pacer pulses are being detected Registering an Event Patient Event Marker The DigiTrak XT allows an easy way for the patient to record events Once an e...

Page 27: ...y to enter the recorder s menus the message Initializing Card briefly appears on the screen When this occurs the MMC card is erased and any previous patient and ECG information is deleted from the recorder If you are storing the recorder after downloading data you can use the following procedure to erase the patient data To delete patient information 1 Remove the battery from the recorder 2 Insert...

Page 28: ......

Page 29: ...ications 2 9 Service Maintenance Cleaning To clean the recorder 1 Remove the battery from the recorder 2 Dampen a soft cloth with a mild detergent and water mixture 3 Clean the recorder lead wires and belt clip 4 Remove any adhesives from the patient lead wires with an adhesive tape remover solution or swab with mild detergent CAUTION Do not use alcohol or acetone to clean the lead wires as this c...

Page 30: ... by pressing a key when inserting the battery Try reinserting the battery making sure you are not pressing any of the recorder keys If the message persists call for service Battery does not last 24 or 48 hours Ensure a new alkaline battery is being used Do not use rechargeable batteries Battery does not last 96 or 168 hours Ensure a new lithium battery is being used Do not use rechargeable batteri...

Page 31: ...le lead set is connected Replace the lead set Leads Error Ensure you have prepared the patient s skin according to the instructions on page 1 12 Ensure the electrodes are properly applied to the patient Ensure the leads are making proper contact with the electrodes Ensure patient cable lead set is connected Replace the lead set Defective Card message Remove and reinsert battery Note that when you ...

Page 32: ...der is placed in dual dock Ensure that the DigiTrak XT cable or dual dock cable is firmly connected to a USB port on the PC Ensure that the PC is powered on Replace the DigiTrak XT cable or dual dock Remove battery from the recorder before placing it in the dual dock Table 2 1 Troubleshooting continued Symptom Solution North America Response Centers Country Telephone Number Canada 800 323 2280 Mex...

Page 33: ...4 Germany 0180 5 47 5000 Greece MCR Response Center located in The Netherlands 31 40 2781619 Hungary MCR Response Center located in The Netherlands 31 40 2781619 Italy 0800 232100 Netherlands 31 40 27 211 27 Norway 47 800 84 080 Poland MCR Response Center located in The Netherlands 31 40 2781619 Rumania MCR Response Center located in The Netherlands 31 40 2781619 Russia MCR Response Center located...

Page 34: ...400 China 800 810 0038 Hong Kong 852 2876 7578 India 1600 112 444 Indonesia 62 21 7910040 ext 8610 Japan 81 0120 095 205 Korea 82 02 3445 9010 Malaysia 1800 886 188 New Zealand 0800 251 400 Philippines 63 2 8162617 ext 875 Singapore 1800 Philips Taiwan 0800 005 616 Thailand 02 614 3569 Africa and Middle East Country Telephone Number All countries MCR Response Center located in The Netherlands 31 4...

Page 35: ...dical Systems Dealer or Distributor or visit our website at http shop medical philips com NOTE For better protection of the recorder we strongly recommend using the DTXT pouch part 989803153451 The pouch provides extra protection and cushioning The following part can be ordered by contacting the Response Center Description Philips P N Solid Gel ECG Electrode 5 pouch M4612A Adult Plastic Tape ECG e...

Page 36: ... underneath the recorder tether slot 4 With the battery door fully closed slide the door to release the locking mechanism 5 Lift the battery door at it s widest point When installed correctly the battery door automatically pivots about the tether The battery door will hang off the end of the recorder Description Philips P N USB Dual Dock 989803157511 Patient diaries 200 M4701A 24 inch patient cabl...

Page 37: ... Memory Capacity Recording time 256 MB up to 96 hours 512 MB up to 168 hours 7 days Recording type MMC Physical Dimensions 91 44 x 55 88 x 19 05mm 3 60 x 2 20 x 0 75inches Weight with battery 70 g 2 5 oz Enclosure Molded plastic UL 94V 2 Operating position Any orientation Electrical Gain setting 0 5X 1X 2X Connector 11 pin Patient cable 5 lead Environmental Operating temperature 0 C to 45 C 32 F t...

Page 38: ...tions 2 10 DigiTrak XT Recorder Instructions for Use Battery Type Life 1 AAA Alkaline IEC LR3 for recordings up to 96 hours 1 AAA Lithium for recordings longer than 96 hours 168 hours 7 days Warranty 24 months from shipment ...

Page 39: ...ith protection against spraying water The recorder will withstand exposure to liquids such as rain or splashing water The recorder will not survive full immersion or liquid spray under pressure The patient should be instructed not to wear the recorder in the shower or bath Internally powered equipment Mode of operation continuous operation The DigiTrak XT recorder should not be used adjacent to or...

Page 40: ... intended for use in the electromagnetic environment specified in the table below The customer or the user of the DigiTrak XT recorder should assure that it is used in such an environment Emissions Test Compliance Electromagnetic Environment guidance RF Emissions CISPR 11 Group 1 The DigiTrak XT recorder uses RF energy only for its internal function Therefore its RF emissions are very low and are ...

Page 41: ...e at least 30 Electrical Fast transient burst IEC 61000 4 4 2 kV for power supply line 1 kV for input output lines N A The DigiTrak XT does not have AC or DC power lines Surge IEC 61000 4 5 1 kV differential mode 2 kV common mode N A The DigiTrak XT does not have AC or DC power lines Voltage dips shortinterruptions and voltage variations on power supply input lines IEC 61000 4 11 5 UT 95 dip in UT...

Page 42: ...ded separation distance calculated from the equation applicable to the frequency of the transmitter Recommended separation distance D 1 2vP D 1 2vP 80 MHz to 800 MHz D 2 3vP 800 MHz to 2 5 GHz Where P is the maximum output power rating of the transmitter in watts W according to the transmitter manufacturer and D is the recommended separation distance in metres m Field strengths from fixed RF trans...

Page 43: ...iTrak XT recorder is intended for use in the electromagnetic environment in which radiated RF disturbances are controlled The customer or the user of the DigiTrak XT recorder can help to prevent electromagnetic interference by maintaining a minimum distance between portable and mobile RF communications equipment transmitters and the DigiTrak XT recorder as recommended below according to the maximu...

Page 44: ......

Page 45: ...ignal quality 1 14 cleaning 2 1 connecting to the dual dock 1 9 downloading data 1 16 entering patient information 1 11 features 1 1 front view 1 4 functions 1 6 indications for use i v navigating the display 1 7 safety information i v saving default settings 1 17 security recommendations i viii serial number 1 5 service tag 1 5 setting the recorder date and time 1 8 shutting down 1 16 specificati...

Page 46: ......

Page 47: ......

Page 48: ...Copyright 2008 Koninklijke Philips Electronics N V All rights are reserved Printed in the U S A January 2008 Edition 1 453564064111 453564064111 1 ...

Reviews: