background image

Register your product and get support at

www.philips.com/welcome

EN

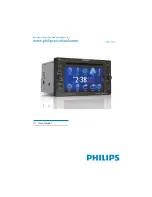
User manual

CID3280

Summary of Contents for CID3280

Page 1: ...Register your product and get support at www philips com welcome EN User manual CID3280 ...

Page 2: ... audio mode 17 Select subtitle language 18 Rotate pictures 18 Zoom 18 Select slide show duration 18 7 Play with Bluetooth device 19 Pair the Bluetooth enabled devices 19 Make a call 19 Receive call 20 Listen to music from Bluetooth device 20 Adjust Bluetooth settings 21 8 Adjust sound 21 Adjust volume 21 Mute 21 Select preset equalizer 21 Adjut fader balance 22 Set Dynamic Bass Boost DBB 22 9 Adju...

Page 3: ...ranty does not apply Use of controls or adjustments or performance of procedures other than herein may result in hazardous radiation exposure or other unsafe operation This unit is designed for negative ground earth 12 V DC operation only 7R UHGXFH WKH ULVN RI WUDIÀF DFFLGHQW GR no watch video during driving To ensure safe driving adjust the volume to a safe and comfortable level Improper fuses ca...

Page 4: ...e into three materials cardboard box polystyrene foam buffer and polyethylene bags protective foam sheet Your system consists of materials which can be recycled and reused if disassembled by a specialized company Please observe the local regulations regarding the disposal of packaging materials exhausted batteries and old equipment Q FKDQJHV RU PRGLÀFDWLRQV PDGH WR WKLV device that are not express...

Page 5: ... the contents of your package a Main unit b Trim plate c Power cable d AV out cable e CMMB cable f Audio cable g I O wire h GPS antenna i Screen cleaning cloth j Printing material include User manual Quick start guide a b c d e g f h j i EN ...

Page 6: ...er phone Dial number m RESET Reset the unit when it hangs up Overview of the main unit a Disc slot b Eject disc c MAP Open the cover and insert remove the GPS map card d TUNE SELECT Skip to the previous or next title chapter or track Search backward forward at different speeds RQÀUP DQ HQWU RU VHOHFWLRQ Start pause or resume play e USB socket f Built in microphone g DISP Adjust screen brightness c...

Page 7: ...f your car has different requirements make the corresponding adjustment If you have any questions regarding installation kits consult your Philips car audio dealer Caution This unit is designed for negative ground earth 12 V DC operation only Always install this unit in the car dashboard Other locations can be dangerous as the rear of the unit heats up during use To avoid short circuit before you ...

Page 8: ...ack ON reconnect the red leads crosswise to the yellow ones Yellow Gearbox White Radio antenna Yellow Rear display Rear display Yellow White White black Grey Grey black Grey black Green Purple Purple Green black Purple black Green black Purple black Green Grey White black AV system AV system AUX AUX Optional accessory GPS antenna Radio antenna White Red Green Blue Red Pink Green white White brown ...

Page 9: ... OSD language is changed to the selected language immediately To turn off the unit press for 3 seconds Set date and time 1 Touch the upper left corner to display main menu If necessary touch in the middle right side of the screen to display the 2nd screen 2 Touch Settings 2 Slide the unit into the dashboard until a click sound is heard 3 Attach the trim plate 4 Reconnect the negative terminal of t...

Page 10: ...st color 1 Press DISP 2 Press or to select an item 3 Touch to adjust the value 4 Press DISP WR FRQÀUP To turn on off the screen press and hold DISP 3 Touch Time The date time setup menu is displayed Set date 1 Touch Date 2 Touch on the displayed date information A submenu is displayed 3 Touch or to set year month and day Set clock mode 1 Touch Clock mode 2 Touch on 12Hr or 24Hr to select clock mod...

Page 11: ...to the map card slot 5 Turn on the car audio The map upgrades in a few minutes 4 Use map Note You may need to upgrade the map before using it see Upgrade the map section 1 Touch the upper left corner to display home menu 2 Touch Navigation The navigation menu is displayed in a few seconds 3 Refer to the map manual in Chinese to operate the navigation tool Tip You can press NAVI to enter exit the n...

Page 12: ...ons with strong and weak signals can be broadcast Store radio stations in memory You can store up to 6 stations in each band Store stations manually 1 Tune to the station 2 Touch 5 Listen to radio Tune to a radio station 1 Touch the upper left corner to display home menu 2 Touch Radio Band and frequency information is displayed 3 Touch on FM or AM to select band FM band options FM1 FM2 FM3 AM band...

Page 13: ...ejected the unit switches to the previous source if connected Otherwise the unit switches to Radio mode automatically 3 Touch Save 4 Touch one of the channels 01 to 06 to save the select band Store stations automatically You can search for a station with intro search which broadcasts a 10 second preview of each detected radio station 1 Select band 2 Touch 3 Touch Search Auto search starts The six ...

Page 14: ...ÀOHV 1 Touch to return to playlist menu 2 Touch WR GLVSOD DOO DYDLODEOH YLGHR ÀOH folders 3 Touch a folder then touch or to VHOHFW D ÀOH 4 Touch to start play Connect USB device Note Ensure that the device contains playable content 1 Open the USB door 2 Insert the USB device to the USB socket Play starts automatically Note To remove the USB device switch to disc UDGLR RU RWKHU VRXUFH ÀUVW E ng li ...

Page 15: ...h to return to playlist menu 2 Touch to display all available audio folders 3 Touch a folder then touch or to VHOHFW D ÀOH 4 Touch to start play RU SLFWXUH ÀOHV 1 Touch to return to playlist menu 2 Touch to display all available picture folders 3 Touch a folder then touch or to select a picture 4 Touch to view the picture Search within a title folder Search by step 1 Touch anywhere except for the ...

Page 16: ...elect Repeat chapter play the current chapter repeatedly Repeat title play all chapters in the title repeatedly Repeat off cancel repeat play ForVCD karaoke or audio CD 1 Touch anywhere except for the upper left corner to display menu on the screen if necessary 2 Touch to select Repeat play the current track repeatedly Repeat off cancel repeat play RU 03 0 ÀOHV 1 Touch anywhere except for the uppe...

Page 17: ...re except for the upper left corner to display menu on the screen if necessary 2 Touch to display the 2nd menu 3 Touch repeatedly to select a language The selected language is displayed Rotate pictures 1 When you view pictures touch anywhere except for the upper left corner to display menu on the screen if necessary 2 Touch repeatedly to rotate the picture Zoom You can zoom in pictures for a close...

Page 18: ...the unit You can also listen to music from a Bluetooth enabled device Pair the Bluetooth enabled devices To connect your Bluetooth device to the unit you need to pair the device to the unit Pairing needs only to be done once You can pair up to eight devices Note The operational range between this unit and a Bluetooth device is approximately 10 meters 30 feet Before you connect a Bluetooth device t...

Page 19: ...on the device 1 Pair the phone with the unit 2 Touch the upper left corner to return to home menu 3 Touch Bluetooth The Bluetooth menu is displayed 4 Start play music via device If your device support AVRCP 1 Touch 2 Touch to start play 5 Touch or to search for phone number from the following list Missed calls Received calls Dialed calls Phone book Sim phone book Local phone book Or touch to dial ...

Page 20: ...ept for the upper left corner to display menu on the screen if necessary Adjust Bluetooth settings You can change below Bluetooth settings Bluetooth to turn on or off Bluetooth function Auto connect to turn on or off Auto connect function Auto answer to turn on or off Auto answer function Pairing code to set paring code Phone Book Sync to synchronize phone book 1 In Bluetooth menu touch The option...

Page 21: ...ing is displayed 3 Touch or to select an EQ 4 Touch or to adjust below settings Bass bass range 14 to 14 Mid middle range 14 to 14 Treb treble range 14 to 14 LPH ORZ SDVV ÀOWHU UDQJH 100 200 MPF PLGGOH SDVV ÀOWHU UDQJH 1K 1 5K 2 5K HPF KLJK SDVV ÀOWHU UDQJH 12 5K 15K 17 5K 5 Touch to restore the above settings into default settings 6 Press to exit Adjut fader balance You can also adjust the front ...

Page 22: ...after last operation 20s Turn on the screen saver automatically 20 seconds after last operation Auto dimmer On Turn on the screen dim automatically 5 seconds after last operation Off Never turn the screen dim Key color Red Button backlight turns red Blue Button backlight turns blue 9 Adjust settings Display system setup menu 1 Touch the upper left corner to display main menu 2 Touch Settings The s...

Page 23: ...s at a low volume without disturbing others Off The DRC function is off 3 Press to exit Adjust video settings 1 Touch Video General settings Options Description Beep On Turn on the beep sound Each time you press a button the unit beeps Off Turn off the beep sound WallPaper Blue Turn background color to blue Black Turn background color to black Red Turn background color to red F1 Select F1 picture ...

Page 24: ...eo settings Options Description Aspect ratio Full For widescreen display Normal For normal display Video input Auto The correct format is set automatically Select this option if you are not sure which format should be selected NTSC Used in the United States Canada Japan Mexico the Philippines South Korea Taiwan and some other countries PAL Used in China India Singapore the western European countri...

Page 25: ... 1 Touch DVD rating Adjust language settings 1 Touch Language 2 Touch an option repeatedly to select Language settings Options Description OSD English Select on screen display language ࡩ ᇓ໗ ᐥᦥɻʼ DVD audio English Select DVD audio language Options available are depends on DVD disc ࡩ ᇓ໗ ᐥᦥɻʼ DVD subtitle English Select DVD subtitle language Options available are depends on DVD disc ࡩ ᇓ໗ ᐥᦥɻʼ Off Tur...

Page 26: ...om the dashboard 2 Touch an option repeatedly to select DVD rating Options Description Set password Set password to restrict the play of discs The default password is 0000 Rating level Kid safe Acceptable for children G Acceptable for general viewers PG Parental guidance suggested PG 13 Unsuitable for children under age 13 PG R Recommend parents to restrict children under 17 to view R Restricted R...

Page 27: ...s W x H x D 178 x 100 x 160 mm Weight main unit 2 5 kg Disc player System DVD CD audio MP3 system Frequency response 20 Hz 20k Hz Signal noise ratio 75dB Total harmonic distortion Less than 1 Channel separation 55dB Video signal format NTSC only Video output 1 0 2V Replace fuse If there is no power the fuse may be damaged and need to be replaced 1 Take out the unit from dashboard 2 Check the elect...

Page 28: ...OHV LQ RVVOHVV IRUPDW Supported MP3 disc format ISO9660 Joliet Maximum title number 512 depending RQ ÀOH QDPH OHQJWK Maximum album number 255 Supported sampling frequencies 32 kHz 44 1kHz 48 kHz Supported Bit rates 32 320 Kbps and variable bit rate Tuner Frequency range FM 87 5 108 0 MHz Europe Frequency range AM MW 522 1620 KHz Europe Usable sensitivity FM 5 uV Usable sensitivity AM MW 50 uV LCD ...

Page 29: ...Fuse has been damaged Replace fuse No sound Volume is too low Adjust volume Speaker connections is incorrect Disc does not play Disc is upside down Ensure the printed side is upwards Disc is dirty Clean the disc with a clean soft lint free cloth Wipe the disc outwards from the center Disc is defective Try another disc incompatible disc is used Try another disc Disc rating exceeds the restrict sett...

Page 30: ...ons with stronger signals Check the connection of the car antenna Change broadcast from stereo to mono Preset stations lost Battery cable is not correctly connected Connect the battery cable to the terminal that is always live Fuse is broken The Fuse type is incorrect Replace it with a 15A fuse Speaker wire or power wire is grounded Check the connections Display show ERR 12 USB data error Check th...

Page 31: ...Picture Experts Group 1 or MPEG 1 Audio Layer 3 With the MP3 format one CD R or CD RW can contain about 10 times more data than a regular CD R Region code A system that allows discs to be played only in the region designated This unit only plays discs that have compatible region codes You FDQ ÀQG WKH UHJLRQ FRGH RI RXU XQLW RQ WKH product label Some discs are compatible with more than one region o...

Page 32: ... 2010 Koninklijke Philips Electronics N V All rights reserved Document order number CID3280_93_UM_V2 0 ...

Reviews: