iXM-MV150F/iXM-MV100 Camera Systems
Installation Guide
Page 24
6.1.1
Using XQD Cards
It is important to follow a few simple guidelines to help avoid loss of data when working with XQD cards, card
readers and digital cameras. Phase One recommends that you test-drive all new XQD cards.
To avoid possible malfunctions, perform an initial test to verify that the capture files are stored properly on
the XQD card and can be accessed by your computer. Note
:
XQD cards are manufactured by external
suppliers; Phase One is not responsible for defective cards.
Inserting and Ejecting an XQD Card
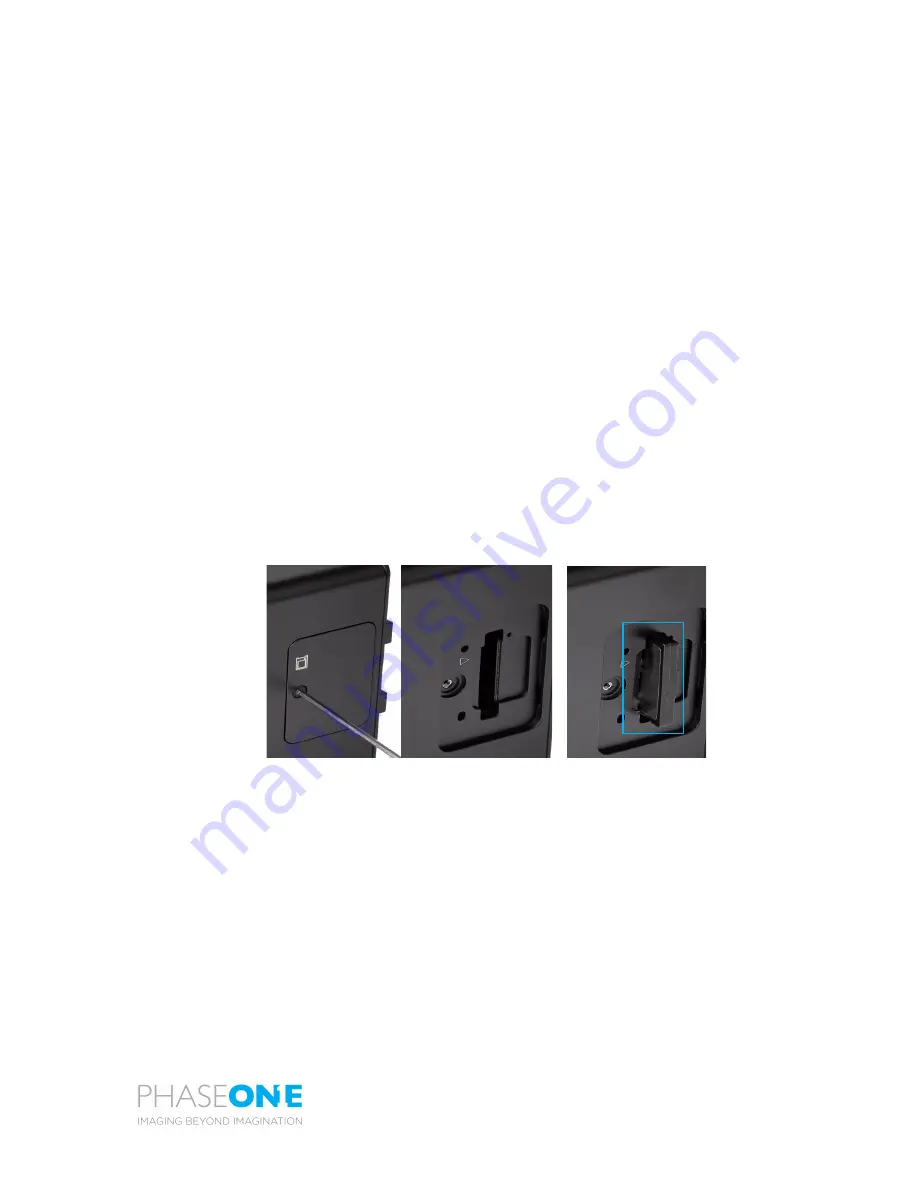
Insert the XQD card into the slot that is underneath the cover on the left hand side of the iXM-MV150F/iXM-
MV100 camera.
To insert an XQD card:
1. Use a 2mm hex key, unscrew the screw on the XQD cover and remove it.
2. Insert a XQD card with the brand label facing the backside of the camera as shown in the image
below.
3. Replace the XQD cover and tighten the XQD card screw – apply 15cNm torque.
To eject the XQD card:
4. Always make sure the camera is in “Low power mode” before ejecting the XQD card to prevent data
corruption. "Low power mode" setting value can be found under camera settings (default is 10
seconds)
5. Push the XQD card further inside and release. The XQD card ejects.
Formatting an XQD card
To use Capture One to format the XQD card:
•
In the Capture One camera menu, go to Camera Settings | Format Storage Card.
•
Click the drop down arrow and select Format.
•
Wait until the value of the setting returns to “None”.
Note
: Before shooting for the 1st time, verify that local storage is set to:
•
“
Enable
” to force use of the XQD card (camera will not capture if no XQD card is
installed), or to:
•
“
If
Present
” to save to an XQD card if one is present.


