Page 6
LaNdiNG Gear iNstaLLatiON
yOu'LL Need tHe fOLLOWiNG Parts frOM tHe Kit:
yOu'LL Need tHe fOLLOWiNG tOOLs aNd suPPLies:
q
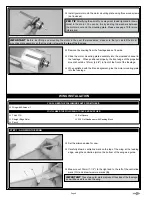
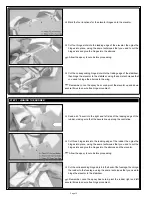
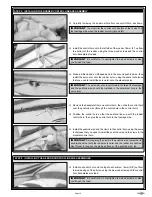
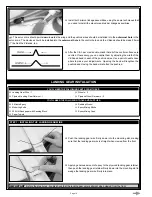
Push the landing gear wire firmly down into the mounting slot, making
sure that the landing gear wire is straight when viewed from the front.
steP 1: iNstaLLiNG tHe LaNdiNG Gear Wire
q
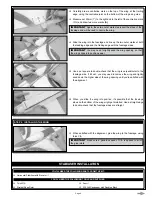
Apply a generous amount of epoxy to the plywood landing gear retainer,
then push the landing gear retainer firmly down into the mounting slot to
wedge the landing gear wire firmly into place.
q
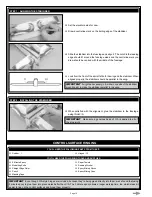
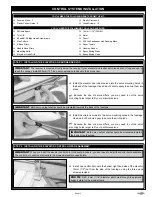
Install both aileron linkage assemblies, using the same techniques that
you used to install the elevator and rudder linkage assemblies.
q
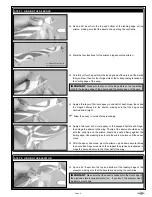
After the C/A has cured, double-check that all of the control surfaces are
centred. If necessary, you can centre them by adjusting the width of the
V-Shaped bend in each of the pushrod wires. Use a pair of needle nose
pliers to make your adjustments. Opening the bend will lengthen the
pushrod and closing the bend will shorten the pushrod.
+
The servo arms should point
down
towards the wing and the pushrod wires should be installed into the
outermost hole
in the
servo arms. The clevises should be installed into the
outermost hole
in the control horns and the V-Bends should be made 25mm
(") behind the Z-Bends, too.
IMPORTANT
Before the glue cures, double-check that the landing gear wire is straight when viewed from the front.
q
5 Minute Epoxy
q
Modelling Knife
q
220 Grit Sandpaper with Sanding Block
q
Paper Towels
q
Landing Gear Wire -
q
Plywood Landing Gear Retainer -
q
Wheels - 2
q
Plywood Wheel Retainers - 2
q
Rubbing Alcohol
q
Epoxy Mixing Sticks
q
Epoxy Mixing Cups

