12
SETTING THE DEPTH STOP
– cont’d
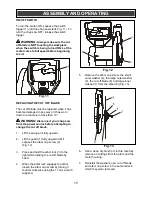
CHECKING THE AUTOMATIC GUARD
The automatic guard must be checked to ensure
it is working properly.
WARNING:
Always disconnect your
chop saw from the power source before
checking the automatic guard.
1.
Lift the guard (1) upward approximately 3"
and then release it (Fig. 3). If the guard is
functioning correctly, it will freely drop
down to its original position.
2.
Lower the swing arm and cutting blade
assembly until the lower edge of the guard
(2) touches the chop saw base. Continue
to lower the swing arm and cutting blade
assembly. The automatic guard should
freely rise as the cutting blade is lowered.
NOTE:
The guard should always rise and
fall freely when the swing arm is lowered
and raised as outlined in #1 & #2 above. If
not, clean any cuttings out from around the
guard mechanism (3) (Fig. 4).
CHECKING THE ARBOR CAP SCREW
It is important to check the arbor cap screw to
make sure the cut off blade is fully tightened.
WARNING:
Disconnect your chop saw
from the power source before checking the
arbor cap screw.
1.
Lift swing arm fully upward as far as it will
go.
2.
Lift the blade guard (1) fully upward until it
will stay in the upright position (Fig. 5).
3.
Press and hold the arbor lock (2) to the
right while rotating the cut off blade by
hand.
4.
When the arbor lock engages the arbor,
tighten the arbor cap screw (3) by turning it
clockwise using the 17 mm wrench
supplied.
NOTE:
Do NOT over tighten the arbor cap
screw as you could crack the hub of the
cutting blade.
Fig. 2
ASSEMBLY AND OPERATING
!
Fig. 3
Fig. 4
!
Summary of Contents for 240-3756
Page 19: ...19 EXPLODED VIEW ...


