156
6
Editin
g an
d Printi
ng Im
age
s
1
In the printing mode selection screen, use the four-way
controller (
23
) to select [DPOF AUTOPRINT].
2
Press the
4
button.
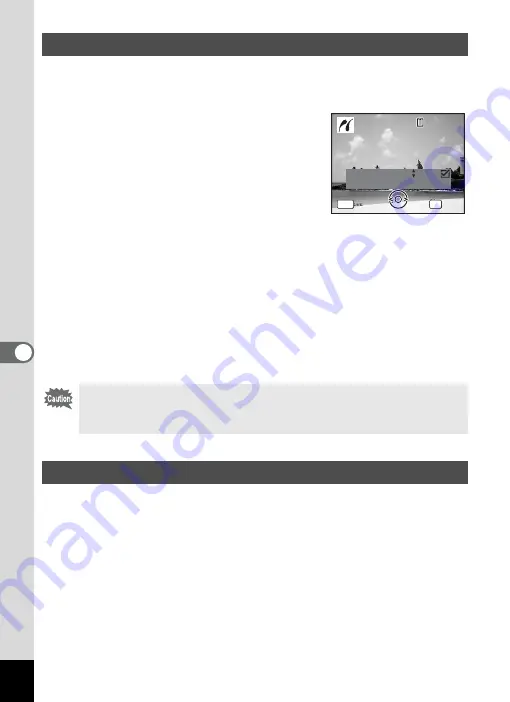
The DPOF settings you have made appear.
Use the four-way controller (
45
) to check
the number of copies for each picture,
whether to insert the date or not, and the
total number of copies. Refer to p.149 for
instructions on how to make the DPOF
settings.
3
Press the
4
button.
A confirmation dialog appears.
Refer to Steps 7 to 11 of “Printing Single Images” (p.153 and p.154) for
details of changing print settings.
4
Press the
4
button.
The images are printed according to the settings.
Press the
3
button to cancel printing.
Disconnect the USB cable from the camera and printer when you have
finished printing.
1
Turn off the camera.
2
Disconnect the USB cable from the camera and printer.
Printing Using the DPOF Settings
If the picture already has the date imprinted on it (p.105), do not set
Date
O
(On) in DPOF settings. Otherwise, the date could be
imprinted twice on your printed picture.
Disconnecting the Cable from the Printer
C o p i e s
T o t a l
D a t e
0 1
P r i n t w i t h DPOF s e t t i n g
P r i n t w i t h DPOF s e t t i n g
OK
1 0
MENU
1 0 0
1 0 0 - 0 0 1 7
0 0 1 7
1 0 0 - 0 0 1 7
C a n c e l
C a n c e l
C a n c e l
Summary of Contents for 17103 - Optio M50 Digital Camera
Page 73: ...71 4 Taking Pictures 7 Press the shutter release button fully The picture is taken ...
Page 205: ...Memo ...
Page 209: ...207 9 Appendix Z Zoom button 44 46 Zoom xw 78 ...
Page 210: ...Memo ...
Page 211: ...Memo ...


