background image

www.peavey.com

Tour

 Series

 Headliner

Bass Amplifier Head


Operating

Manual

ENGLISH ............... 15
FRANÇAIS ............ 20
ESPAÑOL .............. 24 
DEUTSCH .............. 28
ITALIANO .............. 32
PORTUGUÊS ........ 36

中文

 ...................... 40

日本語

 .................. 44

Summary of Contents for Tour Series

Page 1: ...www peavey com Tour Series Headliner Bass Amplifier Head Operating Manual ENGLISH 15 FRANÇAIS 20 ESPAÑOL 24 DEUTSCH 28 ITALIANO 32 PORTUGUÊS 36 中文 40 日本語 44 ...

Page 2: ...rée par l utilisateur Confiez I entretien et la réparation de l appareil à un réparateur Peavey agréé AVIS Dans le but de reduire les risques d incendie ou de decharge electrique cet appareil ne doit pas etre expose a la pluie ou a l humidite et aucun objet rempli de liquide tel qu un vase ne doit etre pose sur celui ci Avant d utiliser de cet appareil lisez attentivement le guide fonctionnant pou...

Page 3: ...DO Para evitar o risco de choque elétrico não remova a cobertura Contém peças não reparáveis pelo usuário Entregue todos os consertos apenas a pessoal qualificado ADVERTÊNCIA Para evitar choques elétricos ou perigo de incêndio este aparelho não deve ser exposto à chuva ou umidade e objetos cheios de líquidos tais como vasos não devem ser colocados sobre ele Antes de usar este aparelho leia o guia ...

Page 4: ...ية المنتج هذا مع المرفق الكتيب داخل مهمة صيانة وصيانة تشغيل تعليمات لوجود المستخدم لتنبيه تشير تفتح ال كهربية لصدمة التعرض خطر تحذير على للحصول الصيانة إلى ارجع بالداخل للمستخدم لالستعمال قابلة أجزاء توجد ال الغطاء بإزالة تقم ال كهربية لصدمة التعرض مخاطر لتقليل تحذير المؤهلين الموظفين من خدمة مثل بالسوائل المملوءة األشياء وضع يجب وال الرطوبة أو للمطر الجهاز هذا تعريض يجب ال حريق مخاطر أو كهربية صد...

Page 5: ...ack rear support should be provided 17 Note for UK only If the colors of the wires in the mains lead of this unit do not correspond with the terminals in your plug proceed as follows a The wire that is colored green and yellow must be connected to the terminal that is marked by the letter E the earth symbol colored green or colored green and yellow b The wire that is colored blue must be connected...

Page 6: ...use algún tipo de apoyo trasero 17 Nota para el Reino Unido solamente Si los colores de los cables en el enchufe principal de esta unidad no corresponden con los terminales en su enchufe proceda de la siguiente manera a El cable de color verde y amarillo debe ser conectado al terminal que está marcado con la letra E el símbolo de Tierra earth coloreado en verde o en verde y amarillo b El cable col...

Page 7: ... suit a Le connecteur vert et jaune doit être connectrer au terminal noté E indiquant la prise de terre ou correspondant aux couleurs verte ou verte et jaune du guide b Le connecteur Bleu doit être connectrer au terminal noté N correspondnat à la couleur noire du guide c Le connecteur marron doit être connectrer au terminal noté L correspondant à la couleur rouge du guide 18 Cet équipement électri...

Page 8: ...ischen Schlag und Erdung zu Schließen Sie nur an die Stromversorgung der Art an die am Gerät neben dem Netzkabel angegeben ist 16 Wenn dieses Produkt in ein Geräte Rack eingebaut werden soll muss eine Versorgung über die Rückseite eingerichtet werden 17 Hinweis Nur für Großbritannien Sollte die Farbe der Drähte in der Netzleitung dieses Geräts nicht mit den Klemmen in Ihrem Stecker übereinstimmen ...

Page 9: ...ee se tukea takaosastaan 17 Note for UK only If the colors of the wires in the mains lead of this unit do not correspond with the terminals in your plug proceed as follows a The wire that is colored green and yellow must be connected to the terminal that is marked by the letter E the earth symbol colored green or colored green and yellow b The wire that is colored blue must be connected to the ter...

Page 10: ...the colors of the wires in the mains lead of this unit do not correspond with the terminals in your plug proceed as follows a The wire that is colored green and yellow must be connected to the terminal that is marked by the letter E the earth symbol colored green or colored green and yellow b The wire that is colored blue must be connected to the terminal that is marked with the letter N or the co...

Page 11: ...Hvis dette produktet skal plasseres i en utstyrsreol må det etableres støtte på baksiden 17 Note for UK only If the colors of the wires in the mains lead of this unit do not correspond with the terminals in your plug pro ceed as follows a The wire that is colored green and yellow must be connected to the terminal that is marked by the letter E the earth symbol colored green or colored green and ye...

Page 12: ...et netsnoer 16 Als dit product in een apparatuurrek gemonteerd moet worden moet voor achterondersteuning worden verzorgd 17 Note for UK only If the colors of the wires in the mains lead of this unit do not correspond with the terminals in your plug pro ceed as follows a The wire that is colored green and yellow must be connected to the terminal that is marked by the letter E the earth symbol color...

Page 13: ...ta posta vicino al cavo di alimentazione 16 Se questo prodotto deve essere montato a rack è necessario sostenerlo anche nella parte posteriore 17 Nota per UK Se i colori dei fili nel cavo di alimentazione per questa unità non corrispondono con i terminali della vostra spina procedere come segue a Il filo di colore verde giallo deve essere collegato al terminale che marcato con lettera E o simbolo ...

Page 14: ... do not correspond with the terminals in your plug proceed as follows a The wire that is colored green and yellow must be connected to the terminal that is marked by the letter E the earth symbol colored green or colored green and yellow b The wire that is colored blue must be connected to the terminal that is marked with the letter N or the color black c The wire that is colored brown must be con...

Page 15: ...ly If the colors of the wires in the mains lead of this unit do not correspond with the terminals in your plug proceed as follows a The wire that is colored green and yellow must be connected to the terminal that is marked by the letter E the earth symbol colored green or colored green and yellow b The wire that is colored blue must be connected to the terminal that is marked with the letter N or ...

Page 16: ...inals in your plug proceed as follows a The wire that is colored green and yellow must be connected to the terminal that is marked by the letter E the earth symbol colored green or colored green and yellow b The wire that is colored blue must be connected to the terminal that is marked with the letter N or the color black c The wire that is colored brown must be connected to the terminal that is m...

Page 17: ... the mains lead of this unit do not correspond with the terminals in your plug proceed as follows a The wire that is colored green and yellow must be connected to the terminal that is marked by the letter E the earth symbol colored green or colored green and yellow b The wire that is colored blue must be connected to the terminal that is marked with the letter N or the color black c The wire that ...

Page 18: ... ﻣﺎ ﺍﺗﺒﻊ ﺑﻚ ﺍﻟﺨﺎﺹ ﺍﻟﻤﻘﺒﺲ ﻓﻲ ﻟﻸﻃﺮﺍﻑ ﺍﻟﻤﺤﺪﺩﺓ ﺍﻟﻤﻠﻮﻧﺔ ﺍﻟﻌﻼﻣﺎﺕ ﻣﻊ ﺗﺘﻮﺍﻓﻖ ﻻ ﺍﻟﻮﺣﺪﺓ ﻟﻬﺬﻩ ﺍﻟﺮﺋﻴﺴﻴﺔ ﺍﻷﻃﺮﺍﻑ ﻓﻲ ﺍﻷﺳﻼﻙ ﺃﻟﻮﺍﻥ ﻛﺎﻧﺖ ﺇﺫﺍ ﻓﻘﻂ ﺍﻟﻤﺘﺤﺪﺓ ﻟﻠﻤﻤﻠﻜﺔ ﻣﻼﺣﻈﺔ 17 ﻭﺍﻷﺻﻔﺮ ﺍﻷﺧﻀﺮ ﺃﻭ ﺑﺎﻷﺧﻀﺮ ﺍﻟﻤﻠﻮﻥ ﺃﻭ ﺍﻷﺭﺿﻲ ﺭﻣﺰ ﺃﻭ E ﺑﺎﻟﺤﺮﻑ ﺍﻟﻤﻤﻴﺰ ﺑﺎﻟﻄﺮﻑ ﻭﺍﻷﺻﻔﺮ ﺑﺎﻷﺧﻀﺮ ﺍﻟﻤﻠﻮﻥ ﺍﻟﺴﻠﻚ ﺗﻮﺻﻴﻞ ﻳﺠﺐ ﺃ ﺍﻷﺳﻮﺩ ﺍﻟﻠﻮﻥ ﺫﻭ ﺃﻭ N ﺑﺎﻟﺤﺮﻑ ﺍﻟﻤﻤﻴﺰ ﺑﺎﻟﻄﺮﻑ ﺍﻷﺯﺭﻕ ﺑﺎﻟﻠﻮﻥ ﺍﻟﻤﻠﻮﻥ ﺍﻟﺴﻠﻚ ﺗﻮﺻﻴﻞ ﻳﺠﺐ ﺏ ﺍﻷﺣﻤﺮ ﺍﻟﻠﻮﻥ ﺫﻭ ﺃﻭ L ﺑﺎﻟﺤﺮﻑ ﺍﻟﻤﻤﻴﺰ ﺑﺎﻟﻄﺮﻑ ﺑﺎﻟﺒﻨﻲ ﺍﻟﻤﻠﻮﻥ ﺍﻟﺴﻠﻚ ...

Page 19: ...te verwijdering van dit product Deze markering geeft aan dat dit product nergens in de Europese Unie met ander huishoudelijk afval mag worden afgevoerd Om mogelijke schade aan het milieu of gezondheid door ongecontroleerde afvalverwijdering te voorkomen recycle het op een verantwoorde wijze om het duurzame hergebruik van materiaalgrondstoffen te bevorderen Om uw gebruikte apparaat in te leveren ku...

Page 20: ...o frequency energy and if not installed and used in accordance with the instructions may cause harmful interference to radio communications However there is no guarantee that interference will not occur in a particular installation If this equipment does cause harmful interference to radio or television reception which can be determined by turning the equipment off and on the user is encouraged to...

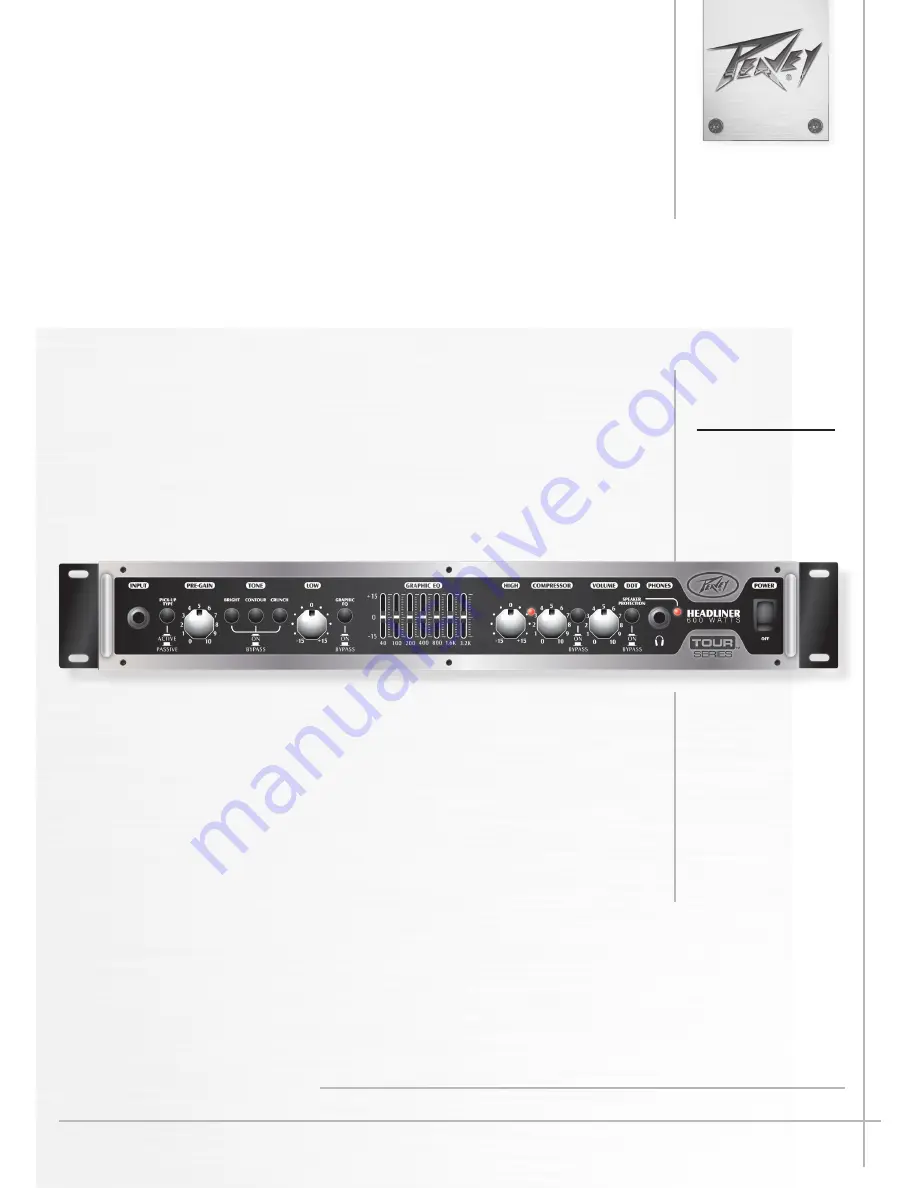
Page 21: ...ter volume and headphone out The Compressor and Crunch features are footswitch selectable The Headliner features a built in XLR direct interface that players can use to route the signal to the house sound system or recording device and an active passive pickup switch that compensates for hot inputs Peavey s exclusive DDT speaker protection circuitry senses the onset of clipping and responds with s...

Page 22: ... turning the tweeter off on your cabinet will result in a more authentic overdriven tone LOW This knob provides a shelving tone control for low frequencies and provides cut boost of 15 dB The center point is flat The center frequency is 50 Hz The 3 dB shelf corner frequency is 100Hz EQ BYPASS This button removes the graphic equalizer from the audio chain When this switch is in the Bypass position ...

Page 23: ...fy that they are not exceeding the 4 ohm load limit and that the cooling vents are free from obstruction The other fault condition is when the output short protection is activated either by a shorted speaker cable or by exceeding the 4 ohm load limit If the LED stays red all the time the amplifier needs to be taken to an authorized Peavey service center immediately for service POWER SWITCH To appl...

Page 24: ...nit as a slave power amplifier the Return Jack should be used as the input DIRECT INTERFACE DI This built in balanced Direct Interface is used to send a buffered signal to an external mixer DI PRE POST SWITCH This button toggles the DI output from pre EQ to post EQ GROUND LIFT This button is provided to prevent a ground loop that may result in hum noise When depressed IN position Ground Lift is en...

Page 25: ...S 4 ohms 300 watts 34 6VRMS Headphone Amplifier Specifications Stereo 8 ohm minimum load Power Output All measurements with no more than 1 THD N 8 ohms 250 mW 1 41VRMS x 2 Preamplifier Specifications Settings for the Following Measurements unless stated otherwise PRE GAIN 5 12 o clock BRIGHT out CONTOUR out CRUNCH out LOW 0 12 o clock HIGH 0 12 o clock GRAPHIC EQ All sliders set to center GRAPHIC ...

Page 26: ... fonctions Compressor et Crunch sont aussi actionnables par le pédalier Le Headliner possède également une interface XLR directe intégrée pour envoyer le signal à un système HI FI ou à un enregistreur et un bouton actif passif de configuration qui permet des connexions à chaud Le circuit de protection des haut parleurs exclusif DDT de Peavey détecte les écrêtages en effectuant une légère compressi...

Page 27: ... le haut parleur aigu de votre boîtier pour obtenir un ton saturé plus authentique LOW Ce bouton fournit un contrôle shelving des basses fréquences ainsi qu une suppression augmentation de i5 dB Le point central est plat La fréquence centrale est de 50 Hz La fréquence shelving de 3 dB est de 100Hz EQ BYPASS Ce bouton supprime l égaliseur graphique de la chaine audio Quand le bouton est sur la posi...

Page 28: ...ion positionner le bouton sur la position ON La diode LED verte s allume indiquant que le courant arrive bien Attention L interrupteur de cet appareil n isole pas des deux cotés du secteur Il peut y avoir de l électricité à l intérieur du boitier même lorsque l interrupteur est dans la position OFF PRISE D ALIMENTATION CA Ceci est la prise de branchement du câble CA qui alimente l appareil en élec...

Page 29: ...se Jack Send fournit une sortie préampli qui peut être utilisée pour faire fonctionner un amplificateur esclave et un processeur d effets externes La prise Jack Return fournit une entrée de puissance pour le dernier effet de la chaine NOTE Lorsque vous utilisez l appareil en tant qu amplificateur de puissance esclave la prise Jack Return doit être utilisée comme entrée INTERFACE DIRECT Dl Cette in...

Page 30: ...onarse con el interruptor de pedal El amplificador Headliner presenta una interfaz directa XLR incorporada que los ejecutantes pueden utilizar para enviar la señal al sistema de sonido del estudio o dispositivo de grabación y un interruptor de captura activo pasivo que nivela las entradas directas El sistema de circuitos eléctricos de protección del altavoz exclusivo DDT de Peavey percibe el comie...

Page 31: ...pagar el tweeter de su cabina obtendrá un tono más auténtico LOW Esta perilla proporciona un control de tonos de estantería para bajas frecuencias y un corte amplificación de 15 dB El punto central es Hat La frecuencia central es de 50 Hz La frecuencia de transición ajustable de 3 dB es de 100Hz EQ BYPASS Este botón elimina el ecualizador gráfico de la cadena de audio Cuando este interruptor se en...

Page 32: ...ción ENCENDIDO Se iluminará el LED verde indicando que se ha suministrado la energía Precaución el interruptor de energía de esta unidad no corta ambos lados de las redes eléctricas principales Podría haber energía peligrosa dentro del armazón aun cuando el interruptor de energía se encuentre en la posición APAGADO ENTRADA DE CORRIENTE ALTERNA CA Este es un receptáculo para un cable de línea I EC ...

Page 33: ...rciona una salida de preamplificador que puede utilizarse para accionar amplificadores secundarios y procesadores externos de efectos El enchufe de retorno proporciona una entrada de energía de amplificador para el último efecto de la cadena NOTA al utilizar la uni dad como amplificador secundario el enchufe de retorno debe utilizarse como la entrada INTERFAZ DIRECTA Dl Se utiliza esta Interfaz di...

Page 34: ...einem Kopfhörerausgang ausgerüstet Der Kompressor und die Crunch Schaltung können auch per Fußschalter angewählt werden Der Headliner verfügt über einem integrierten XLR Ausgang um das Signal zur PA oder einem Aufnahmegerät weiterzugeben Über einen Aktiv Passiv Schalter kann das entsprechende Instrument optimal an den Verstärker angepasst werden Peavey s exklusive DDT Lautsprecher Schutzschaltung ...

Page 35: ... Ausschalten der Hochtöner einen authentischeren übersteuerten Klang LOW Dieser Regler sorgt für eine Shelving Tonregelung für niedrige Frequenzen und einen Cut Boost von 15 dB In Mittelstellung ist das Signal flat Die Hauptfrequenz liegt bei 50 Hz Die 3 dB Shelving Eckfrequenz liegt bei 100 Hz EQ BYPASS Diese Taste entfernt den Grafik Equalizer aus der Audiokette Wenn dieser Schalter in der Bypas...

Page 36: ...n Sie diesen Schalter auf die ON Position um das Gerät einzuschalten Die grüne LED leuchtet und zeigt an dass die Einheit mit Strom versorgt wird Vorsicht Der Power Schalter unterbricht nicht beide Seiten der Hauptstromleitung Gefährlicher Strom kann auch dann im Gehäuse fließen wenn der Power Schalter auf OFF steht WECHSELSTROMEINGANG Dies ist der Anschluss für ein IEC Stromkabel über das der Ver...

Page 37: ...EFFECTS LOOP Der Send Anschluss liefert einen Preamp Output der genutzt werden kann um einen Slave Amp und externe Effektprozessoren anzusteuern Der Return Anschluss liefert das Signal nach der Effek tkette zum Input in eine Endstufe HINWEIS Sollte der Amp als Slave Poweramp genutzt werden so sollte die Return Buchse als Input genutzt werden DIRECT INTERFACE Dl Diese integrierte symmetrische Direk...

Page 38: ...fie Altre caratteristiche risiedono nella selezionabili di compressione e Crunch tramite footswitch L Headliner vanta un interfaccia diretta DI XLR integrata che i bassisti possono utilizzare per inviare il segnale al sistema audio di casa o a un dispositivo di registrazione mixer Inoltre un interruttore di controllo pickup attivo passivo che compensa gli ingressi diretti L esclusivo circuito di p...

Page 39: ... Quando si usa la funzione Crunch lo spegnimento del tweeter dell armadio determinerà una tonalità più autentica LOW Questo controllo di tipo shelving fornisce un taglio incremento di 15dB per le basse frequenze Il punto centrale è di tipo Flat La frequenza centrale è 50 Hz La frequenza di taglio a 3dB è 100 Hz EQ BYPASS Questo interruttore rimuove l equalizzatore grafico dalla catena audio Quando...

Page 40: ... l avvenuto invio di corrente Attenzione L interruttore in questa unità non disconnette entrambi i lati della rete primaria All interno dello chassis potrebbe essere presente Tensione Pericolosa anche se l interruttore si trova nella posizione OFF AC POWER INLET Questa è la presa di corrente per un cavo di alimentazione IEC il quale fornisce la corrente AC all unità Connettete il cavo in dotazione...

Page 41: ...ficatore ad esempio ad un secondo amplificatore o processori effetti esterni La connessione Return consente ad un segnale proveniente da unità esterne di entrare nel finale di potenza dell amplificatore NOTA quando usi quest unità come semplice finale di potenza la connessione Return dovrà essere usata come input DIRECT INTERFACE Dl Questa è un uscita bilanciata D I integrata e viene utilizzata pe...

Page 42: ...e principal e saída para fone de ouvido Os recursos de Compressão e Saturação também são selecionáveis via pedal Os recursos do Headliner uma interface direta XLR interna que os músicos podem usar para conduzir o sinal ao sistema de som ou dispositivo de gravação e um interruptor ativo passivo que compensa as entradas a quente Os sensores do circuito de proteção do alto falante DDT exclusivos da P...

Page 43: ...ca de saturação o desligamento do tweeter no seu painel resultará em um tom de tubo reforçado mais autêntico LOW Este botão fornece um controle de tom shelving para frequências baixas e fornece um corte aumento de 15 dB O ponto central é plano A frequência central é de 50 Hz A frequência shelf de 3 dB é de 100 Hz EQ BYPASS Este botão remove o equalizador gráfico da cadeia de áudio Quando este botã...

Page 44: ...nterruptor para a posição ON O LED verde acenderá indicando que o equipamento está ligado Cuidado O interruptor de energia nesta unidade não corta ambos os lados da energia primária Uma energia perigosa pode estar presente no chassi mesmo quando o interruptor de energia estiver na posição OFF ENTRADA DE VOLTAGEM AC Este é a entrada para um cabo I EC que fornece voltagem AC à unidade Conecte o cabo...

Page 45: ...viar fornece uma saída pré amplificada que pode ser usada para conduzir amplifica dores escravo e processadores externos de efeito O conector de retorno fornece uma entrada de amplificação de potência para o último efeito na cadeia OBSERVAÇÃO Ao utilizar a unidade como um amplificador de potência escravo o botão de retorno deve ser usado como entrada INTERFACE DIRETA DI Essa interface direta balan...

Page 46: ... 功能仅给高音频率加入古典电子管效果的失真 而在低端仍然保存了十分重要的丰满 此放大器的功能还包括 Bright 明亮 和Contour 恒值 开关 效果环路 主音量及耳机输出 压缩器和Crunch 嘎吱音 功能可以用脚踏开关选 择 Headliner 明星 具有一个内置XLR直接接口 玩家可以用来将信号导入到家里的音响系统或录音设备 并有主动 被 动拾音器开关可以补偿热输入 Peavey特有的DDT 扬声器保护电路检测信号的截角失真袭击 略微施以压缩 使放大器能 保持音质 动态余量和动感 请仔细阅读本手册 以确保您的人身安全 也确保您的放大器的安全 功能 带推键旁通分路的7段图形均衡器 D级功放段 专利技术DDT 失真检测技术 内置Crunch 嘎吱音 效果 播音室质量的平衡直接接口输出 内置光学压缩器 缓冲效果环路 扭转锁定组合有源扬声器输出 主动 被动设备开关 前级后级增益控制 低音...

Page 47: ...UNCH开关 此钮接合crunch 嘎吱音 效果 模拟经典的电子管功放的过载声音 使用crunch 嘎吱音 功能时 关闭您机箱上的高音扬声器开关会形成一个更逼真的过载音调 LOW 此旋钮提供低音频率 15分贝削减 提升缓倾音调控制 中心点是降音调模式 中心频率是50Hz 3分贝 斜角频率是100Hz EQ BYPASS 此按钮将图形均衡器从音响链中移除 开关设在 Bypass 旁通 位置时 放大器的响应一如图形均衡器 设定在降音调模式 GRAPHIC EQUALIZER 这些滑键通过等比例Q值7段均衡器提供精确的音调调节 每段能提升或削减15分贝 HIGH 此旋钮提供高音频率 15分贝削减 提升缓倾音调控制 中心点是降音调模式 频率为8KHz 3分贝斜 角频率是5KHz COMPRESSOR 顺时针旋转此旋钮增加信号链中的压缩值 1 2 3 4 5 6 7 8 9 10 1 7 8 15 ...

Page 48: ...lip 保护 截 角失真 LED灯会闪烁 这是正常的 但是 如果LED恒定亮着 则需要降低增益程度 以防止可能 的设备损坏 在DDT 失真检测技术 关闭的状态下 则LED成为截角失真的指示灯 POWER 开关 将开关翻转到 ON 开 位置 给设备接通电源 绿色LED灯亮起 表明电源接通 警告 此设备的电源开关并不能将两边的主电源都切断 即使电源开关在 OFF 关 的位 置 机箱内仍可能存在有害能源 交流电源输入 这是IEC 国际电工委员会 标准电源线插座 向设备提供交流电源 将电源线连接至此连接座 向 设备提供电源 如果使用不当电压 参见设备上的标识电压 可能导致设备损坏 千万不要折断任何设备上的地脚 这是为了您的安全起见 如果使用的电源插座没有接地脚 则应 使用相应的接地转换器 并将第三根导线正确接地 为防止触电或火灾危险 永远确认放大器及其 所有附加设备都正确接地 12 13 14 1...

Page 49: ...音 效果及压 缩器的开启 关闭 注 要使用此脚踏开关 crunch 嘎吱音 及压缩器的按钮必须接通 TNT Headliner 明星 脚踏开关的配件编号是03008010 EFFECTS LOOP Send 发送 插座提供一个前置输出 可用于驱动从属放大器和外接效果处理器 Return 接 收 插座为音响链中最后一个效果提供功放 注 如果将此设备作为从属功放使用 则Return 接收 插座应用作输入 直接接口 DI 此内置平衡直接接口用于将未处理缓冲信号发送至外接混音器 DI PRE POST 开关 此按钮将DI 直接接口 输出从前置均衡切换至后置均衡 GROUND LIFT 此按钮防止可能导致交流哼声的接地回路 按下 IN位置 时 接地解除 19 20 21 22 23 24 25 巡演系列明星功放头方块图 ...

Page 50: ...プはさらにブライト コンツアスイッチ エフェク トループ マスターボリューム ヘッ ドホンの出力を備えています コン プレッサとクランチはフッ トスイッチで選択できます ヘッ ドライナーは ハウスサウンドシステムや録音機器へ信号を送ること ができるビルトインXLRダイレク トインタフェース またホッ トな入力を補正するアクティブ パッシブピックアップスイッチを備 えています Peavey独自のDDT スピーカーの保護回路が クリッピングの兆候を検出し アンプがトーン ヘッ ドルームおよび ダイナミックスを保持できるわずかな圧縮に反応します ユーザの安全およびアンプの安全を守るため このガイドをよくお読みください 特徴 押しボタンバイパスを備えた7バンドグラフィックイコライザ クラスD電源部 特許取得済みDDT 歪み検出技術 内蔵クランチエフェク ト スタジオ品質平衡Dl出力 内蔵光学コンプ...

Page 51: ...サウンドをシミュ レートします クランチ機能を使用するとき キャビネッ トのツイーターをオフにするとオーバードライブが よりリアルな音になります LOW 低周波のシェルビングトーンを調節し 15 dBのカッ ト ブーストを得るノブです 中心点はHat 中心周波 数は50Hzです 3dBのシェルフコーナー周波数は100Hzです EQ BYPASS このボタンはオーディオチェインからグラフィックイコライザを外します このスイッチが バイパス の位置 にある時 アンプは あたかもグラフィックイコライザがHatに設定されているかのように反応します GRAPHIC EQUALIZER 固定Q 7バンドイコライザを通じてトーンを正確に制御するスライダです 各バンドで15dBのブースト カッ トが可能です HIGH このノブによって 高周波のシェルビングトーンを調節でき 15dBのカッ ト ブーストが可...

Page 52: ...時点灯する場合 装置のを防ぐためにゲインレベルを下げる必要があります DDTが無効 な場合 LEDはクリップインジケータになります POWER スイッチ ユニッ トに電力を供給するには スイッチを ON 位置にします 緑のLEDが点灯し 電力が供給されて いることを示します 注意 このユニッ トの電源スイッチは一次電源の両側を遮断しません 電源スイッチが OFF 位置にある場合でも シャシーの内部に危険なエネルギが存在することがあり ます 交流電源差し込み口 これは交流電源をユニッ トに供給するIECラインコードのレセプタクルです このコネクタにラインコー ドを接続してユニッ トに電力を供給します 電源電圧が適合しない場合 装置が破損する恐れがありま す ユニッ トの電源電圧マークを参照 装置の接地ピンを外さないでください これは安全のためです 使用されるアウトレッ トに接地ピンが ない場...

Page 53: ...ッサのボタンをオンにしておく必要があります TNT ヘッ ドライナー フッ トスイッチのパーツ番号は 03008010です EFFECTS LOOP Send ジャックは スレーブアンプおよび外部エフェク トプロセッサを駆動するために使用できるプ リアンプ出力を提供します Returnジャックはチェーン中の最後のエフェク トのためのパワーアン プ入力です 注 ユニッ トをスレーブパワーアンプとして使用する場合 Returnジャックは入力とし て使用します ダイレク トインターフェース DI 非圧縮バッファ信号を外部ミキサーへ送るビルトイン平衡ダイレク トインタフェースです DI PRE POST スイッチ このボタンは Dl出力をプリEQからポストEQへ切り替えます GROUND LIFT ハム ノイズの原因になり得る接地ループを防ぐためのボタンです 押し下げると IN位置 Ground ...

Page 54: ...48 NOTES ...

Page 55: ...9 Features and specifications subject to change without notice Peavey Electronics Corporation 5022 Hartley Peavey Drive Meridian MS 39305 601 483 5365 FAX 601 486 1278 www peavey com 2011 EX000129 NOTES ...

Page 56: ...return shipping charges How To Get Warranty Service 1 Take the defective item and your sales receipt or other proof of date of purchase to your Authorized Peavey Dealer or Authorized Peavey Service Center OR 2 Ship the defective item prepaid to Peavey Electronics Corporation International Service Center 412 Highway 11 80 East Meridian MS 39301 Include a detailed description of the problem together...

Page 57: ...ective 2002 96 EC Annex IV OJ L 37 38 13 02 03 and defined in EN 50419 2005 The bar is the symbol for marking of new waste and is applied only to equipment manufactured after 13 August 2005 U S customer warranty registration ...

Page 58: ......

Reviews: