


© PCE Instruments
6
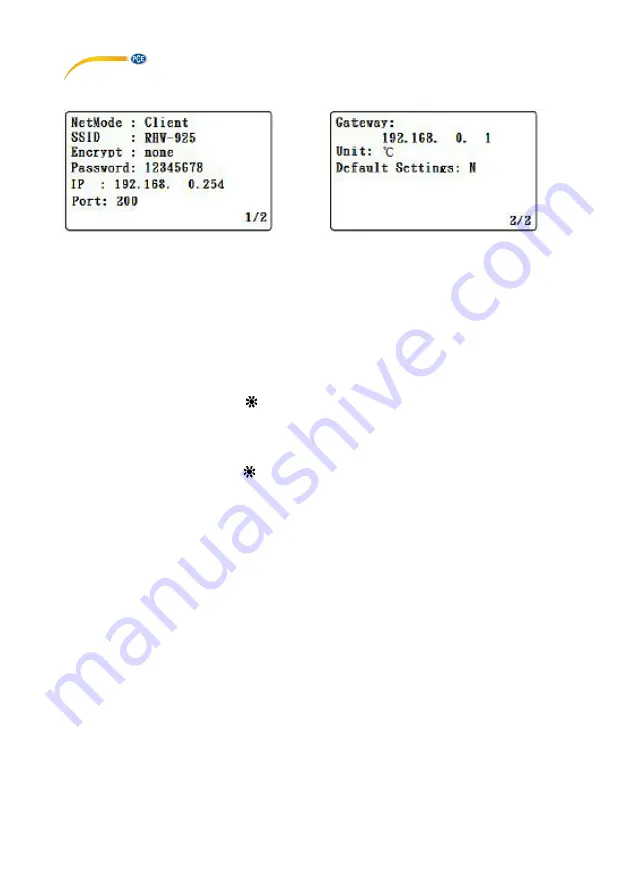
2. Settings screen
Screen 9 (settings)
Screen 10 (setting)
5.3
Button description
•
SETUP/ENTER button: enters the setup screen and confirms selection
•
In the settings menu:
o
Use the
▼
and
▲
buttons to select the desired field.
o
Pressing and holding the
▲
or
▼
button will scroll between the fields more
rapidly.
o
Pressing and holding the
▲
and
▼ buttons together will clear the selected
field.
o
Use the ◄ and ►
buttons to move left or right.
o
EXIT/SHIFT ( ) button: changes the text input type or exits the settings
menu,
•
In measurement mode:
o
Press and hold the
▲
and
▼ buttons simultaneously
until the screen flickers
to toggle between easy and full mode
o
EXIT/SHIFT ( ) button: toggle the backlight
5.4
Changing the settings
•
After the device has been switched on, the start-up screen appears (Screen 1 – Screen
2) and the device will be initialised over 30 sec. The temp/humidity measurement
screen will then be displayed (Screen 3).
•
Press the SETUP/ENTER button to enter the settings screen (Screen 9).
•
Use the
▲
and
▼ buttons to move the selection between settings.
•
Use the ◄ and ► buttons to select between the setting and its value. To change a
value select it by pressing the ► button and then
u
sing the ▲
and
▼ buttons to change
the value. Press the SETUP/ENTER button to confirm the change.
•
Net mode:
o
The default setting is Client
o
With the setting selected (blinking) press the
◄ or ► button, then use the ▲
or
▼ button to toggle between Client and AP.
o
Press the SETUP/ENTER button to confirm your change.
o
Press the
▼ button to move the selection to
SSID.
•
SSID:
o
The default SSID is RHW-925
o
Press the
◄ or ► button to select the value, then use the ▲
and
▼ buttons
to input numbers or letters, after pressing the EXIT/SHIFT button (max. 21
characters).
o
Press the SETUP/ENTER button to confirm your change.
o
Press the
▼ button to move the selection to
Encrypt.


