background image

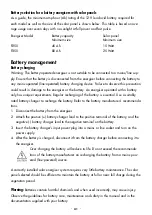
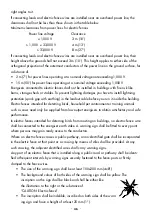
steel stakes or lengths of pipe against the fence. For best results, the fence voltage should 
be lowered to 2,000 V or less. In dry or sandy conditions, it may be necessary to drive the 
stakes up to 300  mm (12”) into the earth.

3.  Turn the energiser back on.
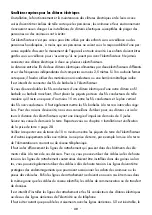
4.  Using a PATURA Digital Voltmeter, ensure that the fence voltage is below 2  kV.
5.  Check your earth system. Insert the voltmeter’s earth probe into the ground at the full extent 

of the lead, and hold the hook against the last earth stake. The tester should not read more 
than 0.5  kV. Anything higher than this indicates that better earthing is required. Either 
add more earth stakes or find a better ground area to drive in the earth stakes. A voltage 
below 0.2 kV would be best.

Safety Considerations

Safety considerations according to European Security Standard EN 60335-2-76

Definition of special terms

Energiser – An appliance that is intended to periodically deliver voltage impulses to a fence 
connected to it.
Fence – A barrier for animals or for the purpose of security, comprising one or more conduc-
tors such as metal wires, rods or rails.
Electric fence – A barrier which includes one or more electric conductors, insulated from earth, 
to which electric pulses are applied by an energiser.
Fence circuit – All conductive parts or components within an energiser that are connected or 
are intended to be connected, galvanically, to the output terminals.
Earth stake – Metal structure that is driven into the ground near an energiser and connected 
electrically to the output earth terminal of the energiser, and that is independent of other earth-
ing arrangements.
Connecting lead – An electric conductor, used to connect the energiser to the electric fence or 
the earth stake.
Electric fence – An electric fence used to contain animals within or exclude animals from a 
particular area.
Pulsed conductors – Conductors which are subjected to high voltage pulses by the energiser.

-  44  -

Energiser

Energiser

earth

DVM

earth

live

live

short circuit

Summary of Contents for MaxiBox P350

Page 1: ...BEDIENUNGSANLEITUNG Beachten Sie alle Hinweise vor Inbetriebnahme MODE D EMPLOI Lire toutes les instructions avant l usage USER MANUAL Read full instructions before use...

Page 2: ...s cl tures lectriques et votre lectrificateur PATURA 19 Installation 20 Mise en service 21 Montage d une cl ture lectrique 27 Conseils de s curit 29 Questions fr quemment pos es Solutions 32 Maintenan...

Page 3: ...Ger t aus bevor Sie Arbeiten am Zaun ausf hren Lesen Sie alle Sicherheitshinweise in dieser Bedienungsanleitung bevor Sie das Ger t installieren berpr fen Sie dass Ihre Elektrozaunanlage mit allen g...

Page 4: ...ein herk mmlicher Zaun Flexibles ndern oder Hinzuf gen von Koppelweiden je nach Bedarf Schnelles und leichtes Aufstellen und Abbauen von tempor ren Z unen f r Portionsbeweidung Geeignet zum H ten ver...

Page 5: ...uf Seite 13 berpr fen Sie sorgf ltig ob Ihr Zaun s mtliche lokalen Sicherheitsbestimmungen erf llt Stellen Sie mit Hilfe der Stromausgangsschalter die Ausgangsleistung ein siehe Wahlschalter Bei jedem...

Page 6: ...schalter steuert die Geschwindigkeit und das Verhalten der Ausgangsimpulse des Elektrozaunger ts Einstellungen Beschreibung Schnell Die Impulsgeschwindigkeit des Elektrozaunger ts ist st ndig hoch Aus...

Page 7: ...utert f r jeden Ger tetyp die Bedeutung der L mpchen und die erforderlichen Ma nahmen L mpchen Reine Batterieger te Batterieger te mit Solaranlagen Gr nes Licht Optimaler Ladezustand der Batterie Opt...

Page 8: ...r fung zu einer zugelassenen Kundendienststelle Rotes Licht Batterie m glicherweise defekt Batterie m glicherweise defekt blinkt Batterie aufladen und 7 Tage Batterie aufladen und 7 Tage lang lang beo...

Page 9: ...in Amperestunden P250 45 Ah 15 W P350 80 Ah 25 W Handhabung der Batterie Batterie laden Warnung Das batteriebetriebene Elektrozaunger t ist nicht geeignet f r den Anschluss ans Netz Die Batterie muss...

Page 10: ...sem Handbuch und in den Unterlagen die mit Ihrer Batterie mitgeliefert wurden Instandhaltung und Wartung der Batterie Halten Sie die Batterieladung w hrend der Verwendung m glichst hoch Laden Sie eine...

Page 11: ...aus stromf hrenden Dr hten und erfordert leitf hige B den Zaunvarianten Z une k nnen auf die Tierart und auf das verf gbare Material abgestimmt werden Besprechen Sie mit Ihrem PATURA H ndler welche L...

Page 12: ...die empfohlene Mindestanzahl an 1 m Erdst ben f r ein Erdungssystem H ufig speziell bei schlecht leitf higen und trockenen B den sind mehrere bzw l ngere Erdst be erforderlich Elektrozaunger t Erdungs...

Page 13: ...die galva nisch an die Ausgangsklemmen angeschlossen sind oder angeschlossen werden k nnen Erdstab Ein Metallteil das in der N he eines Elektrozaunger ts in den Boden versenkt und elektrisch an den E...

Page 14: ...Draht sind in regelm igen Abst nden zu erden Wir empfehlen aus Sicherheitsgr nden bei diesen Z unen auf Abstandsisolatoren nur Ger te unter 5 Joule Impulsenergie zu verwenden Befolgen Sie unsere Erdun...

Page 15: ...hnung von Tieren wie K hen an Elektroz une reicht ein Elektro zaunger t mit geringer Leistung um ein zufrieden stellendes und zuverl ssiges Ergebnis zu erzielen Bei Elektroz unen die V gel davon abhal...

Page 16: ...e Spannung an den Klemmen des Elektrozaunger ts Betr gt die Spannung weniger als 6 kV lassen Sie Ihr Ger t von Ihrem PATURA Kundendienst berpr fen berpr fen Sie die Erdung des Elektrozaunger ts Verfah...

Page 17: ...ewartet werden k nnen F r Reparaturen muss es zu einer PATURA Kundendienststelle gebracht werden Technische Daten MaxiBox P250 MaxiBox P350 Stromversorgung 12 6 V nominal 11 15 V dc 11 15 V dc Stromve...

Page 18: ...18...

Page 19: ...endement en toute fiabilit Attention Mettez l appareil hors circuit avant d effectuer des travaux sur la cl ture Lisez tous les conseils de s curit contenus dans ce manuel avant d installer l appareil...

Page 20: ...l ture traditionnelle sa mise en place ne n cessite pas autant d efforts et de mat riel qu une cl ture traditionnelle adaptation du nombre de p turages vos besoins mise en place ou d montage aussi fac...

Page 21: ...la borne de cl ture de l lectrificateur la cl ture Mise en service Conservez soigneusement ce manuel Lisez attentivement tous les conseils de s curit page 29 Assurez vous que la cl ture remplisse vra...

Page 22: ...ie rie Explications au chapitre Contr le de la batterie page 23 Demi puissance L lectrificateur fonctionne demi puissance AUS OFF L appareil est l arr t et ne fonctionne pas Variateur de vitesse Le va...

Page 23: ...c sur le mode pleine puissance avec contr le de la batterie les t moins lumineux vous informent de l tat de charge et d autres caract ristiques de la batterie Le contr le de la batterie ne donne de r...

Page 24: ...bles en bon tat il est possible que la batterie soit su charg e ou d faillante d connectez le module solaire pendant 24 heures reconnectez le module et observez le pendant une semaine Si le voyant rec...

Page 25: ...cateur Capacit de la batterie Dur e de service P250 45 Ah 10 jours P350 80 Ah 10 jours Maniement de la batterie Charge de la batterie Attention L lectrificateur sur batterie ne doit pas tre branch sur...

Page 26: ...docu mentations fournies avec la batterie Maintenance et entretien de la batterie Maintenez le niveau de charge de la batterie aussi lev que possible pendant son utilisation Rechargez une batterie d c...

Page 27: ...diff rents types de cl ture Vous pouvez choisir vos cl tures en fonction de l esp ce animale et du mat riel dont vous disposez Consultez votre distributeur PATURA pour trouver la solution la mieux ada...

Page 28: ...ute tension pour effectuer le montage en s rie des piquets de terre avec la borne de terre de l lectrificateur Veillez ce que le c ble soit suffisamment d nud pour obtenir une bonne connexion entre le...

Page 29: ...les animaux ou pour raisons de s curit Il consiste en un ou plusieurs conducteurs comme des fils en m tal des barreaux ou des barres Cl ture lectrique une cl ture isol e de la terre qui comprend un ou...

Page 30: ...re les fils conducteurs et le plan vertical des fils non conducteurs Il faut galement mettre les fils barbel s la terre intervalles r gu liers Pour des raisons de s curit nous vous conseillons d utili...

Page 31: ...ec mise la terre sur la ligne de raccordement juste avant qu elle entre l int rieur du b timent Si les cl tures lectriques sont destin es chasser les oiseaux contenir des animaux domestiques ou famili...

Page 32: ...eur du syst me de cl ture V rifiez la tension aux bornes de l lectrificateur avec un d tecteur de pertes un voltm tre num rique ou un testeur cl ture Si la tension est inf rieure 6 kV faites v rifier...

Page 33: ...t aucun l ment que vous puissiez r parer vous m me Adressez vous imp rativement un service apr s vente en cas de dysfonctionnement de l appareil L appareil en fin de vie ainsi que ses composants doive...

Page 34: ...34...

Page 35: ...of the safety instructions in this manual carefully before installing the energiser Check your installation to ensure that it complies with all local safety regulations Note This product has been desi...

Page 36: ...vestock when compared with other fencing mechanisms for example barbed wire Installation To set up the energiser for use install the battery and connect the energiser to an electric fence and an earth...

Page 37: ...or lights will flash with each pulse The lights indicate the approximate voltage at the fence output terminals except when the selector switch is set to Full power with battery test Recommended Indica...

Page 38: ...n Fast The energiser will pulse fast at all times For detailed information refer to Auto setting next section Auto The energiser will adjust its pulse speed to conserve battery power depending on the...

Page 39: ...imal battery charge level Optimal battery charge level Readings for on No action required a solar installation are only accurate in the early morning or late evening when the solar panel has been out...

Page 40: ...checked by a battery specialist if necessary and replaced if necessary Battery selection and management This section refers exclusively to rechargeable wet cell lead acid batteries for example car tra...

Page 41: ...battery charger to recharge the battery Refer to the battery manufacturer s recommenda tions 1 Disconnect the battery from the energiser 2 Attach the positive battery charger lead to the positive ter...

Page 42: ...ks Building an Electric Fence Components of an electric fence An electric fence system comprises the following elements An energiser An earth system This comprises a number of metal stakes inserted in...

Page 43: ...s power or the earth system from another energiser Away from stock or other traffic that could interfere with the installation At a site that can be easily observed for maintenance Ideally at a site t...

Page 44: ...tended to periodically deliver voltage impulses to a fence connected to it Fence A barrier for animals or for the purpose of security comprising one or more conduc tors such as metal wires rods or rai...

Page 45: ...wires are positioned at a minimum dis tance of 150 mm 6 from the vertical plane of the non electrified wires The barbed wire and razor wire shall be earthed at regular intervals For safety reasons we...

Page 46: ...birds household pet containment or training animals such as cows need only be supplied from low output energisers to obtain satisfactory and safe performance In electric fences intended for deterring...

Page 47: ...ge is less than 6 kV request your PATURA service agent to check the energiser Check the energiser earthing Use the procedure described in Installing and testing an earth system on page 43 Check your f...

Page 48: ...Full power fast pulse 135 mA 250 mA Half power fast pulse 70 mA 125 mA Half power slow pulse 45 mA 85 mA Output voltage No Load 10 5 kV 10 7 kV 500 ohms 5 3 kV 5 9 kV Max Output energy 1 3 J at 500 o...

Reviews: