background image


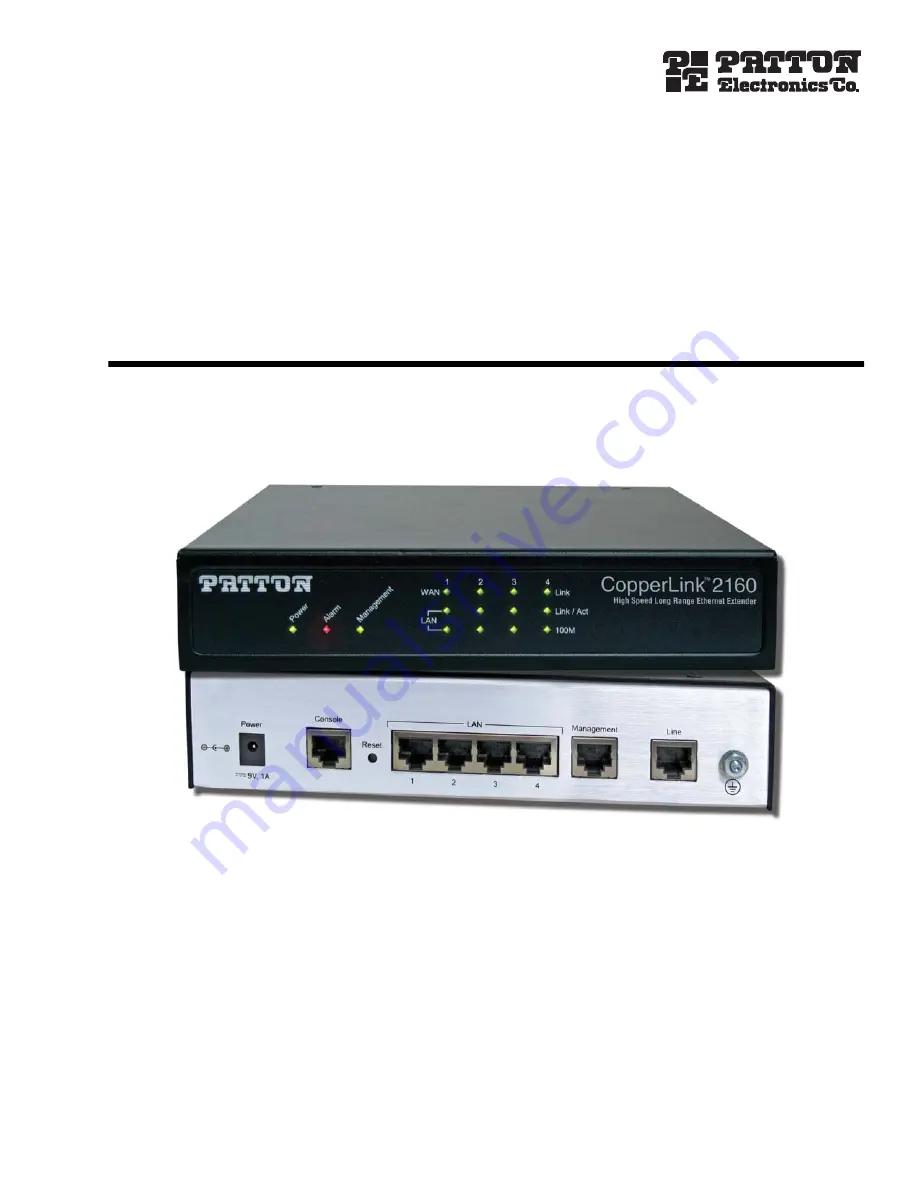
CopperLink™ Model 2160 Series


Long Range Ethernet Extender


Getting Started Guide


Sales Office:


+1 (301) 975-1000


Technical Support:


+1 (301) 975-1007


E-mail:


[email protected]


WWW:


www.patton.com


Part Number: 


07M2160-GS, Rev. B


Revised: 


January 20, 2010


Start Installation

For Quick 

Summary of Contents for CopperLink 2160 Series

Page 1: ... Range Ethernet Extender Getting Started Guide Sales Office 1 301 975 1000 Technical Support 1 301 975 1007 E mail support patton com WWW www patton com Part Number 07M2160 GS Rev B Revised January 20 2010 Start Installation For Quick ...

Page 2: ... be free from defects and will at our option repair or replace the product should it fail within one year from the first date of shipment This warranty is limited to defects in workmanship or materials and does not cover customer damage abuse or unauthorized modification If the product fails to perform as warranted your sole recourse shall be repair or replacement as described above Under no condi...

Page 3: ... information 17 2 Applications overview 22 3 Hardware installation 26 4 Web configuration 32 5 Console and Telnet configuration 66 6 Contacting Patton for assistance 97 A Compliance information 100 B Specifications 102 C Port pin outs 105 ...

Page 4: ...el 19 LED descriptions 19 Model 2160 rear panel 20 Port descriptions 20 Reset button 21 Ground terminal 21 2 Applications overview 22 Introduction 23 Typical application 23 Distance charts 24 Distance Chart 2160 Series Standard Setting 24 Distance Chart 2160 Series High Speed Setting 25 3 Hardware installation 26 Introduction 27 Planning the installation 27 Network diagram 28 IP related informatio...

Page 5: ...ion Options 40 LINE 40 Line Type 40 Annex Type 40 TCPAM Type 41 Main Rate 41 SNR Margin 41 Line Probe 41 VLAN 42 802 1Q Tag Based VLAN 44 Tag Based VLAN Overview 44 Configuring 802 1Q VLAN Tagging 45 Port Based VLAN 47 Port Based QinQ 48 Quality of Service QoS 49 Port Based Priority 50 VLAN Tag Priority 51 WRR Scheduling Configuration Example 52 IP DSCP Priority 53 Differentiated Services Overview...

Page 6: ...Log in using Telnet 68 Interface commands 68 Window structure 69 Main Menu Tree 70 Menu tree for authorized users 70 Menu tree for unauthorized users 71 Enable Command Menu 72 Setup Command Menu 73 Line 73 Mode 74 Link 74 Annex Type 74 TCPAM Type 74 Maximum Main Rate 74 SNR Margin 74 Line Probe 75 Clear 75 LAN 75 VLAN 76 Mode 76 802 1Q VLAN 77 Port Based VLAN 78 QoS 79 Mode 79 Queue Weight 80 Queu...

Page 7: ...1 Legal IP Address Pool 91 SNMP 92 Community 92 Trap host 93 Supervisor Password and ID 94 Supervisor Password 94 Supervisor ID 94 Utility Command Menu 95 Upgrade main software 95 Backup system configuration 95 Restore system configuration 95 Exit Command 96 6 Contacting Patton for assistance 97 Introduction 98 Contact information 98 Warranty Service and Returned Merchandise Authorizations RMAs 98...

Page 8: ...Representative 101 B Specifications 102 Line Connector 103 Line Modulation 103 Ethernet Connector 103 LAN Protocols 103 VLAN Support 103 QoS Support 103 Management Connector 103 Management Interface 104 Front Panel Indicators 104 Power Supply 104 Environment 104 Dimensions 104 Weight 104 C Port pin outs 105 Introduction 106 Console port 106 Ethernet 107 Line CopperLink 107 ...

Page 9: ...hernet frame 48 22 QoS page 49 23 QoS Port Based Priority page 50 24 QoS VLAN Tag Priority page 51 25 IEEE 802 1Q Tagged Frame for Ethernet 51 26 Service by WRR 53 27 Differentiated Services field 53 28 QoS IP DSCP Priority page 55 29 Rate Control page 56 30 Rate Control options 56 31 LINE Status page 8 wire model shown 57 32 MGMT Status page 57 33 LAN Status page 58 34 Security Administration pag...

Page 10: ...Started Guide 48 Main screen for authorized users 71 49 Main menu for unauthorized users 71 50 Main screen for unauthorized users 71 51 LINE Status 87 52 Interface Status 87 53 System Information 88 54 EIA 561 RJ 45 8 pin port 106 ...

Page 11: ...t SNMP Communities 61 14 Console settings 68 15 Interface commands 68 16 Enable Command Menu 72 17 Line Options 73 18 Line Type Chart 74 19 Main Rate Chart 74 20 LAN Options 75 21 VLAN Mode Options 76 22 802 1Q VLAN Options 78 23 VLAN Mode Options 79 24 Queue Weight Options 80 25 Queue Schedule Types 80 26 Queue Schedule Options 81 27 Port Based Priority QoS Options 81 28 VLAN Tag Priority QoS Opt...

Page 12: ...es quick start hardware installation procedures Chapter 4 Web configuration on page 32 describes configuring the Model 2160 via the web interface Chapter 5 Console and Telnet configuration on page 66 describes configuring the Model 2160 via the console interface Chapter 6 Contacting Patton for assistance on page 97 contains information on contacting Patton tech nical support for assistance Appendi...

Page 13: ...PORTANT heading calls attention to important information The alert symbol and CAUTION heading indicate a potential hazard Strictly follow the instructions to avoid property damage The shock hazard symbol and CAUTION heading indicate a potential electric shock hazard Strictly follow the instructions to avoid property damage caused by electric shock The alert symbol and WARNING heading indicate a po...

Page 14: ...powered units ensure that the power cable used meets all applicable standards for the country in which it is to be installed and that it is connected to a wall outlet which has earth ground Hazardous network voltages are present in WAN ports regardless of whether power to the Model 2160 is ON or OFF To avoid electric shock use caution when near WAN ports When detaching the cables detach the end aw...

Page 15: ...ightly moist anti static cloth Place the unit on a flat surface and ensure free air circulation Avoid exposing the unit to direct sunlight and other heat sources Protect the unit from moisture vapors and corrosive liquids Always follow ESD prevention procedures when removing and replacing cards Wear an ESD preventive wrist strap ensuring that it makes good skin contact Connect the clip to an unpai...

Page 16: ...ords are in boldface font Futura bold italic type Parts of commands which are related to elements already named by the user are in boldface italic font Italicized Futura type Variables for which you supply values are in italic font Futura type Indicates the names of fields or windows Garamond bold type Indicates the names of command buttons that execute an action Angle brackets indicate function a...

Page 17: ...17 Chapter 1 General information Chapter contents Model 2160 overview 18 Model 2160 front panel 19 LED descriptions 19 Model 2160 rear panel 20 Port descriptions 20 Reset button 21 Ground terminal 21 ...

Page 18: ... Extender incorporates multi pair bonding to offer unmatched rate reach and reliable Ethernet connectivity providing symmetrical 22 8 Mbps of bandwidth over 4 pair 8 wire at dis tances up to 1 8 miles 2 9 km The Model 2160 comes standard with a 4 port fast Ethernet switch with full QoS and CoS features VLAN 802 1q capabilities include 4 levels of priorities traffic flow control and rate control Th...

Page 19: ...ower is applied ALM On Blink LINE connection dropped LINE self test DIAG On Management port is connected WAN 1 4 LINK On Blink LINE is connected LINE handshake transmitted received data LAN 1 4 LINK ACT On Blink Ethernet is connected Ethernet link transmitted received data LAN 1 4 100M On Off LAN port is on 100M mode LAN port is on 10M mode Power CopperLink 2160 Long Range Ethernet Extender PWR AL...

Page 20: ...5 connector with EIA 561 pinout connects the router to a serial terminal such as a PC or ASCII terminal also called a dumb terminal Asynchronous default data rate 9600 bps hardware DSR and DTR signals for external modems are wired directly together internally RST Reset button for rebooting or loading factory default settings LAN LAN Ethernet Ports 1 4 10 100Base Tx full half duplex RJ 45 auto dete...

Page 21: ...onfiguration To restart the unit in bootloader mode to be used only by trained CopperLink technicians Start with the unit powered off Press and hold the Reset button while applying power to the unit Release the Reset button when the Power LED starts blinking so the unit will enter bootloader mode Ground terminal The marked lug or terminal should be connected to the building protective earth bus Th...

Page 22: ... Chapter 2 Applications overview Chapter contents Introduction 23 Typical application 23 Distance charts 24 Distance Chart 2160 Series Standard Setting 24 Distance Chart 2160 Series High Speed Setting 25 ...

Page 23: ...rs to take advantage of the existing copper infrastructure to connect remote LAN s across distances and at speeds previously unthought of The auto rate feature ensures the highest speed is achieved on each connection and the plug n play operation ensures they are up and running in sec onds Add in the 4 x auto sensing full half duplex 10 100Base TX Ethernet ports with the integrated crossover switc...

Page 24: ...s kbps miles km miles km miles km 192 384 768 4 1 6 6 5 2 8 3 6 6 10 6 256 512 1024 3 7 5 9 4 7 7 5 6 0 9 6 512 1024 2048 3 3 5 3 4 2 6 7 5 4 8 6 768 1536 3072 3 1 5 0 4 0 6 4 5 1 8 1 1024 2048 4096 3 0 4 9 3 8 6 2 4 9 7 9 1280 2560 5120 2 8 4 6 3 6 5 8 4 6 7 4 1536 3072 6144 2 7 4 4 3 5 5 6 4 5 7 2 2048 4096 8192 2 6 4 1 3 2 5 2 4 1 6 6 2304 4608 9216 2 5 4 0 3 1 5 0 4 0 6 4 3840 7680 15360 1 9 3...

Page 25: ...iles km miles km miles km 384 768 1536 1 6 2 6 2 0 3 2 2 6 4 1 512 1024 2048 1 6 2 6 1 9 3 0 2 5 4 0 1024 2048 4096 1 3 2 1 1 6 2 6 2 2 3 5 1536 3072 6144 1 2 2 0 1 5 2 4 2 0 3 2 2048 4096 8192 1 1 1 8 1 4 2 3 1 9 3 0 2560 5120 10240 1 1 1 8 1 3 2 1 1 8 2 9 3072 6144 12288 1 0 1 7 1 3 2 1 1 7 2 7 4096 8192 16384 0 9 1 5 1 2 2 0 1 6 2 6 4608 9216 18432 0 9 1 5 1 2 2 0 1 6 2 6 7680 15360 30720 0 9 1...

Page 26: ...rmation 28 AC Power Mains 28 Location and mounting requirements 29 Installing the Model 2160 29 Unpacking the Model 2160 29 Connecting cables 29 Grounding the Model 2160 and connecting power 30 Configuring the Model 2160 31 Web configuration requirements 31 Console configuration requirements 31 Telnet configuration requirements 31 ...

Page 27: ...les Grounding the Model 2160 and connecting power on page 30 describes how to ground and connect the power source Planning the installation Before beginning the actual installation we strongly recommend that you gather all the information you will need to install and set up the device Create a network diagram Gather IP related information Install the hardware and software needed to configure the M...

Page 28: ...hernet LAN and WAN ports You will need a PC or equivalent with a VT 100 emulation program e g HyperTerminal to configure the software on your Model 2160 AC Power Mains If you suspect that your AC power is not reliable for example if room lights flicker often or there is machinery with large motors nearby have a qualified professional test the power Install a power conditioner if necessary Refer to...

Page 29: ...e shipping carrier immediately for claim purposes Save all packing mate rial in case you need to return an item to the factory for servicing The Model 2160 comes with the following items Model 2160 Quick Start Guide Model 2160 An RJ 45 to RJ 45 cable for use with the console and Ethernet ports A DB 9 to RJ 45 EIA 561 adapter for connecting a PC s serial port to the Model 2160 console port CD ROM c...

Page 30: ...ounding stud see figure 6 and the grounding source 3 Connect the power adapter to the DC 9V port on the Model 2160 and then connect to the power source Mains Voltage Do not open the case the when the power cord is attached Line voltages are present within the power supply when the power cords are connected The mains outlet that is utilized to power the device shall be within 10 feet 3 meters of th...

Page 31: ...n directly connect a terminal or a PC equipped with a terminal emulation program such as Hyper Terminal to the Ethernet Extender s console port Use the supplied serial cable RJ 45 to DB9F to connect the Model 2160 to a PC After marking the connec tion configure the terminal emulation program to use the following parameters 9600 bps 8 data bits no parity 1 stop bit Note For detailed information on ...

Page 32: ...e 41 SNR Margin 41 Line Probe 41 VLAN 42 802 1Q Tag Based VLAN 44 Tag Based VLAN Overview 44 Configuring 802 1Q VLAN Tagging 45 Port Based VLAN 47 Port Based QinQ 48 Quality of Service QoS 49 Port Based Priority 50 VLAN Tag Priority 51 WRR Scheduling Configuration Example 52 IP DSCP Priority 53 Differentiated Services Overview 53 Configuring DSCP Options 55 Rate Control 56 Status Options 57 LINE S...

Page 33: ...l 2160 Series Getting Started Guide 4 Web configuration SNMP Administration 60 Community Pool 61 Trap Host Pool 62 Utility Options 62 System Information 62 Configuration Tool 63 Upgrade 64 Logout 64 Restart 65 ...

Page 34: ... allow users to manage this Model 2160 form anywhere on the network through a standard browser such as Internet Explorer TCP IP setup When DHCP is enabled the Model 2160 acts as a DHCP server in your network The Model 2160 will auto matically assign IP address for the management port connection To set up TCP IP on a Windows PC 1 Click the Start button Select the Control Panel 2 Double click on the...

Page 35: ...me and password after initial onfiguration Figure 7 System login screen Basic Configuration Options This section contains information for setting up the operation mode and MGMT port IP DHCP server and LAN via the WMI Figure 8 shows a flowchart demonstrating basic setup via the WMI for the Model 2160 Figure 8 Basic setup flowchart Operation mode and MGMT port To configure the operation mode and MGM...

Page 36: ...e if your Internet service has been configured with a host name In most cases you can ignore this field 4 Select an option for Trigger DHCP Service If you don t need the DHCP service select Disable 5 Click Next to commit your changes and continue to the DHCP Server page see DHCP server on page 36 DHCP server Dynamic Host Configuration Protocol DHCP is a communication protocol that allows network a...

Page 37: ...from 0 to 255 but 0 is reserved as the network name and 255 is reserved for broadcast This implies that the legal IP address range is from 1 to 254 That means you cannot assign an IP greater than 254 or less than 1 3 A Lease Time of 72 hours indicates that the DHCP server will reassign IP information every 72 hours which is the default value for the Model 2160 You can set up the Lease Time for a r...

Page 38: ...le or Dynamic IP click Next at the bottom of the screen to save your changes If you select Static IP you can enter information for IP Subnet Mask Gate way and DNS Server s IP 3 If you select Static IP as the LAN Type enter details in the Static IP section The default values for Static IP are IP Address 192 168 2 1 Subnet Mask 255 255 255 0 Gateway 0 0 0 0 DNS Server 1 168 95 1 1 DNS Server 2 168 9...

Page 39: ...nformation on the pages for Operation Mode and MGMT Port DHCP Server and LAN the Basic Setup Review page will display to confirm your changes Figure 12 Review and save basic setup changes 2 Look over the Review page to confirm the desired settings 3 Click Restart to reboot the Model 2160 with the new settings 4 Click Continue to configure other options ...

Page 40: ...each the LINE advanced configuration page You can setup the Line Type number of wires Annex Type TCPAM Type Main Rate SNR Margin and Line Probe settings for LINE parameters Figure 13 LINE page Line Type Select the line type for your model from the Link drop down list Line type means how many wires you want to use on the line side For example you can select 2 wire 4 wire or 8 wire line type for the...

Page 41: ...ger SNR margin values For example if you set the SNR margin is 5 the LINE connection will drop and reconnect when the SNR margin is lower than 5 On the other hand the device will reduce the line rate and reconnect for better line connection quality You may select the SNR margin from the range 10 to 21 Line Probe For adaptive mode applications set the Line Probe to Enable The Model 2160 will adapt ...

Page 42: ...en properly configured VLAN prevents one subscriber from accessing the network resources of another on the same LAN VLAN also increases network performance by limiting broadcasts to a smaller and more manageable logical broadcast domain In traditional switched environments all broadcast packets go to each every individual port With VLAN all broadcasts are confined to a specific broadcast domain Yo...

Page 43: ...guration Figure 15 VLAN Diagram VID 20 VID 30 VID 10 PWR ALM DIAG WAN LAN 100M LINK ACT LINK 1 2 3 4 CopperLink 2160 Long Range Ethernet Extender VID 10 VID 20 VID 30 LAN3 LAN1 LAN2 LAN4 CopperLink Model 2160 Long Range Ethernet Extender Backbone WAN5 WAN4 WAN6 WAN7 WAN8 WAN3 WAN2 WAN1 ...

Page 44: ...AN ID A number to identify the VLAN segment Select from 1 to 4094 PVID Port VID An untagged member of the default VLAN Select from 1 to 4094 Link Type Select from Access or Trunk Access means the port can receive or send untagged packets Trunk means that the port can receive or send tagged packets Tag Based VLAN Overview Figure 17 shows the breakdown of the VLAN tag field Figure 17 VLAN tag field ...

Page 45: ...configures one VLAN by default VID 1 A port such as LAN1 4 line or sniffing can have only one Port VID PVID but can have as many VID groups as the Model 2160 has memory in its VLAN table to store them Ports in the same VLAN group share the same frame broadcast domin thus increase network performance through reduced boardcast traffic You can modify VLAN groups at any time by adding moving or changi...

Page 46: ...main of the frame Port Overlapping You can use port overlapping to allow access to commonly shared network resources among different VLAN groups such as file servers or printers Untagged VLANs Untagged or static VLANs are typically used to reduce broadcast traffic and to increase security A group of network users assigned to a VLAN form a broadcast domain that is separate from other VLANs configur...

Page 47: ...ypically performs the VLAN assignment The port configuration is static and cannot be automatically changed to another VLAN without manual reconfiguration As with other VLAN approaches the packets forwarded using this method do not leak into other VLAN domains on the network After a port has been assigned to a VLAN the port cannot send to or receive from devices in another VLAN The default setting ...

Page 48: ... receive or send tagged packets A VLAN tag uses the tag protocol identifier TPID field to identify the protocol type of the tag The value of this field as defined in IEEE 802 1Q is 0x8100 33024 Figure 21 VLAN Tag structure of an Ethernet frame On devices of different vendors the TPID of the outer VLAN tag of QinQ frames may have different default values You can set or modify this TPID value so tha...

Page 49: ...on such as video on demand Click on QoS under Advanced on the main menu to reach the QoS advanced configuration page Figure 22 QoS page QoS Quality of Service is used to decide which devices can get priorities to pass though the Model 2160 once the bandwidth is exhausted or fully saturated There are three types of QoS priority modes Port Based Priority VLAN Tag Priority and IP DSCP Priority You ca...

Page 50: ...ority SP WRR services on a rotating basis and is activated only when a port has more traffic than it can handle A queue is a given an amount of bandwidth irrespective of the incoming traffic on that port The queue then moves to the back of the list The next queue is given an equal amount of bandwidth and then moves to the end of the list and so on depending on the number of queues being used This ...

Page 51: ...ity page VLAN Tag Priority uses the tag field information which has been inserted into an Ethernet frame If a port has an 802 1Q compliant device attached such as this Ethernet Extender these tagged frames can carry VLAN membership information Figure 25 IEEE 802 1Q Tagged Frame for Ethernet Priority defines the user priority level for different classes of traffic There are 8 possible priority leve...

Page 52: ...nts the head of line blocking that can occur with strict priority queuing For this example set up the WRR Type 1 to share bandwidth by using scheduling weights 1 2 4 and 8 for queues 0 through 3 respectively According to above two tables we can get the mapping QoS values to Egress Queues as the following ely Table 9 VLAN Tag Priority Levels Priority Level Traffic Type 0 default Best Effort 1 Backg...

Page 53: ...tion DiffServ defines a new DS Differentiated Services field to replace the Type of Service ToS field in the IP header The DS field contains a 2 bits unused field and 6 bits DSCP field which can define up to 64 service levels Figure 27 shows the DS field Figure 27 Differentiated Services field The DSCP value used to identify 64 levels 26 64 of service determines the forwarding behavior that each p...

Page 54: ...class with the probability Bits 0 1 and 2 define the class bits 3 and 4 specify the drop probability bit 5 is always 0 Table 11 Bits in the DSCP field Bit 0 Bit 1 Bit 2 Precedence Usage 1 1 1 7 Stays the same link layer and routing protocol keep alive 1 1 0 6 Stays the same used for IP routing Protocols 1 0 1 5 Express Forwarding EF 1 0 0 4 Class 4 0 1 1 3 Class 3 0 1 0 2 Class 2 0 0 1 1 Class 1 0...

Page 55: ...Each DSCP value from 0 to 63 is mapped to a Queue value from 0 to 3 from the drop down list The num ber 0 represents the lowest priority and number 3 represents the highest priority and according various queuing strategies to tailor performance to requirements If you want to save the changes click Finish After you click Finish review page will display for you to confirm your changes To let the con...

Page 56: ... efficient networks and prevent a small number of users from monopolizing network bandwidth Rate control can be used to intelligently manage bandwidth allocation in the networking It can prevent one user or device from dominating the available network bandwidth and it allows IT managers to allocate greater bandwidth to the departments and applications that need it Figure 30 Rate Control options Yo...

Page 57: ...or mation such as SNR margin atteunation and CRC error count Figure 31 LINE Status page 8 wire model shown If two Model 2160s have been linked together you can view their run time line rate status and performance information from this screen If you want to clear the performance data click Clear CRC Error Note CPE side s line rate according to the setting of CO side MGMT Status The MGMT Status page...

Page 58: ...inistration Options This section allows you to conifugre administration options for Security and Simple Network Management Protocol SNMP Security Administration For system security you should change the default user name and password during initial setup Otherwise unauthorized persons can access the Model 2160 and change the parameters Click Security in the Adminis tration menu to set up the param...

Page 59: ...and Password are admin There are two UI modes the WMI and the Telnet Console mode to set up the Model 2160 Figure 35 Model 2160 configuration modes Remote Management Hosts The Remote Management Host section of the Security Administration page enables you to set up the legal IP addresses from which authorized persons can configure the Model 2160 This is the most secure way for the network administr...

Page 60: ...the Model 2160 with the new settings Click Continue to con figure other options SNMP Administration Simple Network Management Protocol SNMP provides for the exchange of messages between a network management client and a network management agent for remote management of network nodes These mes sages contain requests to get and set variables that exist in network nodes in order to obtain statistics ...

Page 61: ... up community pools Figure 38 SNMP community pool configuration In the table of the current community pool you can set up access Status Enable Turn on the SNMP function Disable Turn off the SNMP function Access Right Deny Restrict all access Read Read only access Write Read write access Community The password for write access After configuring the community pool click Finish The browser will promp...

Page 62: ...rsion 1 is for SNMPv1 Version 2 for SNMPv2 Disable Turn off IP Address Enter the trap host IP address Community Enter the community password Click OK to finish the setup The browser will prompt the configured parameters and check it before writing into NVRAM Press Restart to reboot the Model 2160 with the new settings Click Continue to configure other options Utility Options This section allows yo...

Page 63: ...will load the factory default parameters for the Model 2160 Note This option will change all of the settings back to factory default You will lose all of your current settings Restore Configuration Use this option to recover the backup configuration easily Click Finish after select ing Restore Configuration Browse to the backup file then click Finish again The Model 2160 will auto matically restor...

Page 64: ... file Click OK to begin the upgrade process The system will reboot auto matically after finishing Firmware upgrades will only take effect after the system reboots After the firmware upgrade process is complete click System Info in the Utility menu to verify your current firmware version number Logout To exit the Model 2160 Web Management Interface securely click Logout in the Utility menu You have...

Page 65: ...2160 Series Getting Started Guide 4 Web configuration Restart To reboot the Model 2160 click Restart in the Utility menu then click the Restart button Figure 44 Restart page The following screen displays Figure 45 Restart page ...

Page 66: ...authorized users 71 Enable Command Menu 72 Setup Command Menu 73 Line 73 Mode 74 Link 74 Annex Type 74 TCPAM Type 74 Maximum Main Rate 74 SNR Margin 74 Line Probe 75 Clear 75 LAN 75 VLAN 76 Mode 76 802 1Q VLAN 77 Port Based VLAN 78 QoS 79 Mode 79 Queue Weight 80 Queue Schedule 80 Port Based Priority QoS 81 VLAN Tag Priority QoS 81 IP DSCP Priority QoS 82 List 83 Rate 83 MGMT 84 DHCP 84 DHCP Server...

Page 67: ... 88 Reboot Command 89 Ping Command 89 Administration Command Menu 90 User Profile 90 Modify Add User 90 Security 91 Telnet TCP Port 91 Legal IP Address Pool 91 SNMP 92 Community 92 Trap host 93 Supervisor Password and ID 94 Supervisor Password 94 Supervisor ID 94 Utility Command Menu 95 Upgrade main software 95 Backup system configuration 95 Restore system configuration 95 Exit Command 96 ...

Page 68: ...mote management Connect the Ethernet cable to the MGMT port of Model 2160 to your computer The MGMT LED on the front panel of the Model 2160 will light up Start your Telnet client with VT100 terminal emulation and connect to the management IP of the Model 2160 Wait for the login prompt to display Enter your user name and password When you see the login screen you can log on to the Model 2160 Enter...

Page 69: ...op bottom with the U O keys For example to show the system information log on to the Model 2160 Press the K key twice and select the show command with the L key Select the system command in the submenu The system will display general information You may also use the Enter key to select a command Figure 46 Console Telnet Menu Window structure From top to bottom the window is divided into four parts...

Page 70: ... can access all of the configuration commands in the subdirectories using the enable command Unauthorized users cannot change any configurations but can view the status and information for the Model 2160 They may also use the ping command to check the Model 2160 s connection Menu tree for authorized users Authorized users may log into the Model 2160 with a supervisor password to obtain access to a...

Page 71: ...d Telnet configuration Figure 48 Main screen for authorized users Menu tree for unauthorized users Unauthorized users may access the following configuration commands for the Model 2160 Figure 49 Main menu for unauthorized users Figure 50 Main screen for unauthorized users ...

Page 72: ... show View system configuration write Update flash configuration reboot Reset and boot system ping Packet internet groper command admin Setup management features utility TFTP upgrade utility exit Quit system Table 16 Enable Command Menu Command Description enable Change the configuration and write changes to nonvolatile RAM NVRAM setup Initially configure the Model 2160 status View the status of t...

Page 73: ...erface profile vlan Configure virtual LAN parameters qos Configure Quality of Service parameters rate Configure Rate Control parameters mgmt Configure management interface profile dhcp Configure DHCP parameters dns_proxy Configure DNS proxy parameters hostname Configure local host name default Restore factory default settings mode Configure line mode link Configure line link annex Configure line a...

Page 74: ... main rate is the multiple of 64kbps 128kbps or 256kpbs depending on your model type Use Table 19 to determine the best main rate for your model SNR Margin SNR margin is an index of line connection quality Generally you won t need to change the SNR Margin You can view the actual SNR margin in status command menu You will experience better line connection quality for larger SNR margin values For ex...

Page 75: ...configure the Link type LAN IP address and subnet mask for the LAN interface Table 20 shows the options available within the lan command menu Command setup lan 1 link_type Disable Dynamic Static Message Please input the following information Link type TAB Select Disable Select the lan 1 link_type as Disable Dynamic or Static Then select address from the lan menu Command setup lan 1 address ip netm...

Page 76: ...etup menu and press Enter The following menu displays To activate the VLAN function move the cursor to mode and press Enter The products support two types of VLAN 802 1Q and Port Based 802 1Q defines the operation of VLAN bridges that permit the definition operation and administration of VLAN topologies within a bridged LAN infrastructure Port Based VLANs are VLANs where the packet for warding dec...

Page 77: ...me membership VLAN ID 10 Use the pvid command to change the member port to untagged members Command setup vlan pvid 1 6 1 4094 Message Please input the following information Port index 1 6 VID value ENTER for default 1 PVID Port VID is an untagged member from 1 to 4094 for the default VLAN For example set vlan pvid 1 100 set vlan pvid 2 100 set vlan pvid 3 100 set vlan pvid 4 100 set vlan pvid 5 1...

Page 78: ...ypically performs the VLAN assignment The port configuration is static and cannot be automatically changed to another VLAN without manual reconfiguration You can set up Port Based VLAN using the method for 802 11Q However VID PVID or link type do not matter for Port Based VLAN Use the list command to check the status of the VLAN Virtual LAN Parameter VLAN Mode Port Based VLAN Virtual LAN Table No ...

Page 79: ...he cursor to qos in the setup menu and press Enter The following menu displays Mode You can choose from three types of QoS Port Based VLAN Tag and IP DSCP If you are not going to use the QoS function set this option to Disable Command setup qos mode Disable PortBased VlanTag IpDscp Message Please input the following information Trigger qoS function TAB Select Disable Table 23 shows the options ava...

Page 80: ...s are Weight Round Robin WRR Best Effort BE and Strictly Priority SP WRR services on a rotating basis and is activated only when a port has more traffic than it can handle A queue is a given an amount of bandwidth irrespective of the incoming traffic on that port The queue then moves to the back of the list The next queue is given an equal amount of bandwidth and then moves to the end of the list ...

Page 81: ...ENTER for default 3 3 Set up the queue value 0 1 2 or 3 on each port VLAN Tag Priority QoS Command setup qos vlanTagPri 0 7 0 3 Message Please input the following information VLAN TAG index 0 7 0 Queue index ENTER for default 1 1 Set up the queue index 0 1 2 or 3 on Priority VLAN Tag VLAN Tag Priority uses the tag field information which has been inserted into an Ethernet frame If a port has an 80...

Page 82: ... delay sensitive applications via priority queuing or bandwidth allocation The DSCP value used to identify 64 levels 26 64 of service determines the forwarding behavior that each packet gets across the DiffServ network Based on the marking rule different kinds of traffic can be marked for different priorities of forwarding Resources can then be allocated according to the DSCP values and the con fi...

Page 83: ...e TAB Select no_limit Table 31 shows the options available to set up the data rate Table 30 IP DSCP Priority QoS Options DSCP Queue Index DSCP Queue Index DSCP Queue Index DSCP Queue Index 0 16 32 48 1 17 33 49 2 18 34 50 3 19 35 51 4 20 36 52 5 21 37 53 6 22 38 54 7 23 39 55 8 24 40 56 9 25 41 57 10 26 42 58 11 27 43 59 12 28 44 60 13 29 45 61 14 30 46 62 15 31 47 63 port Modify port rate list Sh...

Page 84: ...1 1 Subnet mask ENTER for default 255 255 255 0 DHCP Dynamic Host Configuration Protocol DHCP is a communication protocol that allows network adminis trators to manage and automate the assignment of Internet Protocol IP addresses in an organization s net work Each machine that can connect to the Internet needs a unique IP address When an organization sets up the users with a connection to the Inte...

Page 85: ...dress list Move the cursor to fixed in the dhcp menu and press Enter The following menu displays When using the fixed host entry function you must enter the MAC address and IP address at the same time You can configure up to 10 maximum fixed host IP addresses Use the list command to view the DHCP configuration generic DHCP server generic parameters fixed DHCP server fixed host IP list list Show DH...

Page 86: ...r host in various forms of electronic communication Some ISP providers require the Host Name as identifica tion You may check with your ISP to see if your Internet service has been configured with a host name In most cases you can ignore this field Move the cursor to hostname in the setup menu and press Enter The host name cannot use spaces and cannot have more than 15 characters Command setup hos...

Page 87: ... the local side Ethernet Extender and SNR margin attenuation and CRC error count of the remote side Ethernet Extender Figure 51 LINE Status Interface Status To view the status of the MGMT interface move the cursor to interface in the status menu and press Enter Figure 52 Interface Status LINE Show LINE status interface Show interface statistics status Table 32 Status Command Menu Command Descripti...

Page 88: ...The write command saves all new configuration changes to Flash on the Model 2160 You must use the write command and reboot the Ethernet Extender for new configuration changes to tak effect Move the cursor to write in the main menu and press Enter Command write CR Message Please input the following information Are you sure y n y system Show general information config Show all configuration script S...

Page 89: ...ess and then waits for reply The ping output can help you evaluate path to host reliability delays over the path and whether the host can be reached or is func tioning correctly Command ping ip 1 65534 t 1 1999 Message Please input the following information IP address IP 10 0 0 1 Number of ping request packets to send TAB select t Data size 1 1999 32 There are 3 parameters for the ping command IP ...

Page 90: ...ys Use the clear command to delete a user Use the list command to show information for a user profile Use the modify command to edit user information or add a new user to a user profile Modify Add User To modify a user profile or add a new user move the cursor to modify in the user menu and press Enter Select the profile number for the user profile you want to modify Command admin user modify 1 5 ...

Page 91: ...e including user name and UI mode Security The security command menu lists commands to configure sixteen legal IP addresses for Telnet access and the Telnet port number Move the cursor to security in the admin menu and press Enter The following menu displays Telnet TCP Port To set up the Telnet TCP port move the cursor to port in the security menu and press Enter You can select a port number from ...

Page 92: ...t and set variables that exist in network nodes in order to obtain statistics set configura tion parameters and monitor network events SNMP communications can occur over the LAN or WAN con nection The Model 2160 can generate SNMP traps to indicate alarm conditions and it relies on SNMP community strings to implement SNMP security This Model 2160 support both MIB I and MIB II The snmp command menu ...

Page 93: ... can also confgiure five SNMP trap entries Trap host To set up SNMP traps move the cursor to trap in the snmp menu and press Enter You can configure five trap entries Command admin snmp trap 1 5 more Message Please input the following information Trap host entry number 1 5 2 The following menu displays Select edit and press Enter Command admin snmp trap 1 edit Disable 1 2 ip string Message Please ...

Page 94: ...to configure the Model 2160 You should change the supervisor ID and password after initial configuration Supervisor Password To change the supervisor password move the cursor to passwd in the security menu and press Enter The default password is root Command admin passwd pass_conf Message Please input the following information Input old Supervisor password Input new Supervisor password Re type Sup...

Page 95: ...raded firmware file Command utility upgrade ip file Message Please input the following information TFTP server IP address ENTER for default 192 168 0 2 Upgrade filename ENTER for default default bin Backup system configuration To backup the current system configuration move the cursor to backup in the utility menu and press Enter Type the TFTP server IP address and name for the backup file Command...

Page 96: ...information Do you want to disconnect y n y Press y to exit the system A confirmation screen displays Connection closed Press SPACE key to enter console mode configuration enable Modify command privilege setup Configure system status Show running system status show View system configuration write Update flash configuration reboot Reset and boot system ping Packet internet groper command admin Setu...

Page 97: ...er contents Introduction 98 Contact information 98 Warranty Service and Returned Merchandise Authorizations RMAs 98 Warranty coverage 98 Out of warranty service 99 Returns for credit 99 Return for credit policy 99 RMA numbers 99 Shipping instructions 99 ...

Page 98: ... 1 301 975 1007 Alternate Patton support for Europe Middle East and Africa EMEA Online support available at www patton inalp com E mail support e mail sent to support patton inalp com will be answered within 1 business day Telephone support standard telephone support is available five days a week from 8 00 am to 5 00 pm CET 0900 to 1800 UTC GMT by calling 41 0 31 985 25 55 Fax 41 0 31 985 25 26 Wa...

Page 99: ...t will be issued upon receipt and inspection of the equipment 30 to 60 days We will add a 20 restocking charge crediting your account with 80 of the purchase price Over 60 days Products will be accepted for repairs only RMA numbers RMA numbers are required for all product returns You can obtain an RMA by doing one of the following Completing a request on the RMA Request page in the Support section...

Page 100: ...100 Appendix A Compliance information Chapter contents Compliance 101 EMC compliance 101 Radio and TV interference FCC Part 15 101 CE Declaration of Conformity 101 Authorized European Representative 101 ...

Page 101: ... can be determined by disconnecting the cables try to correct the interference by one or more of the following measures moving the computing equipment away from the receiver re orienting the receiving antenna and or plugging the receiving equipment into a different AC outlet such that the computing equip ment and receiver are on different branches CE Declaration of Conformity We certify that the a...

Page 102: ...Line Connector 103 Line Modulation 103 Ethernet Connector 103 LAN Protocols 103 VLAN Support 103 QoS Support 103 Management Connector 103 Management Interface 104 Front Panel Indicators 104 Power Supply 104 Environment 104 Dimensions 104 Weight 104 ...

Page 103: ...x operation LAN Protocols 802 1d Transparent Bridging 2K MAC address learning bridge VLAN Support IEEE 802 1q VLAN Tagging Port Based VLAN up to 4K VLANs VLAN Stacking Q in Q QoS Support Rate limiting rule based port based Traffic classification based on port 802 1p DSCP Differentiated Services Code Point WRR Weighted Round Robin SPQ Strict Priority Queing scheduling algorithm Management Connector...

Page 104: ...nt and MIB RFC 1213 1493 EFM OAM IEEE 802 3af Software upgradeable via web browser TFTP Front Panel Indicators Power Alarm Diagnostic WAN Link x4 Ethernet Link x4 Ethernet 100M x4 Power Supply AC Universal Input UI 90 240 VAC 50 60Hz Environment Operating Temperature 0 50 C Storage Temperature 40 85 C Dimensions 7 67L x 1 89W x 6 61D in 195L x 48H x 168D mm Weight 2 86 lbs 1300 g without power sup...

Page 105: ...105 Appendix C Port pin outs Chapter contents Introduction 106 Console port 106 Ethernet 107 Line CopperLink 107 ...

Page 106: ...nformation for the ports of the Model 2160 Console port Configuration settings 9600 bps 8 bits no parity 1 stop bit no flow control Figure 54 EIA 561 RJ 45 8 pin port Note N C means no internal electrical connection 1 2 3 4 5 6 7 8 8 RTS N C 7 CTS N C 6 TD 5 RD 4 SG 3 DTR 2 CD N C 1 DSR Pins 1 3 are connected together ...

Page 107: ... C Port pin outs Ethernet Note Pins not listed are not used Line CopperLink Table 34 RJ45 socket 10 100Base T Pin Signal 1 TX 2 TX 3 RX 6 RX Table 35 RJ45 socket CopperLink Pin Signal 1 TRD0 2160 2161 2162 2 TRD0 3 TRD1 6 TRD1 4 TRD2 5 TRD2 7 TRD3 8 TRD3 ...

Reviews: