EN
158
EN
159
Operation
Warning!
Always wear eye protec-
tion with side shields. Failure to do
so could result in objects being thrown into
your eyes and other possible serious inju-
ries.
Warning!
This equipment incorpo-
rates parts, that tend to produce
arcs or sparks. Do not use in explosive at-
mosphere.
Warning!
Never exceed the pres-
sure rating of the attached tool as
recommended by the manufacturer. When
using the compressor as an inflation de-
vice, always follow the maximum inflation
guidelines stated by the manufacturer of
the item being inflated.
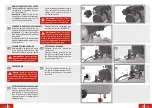
Start up
- Ensure On/Off switch
1
is pushed in to posi-
tion O (OFF).
- Close pressure regulator
clockwise.
- Connect compressor to a suitable outlet
(see technical data). Use a residual current
device (RCD) protected outlet.
- Connect the compressed-air hose and a
suitable tool following section “Draw output
pressure” on previous page and tool manual
(e.g. some tools need to be connected to the
hose after power up.)
- Pull the On/Off switch
1
to position 1 (ON).
- Set the pressure regulator
to the minimum
pressure suitable for your tool or inflatable
item.
NOTE: When the appliance is on, the air com-
pressor will automatically run, as long as the
tank air pressure is below the preset pressure
limit. It will shut off when the max pressure is
reached.
Start up after overload cut-off
- Ensure On/Off switch
1
is pushed in to po-
sition O (OFF) and let the compressor cool
down entirely.
- Press the overload switch
.
- Proceed with a regular start up.
Shut off
- Push down the On/Off switch
to position
O (OFF).
- Unplug the compressor.
- Release output pressure by fully rotating the
pressure regulator
counterclockwise.
- Release tank pressure by rotating the un-
loading nut of the safety valve
11
and pull-
ing the valve rod
until no more air escapes.
Re-tighten nut.
- Drain the tank.
Transport and storage
Warning!
Never transport, store, or
dispose of the compressor while un-
der pressure.
- Drain the tank at the condensation drain
valve
12
.
- Disconnect the coiled hose from the com-
pressor before transport or storage.
- Lift the appliance only by its transport han-
dles
2
.
- Only transport and store the compressor in
upright position. Do not tilt more than 10°:
- Store in a dry and clean place. Lock away
from children.
Care & Maintenance
Danger!
Do not disassemble safety
relief valve or pressure regulator. Do
not open drain valves with air in tank. Bleed
tank. Failure to depressurize tank before
disassembling could result in explosion
and/or serious personal injury.
Warning!
Before performing any
work on the tool, unplug the power
supply cord. Let the appliance cool down.
Burn hazard!
-Wear safety glasses to protect your eyes
whilst cleaning and maintenance.
-
Before work:
Check safety valve
to en-
sure correct operation.
-
After work:
Drain moisture from tank at the
condensation drain valve
12
to prevent tank
corrosion.
-
Weekly:
Check for obvious defects and/or
damaged components.
-
Monthly:
Clean the air filter
-
Monthly:
Check all fixings. These could be-
come loose with time due to vibration.
-
Monthly:
Inspect the hose: The most used
part is the hose. If the hose is worn, it must
be replaced immediately.
-Have any worn or damaged parts replaced at
your local HORNBACH store.
-Always keep the machine clean, dry and free
of oil or grease.
-If the body of the machine needs cleaning,
wipe it with a brush or a soft damp cloth. A
mild detergent can be used but nothing like
alcohol, petrol or other cleaning agent.
-Never use caustic agents to clean plastic
parts.
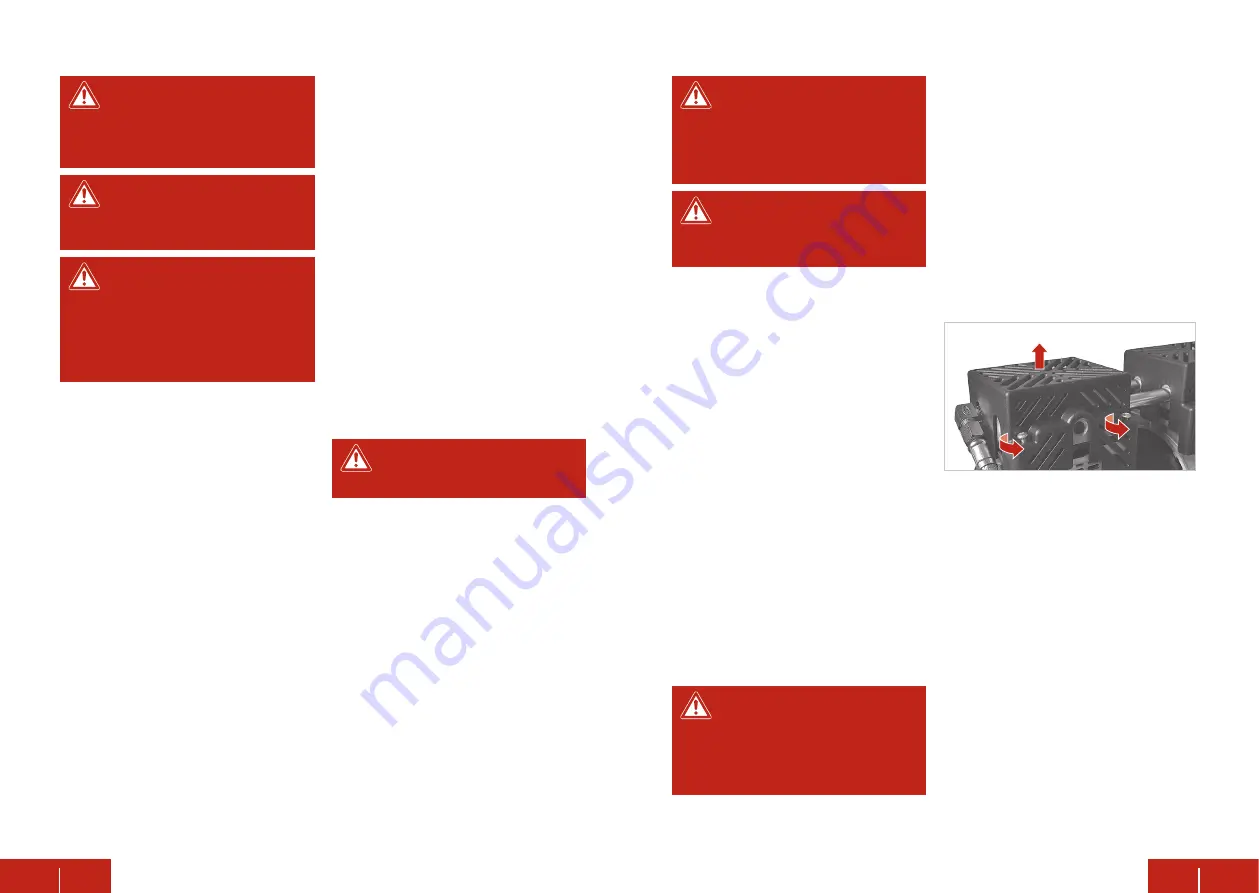
-Regularly clean the cooling ribs. For this
purpose unscrew and remove the coverings.
Fasten the coverings after cleaning the cool-
ing ribs.
Replacement Parts
Warning!
Replacement parts must
conform with the requirements
specified by the manufacturer. Therefore
use original replacement parts only or
spare parts authorised by the manufactur-
er.
In case of service requests or spare parts,
please contact your local HORNBACH store or
write an email to: [email protected]

