background image

©Copyright LOTRONIC 2017  

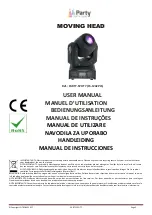
PARTY-SPOT7 


Page 1 


M

M

O

O

V

V

I

I

N

N

G

G


H

H

E

E

A

A

D

D


Ref.: PARTY-SPOT7 (15-1242PLS) 


USER MANUAL 

MANUEL D’UTILISATION 

BEDIENUNGSANLEITUNG


MANUAL DE INSTRUÇÕES 

MANUAL DE UTILIZARE 

NAVODILA ZA UPORABO 

HANDLEIDING 

MANUAL DE INSTRUCCIONES 


IMPORTANT NOTE: Electric products must not be put into household waste. Please bring them to a recycling centre. Ask your local authorities or 

your dealer about the way to proceed. 

NOTE IMPORTANTE : Les produits électriques ne doivent pas être mis au rebut avec les ordures ménagères. Veuillez les faire recycler là où il existe 

des centres pour cela. Consultez les autorités locales ou votre revendeur sur la façon de les recycler. 

WICHTIGER HINWEIS: Elektrogeräte gehören nicht in den Hausmüll. Sie müssen in speziellen Betrieben recycelt werden. Bringen Sie sie zu einer 

speziellen Entsorgungsstelle für Elektrokleingeräte (Wertstoffhof)! 

BELANGRIJK: De elektrische producten mogen niet naast het huisvuil geplaatst worden. Gelieve deze te laten recycleren daar waar er centra’s hiervoor voorzien 

is. Raadpleeg de plaatselijke autoriteiten of uw verkoper ivm de manier van recycleren. 

NOTA IMPORTANTE: Produtos eléctricos não deverão ser postos em contentores de lixo caseiros. Por favor, deposite-os em contentores para reciclagem. 

Questione as autoridades locais ou onde adquiriu o produto sobre como deverá proceder. 

NOTA IMPORTANTA: Deseurile care provin de la produsele electrice si electronice nu se vor pune la gunoiul menajer. Dezafectarea acestora trebuie sa se faca la 

centrele de colectare special amenajate. Contactati autoritatile locale pentru informatii privind procedura de dezafectare a deseurilor electrice si electronice. 


Summary of Contents for 15-1242PLS

Page 1: ...smüll Sie müssen in speziellen Betrieben recycelt werden Bringen Sie sie zu einer speziellen Entsorgungsstelle für Elektrokleingeräte Wertstoffhof BELANGRIJK De elektrische producten mogen niet naast het huisvuil geplaatst worden Gelieve deze te laten recycleren daar waar er centra s hiervoor voorzien is Raadpleeg de plaatselijke autoriteiten of uw verkoper ivm de manier van recycleren NOTA IMPORT...

Page 2: ...rear panel of the fixture This product is intended for indoor use only To prevent risk of fire or shock do not expose fixture to rain or moisture Make sure there are no flammable materials close to the unit while operating The unit must be installed in a location with adequate ventilation at least 20in 50cm from adjacent surfaces Be sure that no ventilation slots are blocked Always disconnect from...

Page 3: ... ground Grounding the common can cause a ground loop and your fixture may perform erratically Test cables with an ohm meter to check correct polarity and to make sure the pins are not grounded or shorted to the shield or each other Mounting The LED moving head provides a unique mounting bracket assembly that integrates the bottom of the base the included omega bracket and the safety cable rigging ...

Page 4: ...shake 100 109 Gobo5 shake 110 119 Gobo4 shake 120 129 Gobo3 shake 130 139 Gobo2 shake 140 149 Gobo1 shake 150 255 Gobo Auto From slow to fast 7 0 30 No function 31 60 Auto1 Speed from slow to fast 61 90 Auto2 Speed from slow to fast 91 120 Auto3 Speed from slow to fast 121 150 Auto4 Speed from slow to fast 151 180 Sound1 Sensitivity from low to high 181 210 Sound2 Sensitivity from low to high 211 ...

Page 5: ...obo3 9 40 49 Gobo4 50 59 Gobo5 60 69 Gobo6 70 79 Gobo7 80 89 Gobo7 shake 90 99 Gobo6 shake 100 109 Gobo5 shake 110 119 Gobo4 shake 120 129 Gobo3 shake 130 139 Gobo2 shake 140 149 Gobo1 shake 150 255 Gobo Auto From slow to fast 10 0 30 No function 31 60 Auto1 Speed from slow to fast 61 90 Auto2 Speed from slow to fast 91 120 Auto3 Speed from slow to fast 121 150 Auto4 Speed from slow to fast 151 18...

Page 6: ...LR male socket Data output Locking 3 pin DMX female socket Data pin configuration Pin1 shield pin 2 pin 3 Dimensions 155 x 145 x 240 mm N W 2 88kg 1 PREPARATIFS Contenu de l emballage 1 effet de lumière PARTY SPOT7 Mode d emploi Cordon XLR Attache Oméga Déballage Dès réception de l appareil ouvrez le carton et vérifiez que le contenu est complet et en bon état Sinon prévenez immédiatement le trans...

Page 7: ...re fonctionner l appareil à des températures supérieures En cas de dysfonctionnement arrêtez immédiatement l appareil N essayez jamais de réparer l appareil par vous même Une réparation mal faite peut entraîner des dommages et des dysfonctionnements Contactez un service technique agréé Utilisez uniquement des pièces détachées identiques aux pièces d origine Ne pas brancher l appareil sur un variat...

Page 8: ...ourvu qu il y ait une ventilation suffisante Lors du choix d un emplacement tenez compte de la facilité d accès à l appareil pour des travaux de maintenance et de nettoyage Utilisez toujours de câbles de sécurité Ne jamais installer l appareil à un endroit exposé à la pluie l humidité aux changements de température importants et présentant une ventilation limitée RIGGING La lyre à led comporte un ...

Page 9: ... 121 150 Auto4 Speed from slow to fast 151 180 Sound1 Sensitivity from low to high 181 210 Sound2 Sensitivity from low to high 211 255 Keep 5 seconds the system reset 10CH CH Value Function 1 0 255 PAN 0 540º 2 0 255 PAN 16 bit 3 0 255 Tilt 0 220º 4 0 255 Tilt 16 bit 5 0 255 Pan Tilt Speed from fast to slow 6 0 255 Dimmer 0 100 7 0 255 Strobe in the line from slow to fast 8 0 9 While 10 19 Color1 ...

Page 10: ...50 255 Gobo Auto From slow to fast 10 0 30 No function 31 60 Auto1 Speed from slow to fast 61 90 Auto2 Speed from slow to fast 91 120 Auto3 Speed from slow to fast 121 150 Auto4 Speed from slow to fast 151 180 Sound1 Sensitivity from low to high 181 210 Sound2 Sensitivity from low to high 211 255 Keep 5 seconds the system reset 4 MENU FUNCTION ADDR 1 512 CHAN 10CH 7CH AUTO AUT1 AUT2 SPED 0 255 AUT...

Page 11: ...nleitung für spätere Bezugnahme aufbewahren und an den nächsten Bediener weitergeben Stets die Netzspannung vor Anschluss des Geräts überprüfen Sie muss mit der auf der Rückseite des Geräts angegebenen Spannung übereinstimmen und darf auf keinen Fall höher sein Dieses Gerät ist nur für Innengebrauch Um Brand und Stromschlag zu vermeiden das Gerät vor Regen und Feuchtigkeit schützen Keine brennbare...

Page 12: ...rt Signalfehler Um Signalübertragungsprobleme und Störungen zu vermeiden ist es ratsam einen DMX Signalwiderstand zwischenzuschalten Einrichten einer seriellen DMX Datenverbindung 1 Den 3 pol Stecker des DMX Kabels in die 3 pol Eingangsbuchse des Controllers stecken 2 Das vom Controller kommende Kabel mit der 3 pol Buchse an den 3 pol Eingangsstecker des folgenden Geräts stecken 3 Dann den Ausgang...

Page 13: ...kop langsam schnell 5 0 9 Weiss 10 19 Farbe1 20 29 Farbe 2 110 119 Farbe 11 120 129 Farbe 12 130 139 Farbe 13 140 149 Farbe 14 150 255 Farbe Automatisch langsam schnell 0 9 Weiss 10 19 Gobo1 20 29 Gobo2 30 39 Gobo3 6 40 49 Gobo4 50 59 Gobo5 60 69 Gobo6 70 79 Gobo7 80 89 Gobo7 shake 90 99 Gobo6 shake 100 109 Gobo5 shake 110 119 Gobo4 shake 120 129 Gobo3 shake 130 139 Gobo2 shake 140 149 Gobo1 shake...

Page 14: ...149 Farbe14 150 255 Farbe Auto langsam schnell 0 9 Weiss 10 19 Gobo1 20 29 Gobo2 30 39 Gobo3 9 40 49 Gobo4 50 59 Gobo5 60 69 Gobo6 70 79 Gobo7 80 89 Gobo7 shake 90 99 Gobo6 shake 100 109 Gobo5 shake 110 119 Gobo4 shake 120 129 Gobo3 shake 130 139 Gobo2 shake 140 149 Gobo1 shake 150 255 Gobo Auto langsam schnell 10 0 30 Keine Funktion 31 60 Auto1 Geschwindigkeit langsam schnell 61 90 Auto2 Geschwin...

Page 15: ...O RST YES Technische Daten Versorgung 100 240V 50 60Hz Verbrauch 25W Lichtquelle weisse 10W Hochleistungs LED DMX Kanäle 7 10 Kanäle Eingebaute Programme 8 Pan Tilt X Achse 540 Y Achse 190 Dateneingang 3 pin XLR Stecker mit Verriegelung Datenausgang 3 pin DMX Buchse mit Verriegelung Stiftbelegung Pin1 Abschirmung Pin 2 Pin 3 Abmessungen 155 x 145 x 240 mm Nettogewicht 2 88kg ...

Page 16: ...tinado apenas para uso interno Para evitar risco de incêndio ou choque não exponha equipamento à chuva ou humidade Certifique se de que não existem materiais inflamáveis próximos à unidade durante a operação A unidade deve ser instalada num local com ventilação adequada pelo menos 50cm de superfícies adjacentes Certifique se de que nenhumas das aberturas de ventilação estão bloqueadas Desligue sem...

Page 17: ...missão de sinal é sempre aconselhável ligar a um terminal de sinal DMX AVISO Não permitir o contacto entre o comum e a ligação terra do dispositivo eléctrico do chassis A ligação terra do comum pode causar um loop de ligação terra e o dispositivo pode funcionar de forma irregular Teste os cabos com um medidor de ohm para verificar a polaridade e para garantir que os pinos não estão aterrados ou em...

Page 18: ...pelo menos um cabo de segurança devidamente classificado para o equipamento usando um dos pontos de suspensão de cabos de segurança integrados no conjunto da base Ao selecionar o local de instalação leve em consideração o acesso a substituição da lâmpada e manutenção de rotina Cabos de segurança devem ser sempre utilizados Nunca monte em locais onde o equipamento será exposto à chuva humidade elev...

Page 19: ...16 bit 3 0 255 Tilt 0 220º 4 0 255 Tilt 16 bit 5 0 255 Pan Tilt Speed from fast to slow 6 0 255 Dimmer 0 100 7 0 255 Strobe in the line from slow to fast 8 0 9 White 10 19 Color1 20 29 Color2 30 39 Color3 40 49 Color4 50 59 Color5 60 69 Color6 70 79 Color7 80 89 Color8 90 99 Color9 100 109 Color10 110 119 Color11 120 129 Color12 130 139 Color13 140 149 Color14 150 255 Color Auto From slow to fast ...

Page 20: ... the system reset 4 MENU DE FUNÇÕES ADDR 1 512 CHAN 10CH 7CH AUTO AUT1 AUT2 SPED 0 255 AUT4 SOUN SUN1 SENS 0 255 SUN2 PAN YES NO TILT YES NO DEFA YES NO RST YES Especificações Voltagem 100 240V 50 60Hz Potência de consumo 25W Fonte de iluminação LEDs 10W alta potência branco Canais DMX 7 10 canais Programas embutidos 8 Pan Tilt Ângulo X 540 Ângulo Y 190 Entrada de dados Conector DMX 3 pin macho co...

Page 21: ...ui nu se afla materiale inflamabile Aparatul trebui instalat intr un loc ventilat corespunzator la cel putin 50cm de suprafete vecine Verificati ca orificiile de ventilatie sa nu fie blocate Deconectati intotdeauna de la sursa de alimentare inainte de efectuarea intretinerii sau inlocuirea sigurantei si asigurati va ca ati inlocuit cu o siguranta de aceeasi dimensiune si acelasi tip cu siguranta o...

Page 22: ...ducerea erorilor de conexiune ATENTIE Nu permiteti contactul intre nul si pamantarea dispozitivului deoarece poate provoca o bucla de curent si dispozitivul poate functiona haotic Testati cablurile cu un multimetru pentru a verifica polaritatea corecta si pentru a va asigura ca pinii de alimentare de la cablul de la retea faza si nul nu sunt in scurt fata de carcasa aparatului Setarea unei conexiu...

Page 23: ...ul tip omega inclus folosind un șurub M10 montat prin gaura centrală a consolei omega Ca o măsură de siguranță atașati cel puțin un cablu de siguranță la dispozitivul de fixare folosind unul dintre punctele de suspendare pentru cablul de siguranță integrat în ansamblul de bază Tabel Canale DMX 7CH CH Value Function 1 0 255 PAN 0 540º 2 0 255 Tilt 0 220º 3 0 255 Dimmer 0 100 4 0 255 Strobe in the l...

Page 24: ...255 Dimmer 0 100 7 0 255 Strobe in the line from slow to fast 8 0 9 White 10 19 Color1 20 29 Color2 30 39 Color3 40 49 Color4 50 59 Color5 60 69 Color6 70 79 Color7 80 89 Color8 90 99 Color9 100 109 Color10 110 119 Color11 120 129 Color12 130 139 Color13 140 149 Color14 150 255 Color Auto From slow to fast 0 9 White 10 19 Gobo1 20 29 Gobo2 30 39 Gobo3 9 40 49 Gobo4 50 59 Gobo5 60 69 Gobo6 70 79 Go...

Page 25: ...UNCTII MENIU ADDR 1 512 CHAN 10CH 7CH AUTO AUT1 AUT2 SPED 0 255 AUT4 SOUN SUN1 SENS 0 255 SUN2 PAN YES NO TILT YES NO DEFA YES NO RST YES Specificatii Alimentare 100 240VAC 50 60Hz Consum 25 W Sursa de lumina Alb 10W Led uri de putere mare Canale DMX 7 10 canale Programe incorporate 8 Miscare Pan Tilt axa X 540 axa Y 190 Conector intrare XLR tata 3 pini Conector iesire Conector DMX mama 3 pini Con...

Page 26: ...r z ustreznim prezračevanjem vsaj 50 cm od sosednjih površin Prepričajte se da niso blokirani zračniki Vedno izključite iz električnega omrežja pred servisiranjem ali zamenjavo varovalke in se prepričajte da nadomestite z varovalko enake velikosti in tip Zaradi varnosti napravepritrdite z varnostno vrvjo Nikoli ne nosite naprave samo glavo Uporabite ročaje Maksimalna temperatura Ta je 104 F 40 C N...

Page 27: ...vsakem položaju pod pogojem da je dovolj prostora za prezračevanje Pomembno je da nikoli ne ovirajte ventilatorja ali zračnika Pri izbiri lokacije namestitve upoštevajte tudi žarnico Dostop za zamenjavo in redno vzdrževanje Obvezna je uporaba varnostne vrvi Nikoli ne namestite na mestih kjer bo naprava izpostavljene dežju visoki vlagi ekstremnim temperaturnim spremembam ali omejenem prezračevanju ...

Page 28: ...bo6 shake 100 109 Gobo5 shake 110 119 Gobo4 shake 120 129 Gobo3 shake 130 139 Gobo2 shake 140 149 Gobo1 shake 150 255 Gobo Auto From slow to fast 7 0 30 No function 31 60 Auto1 Speed from slow to fast 61 90 Auto2 Speed from slow to fast 91 120 Auto3 Speed from slow to fast 121 150 Auto4 Speed from slow to fast 151 180 Sound1 Sensitivity from low to high 181 210 Sound2 Sensitivity from low to high ...

Page 29: ...o5 60 69 Gobo6 70 79 Gobo7 80 89 Gobo7 shake 90 99 Gobo6 shake 100 109 Gobo5 shake 110 119 Gobo4 shake 120 129 Gobo3 shake 130 139 Gobo2 shake 140 149 Gobo1 shake 150 255 Gobo Auto From slow to fast 10 0 30 No function 31 60 Auto1 Speed from slow to fast 61 90 Auto2 Speed from slow to fast 91 120 Auto3 Speed from slow to fast 121 150 Auto4 Speed from slow to fast 151 180 Sound1 Sensitivity from lo...

Page 30: ...ker dat het toestel in geode toestand is Breng direct uw dealer op de hoogte en bewaar het verpakkingsmateriaal indien onderdelen of het karton door het transport beschadigd zijn Bewaar het karton en alle verpakkingsmaterialen Indien het toestel moet gerepareerd worden is het belangrijk het toestel in zijn originele verpakking te versturen Veiligheidsinstructies Lees de handleiding aandachtig door...

Page 31: ...data kabels om toestellen met elkaar te verbinden Indien U uw eigen kabel bouwen wilt gebruik hoogwaardige kabels die het signaal goed overdragen en niet gevoelig zijn voor elektromagnetische interferenties KABELCONNECTOREN De kabel moet een XLR stekker op één eind en een XLR contra op het andere eind hebben DMX connector configuratie De eindweerstand vermindert signaalfouten Om transmissie proble...

Page 32: ... een veiligheidskabel in ééns zie afbeelding rechts Als u het toestel op een truss systeem monteert gebruik een geschikte klem voor de omega houder en bevestig de klem d m v een M10 moer in de centergat van de omega houder Voor een betere veiligheid bevestig tenminste één geschikte staalkabel op één van de bevestigingspunten op de onderzijde van het toestel DMX Kanaal tabel 7CH CH Value Function 1...

Page 33: ... 0 540º 2 0 255 PAN 16 bit 3 0 255 Tilt 0 220º 4 0 255 Tilt 16 bit 5 0 255 Pan Tilt Speed from fast to slow 6 0 255 Dimmer 0 100 7 0 255 Strobe in the line from slow to fast 8 0 9 White 10 19 Color1 20 29 Color2 30 39 Color3 40 49 Color4 50 59 Color5 60 69 Color6 70 79 Color7 80 89 Color8 90 99 Color9 100 109 Color10 110 119 Color11 120 129 Color12 130 139 Color13 140 149 Color14 150 255 Color Aut...

Page 34: ...ow to high 211 255 Keep 5 seconds the system reset 4 MENU FUNCTIE ADDR 1 512 CHAN 10CH 7CH AUTO AUT1 AUT2 SPED 0 255 AUT4 SOUN SUN1 SENS 0 255 SUN2 PAN YES NO TILT YES NO DEFA YES NO RST YES Specificaties Voeding 100 240V 50 60Hz Opgenomen vermogen 25W Lichtbron 10W high power witte LED DMX kanalen 7 10 kanalen Ingebouwd programma s 8 Pan Tilt X as 540 Y as 190 Data ingang Locking 3 pin XLR male s...

Page 35: ...las de ventilación no quedan bloqueadas Desenchufe el equipo de la corriente antes de cualquier manipulación limpieza o mantenimiento Cuando cambie el fusible hágalo por uno de idénticas características al original Asegure el equipo en un dispositoivo de sujección mediante una cadena sujeta a un punto diferente del lugar de fijación del soporte del equipo NO traslade el equipo cojiendolo por la ca...

Page 36: ...ucesivamente Montaje Puede instalr este equipo en cualquier lugar estable interior y seco siempre y cuándo haya una ventilación suficiente Cuándo seleccione el emplazamiento tenga en cuenta l facilidad de acdceso al equipo para los trabajos de limpieza y mantenimiento Utilice siempre un cable de seguridad lo suficientemente robusto anclado a un lugar seguro y rsistente Jamás instale el equipo en u...

Page 37: ... 109 Gobo5 shake 110 119 Gobo4 shake 120 129 Gobo3 shake 130 139 Gobo2 shake 140 149 Gobo1 shake 150 255 Gobo Automático De lento a rápido 7 0 30 Sin función 31 60 Auto1 Velocidad De lento a rápido 61 90 Auto2 Velocidad De lento a rápido 91 120 Auto3 Velocidad De lento a rápido 121 150 Auto4 Velocidad De lento a rápido 151 180 Sound1 Sensibilidad De poca a más 181 210 Sound2 Sensibilidad De poca a...

Page 38: ... 79 Gobo7 80 89 Gobo7 shake 90 99 Gobo6 shake 100 109 Gobo5 shake 110 119 Gobo4 shake 120 129 Gobo3 shake 130 139 Gobo2 shake 140 149 Gobo1 shake 150 255 Gobo Automático De lento a rápido 10 0 30 Sin función 31 60 Auto1 Velocidad De lento a rápido 61 90 Auto2 Velocidad De lento a rápido 91 120 Auto3 Velocidad De lento a rápido 121 150 Auto4 Velocidad De lento a rápido 151 180 Sound1 Sensibilidad D...

Page 39: ...mo 25W Fuente luminosa 1 LED Blanco 10W Alta potencia Canles DMX 7 10 Programas integrados 8 Pan Tilt 540 190 Entrada DMX Fiche XLR mâle à verrouillage Salida DMX Fiche XLR femelle à verrouillage Configuración de los pin XLR Pin 1 Tierra Pin 2 Pin 3 Dimensiones 155 x 145 x 240 mm Peso neto 2 88kg Imported from China by LOTRONIC SA Avenue Zénobe Gramme 9 1480 Saintes Belgium ...

Reviews: