background image

10

GB

IE

NI

CY

Inserting/removing the 
battery

1.  To remove the battery (1) from the de

-

vice, press both release buttons (2) on 

the battery and pull the battery out.

2.  To insert the battery (1), push the bat

-

tery along the guide rail into the de-
vice. You will hear it click into place.

  Only insert the rechargeable 

battery once the battery-op-
erated tool is ready for use. 

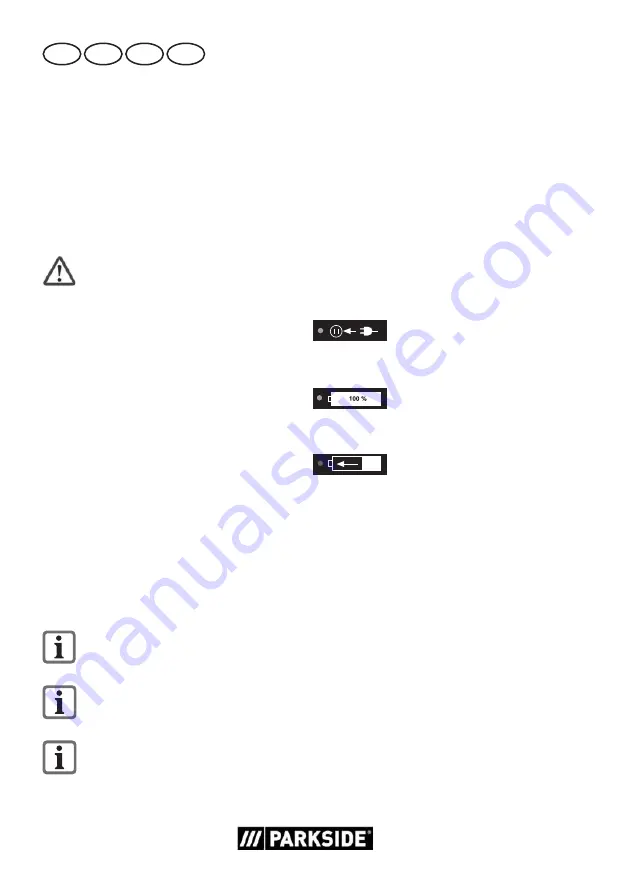
Checking the battery charge 
level

The battery’s (1) charge level is indicated 

by the charge state indicator.

•  The charge level of the battery is indi

-

cated by illumination of the correspond-

ing LED lights while the device is in 

operation. Press and hold the power 
button to view.

red-yellow-green

 => Battery fully charged

red and yellow

  => Battery half charged

red


=> Battery needs  

to be charged

Recharging the battery

  Allow a hot battery to cool before 

charging.

  Charge the battery (1) when only 

the red LED on the level indicator is 

illuminated.

  The charging time is around 1 hour.

1.  Remove the battery (1) from the appli

-

ance if necessary.

2.  Plug the battery charger (3) into a 

mains outlet. 

3.  Insert the battery (1) in the charging 

compartment of the battery charger (3).

4.  Pull the battery (1) out of the battery 

charger (3).

5.  Unplug the battery charger (3) from the 

mains.

Overview of the LED indicators on 
the charger (3):

  Green LED (5) lights up with-

out battery inserted:


Charger ready.


Green LED (5) lights up:


Battery such alleged 
charged.


Red LED (4) lights up:


Battery charging.

Used batteries

•  If a fully recharged battery lasts for 

considerably shorter operating times, 
the battery is used up and needs to be 

replaced. Only use an OEM battery 

pack replacement available from our 
Customer Service.

•  Always take heed of the applicable 

safety instructions as well as the envi-
ronmental protection regulations and 

information (see “Cleaning and Mainte

-

nance”).

Summary of Contents for PBSA 12 D2

Page 1: ...rill PBSA 12 D2 Akku Bohrschrauber Originalbetriebsanleitung Cordless Drill Translation of the original instructions Επαναφορτιζόμενο δραπανοκατσάβιδο Μετάφραση των αυθεντικών οδηγιών λειτουργίας IAN 309546_1904 ...

Page 2: ... τις εικόνες και εξοικειωθείτε με όλες τις λειτουργίες της συσκευής Klappen Sie vor dem Lesen die Seite mit den Abbildungen aus und machen Sie sich anschließend mit allen Funktionen des Gerätes vertraut GB IE NI CY Translation of the original instructions Page X4 GR CY Μετάφραση των αυθεντικών οδηγιών λειτουργίας Σελίδα 17 DE AT CH Originalbetriebsanleitung Seite 32 ...

Page 3: ...1 2 3 4 12 5 6 10 13 11 7 8 9 6 11 1 14 1 2 14 D ...

Page 4: ...r quality and subjected to a final inspection The functionality of your equipment is therefore guaranteed The operating instructions constitute part of this product They contain important information on safety use and disposal Before using the product familiarise yourself with all of the operating and safety in structions Use the product only as described and for the applications specified Keep th...

Page 5: ...dling speed n0 1st gear 0 350 min 1 2nd gear 0 1300 min 1 Maximum torque 28 Nm Span chuck 0 8 10 mm Weight without battery charger 1 0 kg Drilling capacity for wood max 25 mm for steel max 8 mm Sound power level LpA 70 2 dB A KpA 5 dB Sound power level LWA 81 2 dB A KWA 5 dB Vibration ah Drilling in metal 2 5 m s2 Screwdriving 2 5 m s2 K 1 5 m s2 Noise and vibration values have been determined acc...

Page 6: ...in the manual Warning symbols with information on damage and injury prevention Hazard symbol with information on the pre vention of personal in jury caused by electric shock Instruction symbols with infor mation on preventing dam age Help symbols with informa tion on improving tool han dling General Safety Directions for Power Tools WARNING Read all safety notices instruc tions illustrations and t...

Page 7: ...at you are doing and use common sense when operating a power tool Do not use a power tool while you are tired or un 1 WORK AREA SAFETY a Keep work area clean and well lit Cluttered or dark ar eas invite accidents b Do not operate power tools in explosive atmos pheres such as in the presence of flammable Iiquids gases or dust Power tools create sparks which may ignite the dust or fumes c Keep child...

Page 8: ...oper footing and bal ance at all times This ena bles better control of the power tool in unexpected situations f Dress properly Do not wear loose clothing or jewellery Keep your hair clothing and gloves away from moving parts Loose clothes jewellery or long hair can be caught in moving parts g If dust extraction and col lection devices can be installed make sure that these are connected and used c...

Page 9: ...ls sharp and clean Properly main tained cutting tools with sharp cutting edges are less Iikely to bind and are easier to control g Use the power tool ac cessories and tool bits etc in accordance with these instructions taking into account the working con ditions and the work to be performed Use of the power tool for operations different from those intended could result in a hazardous situation h K...

Page 10: ...nstructions Incorrect charging or charging outside the permitted temperature range may destroy the battery and in crease the risk of fire 6 SERVICE a Have your power tool ser viced by a qualified repair person using only identi cal replacement parts This will ensure that the safety of the power tool is maintained b Never repair damaged batteries All battery repairs should be carried out by the man...

Page 11: ...resulting in inju ries The device is part of the Parkside X 12 V TEAM series and can be oper ated using X 12 V TEAM series batteries The batteries may only be charged using charg ers from the Parkside X 12 V TEAM series Attention Observe the safety information and notes on charging and proper use as shown in the instruction manual for your battery and charger from the Park side X 12 V Team se ries...

Page 12: ...ly charged red and yellow Battery half charged red Battery needs to be charged Choice of gear Slide the gear selector 5 to 1 or 2 corresponding to a low or high torque selection A gear change may only be per formed in standstill mode Set the direction of rotation You can select the direction of rotation with the direction switch clockwise and anti clockwise direction and secure the device against ...

Page 13: ...Push the keyless chuck 1 on as far as it will go If the keyless chuck 1 does not engage automatically turn the drill chuck ring 2 Using the bitholder After removing the keyless chuck 1 you can use the bitholder 14 1 Insert a suitable 6 point bit in the bitholder 14 Because of the 6 point bit holder it may be that you need to rotate the bit slightly 2 Slide the bit right into the bitholder 14 The b...

Page 14: ... Disposal and protection of the environment Remove the battery from the device and take the device battery accessories and packaging for environmentally friendly recycling Machines do not belong with do mestic waste Remove the rechargeable battery be fore disposing of the appliance Return the unit to a recycling centre The plastics and metals in the unit can be sorted and appropriately recycled As...

Page 15: ...f the guarantee period are chargeable Guarantee Cover The equipment has been carefully pro duced in accordance with strict quality guidelines and conscientiously checked prior to delivery The guarantee applies for all material and manufacturing defects This guarantee does not extend to cover product parts that are subject to normal wear and may there fore be considered as wearing parts e g keyless...

Page 16: ...ost estimate for you We can handle only equipment that has been sent with adequate packaging and postage Attention Please send your equipment to our service branch in clean condition and with an indication of the defect Equipment sent carriage forward or by bulky goods express or other special freight will not be accepted We will dispose of your defective devices free of charge when you send them ...

Page 17: ... αλλά και σε τελικό έλεγχο Με τον τρόπο αυτό εξασφαλίστηκε η λειτουργικότητα της συ σκευής σας Οι οδηγίες χρήσης αποτελούν αναπόσπαστο τμήμα αυτού του προϊόντος Περιέχουν σημαντικές υποδείξεις για την ασφάλεια τη χρήση και διάθεση της συσκευής Πριν τη χρήση του προϊόντος να εξοικειωθείτε με όλες τις οδηγίες χειρισμούς και τις υποδείξεις ασφα λείας Να χρησιμοποιείτε το προϊόν μόνο όπως περιγράφεται...

Page 18: ...θέτει ρύθμιση ροπής στρέψης 19 1 βαθμίδων φορά κίνησης προς τα δεξιά και προς τα αριστερά ένα αποσπώμενο ταχυτσόκ μια υποδοχή 6γωνων μυτών και μια λυχνία LED λει τουργίας Τεχνικά στοιχεία Επαναφορτιζόμενο δραπανοκατσάβιδο PBSA 12 D2 Τάση κινητήρα U 12 V Αριθμός στροφών ρελαντί n0 1η ταχύτηήτα 0 350 min 1 2η ταχύτηήτα 0 1300 min 1 Μέγιστη ροπή στρέψης 28 Nm Διάσταση τσοκ 0 8 10 mm Βάρος χωρίς Φορτι...

Page 19: ... Στο κεφάλαιο αυτό θα βρείτε τις βασικές προδιαγραφές ασφαλείας που αφορούν την εργασία με τη συσκευή Σύμβολα και εικονοσύμβολα Σήματα εικόνες στη συσκευή Διαβάστε προσεκτικά ολό κληρη την οδηγία χειρισμού Η συσκευή είναι τμήμα της σειράς Parkside X 12 V TEAM Μην πετάτε τις ηλεκτρικές συσκευές στα σκουπίδια Σύμβολα στις οδηγίες Σύμβολα κινδύνου με στοιχεία για την πρόληψη προσωπικών και υλικών ζημ...

Page 20: ...ξίας δ Μη μεταφέρετε το ηλεκτρικό εργαλείο κρατώντας το από το καλώδιο μη κρεμάτε τη συσκευή από το καλώδιο και ηλεκτροπληξία πυρκαγιά και ή βαρείς τραυματισμούς Διατηρείτε όλες τις υποδείξεις ασφαλείας και τις οδηγίες για μελλοντική αναφορά Η έννοια ηλεκτρικά εργαλεία που χρησιμοποιείται στις υποδεί ξεις ασφαλείας αναφέρεται σε ηλεκτρικά εργαλεία που λειτουρ γούνται με το ηλεκτρικό δίκτυο με καλώ...

Page 21: ... μοποιείτε το ηλεκτρικό εργα λείο όταν είστε κουρασμένοι ή υπό την επήρεια ναρκω τικών οινοπνευματωδών ποτών ή φαρμάκων Μόνο μία στιγμή απροσεξίας κατά τη χρήση του ηλεκτρικού εργαλεί ου μπορεί να προκαλέσει σο βαρούς τραυματισμούς β Να χρησιμοποιείοτε τα μέσα ατομικής προστασίας και πά ντα προστατευτικά γυαλιά Η χρήση των μέσων ατομικής προστασίας όπως αντιολισθητι κά υποδήματα προστατευτικό κράν...

Page 22: ...παρακάμπτετε τους κανόνες ασφάλειας για ηλεκτρικά ερ γαλεία ακόμα και εάν έχετε εξοικειωθεί με το ηλεκτρικό εργαλείο μετά από πολλα πλές χρήσεις Απρόσεκτοι χειρισμοί μπορούν μέσα σε κλάσματα του δευτερολέπτου να οδηγήσουν σε σοβαρούς τραυματισμούς 4 ΧΡΗΣΗ ΚΑΙ ΦΡΟΝΤΙΔΑ ΤΟΥ ΗΛΕΚΤΡΙΚΟΥ ΕΡΓΑΛΕΙΟΥ α Προσέξτε να μην υπερ φορτώνετε τη συσκευή Να χρησιμοποείτε τα ηλεκτρικά εργαλεία που είναι κατάλλη λα γι...

Page 23: ... κοπτικά εξαρτήματα με ακονι σμένες λάμες δεν μπλοκάρουν εύκολα και κινούνται καλύτερα η Να χρησιμοποιείτε το ηλε κτρικό εργαλείο τα εξαρτή ματά του τα πρόσθετα εργα λεία κλπ μόνο σύμφωνα με αυτές τις οδηγίες Nα λάβετε υπόψη σας τις συνθήκες εργασίας και το είδος της εργασίας σας Η χρήση του ηλεκτρικού εργαλείου για άλλες εργασίες εκτός αυτών για τις οποίες προορίζεται μπορεί να προκαλέσει επικίνδ...

Page 24: ...ωρευτές μπορεί να συμπεριφερθούν απρόβλεπτα και να οδηγήσουν σε πυρκαγιά έκρηξη ή κίνδυνο τραυματισμών ζ Μην εκθέτετε τους συσσω ρευτές σε πυρκαγιά ή σε υψηλές θερμοκρασίες Πυρ καγιά ή θερμοκρασίες πάνω από 130 C μπορούν να προ καλέσουν έκρηξη η Τηρείτε όλες τις οδηγίες σχε τικά με τη φόρτιση και μη φορτίζετε το συσσωρευτή ή το επαναφορτιζόμενο εργα λείο εκτός του αναφερόμενου στις οδηγίες λειτουρ...

Page 25: ... στροφών από τον μέγιστο επιτρεπό μενο για το τρυπάνι Σε υψη λότερους αριθμούς στροφών μπορεί το τρυπάνι να καμφθεί ελαφρά εάν περιστρέφεται ελεύθερα χωρίς επαφή με το τεμάχιο επεξεργασίας με απο τέλεσμα να προκύψουν τραυ ματισμοί b Εκκινείτε πάντα τη διαδικα σία διάτρησης με χαμηλό αριθμό στροφών και όταν το τρυπάνι είναι σε επαφή με το τεμάχιο επεξεργασί ας Σε υψηλότερους αριθμούς στροφών μπορεί...

Page 26: ... δημιουργεί κατά τη λειτουργία ένα ηλεκτρομα γνητικό πεδίο Αυτό το πεδίο δεν αποκλείεται υπό ορισμέ νες συνθήκες να εηρεάσει τη λειτουργία ενεργητικά ή παθηιτκά ιατρικά εμφυτεύ ματα Προς αποφυγή του κινδύνου σοβαρών ή και θα νατηφόρων τραυματισμών συνιστούμε σε άτομα με ιατρικά εμφυτεύματα να συμ βουλευθούν τον γιατρό τους και τον κατασκευαστή του ιατρικού εμφυτεύματος πριν χειριστούν τη μηχανή Χε...

Page 27: ... Ο διακόπτης κατεύθυνσης περι στροφής επιτρέπεται να χρησιμο ποιείται μόνο σε κατάσταση ακινη σίας Ρύθμιση ροπής στρέψης Περιστρέφοντας το δακτύλιο ρύθμισης της ροπής στρέψης 3 μπορείτε να προρυθμίσετε τη μέγιστη ροπή στρέψης Υπάρχουν 19 1 βαθμίδες ροπής στρέ ψης 1 Επιλέξτε την επιθυμητή ροπή στρέψης μέσω περιστροφής στον δακτύλιο ρύθμισης 3 Βαθμίδα 1 χαμηλότερη ροπή στρέ ψης Βαθμίδα υψηλότερη ροπ...

Page 28: ... μέσα στην υποδοχή μυτών 14 Χάρη στον οδηγό και τη μαγνητική στήριξη εδράζεται στα θερά η μύτη 3 Για την αφαίρεση της μύτης τραβήξτε απλώς προς τα έξω τη μύτη από την υποδοχή μυτών 14 Ενεργοποίηση απενεργοποίηση Με το διακόπτη ενεργοποίησης απενερ γοποίησης 7 μπορείτε να ρυθμίζετε αδιαβάθμιτα τις στροφές Όσο περισσό τερο πιέζετε το διακόπτη ενεργοποίησης απενεργοποίησης τόσο αυξάνονται οι στροφές ...

Page 29: ...ταρία από τη συσκευή και διαθέστε τη συσκευή τη μπαταρία τα αξεσουάρ και τη συσκευασία για ανακύ κλωση με τρόπο φιλικό για το περιβάλλον Ηλεκτρικές συσκευές δεν ανήκουν στα οικιακά απορρίμματα Αφαιρέστε το συσσωρευτή από τη συ σκευή προτού την απορρίψετε Παραδώστε τη συσκευή σε σημείο συλλογής προς ανακύκλωση Τα χρη σιμοποιηθέντα πλαστικά και μεταλλικά εξαρτήματα μπορούν να ξεχωριστούν και να αποσ...

Page 30: ...επεκτείνεται από την παροχή εγγύησης Αυτό ισχύει και για αντικαταστημένα και επισκευασμέ να εξαρτήματα Ενδεχόμενα ελαττώματα που διαπιστώνονται κατά την αγορά πρέπει να δηλωθούν αμέσως μετά το ξε πακετάρισμα Για όλες τις επισκευές που καθίστανται απαραίτητες μετά τη λήξη της εγγύησης επιβαρύνεστε με τις σχετικές δαπάνες Έκταση της εγγύησης Η συσκευή κατασκευάστηκε βάσει αυστη ρών κριτηρίων ποιότητ...

Page 31: ... Στείλτε τη συσκευή μαζί με όλα τα αξεσουάρ που σας παραδό θηκαν κατά την αγορά και φροντίστε για ασφαλή συσκευασία Σέρβις επισκευής Επισκευές που δεν καλύπτονται από την εγγύηση μπορούν να εκτελεστούν από το υποκατάστημά μας για σέρβις έναντι πλη ρωμής Το υποκατάστημα σέρβις θα σας υποβάλει προϋπολογισμό εξόδων Μπορούμε να αναλάβουμε την επεξερ γασία συσκευών που μας απεστάλησαν καλά συσκευασμένε...

Page 32: ...nterzogen Die Funktionsfähigkeit Ihres Gerätes ist somit sichergestellt Die Betriebsanleitung ist Bestandteil dieses Gerätes Sie enthält wichtige Hinweise für Sicherheit Gebrauch und Entsorgung Machen Sie sich vor der Benutzung des Gerätes mit allen Bedien und Sicherheitshin weisen vertraut Benutzen Sie das Gerät nur wie beschrieben und für die angegebenen Einsatzbereiche Bewahren Sie die Betriebs...

Page 33: ...ku Bohrschrauber PBSA 12 D2 Motorspannung U 12 V Leerlaufdrehzahl n0 Gang 1 0 350 min 1 Gang 2 0 1300 min 1 Max Drehmoment 28 Nm Spannweite Bohrfutter 0 8 10 mm Gewicht ohne Ladegerät 1 0 kg Bohrdurchmesser für Holz max 25 mm Bohrdurchmesser für Stahl max 8 mm Schalldruckpegel LpA 70 2 dB A KpA 5 dB Schallleistungspegel LWA 81 2 dB A KWA 5 dB Vibration ah Bohren in Metall 2 5 m s2 Schrauben 2 5 m ...

Page 34: ...nen oder Sachschäden Gefahrenzeichen mit Angaben zur Verhütung von Personenschäden durch einen elektrischen Schlag Gebotszeichen mit Angaben zur Verhütung von Schäden Hinweiszeichen mit Informati onen zum besseren Umgang mit dem Gerät Allgemeine Sicherheits hinweise für Elektrowerk zeuge WARNUNG Lesen Sie alle Sicherheitshinwei se Anweisungen Be bilderungen und techni schen Daten mit denen dieses ...

Page 35: ...chädigte oder verwickelte Anschlussleitungen erhöhen das Risiko eines elektrischen Schla ges e Wenn Sie mit dem Elek trowerkzeug im Freien arbeiten verwenden Sie Elektrowerkzeuge ohne Netzlei tung 1 Arbeitsplatzsicherheit a Halten Sie Ihren Arbeits bereich sauber und gut beleuchtet Unordnung oder unbeleuchtete Arbeitsbereiche können zu Unfällen führen b Arbeiten Sie mit dem Elektrowerkzeug nicht i...

Page 36: ...en b Tragen Sie persönliche Schutzausrüstung und immer eine Schutzbrille Das Tragen persönlicher Schut zausrüstung wie Staubmaske rutschfeste Sicherheitsschuhe Schutzhelm oder Gehörschutz je nach Art und Einsatz des Elek trowerkzeugs verringert das Risiko von Verletzungen c Vermeiden Sie eine unbe absichtigte Inbetriebnah me Vergewissern Sie sich dass das Elektrowerkzeug ausgeschaltet ist bevor Si...

Page 37: ... sind Achtloses Handeln kann binnen Sekundenbruchteilen zu schweren Verletzungen führen 4 Verwendung und Behand lung des Elektrowerkzeu ges a Überlasten Sie das Elek trowerkzeug nicht Ver wenden Sie für Ihre Arbeit das dafür bestimmte Elek trowerkzeug Mit dem pas senden Elektrowerkzeug arbei ten Sie besser und sicherer im angegebenen Leistungsbereich b Benutzen Sie kein Elektro werkzeug dessen Sch...

Page 38: ...rwenden Sie Elektro werkzeug Einsatzwerk zeug Einsatzwerkzeuge usw entsprechend diesen Anweisungen Berück sichtigen Sie dabei die Ar beitsbedingungen und die auszuführende Tätigkeit Der Gebrauch von Elektrowerk zeugen für andere als die vor gesehenen Anwendungen kann zu gefährlichen Situationen füh ren h Halten Sie Griffe und Griffflächen trocken sau ber und frei von Öl und Fett Rutschige Griffe u...

Page 39: ... zungsgefahr führen f Setzen Sie einen Akku kei nem Feuer oder zu hohen Temperaturen aus Feuer oder Temperaturen über 130 C können eine Explosion hervorru fen g Befolgen Sie alle Anwei sungen zum Laden und laden Sie den Akku oder das Akkuwerkzeug nie mals außerhalb des in der Betriebsanleitung ange gebenen Temperaturbe reichs Falsches Laden oder Laden außerhalb des zugelas senen Temperaturbereichs...

Page 40: ...kann sich der Bohrer leicht verbiegen wenn er sich ohne Kontakt mit dem Werkstück frei drehen kann und zu Verletzungen führen b Beginnen Sie den Bohrvor gang immer mit niedriger Drehzahl und während der Bohrer Kontakt mit dem Werkstück hat Bei hö heren Drehzahlen kann sich der Bohrer leicht verbiegen wenn er sich ohne Kontakt mit dem Werkstück frei drehen kann und zu Verletzungen führen c Üben Sie...

Page 41: ...von ernsthaften oder tödlichen Verletzungen zu verringern empfehlen wir Personen mit medizinischen Implantaten ihren Arzt und den Hersteller des medizini schen Implantats zu konsul tieren bevor die Maschine bedient wird Bedienung Akku entnehmen einsetzen 1 Zum Herausnehmen des Akkus 10 aus dem Gerät drücken Sie die Entrie gelungstaste 11 am Akku und ziehen den Akku heraus 2 Zum Einsetzen des Akkus...

Page 42: ...stellring darf nur im Stillstand betätigt werden Das Erreichen der voreingestellten Drehmomentgrenze wird von einem deutlichen Ratschen begleitet Dieses Geräusch wird durch die Rutschkupplung verursacht Werkzeugwechsel 1 Drehen Sie das Schnellspannbohrfutter 1 in Richtung RELEASE bis die Bohrfut teröffnung 9 groß genug ist um das Werkzeug aufzunehmen 2 Schieben Sie das Werkzeug soweit wie möglich ...

Page 43: ...den Ein Ausschalter 7 los Wenn Sie den Drehrichtungsschalter 6 in Mittelstellung bringen ist das Ge rät gegen Einschalten gesichert Reinigung und Wartung Lassen Sie Instandsetzungsarbeiten und Wartungsarbeiten die nicht in dieser Anleitung beschrieben sind von unserem Service Center durchführen Verwenden Sie nur Originalteile Schalten Sie das Gerät aus und nehmen Sie vor allen Arbeiten den Akku au...

Page 44: ...lle ab Die verwendeten Kunst stoff und Metallteile können sortenrein getrennt werden und so einer Wieder verwertung zugeführt werden Fragen Sie hierzu unser Service Center Die Entsorgung Ihrer defekten einge sendeten Geräte führen wir kostenlos durch Ersatzteile Zubehör Ersatzteile und Zubehör erhalten Sie unter www grizzly service eu Sollten Sie Probleme mit dem Bestellvor gang haben verwenden Si...

Page 45: ...en gemeldet werden Nach Ablauf der Garantiezeit anfallende Reparaturen sind kostenpflichtig Garantieumfang Das Gerät wurde nach strengen Qualitäts richtlinien sorgfältig produziert und vor Anlieferung gewissenhaft geprüft Die Garantieleistung gilt für Material oder Fabrikationsfehler Diese Garantie erstreckt sich nicht auf Produktteile die normaler Abnutzung ausgesetzt sind und daher als Verschlei...

Page 46: ...ntie unterliegen gegen Berechnung von unserer Service Niederlassung durchführen lassen Sie erstellt Ihnen gerne einen Kos tenvoranschlag Wir können nur Geräte bearbeiten die ausreichend verpackt und frankiert einge sandt wurden Achtung Bitte senden Sie Ihr Gerät gerei nigt und mit Hinweis auf den Defekt an unsere Service Niederlassung Nicht angenommen werden unfrei per Sperrgut Express oder mit so...

Page 47: ...47 ...

Page 48: ...ve been applied EN 62841 1 2015 EN 62841 2 1 2018 EN 62471 2008 EN 55014 1 2017 EN 55014 2 2015 EN 62233 2008 EN 62321 1 2013 EN 12100 2010 This declaration of conformity is issued under the sole responsibility of the manufacturer Grizzly Tools GmbH Co KG Stockstädter Straße 20 63762 Großostheim GERMANY 04 10 2019 The object of the declaration described above satisfies the provisions of Directive ...

Page 49: ...ραφές και κανονισμοί EN 62841 1 2015 EN 62841 2 1 2018 EN 62471 2008 EN 55014 1 2017 EN 55014 2 2015 EN 62233 2008 EN 62321 1 2013 EN 12100 2010 Η αποκλειστική ευθύνη για την έκδοση της παρούσας δήλωσης συμμόρφωσης ανή κει στον κατασκευαστή Grizzly Tools GmbH Co KG Stockstädter Straße 20 63762 Großostheim GERMANY 04 10 2019 Το ανωτέρω περιγραφόμενο αντικείμενο της δήλωσης πληροί τις προδιαγραφές τ...

Page 50: ...50 20190902_rev02_mt ...

Page 51: ...62841 1 2015 EN 62841 2 1 2018 EN 62471 2008 EN 55014 1 2017 EN 55014 2 2015 EN 62233 2008 EN 62321 1 2013 EN 12100 2010 Die alleinige Verantwortung für die Ausstellung dieser Konformitätserklärung trägt der Hersteller Grizzly Tools GmbH Co KG Stockstädter Straße 20 63762 Großostheim GERMANY 04 10 2019 Der oben beschriebene Gegenstand der Erklärung erfüllt die Vorschriften der Richtlinie 2011 65 E...

Page 52: ...52 ...

Page 53: ...53 Exploded Drawing Επί μέρoυς σχεδιαγράμματα Explosionszeichnung PBSA 12 D2 informativ informative ενημερωτικό ...

Page 54: ...ZZLY TOOLS GMBH CO KG Stockstädter Straße 20 DE 63762 Großostheim GERMANY Last Information Update Έκδοση των πληροφοριών Stand der Informationen 08 2019 Ident No 72036056082019 GB IE NI CY IAN 309546_1904 ...

Page 55: ...ger PLGK 12 A1 PAPK 12 A1 Akku Ladegerät Originalbetriebsanleitung Rechargeable battery Charger Translation of the original instructions Συσσωρευτής Συσκευή φόρτισης Μετάφραση των αυθεντικών οδηγιών λειτουργίας IAN 309546_1904 ...

Page 56: ... τις εικόνες και εξοικειωθείτε με όλες τις λειτουργίες της συσκευής Klappen Sie vor dem Lesen die Seite mit den Abbildungen aus und machen Sie sich anschließend mit allen Funktionen des Gerätes vertraut GB IE NI CY Translation of the original instructions Page X4 GR CY Μετάφραση των αυθεντικών οδηγιών λειτουργίας Σελίδα 14 DE AT CH Originalbetriebsanleitung Seite 25 ...

Page 57: ...2 1 1 3 5 4 3 5 4 ...

Page 58: ...series The rechargeable battery compatible with all devices in the Parkside X 12 V TEAM series Any other use that is not explicitly approved in these instructions may result in damage to the equipment and represent a serious danger to the user This equipment is not suitable for commercial use Com mercial use will invalidate the guarantee The manufacturer is not liable for damages caused by an impr...

Page 59: ... the Parkside X 12 V TEAM series and operates with the X 12 V TEAM battery The batteries may only be charged using chargers from the Parkside X 12 V TEAM series You will find a current overview of compat ible batteries at www lidl co uk Safety instructions This appliance can be used by chil dren aged from 8 years and above and persons with reduced physi cal sensory or mental capabilities or lack o...

Page 60: ... batteries to an old bat tery collection point where they will be recycled in an environmentally friendly man ner Electrical devices must not be disposed of with domestic waste Symbols on the recharger Warning Read the operating instruc tions carefully The charger is only suitable for use indoors Device fuse Protection class II Double in sulation Electrical devices must not be disposed of with dom...

Page 61: ...ause burns or fire d If used incorrectly liquid may leak from the bat tery Avoid contact with this In the event of ac cidental contact rinse off with water If the liquid gets into eyes seek medical assis tance Leaking battery fluid may cause skin irritations or burns e Do not use damaged or altered batteries Damaged or altered batteries can be un predictable and lead to fire explosion or risk of i...

Page 62: ...act Ensure fresh air and seek medical assistance in the event of discomfort g Do not use non rechargea ble batteries Correct handling of the bat tery charger Keep the equipment away from children and pets Children must be supervised to ensure that they do not play with the de vice To charge the battery use only the charger supplied Risk of fire and explosion This ensures that the safety of the de ...

Page 63: ... escaping electrolytic so lution After eye skin contact rinse the affected areas with water or a neutraliser and consult a doctor Charge the battery in a dry room only Prior to attaching the charg er check that the battery s outer surface is clean and dry There is a risk of injury due to electric shock Switch off the device and remove the battery before carrying out any maintenance work The rechar...

Page 64: ... to cool before charging Charge the battery 1 when only the red LED on the level indicator is illuminated The charging time is around 1 hour 1 Remove the battery 1 from the appli ance if necessary 2 Plug the battery charger 3 into a mains outlet 3 Insert the battery 1 in the charging compartment of the battery charger 3 4 Pull the battery 1 out of the battery charger 3 5 Unplug the battery charger...

Page 65: ...ance with the local regulations Take batteries to an old battery collection point where Storage Only store the batteries in the partially charged state During prolonged stor age 2 to 3 LEDs should be illuminated Remove the battery before storing the unit for longer periods of time During a longer storage period check the state of charge of the battery and recharge if necessary roughly every 3 mont...

Page 66: ...quires the defective equipment and proof of pur chase to be presented within the three year period with a brief written description of what constitutes the defect and when it oc curred If the defect is covered by our guarantee you will receive either the repaired product or a new product No new guarantee pe riod begins on repair or replacement of the product Guarantee Period and Statutory Claims f...

Page 67: ...ment is not sent carriage forward or by bulky goods express or other special freight Please send the equipment inc all accessories supplied at the time of purchase and ensure adequate safe transport pack aging Repair Service For a charge repairs not covered by the guarantee can be carried out by our service branch which will be happy to issue a cost estimate for you We can handle only equipment th...

Page 68: ...χύει η εγγύηση Ο κατασκευαστής δεν ευθύνεται για ζημιές που προκλήθηκαν λόγω μη ενδεδειγμένης χρήσης ή λόγω εσφαλμένου χειρισμού Γενική περιγραφή Θα βρείτε τις απεικονίσεις στην μπροστινή ανοιγόμενη σελίδα Παραδοτέα υλικά Συσσωρευτής Συσκευή φόρτισης Οδηγίες λειτουργίας Μετάφραση της πρωτότυπης Δήλωσης συμμόρφωσης CE 38 Περιεχόμενα Εισαγωγή 14 Σκοπός χρήσης 14 Γενική περιγραφή 14 Παραδοτέα υλικά 1...

Page 69: ... συσκευές φόρτισης της σειράς Parkside X 12 V TEAM Μπορείτε να βρείτε μια τρέχουσα επισκό πηση της συμβατότητας μπαταριών στον ιστότοπο www lidl gr Υποδείξεις ασφάλειας Αυτή η συσκευή μπορεί να χρη σιμοποιηθεί από παιδιά άνω των 8 ετών καθώς και από άτομα με περιορισμένες σωματικές αισθη τικές ή πνευματικές ικανότητες ή με έλλειψη πείρας και γνώσεων εφόσον επιτηρούνται από άτομο αρμόδιο για την ασ...

Page 70: ...που θα μεριμνηθεί η ανακύκλω σή τους με τρόπο φιλικό για το περιβάλλον Οι ηλεκτρικές συσκευές δεν ανήκουν στα οικιακά απορ ρίμματα Σήματα εικόνες στη συσκευή φόρτισης Προσοχή Διαβάστε τις οδηγίες λει τουργίας προσεκτικά Η συσκευή φόρτισης είναι κατάλληλη μόνο για χρήση σε κλειστούς χώρους Ασφάλεια συσκευής Κατηγορία προστασίας II Διπλή μόνωση Οι ηλεκτρικές συσκευές δεν ανήκουν στα οικιακά απορ ρίμ...

Page 71: ...πορεί να έχει σαν συνέπεια εγκαύματα ή φωτιά δ Σε περίπτωση εσφαλμένης χρήσης μπορεί να εξέλθει υγρό από τη μπαταρία Να αποφεύγετε την επαφή με το υγρό αυτό Σε περίπτωση αθέλητης επαφής ξεπλύντε με νερό Εάν το υγρό πάει στα μάτια συμβουλευθείτε και ένα γιατρό Το εξερχόμενο υγρό από μπαταρία μπορεί να προκαλέσει δερματικούς ερεθι σμούς ή και εγκαύματα ε Μη χρησιμοποιείτε έναν φθαρμένο ή παραμορφωμέ...

Page 72: ... εντατική ηλια κή ακτινοβολία και μη την ακουμπάτε πάνω σε σώματα καλοριφέρ Η ψηλές θερμο κρασίες βλάπτουν τη μπαταρία και υφίσταται κίνδυνος έκρηξης ε Πριν τη φόρτιση αφήστε τη ζεστή να κρυώσει ζ Μην ανοίγετε τη μπαταρία και αποφεύγετε τη μηχανική της βλάβη Υφίσταται κίνδυ νος βραχυκυκλώματος και ενδεχομένως εξόδου ατμών που ερεθίζουν τις αναπνευ στικές οδούς Φροντίστε για καθαρό αέρα και σε περί...

Page 73: ...ι βραχυκύκλωμα Ο φορτιστής δεν επιτρέπεται να λειτουργεί πάνω σε εύ φλεκτη επιφάνεια π χ χαρτί ύφασμα Υφίσταται κίνδυνος πυρκαγιάς λόγω της δημιουρ γούμενης θερμότητας κατά τη φόρτιση Εάν προκληθεί ζημιά στον αγωγό σύνδεσης αυτής της συσκευής πρέπει να αντικατασταθεί από τον κα τασκευαστή ή το τμήμα εξυ πηρέτησης πελατών ή από ένα παρόμοια εξειδικευμένο άτομο προς αποφυγή κινδύ νων Η μπαταρία της ...

Page 74: ...πελατών Προσέχετε σε κάθε περίπτωση τις εκά στοτε ισχύουσες υποδείξεις ασφάλειας καθώς και τις διατάξεις και τις υποδεί ξεις για την προστασία του περιβάλλο ντος Ελαττώματα τα οποία προκύπτουν λόγω ακατάλληλου χειρισμού δεν υπόκεινται στην εγγύηση τοποθέτηση Αφαίρεση της μπαταρίας 1 Για την εξαγωγή του συσσωρευτή 1 από τη συσκευή πατήστε τα πλήκτρα απασφάλισης 2 στο συσσωρευτή και τραβήξτε έξω το ...

Page 75: ...τή προαιρετικό Μπορείτε να συναρμολογήσετε το φορτι στή 3 και σε τοίχο Τοποθετήστε δύο βίδες σε απόσταση 54 mm με τη βοήθεια πείρων στην επι θυμητή θέση στον τοίχο Η κεφαλή βίδας μπορεί να έχει μια διά μετρο 6 10 mm Φορτίζετε τον συσσωρευτή 1 όταν ανάβει μόνο η κόκκινη LED της ένδειξης κατάστασης φόρτισης Ο χρόνος φόρτισης ανέρχεται πε ρίπου σε 1 ώρα 1 Εάν απαιτείται απομακρύνετε το συσ σωρευτή 1 ...

Page 76: ... τοξικοί ατμοί ή υγρά Παραδώστε τη συσκευή σε σημείο συλλογής προς ανακύκλωση Τα χρη σιμοποιηθέντα πλαστικά και μεταλλικά εξαρτήματα μπορούν να ξεχωριστούν και να αποσυρθούν με σκοπό την ανα κύκλωσή τους Προς το σκοπό αυτό απευθυνθείτε στο Κέντρο Σέρβις της εταιρίας μας Να διαθέτετε τις μπαταρίες σε εκφορ τισμένη κατάσταση Συνιστούμε να καλύπτετε τους πόλους με κολλητική ταινία για προστασία από β...

Page 77: ...μες αξιώσεις για ελαττώματα Η διάρκεια της εγγύησης δεν επεκτείνεται από την παροχή εγγύησης Αυτό ισχύει και για αντικαταστημένα και επισκευασμέ να εξαρτήματα Ενδεχόμενα ελαττώματα που διαπιστώνονται κατά την αγορά πρέπει να δηλωθούν αμέσως μετά το ξε πακετάρισμα Για όλες τις επισκευές που καθίστανται απαραίτητες μετά τη λήξη της εγγύησης επιβαρύνεστε με τις σχετικές δαπάνες Έκταση της εγγύησης Η ...

Page 78: ...ο Στείλτε τη συσκευή μαζί με όλα τα αξεσουάρ που σας παραδό θηκαν κατά την αγορά και φροντίστε για ασφαλή συσκευασία Σέρβις επισκευής Επισκευές που δεν καλύπτονται από την εγγύηση μπορούν να εκτελεστούν από το υποκατάστημά μας για σέρβις έναντι πλη ρωμής Το υποκατάστημα σέρβις θα σας υποβάλει προϋπολογισμό εξόδων Μπορούμε να αναλάβουμε την επεξερ γασία συσκευών που μας απεστάλησαν καλά συσκευασμέν...

Page 79: ...u nutzen Der Akku ist kompatibel zu allen Geräten des Parkside X 12V Teams Jede andere Verwendung kann zu Schäden am Gerät führen und eine ernsthafte Gefahr für den Benutzer darstel len Dieses Gerät ist nicht zur gewerblichen Nutzung geeignet Bei gewerblichem Ein satz erlischt die Garantie Der Hersteller haftet nicht für Schäden die durch bestimmungswidrigen Gebrauch oder falsche Bedienung verursa...

Page 80: ...kann mit Akkus der X 12 V TEAM Serie betrieben werden Die Akkus dürfen nur mit Ladegeräten der Se rie Parkside X 12 V TEAM geladen werden Eine aktuelle Übersicht der Batteriekompati bilität finden Sie unter www lidl de Onlineshop Baumarkt PARKSIDE X 12 V TEAM Sicherheitshinweise Dieses Gerät kann von Kindern ab 8 Jahren und darüber sowie von Personen mit verringerten physi schen sensorischen oder ...

Page 81: ...etzen Sie den Akku nicht über längere Zeit starker Sonneneinstrahlung aus und legen Sie ihn nicht auf Heiz körpern ab max 50 C Geben Sie Akkus an einer Altbatteriesammelstelle ab wo sie einer umweltgerech ten Wiederverwertung zuge führt werden Elektrogeräte gehören nicht in den Hausmüll Bildzeichen auf dem Ladegerät Achtung Lesen Sie die Bedienungsan leitung aufmerksam durch Das Ladegerät ist nur ...

Page 82: ...önnten Ein Kurzschluss zwischen den Akku kontakten kann Verbrennungen oder Feuer zur Folge haben Bei falscher Anwendung kann Flüssigkeit aus dem Akku austreten Vermeiden Sie den Kontakt damit Bei zufälligem Kontakt mit Wasser abspülen Wenn die Flüssigkeit in die Au gen kommt nehmen Sie zusätz lich ärztliche Hilfe in Anspruch Austretende Akkuflüssigkeit kann zu Hautreizungen oder Verbren nungen füh...

Page 83: ...Lassen Sie einen erwärmten Akku vor dem Laden abkühlen Öffnen Sie den Akku nicht und vermeiden Sie eine mechanische Beschädigung des Akkus Es besteht die Gefahr eines Kurz schlusses und es können Dämp fe austreten die die Atemwege reizen Sorgen Sie für Frischluft und nehmen Sie bei Beschwer den zusätzlich ärztliche Hilfe in Anspruch Verwenden Sie keine nicht wie deraufladbaren Batterien Das Gerät ...

Page 84: ...ine ähnlich qualifizierte Person ersetzt werden um Gefährdun gen zu vermeiden Der Akku Ihrers Gerätes wird nur teilweise vorgeladen ge liefert und muss vor Gebrauch zum ersten Mal richtig aufgela den werden Stecken Sie den Akku in den Sockel ein und schließen Sie das Ladegerät ans Stromnetz an Ziehen Sie den Netzstecker wenn der Akku voll aufgeladen ist und trennen Sie den Akku vom Ladegerät Laden...

Page 85: ...setzen des Akkus 1 schieben Sie den Akku entlang der Führungs schiene in das Gerät Er rastet hörbar ein Setzen Sie den Akku erst ein wenn das Akku Werkzeug vollständig für den Einsatz vorbereitet ist Ladezustand des Akkus prüfen Die Ladezustandsanzeige am Gerät signa lisiert den Ladezustand des Akkus 1 Der Ladezustand des Akkus wird durch Aufleuchten der entsprechenden LED Leuchte angezeigt wenn d...

Page 86: ...r umweltgerechten Wieder verwertung zu Elektrische Geräte gehören nicht in den Hausmüll Grüne LED 5 leuchtet Akku ist geladen Rote LED 4 leuchtet Akku lädt Verbrauchte Akkus Eine wesentlich verkürzte Betriebszeit trotz Aufladung zeigt an dass der Akku verbraucht ist und ersetzt wer den muss Verwenden Sie nur einen Ersatz Akku den Sie über den Kunden dienst beziehen können Beachten Sie in jedem Fal...

Page 87: ...ifen zum Schutz vor einem Kurzschluss abzudecken Öffnen Sie den Akku nicht Entsorgen Sie Akkus nach den lokalen Vorschriften Geben Sie Akkus an einer Altbatteriesammelstelle ab wo sie einer umweltgerechten Wiederverwertung zugeführt werden Fragen Sie hierzu Ihren lokalen Müllentsorger oder unser Service Center Die Entsorgung Ihrer defekten einge sendeten Geräte führen wir kostenlos durch Ersatztei...

Page 88: ...üssen sofort nach dem Auspa cken gemeldet werden Nach Ablauf der Garantiezeit anfallende Reparaturen sind kostenpflichtig Garantieumfang Das Gerät wurde nach strengen Qualitäts richtlinien sorgfältig produziert und vor Anlieferung gewissenhaft geprüft Die Garantieleistung gilt für Material oder Fabrikationsfehler Diese Garantie erstreckt sich nicht auf Produktteile die normaler Abnutzung ausgesetz...

Page 89: ...en Reparaturen die nicht der Ga rantie unterliegen gegen Berechnung von unserer Service Niederlassung durchführen lassen Sie erstellt Ihnen gerne einen Kos tenvoranschlag Wir können nur Geräte bearbeiten die ausreichend verpackt und frankiert einge sandt wurden Achtung Bitte senden Sie Ihr Gerät gerei nigt und mit Hinweis auf den Defekt an unsere Service Niederlassung Nicht angenommen werden unfre...

Page 90: ...36 20190902_rev02_mt ...

Page 91: ...233 2008 EN 60335 2 29 2004 A11 2018 EN 55014 1 2017 EN 55014 2 2015 EN 61000 3 2 2014 EN 61000 3 3 2013 EN 62321 1 2013 This declaration of conformity 19 is issued under the sole responsibility of the manufacturer Grizzly Tools GmbH Co KG Stockstädter Straße 20 63762 Großostheim Germany 15 09 2019 The object of the declaration described above satisfies the provisions of Directive 2011 65 EU of th...

Page 92: ...N 60335 2 29 2004 A11 2018 EN 55014 1 2017 EN 55014 2 2015 EN 61000 3 2 2014 EN 61000 3 3 2013 EN 62321 1 2013 Η αποκλειστική ευθύνη για την έκδοση της παρούσας δήλωσης συμμόρφωσης 19 ανήκει στον κατασκευαστή Grizzly Tools GmbH Co KG Stockstädter Straße 20 63762 Großostheim Germany 15 09 2019 Το ανωτέρω περιγραφόμενο αντικείμενο της δήλωσης πληροί τις προδιαγραφές της Οδηγί ας 2011 65 ΕΕ του Ευρωπ...

Page 93: ...EN 55014 1 2017 EN 55014 2 2015 EN 61000 3 2 2014 EN 61000 3 3 2013 EN 62321 1 2013 Die alleinige Verantwortung für die Ausstellung dieser Konformitätserklärung 19 trägt der Hersteller Grizzly Tools GmbH Co KG Stockstädter Straße 20 63762 Großostheim Germany 15 09 2019 Der oben beschriebene Gegenstand der Erklärung erfüllt die Vorschriften der Richtlinie 2011 65 EU des Europäischen Parlaments und ...

Page 94: ...40 ...

Page 95: ...41 ...

Page 96: ...ZZLY TOOLS GMBH CO KG Stockstädter Straße 20 DE 63762 Großostheim GERMANY Last Information Update Έκδοση των πληροφοριών Stand der Informationen 08 2019 Ident No 72036056082019 GB IE NI CY IAN 309546_1904 ...

Reviews: