5115 Hadley Ave. N., St. Paul, MN 55128 (USA) www.parktool.com
PARK TOOL CO.
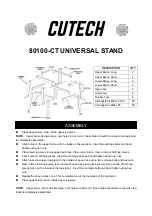
PRS-33TT Tool Tray
Magnet Assembly
1. Loosely assemble the M6 x 16mm button head cap screw (#10), M6
washers (#6), and M6 T-nuts (#4) onto the magnet bar (#9). (Figure 1)
2. With the Park Tool logo right side up slide the magnet bar with hardware
onto the side of the extrusion (#2) until magnet is flush with end cap (#11)
and fully tighten.
Hook Assembly
1. Remove one M8 nut (#7) from the hook and slide into the bottom T-track of
the extrusion. (Figure 2)
2. Thread the end of the hook into the M8 nut in the T-track so that the other
M8 nut and the washer are on the outside of the T-track, as shown. Thread
until just before the hook stops threading.
3. Slide the hook in the desired location and tighten the lower M8 nut with a
13mm wrench.
Bracket Mounting Hardware Assembly
1. Assemble the three sets of M8 screws (#13), washers (#12), and T-nuts (#4)
onto the mounting bracket as shown. Leave loose. (Figure 3)
PRS-33TT
Instructions / Instructions / Anleitung / Instrucciones
STEP 3
2
4
3
1
5
10
7
6
14
8
13
10
1
2
7
12
11
4
3
9
11
4
2
2