background image

9-2 

9. Troubleshooting

Please read this section carefully. It can help you solve common malfunctions in the printing 

process. If the problems appeared cannot be solved, please timely contact Pantum After-

sales Service Center.

Prior to handling common malfunctions, firstly check the following situations:
• Whether the power cord is connected correctly and the printer is powered on.
• Whether all the protective parts are removed.
• Whether the laser toner cartridge is correctly installed.
• Whether the output bin is fully closed.
• Whether the paper is correctly loaded into the tray.
• Whether the interface cable is correctly connected between the printer and the computer.
• Whether the correct printer driver is selected and installed properly.
• Whether the computer port is properly configured and is connected to the proper printer 

port.

9.1. Clearing Jammed Paper 

Note: 

  • Remove the jammed paper in accordance with the following steps, close the 

front cover and tidy the paper in the tray, then the printer will automatically 

resume printing. If the printer cannot automatically start printing, please press the 

button on the control panel.

• If the printer still does not start printing, please check whether all the jammed 

paper inside the printer are cleared. 

• If you cannot remove the jammed paper yourself, please contact your local 

Pantum Authorized Repair Center or send the printer to the nearest Pantum 

Authorized Service Center for repair.

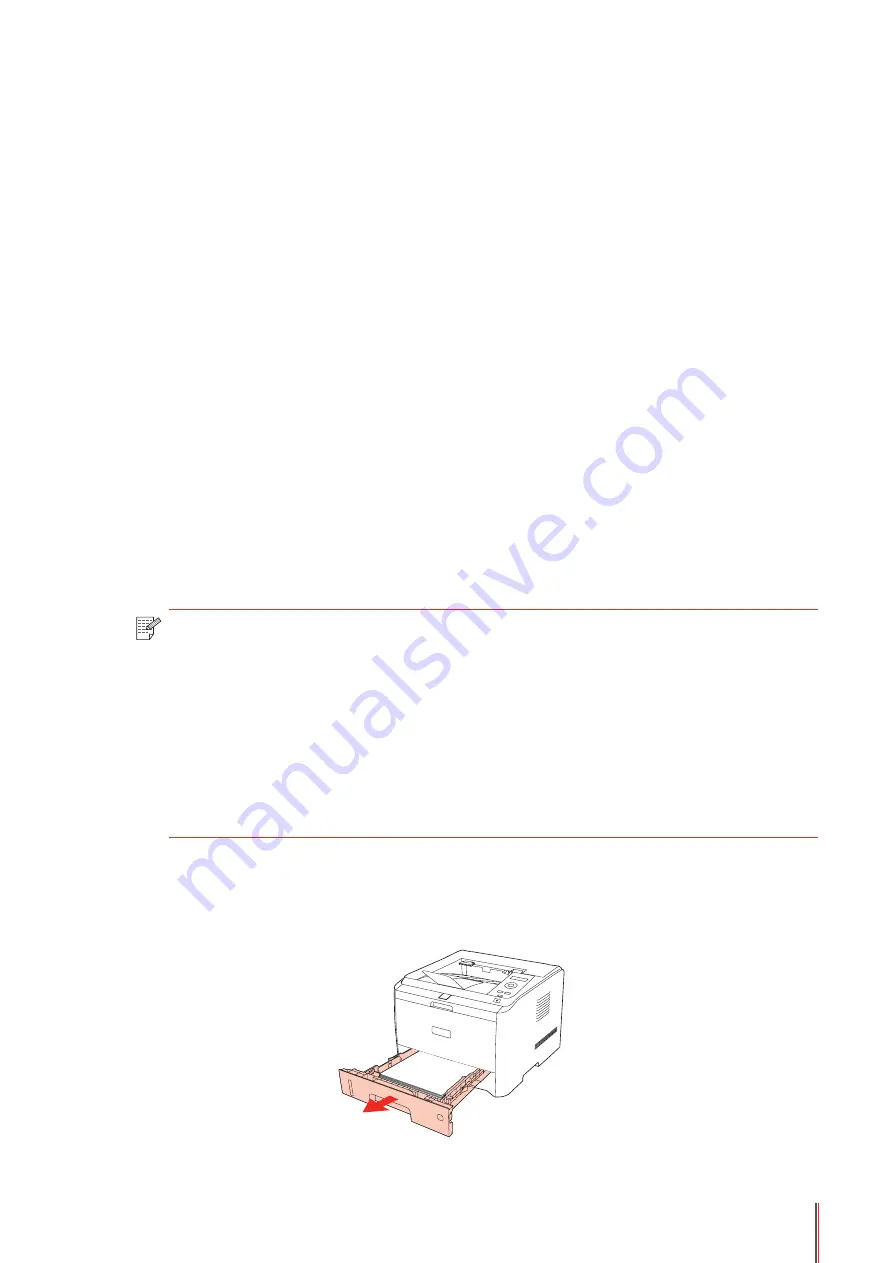
9.1.1. Paper Jam in the Tray

1. Open the tray.

Summary of Contents for P3502DN

Page 1: ...It is recommended to carefully read this Guide before using the printer Pantum P3500 Series Monochrome Single Function Laser Printer User Guide...

Page 2: ...and the AirPrint logo are trademarks of Apple Inc Wi Fi Wi Fi Alliance Wi Fi Protected Access WPA the Wi Fi CERTIFIED logo the Wi Fi logo and the Wi Fi Protected Setup logo are registered trademarks o...

Page 3: ...manual or service commitment Zhuhai Pantum Electronics Co Ltd does not make any express or implied warranty or guarantee to this User Guide including composing or words Using this product to copy pri...

Page 4: ...laser components inside the printer Reclamation and recycling To protect the environment our corporation has already established the system of reclamation and recycling for waste products Please refe...

Page 5: ...assembly could also result in an electric shock during future use 13 If any one of the following occurs disconnect the equipment from the computer and pull out the power cord from the AC wall socket a...

Page 6: ...art 15 of the FCC Rules These limits are designed to provide reasonable protection against harmful interference in a residential installation This equipment generates uses and can radiate radio freque...

Page 7: ...ments of EC directives 2004 108 EC and 2006 95 EC on the approximation and harmonization of the laws of the Member States relating to electromagnetic compatibility and safety of electrical equipment d...

Page 8: ...ess Network Configuration For printer models that support wireless network features 4 2 4 2 1 Wi Fi Protected Setup 4 2 4 2 2 Setting up through Wi Fi Configuration Tool 4 3 4 2 3 Setting up through W...

Page 9: ...ge 8 4 9 Troubleshooting 9 2 9 1 Clearing Jammed Paper 9 2 9 1 1 Paper Jam in the Tray 9 2 9 1 2 Paper Jam in the Manual Input Tray 9 3 9 1 3 Paper Jam in the Optional Tray 9 4 9 1 4 Internal Paper Ja...

Page 10: ...1 1 1 Chapter Before Using the Printer 1 Before Using the Printer 1 2 1 1 Packing List 1 2 1 2 Product View 1 3 1 3 Laser Toner Cartridge 1 5 1 4 Control Panel 1 6 1 5 Print the Product Report 1 7...

Page 11: ...package make sure that the following parts are included in the carton Parts Name Quantity Printer 1 Laser Toner Cartridge 1 USB Interface Cable 1 Power Cord 1 CD ROM 1 Quick Setup Guide 1 Pantum Warra...

Page 12: ...en the front cover to take out the laser toner cartridge 5 Multipurpose Input Tray To open the front cover of the multipurpose input tray and put in the print media 6 Multipurpose Input Tray Guide To...

Page 13: ...the printer to the network 3 Power Interface For connecting the power cord 4 Rear Cover To be opened for checking the jammed paper 5 Duplex Printing Unit For releasing jammed paper at the rear during...

Page 14: ...Cartridge with Ultra high Capacity About 10 000 pages The volume is based on ISO IEC 19752 standard Note The model is subject to volume increase without prior notice Consumables capacity may vary depe...

Page 15: ...n status only applicable to Wi Fi model For non Wi Fi model this button will be used to print the Printer Information Page and the Network Configuration Report 6 OK Press this button to save the setti...

Page 16: ...owse through each menu and its options For menu items need to input change the numeric value by cycle accumulating 1 5 Print the Product Report Users can print the product report by manipulating the c...

Page 17: ...ia 2 Paper and Print Media 2 2 2 1 Paper Specification 2 2 2 2 Loading Paper 2 4 2 2 1 Loading into Standard Input Tray 2 4 2 2 2 Loading into Multipurpose Input Tray 2 6 2 2 3 Loading into Optional T...

Page 18: ...per envelope paper Media size Auto A4 A5 Short Edge A5 Long Edge A6 JIS B5 IS0 B5 B6 Letter Legal Executive Folio Oficio Statement 16K Big 16K 32K Big 32K No 10 Env Monarch Env DL Env C5 Env C6 Env ZL...

Page 19: ...appropriate temperature and humidity or other factors beyond the control of Pantum Before purchasing large quantities of print media make sure that the print media meets the specifications specified i...

Page 20: ...approved for use in laser printers Use transparent print media that is not suitable for laser printers Thick paper carton paper Use only heavy paper that is approved for use in laser printers and meet...

Page 21: ...nting is different from that the dial sets the LCD display of the printer will show PaprSize Mismat indicating an error then it is necessary to reset the dial to eliminate the error For those paper ty...

Page 22: ...arency contacts the correction roller Note When loading paper into the multipurpose input tray and the paper source is set up as Auto select or Multipurpose Input Tray as specified the printing will b...

Page 23: ...ngth guide and paper width guide of the tray to the desired paper size slot so as to match with the length and width of the paper Note Do not overly squeeze the paper length guide and paper width guid...

Page 24: ...4 Raise the output tray to avoid the printed paper from slipping and falling Note If the paper loaded into the optional tray at one time exceed 550 pages 80 g m paper will jam or cannot be fed in If p...

Page 25: ...river Software 3 Installation and Uninstallation of the Driver Software 3 2 3 1 Windows based Driver 3 2 3 1 1 Introduction 3 2 3 1 2 Installation Steps 3 2 3 1 3 Driver Uninstallation 3 11 3 2 Instal...

Page 26: ...tion wizard of the printer driver Uninstallation Provides users with the uninstallation wizard of the printer driver Note For users of Windows XP and Windows Server 2003 when connecting the equipment...

Page 27: ...ing system by default and users can select different languages according to their different needs Select Printer it shows the printer model and users can select the corresponding model based on the pr...

Page 28: ...3 4 Click Back to return to the original interface 3 Installation Process Interface Select Install to enter the Driver Installation Process interface...

Page 29: ...s interface after the driver installation is completed It will automatically exit in 3 seconds and set the printer as default 3 1 2 2 NET Model Wired and Wireless 1 Running Interface After inserting t...

Page 30: ...lation Instruction USB Printer applicable to the local installation of all models Printers connected to the network applicable to NET Model Network Installation or reinstallation when the Wi Fi Model...

Page 31: ...nter and the corresponding installation options are available through Installation mode 2 Search for Printers interface After entering the Search for Printers interface the program will automatically...

Page 32: ...fresh and search for printers on the network If you know the IP address of the printer to be connected you can select Specify an IP Address for Installation to enter the printer s IP address for conne...

Page 33: ...rface will display Users select the corresponding Wi Fi Model through Select Printer and the corresponding installation options are available through Installation mode Generally users select the third...

Page 34: ...interface and connect the printer to Wi Fi Please refer to Chapter 4 for the specific setting steps of the Wi Fi configuration tools 3 Installation Complete Interface This interface indicates that the...

Page 35: ...to be uninstalled to enter the uninstallation interface Or click Start Control Panel and then click Uninstall Programs to find the product to be uninstalled with the uninstallation interface shown as...

Page 36: ...ease uninstall the driver after the printing is completed See the figure below 4 Complete Interface After the progress bar advancing is completed it will enter the Complete Interface Click the Done bu...

Page 37: ...e destination volume installation type installation and summary Installation Steps 1 Introduction Insert the CD ROM into the CD ROM driver run the CD ROM and click the Mac system installation package...

Page 38: ...ense agreement dialog box Click Agree to accept the License Agreement and continue the installation 4 Installation Type Display the installation related information as shown below Click Install the fo...

Page 39: ...3 15 5 Installation The installation progress is shown below 6 Summary Installation completes as shown below...

Page 40: ...ion For printer models that support wired network features 4 2 4 2 Wireless Network Configuration For printer models that support wireless network features 4 2 4 2 1 Wi Fi Protected Setup 4 2 4 2 2 Se...

Page 41: ...ireless network features For printer models that support Wi Fi features users can connect the printer with the wireless network through Wi Fi Protected Setup Web Server Setup or Wi Fi Configuration To...

Page 42: ...pen the Wi Fi configuration tool from the driver installation package The specific steps are as follows 4 2 2 1 Windows System 1 Detect Wireless Network Card Wi Fi configuration tool can search the wi...

Page 43: ...r SSID Manually interface i e Step 3 Refresh Searching for wireless network information again Next Enter the Information Input interface Cancel The prompt of cancellation appears after clicking it As...

Page 44: ...n of the wireless network Note Safe Mode is currently available in three types None WEP and WPA WPA2 When it is None the password entry field will be hidden which means no password is needed while con...

Page 45: ...ompting window will pop up 5 Configuration Completed After completing the above steps the Wireless Network Configuration Result interface pops up The configuration result will be displayed If the conf...

Page 46: ...with the computer Click Next and the program will automatically search for the printers connected to the PC currently If searching for the printer models supported by this PC is failed it will remain...

Page 47: ...redentials provided To reenter the credentials please click Previous The following message will appear if the printer can apply the configuration by using the wireless network provided but the PC does...

Page 48: ...cally by using a wireless card in the computer If the computer does not have a wireless card the option of Enter SSID Manually will be automatically ticked on the Wireless Network List page Please ski...

Page 49: ...ter the Information Input interface Enter SSID Manually click to switch to the Enter SSID Manually interface i e Step 3 Refresh Searching for wireless network information again Next Enter the Informat...

Page 50: ...allow you to print the list of wireless networks detected by the printer Next enter the Information Input interface Note If the printer with current configuration has ongoing printing work the followi...

Page 51: ...rd is unchecked by default when it is checked the password entered will be displayed as it is instead of asterisks If the printer with current configuration has ongoing printing work the following err...

Page 52: ...r with the computer Click Next and the program will automatically search for the printers connected to the PC currently If searching for the printer models supported by this PC is failed it will remai...

Page 53: ...credentials provided To reenter the credentials please click Previous The following message will appear if the printer can apply the configuration by using the wireless network provided but the PC doe...

Page 54: ...etwork with the wireless credentials provided 4 2 3 Setting up through Web Server You can use the embedded Web server of the printer to conduct the wireless network configuration 1 Print the network i...

Page 55: ...on the control panel 1 Press Menu to enter the Menu Settings interface 2 Press direction key or to select the 3 Network Set option and press OK 3 Press direction key or to select the 2 Wireless Conf o...

Page 56: ...r change IP settings 1 Print the network information page and view the IP address of the printer Note For printing product network information page please refer to Chapter 1 Enter the IP address into...

Page 57: ...Wi Fi hotspot etc for Printer Setting can complete the settings of Printing Preferences e mail and other relative configuration information 4 3 1 2 Set or Change Web Page Login Password Users can rea...

Page 58: ...gh a network cable and complete the startup preparation work 2 The printer will automatically obtain the IP address assigned by the server The IP address obtained automatically can be used after a few...

Page 59: ...de into Automatic or Manual To reset all the parameter settings of the printer users can restore to the factory settings and please refer to Chapter 6 for the specific operations 4 3 2 Control Panel S...

Page 60: ...tW or 2 WPS PIN mode 4 3 2 2 Network Information Users can check the network status through Network Information 1 Press Menu to enter the Menu Settings interface 2 Press direction key or to select the...

Page 61: ...teway 5 Select the 2 Wireless Info option and press OK Press direction key or to select 1 Connect state 2 IP Address 3 Subnet mask 4 Gateway 5 Channel or 6 SSID 6 Select the 3 WiFi Hots Info option an...

Page 62: ...Chapter Mobile Print 5 Mobile Print 5 2 5 1 Infrastructure connection mode 5 2 5 2 Wi Fi hotspot connection mode recommended 5 3 5 2 1 Android device mobile printing 5 3 5 2 2 IOS device mobile printi...

Page 63: ...ss point wireless router as a medium Important note Prior to the installation of wireless network you must know both the network name SSID and password of your access point wireless router If you re n...

Page 64: ...visit http mopria org Developers SpotlightAppsWall aspx 5 2 1 1 2 How to download Mopria Print Service 1 Download and install Mopria Print Service plugin to the Android mobile device from Google Play...

Page 65: ...higher version 5 2 2 2 Preliminary preparations 1 A printer with wireless network feature 2 IOS mobile device 5 2 2 3 How to use AirPrint mobile printing The printing steps may varied by applications...

Page 66: ...6 1 6 Chapter System Settings 6 System Settings 6 2 6 1 Language Setting 6 2 6 2 Sleep Time Setting 6 2 6 3 Toner Save Setting 6 3 6 4 Restore Factory Settings 6 5...

Page 67: ...s OK to select the 1 Language Set option as shown below 6 2 Sleep Time Setting Set the Sleep Time Mode can lower the power consumption Sleep time Set allows users to select the idle time before the de...

Page 68: ...mode 6 3 Toner Save Setting Users can select Toner Save Setting to lower the cost of printing When the Toner Save mode is On the output color of the print will be lighter The Default Setting is Off 1...

Page 69: ...s after selecting the 2 Open option it indicates that the toner save setting is on 5 Press Menu to exit the menu interface or select Back which is the last item of each menu and press OK to exit the m...

Page 70: ...actory Settings is used to restore the default settings of the printer 1 Press Menu to enter the Menu Settings interface 2 Press OK to select the 1 System Setting option 3 Press direction key or to se...

Page 71: ...Tray Dial Settings 7 3 7 2 2 Tray Settings through Control Panel 7 4 7 3 Open Help Document 7 5 7 4 Printing Mode 7 5 7 4 1 Printing with Standard Input Tray 7 6 7 4 2 Printing with Multipurpose Inpu...

Page 72: ...tomatic Duplex Print Collate Print Reverse Print N in 1 Poster Print For Windows system only Zoom Print Custom Size Note You can select the 2 x 2 Poster Print in N in 1 to enable the poster printing f...

Page 73: ...from the specific tray Users can also choose not to set and adjust to the position of providing no limitation on the tray and the paper type Dial Support Sizes B5 STA LGL LTR A4 and A5 1 Completely dr...

Page 74: ...d the optional tray Here we take the standard input tray as an example 1 Press Menu to enter the Menu Settings interface 2 Press direction key or to select the 2 Tray Setup option and press OK 2 Tray...

Page 75: ...the information on print settings 7 4 Printing Mode This printer can perform the printing operation with the standard input tray the multipurpose input tray and the optional tray If there is any prin...

Page 76: ...Printing with Multipurpose Input Tray When loading paper into the multipurpose input tray the printer will automatically print with the paper in the multipurpose input tray Note The multipurpose input...

Page 77: ...l or remove the optional tray After the installation of the optional tray please do not lift the printer up during the printing process or else the communication with the optional tray will fail Users...

Page 78: ...he paper source is set as Optional Tray I II by users the printer will get paper from the optional tray to finish the print job Note The optional tray can be loaded with 550 pages of plain paper 80 g...

Page 79: ...per media are not suitable for automatic duplex print If the paper loaded into the standard input tray at one time exceed 250 pages paper will jam or cannot be fed in Automatic duplex print does not s...

Page 80: ...nting with plain paper 3 Automatic duplex print with the optional tray Before printing ensure that certain amount of media is loaded into the optional tray and there is no media in the standard and mu...

Page 81: ...tum printer with the appropriate model 4 Click Preferences or Properties button for the configuration of printing 5 Select Basic tab in the Duplex Printing area and select Long Edge or Short Edge as t...

Page 82: ...per platform to prevent the printed paper from sliding out of the output tray If you choose not to raise the paper platform of the output tray we recommend that you immediately remove the printed pape...

Page 83: ...Chapter Routine Maintenance 8 Routine Maintenance 8 2 8 1 Cleaning the Printer 8 2 8 2 Maintenance of Laser Toner Cartridge 8 3 8 2 1 About Laser Toner Cartridge 8 3 8 2 2 Replace Laser Toner Cartridg...

Page 84: ...n the shaded area as shown in the following figure 1 Use a soft cloth to wipe the outside of the printer clean 2 Open the front cover to take out the laser toner cartridge Note When removing the laser...

Page 85: ...do not put the laser toner cartridge near any source of ignition so as to avoid causing a fire When removing or disassembling the laser toner cartridge please pay attention to the toner leakage proble...

Page 86: ...cartridge into the printer so as to avoid photosensitive drum damage caused by exposing to too much direct sunlight or indoor light When installing the laser toner cartridge do not touch the surface...

Page 87: ...into the printer along the guides and close the cover tightly Note Check whether there is any seal before installing the toner cartridge into the printer if there is any please tear off the seal and t...

Page 88: ...the Tray 9 2 9 1 2 Paper Jam in the Manual Input Tray 9 3 9 1 3 Paper Jam in the Optional Tray 9 4 9 1 4 Internal Paper Jam 9 5 9 1 5 Paper Jam in the Fuser Unit 9 6 9 1 6 Duplex Unit Jam 9 7 9 2 Sof...

Page 89: ...printer and the computer Whether the correct printer driver is selected and installed properly Whether the computer port is properly configured and is connected to the proper printer port 9 1 Clearin...

Page 90: ...med paper reload the tray into the printer then the printer will automatically resume printing 9 1 2 Paper Jam in the Manual Input Tray 1 Gently draw the jammed paper out 2 After removing the jammed p...

Page 91: ...the following steps based on the prompts on the LCD display of the control panel to remove the jammed paper 1 Draw out the drawer of the optional tray 2 Gently draw the jammed paper straight out 3 Aft...

Page 92: ...nput Tray 2 Remove the jammed paper from the standard input tray 3 Put the tray back into the printer after removing the jammed paper 9 1 4 Internal Paper Jam Note Do not touch the shaded area as foll...

Page 93: ...cartridge with a black plastic bag or cover it with paper 3 Gently draw the jammed paper straight out 4 After removing the jammed paper reload the laser toner cartridge and close the front cover then...

Page 94: ...ting unit from the back of the printer 2 Remove the jammed paper from the duplex unit 3 If the paper does not come out together with the duplex unit open the tray and remove the jammed paper directly...

Page 95: ...ddress with the printer MAC address in the DHCP network 9 3 Common Trouble Shooting 9 3 1 Common Trouble Trouble Cause Solution Printer Problems The printer does not work The cable between the compute...

Page 96: ...the paper that meets specifications If you print on special print media please use the multipurpose input tray Clean the feed channel Clean the feed roller Print with Multi page Fed Paper Excessive st...

Page 97: ...int media that does not meet usage specifications such as the media is damp or too rough has been used The feed channel is dirty The internal part of the laser toner cartridge is damaged The reflectiv...

Page 98: ...contact Pantum Customer Service to repair or replace the fuser component Skewed pages The print media is loaded incorrectly The feed channel of the printer is dirty Ensure correct loading of the print...

Page 99: ...e inside of the printer is dirty The laser toner cartridge is damaged The internal part of the printer is damaged Please use the print media within the specification range Clean the inside of the prin...

Page 100: ......

Reviews: