background image


BA_PH_3V_EN_07-22.docx


7


6.3


Emission Levels according to EN ISO 3746:2010 ................................................................................. 24


6.3.1


Noise Information ....................................................................................................................................... 24


6.3.2


Noise Emission Values ................................................................................................................................. 24


6.3.3


Dust Emission Values ................................................................................................................................... 24


7


Dimensions ................................................................................................................................................... 25


7.1


Rear View ............................................................................................................................................. 25


7.2


Side View ............................................................................................................................................. 26


7.3


Top View .............................................................................................................................................. 27


8


Installation and Connection ......................................................................................................................... 28


8.1


Check Delivery Conditions ................................................................................................................... 28


8.2


Transport to the Installation Site ......................................................................................................... 28


8.3


Lashing on a Transport Vehicle ............................................................................................................ 28


8.4


Machine Installation ............................................................................................................................ 29


8.5


Temporary Storage .............................................................................................................................. 29


8.6


Connecting the Extraction Unit ........................................................................................................... 30


8.7


Electrical Connections ......................................................................................................................... 31


8.8


Backup Fuses ....................................................................................................................................... 31


8.9


Supply Cable ........................................................................................................................................ 31


9


Components and Controls ............................................................................................................................ 32


9.1


Control Panels...................................................................................................................................... 33


10


Commissioning ............................................................................................................................................. 34


10.1


Switching ON and OFF ......................................................................................................................... 34


10.1.1


Switch Machine ON ..................................................................................................................................... 34


10.1.2


Switch Machine OFF .................................................................................................................................... 34


10.1.3


Brake Release .............................................................................................................................................. 34


10.1.4


Emergency Stop Equipment ........................................................................................................................ 34


10.2


Frequent switching ON and OFF in succession .................................................................................... 35


11


Settings and Operation................................................................................................................................. 35


11.1


Basic Factory Setting ............................................................................................................................ 35


11.2


Door Interlock with Safety Switches .................................................................................................... 35


11.3


Inserting and Tensioning a Bandsaw Blade ......................................................................................... 36


11.4


Adjusting the upper Bandsaw Wheel .................................................................................................. 37


11.5


Height adjustment of the upper Saw Blade Guide .............................................................................. 37


11.6


APA 2 - Saw Blade Guides .................................................................................................................... 38


11.6.1


Structure and Components ......................................................................................................................... 38


11.6.2


Adjusting the Saw Blade Guides .................................................................................................................. 38


11.6.3


Basic Setting of the Back and Side Rollers (Overview) ................................................................................ 39


11.6.4


Conversion to Left Version .......................................................................................................................... 39


11.6.5


Saw Blade Guides - Troubleshooting ........................................................................................................... 40


Summary of Contents for 3V

Page 1: ...hinenbau GmbH Graf Stauffenberg Kaserne Binger Str 28 Halle 120 DE 72488 Sigmaringen Tel 49 07571 755 0 E Mail info hokubema panhans de Web https hokubema panhans de Operating Manual 3 Wheel Bandsaw M...

Page 2: ...BA_PH_3V_EN_07 22 docx 2 Space for notes...

Page 3: ...rly commissioned We therefore ask for immediate return Important Please read and follow the instructions in chapter 1 Liability and Warranty Confirmation of the buyer The machine described above was p...

Page 4: ...BA_PH_3V_EN_07 22 docx 4 Space for notes...

Page 5: ...rly commissioned We therefore ask for immediate return Important Please read and follow the instructions in chapter 1 Liability and Warranty Confirmation of the buyer The machine described above was p...

Page 6: ...ctions 16 5 1 1 Application Area and Intended Use 16 5 1 2 Modifications and Conversions to the Machine 16 5 1 3 Residual Risks 17 5 1 4 Observe the Environmental Protection Regulations 18 5 1 5 Organ...

Page 7: ...and Controls 32 9 1 Control Panels 33 10 Commissioning 34 10 1 Switching ON and OFF 34 10 1 1 Switch Machine ON 34 10 1 2 Switch Machine OFF 34 10 1 3 Brake Release 34 10 1 4 Emergency Stop Equipment...

Page 8: ...Special Features of Use 45 16 Troubleshooting 46 17 Maintenance and Inspection 48 17 1 Replace Ball Bearings 48 17 2 Lubrication of the Machine 49 17 3 Maintenance and Lubrication of the APA Saw Blade...

Page 9: ...e bandsaw blade 36 Figure 20 Bandsaw wheel adjustment 37 Figure 21 Height adjustment of the upper saw blade guide 37 Figure 22 APA Structure and components 38 Figure 23 Adjusting the guides 38 Figure...

Page 10: ...onnection and repair and or maintenance work on hydraulic or pneumatic components by personnel who do not have the appropriate qualifications Non observance of the instructions in the operating manual...

Page 11: ...maintenance servicing inspection repair and or during transport Apart from the operating manual and the legally binding accident prevention provisions applicable in the country and place of use the r...

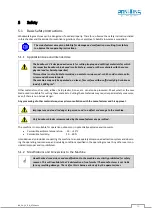
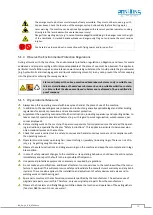
Page 12: ...o the obligation to wear protective goggles Non observance of these instructions may result in personal injury Reference to the obligation to wear a respiratory protection mask Non observance of these...

Page 13: ...nd control Both control panels have their own emergency stop switch The main switch is located on the rear of the machine 4 2 Target Group and Previous Experience This operating manual is intended for...

Page 14: ...ty and monitoring devices must be regularly checked and maintained by the operator Only instructed trained or qualified persons may work on this machine Maintenance work must be carried out and docume...

Page 15: ...by safety switches Three phase motors with 3 kW 4 HP Finely planed machine table Replaceable table insert Fence ruler can be used to the left and right of the saw blade fence profile can be folded ov...

Page 16: ...rocessed Check whether the saw blade used is suitable for cutting these materials Cutting these materials may require special safety measures even if there is no obvious danger Any processing of other...

Page 17: ...tion to the existing danger of being cut by the bandsaw blade Never reach into the run ning bandsaw blade Use pushing devices for short and thin workpieces Wear protective gloves when changing the saw...

Page 18: ...her binding regulations for accident prevention and environmental protection Supplement the operating manual with further instructions including supervisory and reporting duties to take account of spe...

Page 19: ...ghting at least 500 lux around the machine must be ensured 5 2 1 Before starting Work Only use sharp crack free and sufficiently set bandsaw blades Check that the saw blade is correctly aligned on the...

Page 20: ...terruptions Never leave the machine running unattended When the work is finished Release the saw blade tension and provide the machine with a warning sign Lower the saw blade guard to table height Lea...

Page 21: ...f the saw blade along its entire length The saw blade guard is electromotive height adjustable and covers the saw blade from all four sides pre venting hands from entering the danger zone For safety r...

Page 22: ...operation it is strictly forbidden for the operator as well as any helpers and possible observers to stay in this area Figure 3 Danger zone around the machine The operator of the machine must generall...

Page 23: ...ringen Germany Tel 49 0 7571 755 0 Fax 49 0 7571 755 2 22 Figure 4 Nameplate 6 2 Technical Features High performance saw blade guide APA 2 top and bottom Hardened back and side rollers Cutting height...

Page 24: ...en determined considering a continuous cutting cycle and without considering the time required for placing preparing the workpiece Average acoustic power k3A 4dB 79 7 dB A Average acoustic pressure at...

Page 25: ...BA_PH_3V_EN_07 22 docx 25 7 Dimensions 7 1 Rear View Figure 5 Dimensions rear view Dimensions and construction subject to change...

Page 26: ...BA_PH_3V_EN_07 22 docx 26 7 2 Side View Figure 6 Dimensions side view Dimensions and construction subject to change...

Page 27: ...BA_PH_3V_EN_07 22 docx 27 7 3 Top View Figure 7 Dimensions top view Dimensions and construction subject to change...

Page 28: ...bolted via the 4 holes in the base upright on a pallet and braced with lashing straps on the floor of the loading area A separate lashing strap must be used for each lashing and tensioned individually...

Page 29: ...zine Be aware of possible crushing hazards when placing the machine from the pallet to the floor by means of a forklift truck or overhead crane Pay particular attention to your hands and feet and wear...

Page 30: ...average air speed of 20 m s 1450 m h for dry chips 28 m s 2050 m h with moist chips moisture 18 or more is achieved at the extraction nozzles The required air volume for extraction is 1000 m3 h The pr...

Page 31: ...in so that it is dust tight Figure 11 Control cabinet Important Also check the correct running direction of the bandsaw blade If the running direction is incorrect two phases in the control cabinet mu...

Page 32: ...saw blade tension 3 Height adjustment for upper saw blade guide 12 Wheel for upper wheel inclination 4 Rip fence 13 Clamping lever for adjusting wheel 12 5 Rip fence clamping 14 Main motor 6 Rip fence...

Page 33: ...anel No Height control panel upper saw blade guide 16 Switch saw blade ON 21 Button for height adjustment 17 Switch saw blade OFF 22 Enable button for height adjustment 18 Brake release switch positio...

Page 34: ...safety switches see 11 2 locked Make sure that the brake release switch 18 is in the OFF position turned to the left The machine can only be started when the brake release switch 3 is switched off lef...

Page 35: ...erved exclusively for Hokubema Maschinenbau GmbH factory tech nicians In case of doubt or problems with the machine please contact our customer service department Note The adjustment screws are also p...

Page 36: ...Remove chip catcher S by pulling it out Loosen the handwheel 10 for the band tension and remove the old bandsaw blade if necessary Place the new blade on the wheels teeth pointing outwards and preten...

Page 37: ...e Teeth at the edge of the wheels but not protruding beyond them Figure 20 Bandsaw wheel adjustment 11 5 Height adjustment of the upper Saw Blade Guide The height adjustment of the upper saw blade gui...

Page 38: ...he procedure for adjustment is identical for the upper and lower saw blade guides Figure 23 Adjusting the guides Loosen the back roller with the tommy screw K2 and move it all the way back by pulling...

Page 39: ...ea The opening angles between the side rollers and the saw blade must be the same on both sides Figure 24 bottom right Both guides must be exactly vertical After the basic adjustment has been made tig...

Page 40: ...e on the back roller Check basic adjustment Figure 24 and readjust if necessary see section 11 6 2 The running surface of the back roller wears more on the outside than on the inside Saw blade runs to...

Page 41: ...8 Fence turned to flat position 12 1 Convert the Fence to the Right of the Saw Blade Figure 29 Converting the fence for left handers To be able to use the fence on the right of the saw blade the follo...

Page 42: ...ependent on the saw blade They are not caused by the machine provided it is set according to the operating manual and has not been changed Chapter 16 Troubleshooting lists the main causes and suggesti...

Page 43: ...rk piece support for diagonal cutting by means of a fixture Use a push stick at the end of the cut Tenon cutting If a tenoning machine is not available tenons can also be cut safely with a bandsaw Fig...

Page 44: ...ally the lower one are always free of chips a functioning scraper brush is present the chip catcher is attached to the lower bandsaw wheel and is not damaged blurred or damaged bandsaw blades are repl...

Page 45: ...ard and tilted in the direction of the machine Figure 33 Laser cutting edge The laser beam projects the exact cutting edge onto the workpiece and thus provides valuable support dur ing cutting 15 1 1...

Page 46: ...tor becomes very hot Overload or defective motor Contact customer service Brake motor no longer brakes within 10 sec a Brake needs to be readjusted b Brake pads are worn c The brake is defective Adjus...

Page 47: ...adjust saw blade guide according to section 11 6 2 Manual feed rate too high Select feed rate according to the material Saw blade blunt or badly set Replace saw blade Saw blade torn or teeth burnt due...

Page 48: ...ction system must be checked before the initial commissioning and after signifi cant modifications The function of the gas springs should be checked occasionally If it takes a lot of force to open the...

Page 49: ...he side bearing sleeves should occasionally be lubri cated with a little acid free grease preferably Vaseline Oil Back Roller Unscrew the sealing cap from the back roller bearing Figure 36 Press a lit...

Page 50: ...he machine during maintenance and repair work and secure it against being switched on again unexpectedly Lock the main switch with a padlock Only V belts with the same cross section and length may be...

Page 51: ...1 again and switch it on position I Turn the brake release switch 17 to the right position released see Figure 13 Now it must be possible to move the saw blade by hand By turning it you can now check...

Page 52: ...aws in force at the place of use regarding the disposal of industrial solid waste toxic and hazardous waste Hoses and plastic parts as well as other components that are not made of metal must be disma...

Page 53: ...by the customer e g on an additional work table or roller conveyor 5309 LASER CUT INDICATOR As optical support for exact and targeted cuts with power connection via socket on the machine 5212 V BELT S...

Page 54: ...complies with the following directives Machinery Directive 2006 42 EG EMC Directive 2004 108 EG Harmonised standards applied in particular EN 1807 1 The notified body 0392 DGUV Test Pr f und Zertifizi...

Reviews: