


AT-UHD-CLSO-840
21
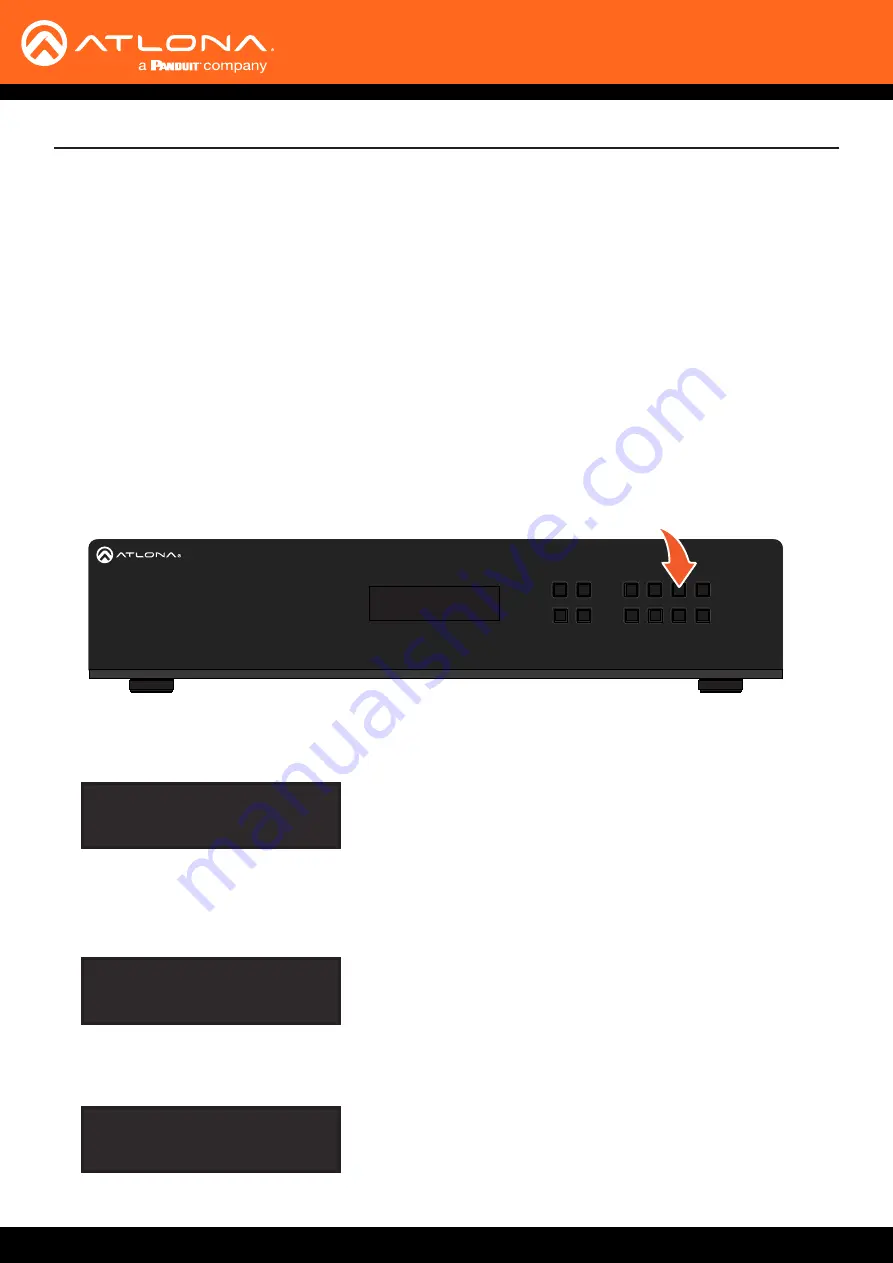
1. Make sure the home screen is displayed. If the home screen is not displayed, press the
CANCEL
button to
return to the home screen.
2.
Press and release the desired input from the bank of numerical buttons on the front panel. In this example,
HDMI IN 3
will be selected by pressing button
3
.
When the AT-UHD-CLSO-840 is shipped from the factory, the matrix is set to “one-to-one” routing mode. This means
that input 1 is routed to output 1, input 2 is routed to output 2, and so on. The following section describes how to
change the routing state. When changing the routing state, the input is specified first, then the output.
The AT-UHD-CLSO-840 can route individual inputs to outputs or can route a single input to all outputs,
simultaneously.
4.
Press the button for the desired output. If a different output is desired, press the
CANCEL
button to return to the
home screen, then press the button of the desired output. In this example,
HDBaseT OUT 4
will be selected by
pressing button
4
.
5.
Press the
ENTER
button to complete the routing process. The front panel display will confirm the current routing
selection.
HDMI IN
HDBaseT IN
R
L
1
R
L
2
7
6
8
2
1
3
4
4
3
2
1
5
R
L
3
R
L
4
R
L
1
R
L
2
R
L
3
R
L
4
HDBaseT OUT
LAN
ON
OFF
PWR 100-240VAC 50/60Hz
RS-232
HDMI OUT
AUDIO IN
AUDIO OUT
+
+
+
+
+
+
+
+
+
+
+
+
+
+
+
+
RX TX
AT-UHD-CLSO-840
FCN
CANCEL
EDID
INFO
POWER
ENTER
5
6
7
8
1
2
3
4
Basic Operation
Select input 03
enter to confirm
Select OUTPUT 04
enter to confirm
iNPUT 03 ROUTED to
OUTPUT 04
Routing Inputs to Outputs
3.
Press the
ENTER
button to confirm the selected input. If a different input is desired, press the
CANCEL
button
to return to the home screen, then press the button of the desired input.
Single Input-to-Output Routing
Using the Front Panel