background image

Before attempting to connect or operate this product,

please read these instructions carefully and save this manual for future use.
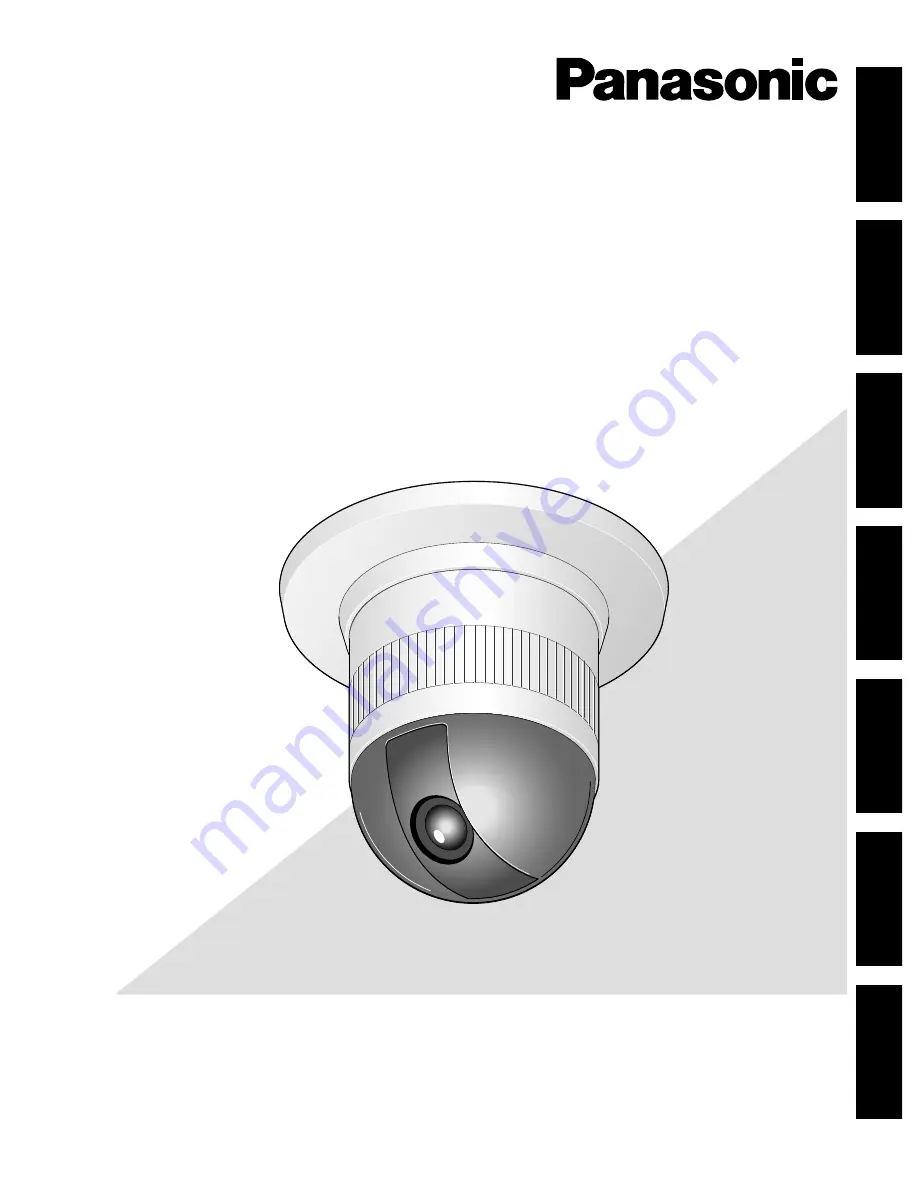
Model No.      

WV-CS850B

WV-CS854BE

Colour CCTV Camera

Operating Instructions

ENGLISH

DEUTSCH

FRANÇAIS

ESP

AÑOL

IT

ALIANO

中  文

êìëëäàâ

Summary of Contents for WV-CS850B

Page 1: ...t or operate this product please read these instructions carefully and save this manual for future use Model No WV CS850B WV CS854BE Colour CCTV Camera Operating Instructions ENGLISH DEUTSCH FRANÇAIS ESPAÑOL ITALIANO 中 文 êìëëäàâ ...

Page 2: ...ngle is intended to alert the user to the presence of important operating and maintenance servic ing instructions in the literature accompanying the appliance Turn the power off at the mains to disconnect the main power for all unit CAUTION TO REDUCE THE RISK OF ELECTRIC SHOCK DO NOT REMOVE COVER OR BACK NO USER SERVICEABLE PARTS INSIDE REFER SERVICING TO QUALIFIED SERVICE PERSONNEL CAUTION RISK O...

Page 3: ...nu 16 Deleting Preset Positions 20 Home Position Setting HOME POSITION 21 Self Return Setting SELF RETURN 21 Auto Mode Selection AUTO MODE 21 Auto Pan Key Setting AUTO PAN KEY 23 Digital Flip Setting DIGITAL FLIP 23 Special 1 Menu Setting SPECIAL 1 25 Camera Setting 32 RS485 Setup 41 INSTALLATION 43 CONNECTIONS 48 SYSTEM CONNECTIONS 50 SPECIFICATIONS 51 ACCESSORIES 52 OPTIONAL ACCESSORIES 52 APPEN...

Page 4: ...g under the camera Digital Flip Operation 4 A newly developed 1 4 inch CCD is employed for use under extremely low light conditions 0 06 lx for mono chrome and 1 lx for colour It also assures clear display of pictures in which bright and dark objects coexist without mutual interference thanks to Super Dynamic 2 DSP Setup menus allow the camera to fulfill surveillance tasks by such means as Motion ...

Page 5: ...servicing 2 Handle the camera with care Do not misuse the camera Avoid striking shaking etc The camera could be damaged by improper handling or storage 3 Do not expose the camera to rain or moisture nor try to operate it in wet areas This product is designed for indoor use or locations where it is protected from rain and moisture Turn the power off immediately and ask qualified service personnel f...

Page 6: ...all moist surfaces with a soft cloth 11 Consumables Parts having contacts such as the lens drive motors cooling fan motor and slip rings inside the camera are subject to wear with time Please ask the nearest service centre about replacement and maintenance of such parts 12 Do not aim the camera at the same object for a long time Burn in of an image may be caused on the fluores cent screen of CRT 1...

Page 7: ...ut Connector e Video Output Connector r Data Port t Power Cable for WV CS850B t Power Cable for WV CS854BE y Camera Mounting Base u Panning Start Point i Fall Prevention Wire o Decoration Cover 0 Dome Cover 7 w e r t t q y u o i 0 WV CS850B WV CS854BE ...

Page 8: ...e Selection P 34 Electronic Sensitivity Enhancement P 34 Synchronization P 35 White Balance P 36 Motion Detector P 37 Auto Focus Setting P 38 Special 2 Menu P 38 RS485 Setup P 41 Password Lock P 24 Preset No Setting P 16 Preset Setting Menu P 16 Auto Pan Setting P 23 INT Manual Selection P 35 LL Manual Selection P 35 VD2 Automatic Selection P 35 Manual Level Adjustment ATW1 ATW2 P 36 Manual Level ...

Page 9: ...1 Alarm Data P 41 Delay Time P 41 Light Control Setting P 19 To Restore the Camera Default Position P 40 Camera Resetting P 40 Zone Number Selection P 25 Zone Parameter Setting P 25 Setting for ON USER P 27 Setting for ON NESW P 26 Area Title Display P 27 Learning Display P 28 Alarm IN OUT Setting P 29 Cleaning Display P 30 Scene File Setting P 19 Preset Speed P 20 B W AUTO ON OFF P 39 B W Auto Se...

Page 10: ...ey SET SW Enter CAM ID PRESET ID display position MON ESC key MON ESC key SET key SET SW for 2 seconds Enter MASK setting MON ESC key MON ESC key SET key SET SW for 2 seconds All Reset F3 key 4 5 6 key for 2 seconds or more 4 5 6 key for 2 seconds or more R SET L SW for 2 seconds 4 6 key for 2 seconds or more 4 6 key for 2 seconds or more R L SW for 2 seconds OPERATE LOGIN ALARM FUNCTION SX IRIS C...

Page 11: ...position AT the auto mode is set to other than OFF Activates the auto mode HP Shifts the camera direction to the home position AP Starts the auto pan function SQ Starts the sequence function SR Starts the sort function PT Starts the patrol function See page 21 for the setting Auto Mode AUTO MODE The auto mode is used for setting the movement of the camera You can select one of four automatic opera...

Page 12: ...ted in the ALARM IN mode When positioning to the starting point is completed while AUTO MODE is set to AUTO PAN When positioning to the starting point is completed while PATROL is set to PLAY 9 Image Hold IMAGE HOLD The camera picture remains as a still image on the monitor screen or until the camera reaches the pre set position This function is useful for surveillance via a local area network 10 ...

Page 13: ...l and vertical resolution will be lowered in this mode If the iris opening is too small the SENS UP AUTO mode will not function 6 Synchronization SYNC You can select the internal sync INT mode or the line lock sync LL mode Additionally this model accepts the VD2 signal from a specified component Whenever the VD2 signal is supplied to this camera the camera automatically switches to the VD2 sync mo...

Page 14: ...adjust and set up the fol lowing items and functions chroma level aperture level and pedestal level You can also reset your parameters to the factory default settings See page 38 for the setting 11 Self diagnosis Function If the camera continues operating abnormally for 30 seconds or more due to such accident as external noise the camera will automatically reset its power In the case it happens fr...

Page 15: ...Press the CAMERA SETUP key for 2 seconds or more to open the SETUP menu WV RM70 1 Turn the MODE SELECTION switch to the NORMAL or ALARM OFF position 2 Press the PROG switch for 2 seconds or more to open the Program menu 3 Move the cursor to Camera Set Up Menu and press the SET switch to open SETUP MENU Submenu Display The items marked O can be selected changed on the submenu Move the cursor to an ...

Page 16: ...rm input 2 3 or 4 Position Setting POSITION SET 1 Move the cursor to POSITION SET on the preset set ting menu and press the CAM SET key The position setting menu appears 2 To Set Panning Tilting Positions 1 For PAN TILT move the cursor to PUSH SET and press the CAM SET key The PAN TILT setting menu appears 2 Select panning tilting positions with the joystick and press the CAM SET key The positions...

Page 17: ...he loading when the camera fails to upload or download the data 4 To Set the Lens Zoom and Focus Positions 1 Move the cursor to PUSH SET for ZOOM FOCUS and press the CAM SET key The ZOOM FOCUS setting menu appears 2 Select a zoom position by moving the zoom control up and down and a focus position by moving the focus control up and down and then press the CAM SET key The positions are set and the ...

Page 18: ...hange an Entered Preset ID 1 Move the pointer to the character to be edited in the editing area with the joystick 2 Select a new character with the joystick 3 Press the CAM SET key to determine the Preset ID To Delete an Entered Preset ID Move the cursor to RESET and press the CAM SET key To Set a Display Position for a Preset ID 1 Move the cursor to POSI and press the CAM SET key The display posi...

Page 19: ...h the joystick Dwell Time DWELL TIME Move the cursor to DWELL TIME and set a dwell time with the joystick The factory default setting is 10S Dwell time changes as follows S stands for second s and MIN stands for minute s Scene File Setting SCENE FILE 1 To set a scene file number Move the cursor to SCENE FILE and select a scene file number 1 to 10 or OFF with the joystick The factory default settin...

Page 20: ...and the PRESET NUMBER SET menu appears The mark on the right of the number disappears Note Your selected preset number is cancelled only in the SEQ and SORT mode The previously set parameters for PAN TILT positions etc are not changed If you want to change these parameters you must set them again PRESET NO 1 POSITION SET PRESET ID ALC MANUAL DWELL TIME SCENE FILE PRESET SPEED RET DEL ON ALC 10S 1 ...

Page 21: ...int and panning end point Follow the steps below 1 Move the cursor to POSITION and press the CAM SET key The cursor moves to START 2 Move the joystick to select a panning starting point and press the CAM SET key SET UP MENU PRESET 1 MAP HOME POSITION SELF RETURN AUTO MODE AUTO PAN KEY DIGITAL FLIP SPECIAL1 CAMERA RS485 SET UP PASSWORD LOCK OFF 15 OFF OFF AUTO PAN ON SET UP MENU PRESET 1 MAP HOME P...

Page 22: ... This movement is repeated over and over 6 To set a dwell time Move the cursor to DWELL TIME and select a dwell time with the joystick Dwell time changes as follows 7 To set pan limit ON OFF Move the cursor to PAN LIMIT and select ON or OFF with the joystick The factory default setting is OFF ON Manual pan is limited from the starting point to the endpoint specified by position setting Set ENDLESS...

Page 23: ...h the AUTO PAN key If PASSWORD LOCK is set to ON you cannot operate AUTO PAN SEQ SORT and PATROL even by pressing the AUTO key Digital Flip Setting DIGITAL FLIP Move the cursor to DIGITAL FLIP and select ON or OFF with the joystick OFF The tilt range is limited from 0 to 90 ON The digital flip function allows the tilt angle to widen up to 180 The image on the monitor screen is flipped horizontally...

Page 24: ...ve the cursor to RESET and press the CAM SET key The screen returns to the verification menu 3 5 To return to the SET UP MENU menu without verifying the password move the cursor to RET and press the CAM SET key New Password 4 To change the password in step 3 3 above move the cursor from OK to NEW PASSWORD then press the CAM SET key NEW PASSWORD menu appears Note The NEW PASSWORD menu is accessible...

Page 25: ...e direction of the camera The privacy zone function will not work at start up immediately after turning the power on 3 To register a new zone 3 1 For PAN TILT move the cursor to PUSH SET and press the CAM SET key 3 2 Adjust the pan and tilt position so that the desired position comes into the zone frame with the joystick 3 3 For ZOOM FOCUS move the cursor to PUSH SET and press the CAM SET key 3 4 ...

Page 26: ...le AREA TITLE Up to 8 area titles can be added in specific positions 1 Select ON NESW ON USER or OFF with the joy stick ON NESW An area title is displayed for indicating the camera direction North N North East NE East E South East SE South S South West SW West W and North West NW ON USER A user customized area title appears in a maximum of 16 characters OFF Area tittle does not appear Factory defa...

Page 27: ...OOM FOCUS and display the position in the same way as AREA TITLE DIREC TION NESW See page 26 3 To add a user customized title move the cursor to the title of the desired number and press the CAM SET key The AREA TITLE menu of the selected number appears Area Title Editing 1 Move the cursor to the desired character in the character field with the joystick and press the CAM SET key 2 The selected ch...

Page 28: ...UTTER AGC SENS UP WHITE BALANCE IMAGE HOLD AREA TITLE DIGITAL FLIP PRIVACY ZONE CAMERA ID PROPO PT PAN LIMIT ZOOM LIMIT TILT ANGLE BURST CLEANING After starting the patrol learn the following manual operations are stored PAN TILT ZOOM FOCUS operation IRIS operation Preset positioning 2 Open the SET UP menu and move the cursor to SPECIAL 1 For PATROL select LEARN PLAY or STOP with the joystick The ...

Page 29: ...ally deviate from the entered routine when the routine includes a move to a preset position If this happens re enter the routine of manual opera tions for patrol learn In the patrol play mode black and white automatic switching does not work In the patrol play mode when the power of the con troller is turned on or off the patrol play stops In this case press the PATROL PLAY key again If SELF RETUR...

Page 30: ...ALM OUT and select ON or OFF 2 Press the CAM SET key The factory default setting is OFF ON The camera sends an alarm output signal after it turns to a preset position OFF The camera does not send an output signal Notes The camera ignores alarm inputs during manual operation Select OFF when the camera downloads or uploads the preset data Cleaning CLEANING With CLEANING in the ON position the camera...

Page 31: ...output Note Select OFF when the camera downloads or uploads the preset data Image Hold IMAGE HOLD The camera picture remains as a still image on the monitor screen until the camera reaches the preset position This function is useful for surveillance via local area network 1 Move the cursor to IMAGE HOLD and select ON or OFF ON The last displayed still image is shown till the camera finishes moving...

Page 32: ...er in the editing area select a new char acter and press the CAM SET key This func tion allows you to edit or correct a specific char acter To enter a blank space into the camera ID move the cursor to SPACE and press the CAM SET key To erase all characters in the editing area move the cursor to RESET and press the CAM SET key The positioning of CAMERA ID stops at the edges of the screen CAMERA ID ...

Page 33: ...n 2 ALC Mode with SUPER D2 OFF 1 Move the cursor to SUPER D2 and select OFF When you select MANUAL SUPER D2 is not avail able MASK SET appears on the menu 2 Move the cursor to MASK SET and press the CAM SET key The 48 mask areas appear on the moni tor screen The cursor is blinking in the top left cor ner of the screen 3 To mask an area where backlight is bright move the cursor to the area and pres...

Page 34: ...k Notes Even if AGC is set to ON and if the noise reduction function is enabled afterimages may be produced by shooting a moving object or by panning or tilting the camera For more information refer to Digital Noise Reduction on page 39 Electronic Sensitivity Enhancement SENS UP Move the cursor to SENS UP and select the desired electronic sensitivity enhancement mode with the joy stick The electro...

Page 35: ...k The LL sync mode is not available when the multiplexed vertical drive VD2 pulse is supplied 2 After selecting LL press the CAM SET key The SYNC menu appears on the monitor screen 3 Supply the video output signal of the camera to be adjusted and the reference video output signal to a dual trace oscilloscope 4 Set the dual trace oscilloscope to the vertical rate and expand the vertical sync portio...

Page 36: ... ATW1 ATW2 press the CAM SET key The ATW1 ATW2 fine adjustment menu appears on the monitor screen 3 Move the cursor to RET with the joystick and press the CAM SET key to return to the SET UP menu 2 Automatic White Balance Control Mode AWC 1 Move the cursor to WHITE BAL and select AWC PUSH SW with the joystick 2 Press the CAM SET key to start the white balance setup PUSH SW is highlighted to indica...

Page 37: ...motion detection the camera will notify the connected device of the alarm activation The default setting is 2 seconds Selectable times seconds 2s 5s 10s 30s 9 Move the cursor to RECOVER TIME with the joystick You can select the following recover times 10 Move the cursor to RET and press the CAM SET key to return to SET UP Important Notices The motion detection should meet the following con ditions...

Page 38: ...a white wall or fine felt 5 No centre objects and sloping objects 6 Far and near objects on the screen Special 2 Menu SPECIAL2 This menu lets you adjust and set up the picture quality to meet your requirements Move the cursor to SPECIAL2 and press the F2 button of WV CU550C The special menu appears on the mon itor screen For WV RM70 hold down the right and left switches simultaneously for 2 second...

Page 39: ...r LOW for the threshold level at which the camera automatically switches to BW or colour mode Default HIGH The illuminance shown below is based on the assumption that the camera is used in an area lit by halogen lamps and that AGC on the menu is set to MID HIGH approximately 6 lx LOW approximately 2 5 lx Note When near infrared lamps are used the image may be displayed out of focus and mode switch...

Page 40: ...ght and left buttons simultaneously for 2 seconds or more For WV CU360C CJ and WV CU161C hold down the 4 and 6 keys simultaneously for 2 seconds or more Camera Resetting CAMERA RESET Move the cursor to CAMERA RESET with the joystick and press the F3 button of WV CU550C CJ The camera is reset to the factory default settings For WV RM70 hold down the right left and set switches simultaneously for 2 ...

Page 41: ...tion The factory default setting is 19 200 Data Bit DATA BIT Specifies the number of data bits 7 or 8 bits for the RS485 communication The factory default setting is 8 Parity Check PARITY CHECK Specifies the parity check mode NONE ODD EVEN The factory default setting is NONE Stop Bit STOP BIT Specifies the number of stop bits 1 or 2 bits The fac tory default setting is 1 X ON X OFF X ON X OFF Spec...

Page 42: ...N MID OFF INT ATW1 OFF AUTO L I I I NORMAL LOW2 OFF OFF ON Item Setting Menu PRESET MENU AUTO PAN SCENE FILE RS485 SET UP ALARM IN OUT PRESET ID ALC MANUAL SUPER D2 DWELL TIME SCENE FILE PRESET SPEED SPEED PAN LIMIT ENDLESS DWELL TIME UNIT NUMBER SUB ADDRESS BAUD RATE DATA BIT PARITY CHECK STOP BIT XON XOFF WAIT TIME ALARM DATA DELAY TIME ALARM IN1 ALARM IN2 ALARM IN3 ALARM IN4 CNT CLS 1 TIME OUT ...

Page 43: ...s switched on 1 Switch off the camera 2 Set the switch as shown in the table below 3 Switch on the camera to read in the changed switch settings around 5 seconds 4 Switch off the camera 5 Set the unit number with the DIP switch see the next page 6 Switch on the camera to read in the changed switch settings Note The changed communication parameters are displayed on the RS485 SETUP menu after the ca...

Page 44: ... 4 ON 5 6 7 8 1 2 3 4 ON 5 6 7 8 1 2 3 4 ON 5 6 7 8 1 2 3 4 ON 5 6 7 8 1 2 3 4 ON 5 6 7 8 1 2 3 4 ON 5 6 7 8 Switch position Unit number Switch position Unit number 1 96 1 2 3 4 5 6 7 8 9 10 11 12 13 14 15 16 17 18 19 20 21 22 23 24 25 26 27 28 29 30 31 32 33 34 35 36 37 38 39 40 41 42 43 44 45 46 47 48 49 50 51 52 53 54 55 56 57 58 59 60 61 62 63 64 65 66 67 68 1 2 3 4 ON 5 6 7 8 1 2 3 4 ON 5 6 7...

Page 45: ... 1 2 3 4 ON 5 6 7 8 1 2 3 4 ON 5 6 7 8 1 2 3 4 ON 5 6 7 8 1 2 3 4 ON 5 6 7 8 1 2 3 4 ON 5 6 7 8 1 2 3 4 ON 5 6 7 8 1 2 3 4 ON 5 6 7 8 Switch position Unit number Switch position Unit number 69 70 71 72 73 74 75 76 77 78 79 80 81 82 83 84 85 86 87 88 89 90 91 92 93 94 95 1 2 3 4 ON 5 6 7 8 1 2 3 4 ON 5 6 7 8 1 2 3 4 ON 5 6 7 8 1 2 3 4 ON 5 6 7 8 1 2 3 4 ON 5 6 7 8 1 2 3 4 ON 5 6 7 8 1 2 3 4 ON 5 6 ...

Page 46: ...shown in the following figures Cutout in Diecast Case Cutout in Decoration Cover Note Remove sharp edges to protect the cables b Top Cable Exit Prepare a hole in the ceiling board to run the cables 1 Mark the mounting holes on the ceiling using the removed camera mounting base as a template 2 Fix the camera mounting base to the ceiling with four screws not provided M4 RS485 Setting The 4 bit DIP s...

Page 47: ... Tighten the fixing screw M3 provided Notes 1 Tighten the camera fixing screw with a screw driver 2 Follow the instructions given here to ensure that the camera and camera mounting base are installed safely 3 When removing the camera from the camera mounting base loosen and press up the camera fixing screw M3 with a screwdriver 6 Fix the decoration cover to the camera mounting base a Sideway Cable...

Page 48: ...des See the reverse side of the cover page for main lead connection The coaxial cable length RG 6 U 5C 2V for the connection is up to 1 200 meters 4 000 ft To VIDEO IN CAMERA IN Video output 24 V AC WV CS854BE BNC plug Coaxial cable RS485 cable Data port BNC plug Alarm in Alarm out To sensors To indicators 24 V AC cable 220 V 240 V AC WV CS850B Note When powered up the unit performs a self check i...

Page 49: ... Note Use a relay if the voltage or current of the con nected device exceeds the ratings GND Brown Red Data transmission Data reception Orange Yellow Green T B T A R B R A RS485 Connection Black Brown Red Orange Yellow Light blue or green Blue Purple Wire colour Function IN 1 GND IN 2 GND IN 3 GND IN 4 GND Alarm IN 8 pin ALARM OUT Connections Connect an external device for example a buzzer or lamp...

Page 50: ...BUSY F3 F4 F2 F1 AF 1 2 3 4 5 6 7 8 9 MON CAM ESC SET 0 ACK RESET BACK SEQ FORWARD SEQ ALT DEC 1CAM INC 1CAM STOP 1 2 AUX CLOSE OPEN IRIS PRESET FOCUS NEAR ZOOM TELE FAR WIDE System Controller WV CU 550 550B LEFT RIGHT UP DOWN ALARM BUSY F3 F4 F2 F1 AF 1 2 3 4 5 6 7 8 9 MON CAM ESC SET 0 ACK RESET BACK SEQ FORWARD SEQ ALT DEC 1CAM INC 1CAM STOP 1 2 AUX CLOSE OPEN IRIS PRESET FOCUS NEAR ZOOM TELE F...

Page 51: ...ption Ambient Operating Temperature Weight selectable ON OFF SETUP MENU x 22 digital zoom x10 internal line lock multiplexed vertical drive VD2 50 00 Hz 1 0 V P P PAL composite 75 Ω more than 480 lines at centre C L NORMAL more than 510 lines at centre C L HIGH 570 lines at centre B W more than 400 lines at centre 50 dB AGC OFF weight on 1 lx 0 1 foot candle C L at SENS UP OFF AGC HIGH 0 06 lx 0 0...

Page 52: ...position maximum approx 300 s pan tilt lens 64 preset positions home position Panning Angle Setting Panning Mode Panning Speed Tilting Range Tilting Mode Tilting Speed ACCESSORIES Operating Instructions this document 1 pc The following parts are for installation Decoration Cover 1 pc Alarm In Cable 1 pc Alarm Out Cable 1 pc Connector for 24 V AC only for WV CS854BE 1 pc OPTIONAL ACCESSORIES Dome C...

Page 53: ...UNC EL SHUTTER On 1 7 1 CAM FUNC Off 1 7 2 CAM FUNC Speed Up 1 7 3 CAM FUNC Speed Down 1 7 4 CAM FUNC AGC On 1 7 5 CAM FUNC Off 1 7 6 CAM FUNC SENS UP On 1 7 7 CAM FUNC Off 1 7 8 CAM FUNC Up 1 7 9 CAM FUNC Down 1 8 0 CAM FUNC SENS UP AUTO On 1 8 1 CAM FUNC Off 1 8 2 CAM FUNC Up 1 8 3 CAM FUNC Down 1 8 4 CAM FUNC LL SYNC phase INC 1 8 5 CAM FUNC DEC 1 8 6 CAM FUNC PAN 180 turn 1 8 7 CAM FUNC CLEANI...

Page 54: ...Printed in Japan Gedruckt in Japan Imprimé au Japon Impreso en Japón Stampato in Giappone 在日本印刷 2003 Matsushita Electric Industrial Co Ltd All rights reserved N0703 1083 3TR001738BAA ç ÔÂ Ú ÌÓ üÔÓÌËË ...

Reviews: