Panasonic WJ-PC200 Operating Instructions Manual Download Page 1

Operating Instructions

Coaxial - LAN Converter
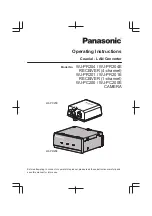
Model No.    

WJ-PR204 / WJ-PR204E

RECEIVER (4-channel)

WJ-PR201 / WJ-PR201E

RECEIVER (1-channel)

WJ-PC200 / WJ-PC200E

CAMERA

WJ-PC200

WJ-PR204

Before attempting to connect or operate this product, please read these instructions carefully and
save this manual for future use.

Summary of Contents for WJ-PC200

Page 1: ...No WJ PR204 WJ PR204E RECEIVER 4 channel WJ PR201 WJ PR201E RECEIVER 1 channel WJ PC200 WJ PC200E CAMERA WJ PC200 WJ PR204 Before attempting to connect or operate this product please read these instructions carefully and save this manual for future use ...

Page 2: ...006 95 CE y 2004 108 CE Noi dichiariamo sotto nostra esclusiva responsabilità che il prodotto a cui si riferisce la presente dichiarazione risulta conforme ai seguenti standard o altri documenti normativi conformi alle disposizioni delle direttive 2006 95 CE e 2004 108 CE Wij verklaren als enige aansprakelijke dat het product waarop deze verklaring betrekking heeft voldoet aan de volgende normen o...

Page 3: ...ot be used until a replacement cover is obtained A replacement fuse cover can be purchased from your local Panasonic Dealer IF THE FITTED MOULDED PLUG IS UNSUITABLE FOR THE SOCKET OUTLET IN YOUR HOME THEN THE FUSE SHOULD BE REMOVED AND THE PLUG CUT OFF AND DISPOSED OF SAFELY THERE IS A DANGER OF SEVERE ELECTRICAL SHOCK IF THE CUT OFF PLUG IS INSERTED INTO ANY 13 AMP SOCKET How to replace the fuse ...

Page 4: ...apparatus 10 Only use attachments accessories specified by the manufacturer 11 Use only with the cart stand tripod bracket or table specified by the manufacturer or sold with the apparatus When a cart is used use caution when moving the cart apparatus combination to avoid injury from tip over S3125A 12 Unplug this apparatus during lightning storms or when unused for long periods of time 13 Refer a...

Page 5: ... 4 1 Connection Conditions 30 4 1 1 When using a 1 channel Receiver Side Unit 30 4 1 2 When using a 4 channel Receiver Side Unit 32 4 2 Connections 34 5 Maintenance Screen of coaxial LAN converter 41 5 1 Accessing the Maintenance Screen 42 5 1 1 Temporarily Changing the Computer s IP Address 42 5 1 2 Accessing the Maintenance Screen 44 5 1 3 Maintenance Screen Overview 46 5 2 Using the Maintenance...

Page 6: ...s with these notation are available when using the model WJ PR204 WJ PR204E Receiver side unit 1 channel PR201 The functions with these notation are available when using the model WJ PR201 WJ PR201E Camera side unit PC200 The functions with these notation are available when using the model WJ PC200 WJ PC200E Note The Coaxial LAN Converter RECEIVER is called the receiver side unit and the LAN Conve...

Page 7: ... converter is capable of transmission speeds of 35 Mbps or over for TCP 2 and 45 Mbps or over for UDP connections 2 When used with RG 6 U coaxial cable and for distances under 2 0 km 6 560 feet PR201 500 m 1 640 feet PR204 No setup required Connections can be established by simply connecting the coaxial cable to the coaxial LAN converter 1 There are limitations on the combinations of the cameras t...

Page 8: ...ormal use due to improvement of the product Trademarks Microsoft Windows Windows Vista Windows Media Internet Explorer and ActiveX are either registered trademarks or trademarks of Microsoft Corporation in the United States and or other countries Microsoft product screen shot s reprinted with permission from Microsoft Corporation Linux is a registered trademark of Linus Torvalds in the United Stat...

Page 9: ...System Networks Co Ltd BE LIABLE TO ANY PARTY OR ANY PERSON EXCEPT FOR REPLACEMENT OR REASONABLE MAINTENANCE OF THE PRODUCT FOR THE CASES INCLUDING BUT NOT LIMITED TO BELOW 1 ANY LOSS OR DAMAGE INCLUDING WITHOUT LIMITATION DIRECT OR INDIRECT SPECIAL CONSEQUENTIAL OR EXEMPLARY ARISING OUT OF OR RELATING TO THE PRODUCT 2 ANY INCONVENIENCE LOSS OR DAMAGE CAUSED BY INAPPROPRIATE USE OR NEGLIGENT OPERA...

Page 10: ...ized user name and password Apply measures such as user authentication to protect your network against leakage or theft of information including image data authentication information user names and passwords alarm mail information FTP server information and DDNS server information After the unit is accessed by the administrator make sure to close the browser Change the administrator password perio...

Page 11: ...BNC Connector Cover 1 ch 1 pc PR201 Screw M2 6 10 mm 3 8 inches 2 pcs of them 1 for spare WJ PC200 WJ PC200E Operating Instructions this document 1 pc Warranty Card 1 pc WJ PC200 BNC Connector Cover 1 ch 1 pc Wood screw 4 20 mm 13 16 inches 3 pcs of them 1 for spare Screw M2 6 10 mm 3 8 inches 2 pcs of them 1 for spare PoE incompatible cable 1 pc Cable coupler used with the network cable 1 pc 1 UK...

Page 12: ...l weight Selecting an inappropriate installation surface may cause this product to fall down or topple over resulting in injury or accidents Installation work shall be started after sufficient reinforcement Do not install this product in locations subject to vibration Loosening of mounting screws or bolts may cause a fall of the product resulting in injury or accidents Turn the power off when do w...

Page 13: ...s product Failure to observe this may cause fire or electric shock Consult the dealer for the repair or inspections Do not insert any foreign objects Fire or electrical shock may be caused if water or any foreign objects such as metal objects enter inside the unit Turn the power off immediately and contact qualified service personnel for service Only use the included AC adapter PR204 PR201 If othe...

Page 14: ... cables insert objects into the conductor or connect coaxial cables with incomplete relays If water or other objects enter the conductor or coaxial cables with incomplete relays are connected it may result in electric shock or fire Disconnect the power line and contact an authorized service center if there is any damage to the coaxial cables Do not forcibly pull on the cable Doing so may result in...

Page 15: ...the unit 1 6 General Precautions Follow the instructions written in Important safety instructions see page 4 and 1 5 For Your Safety see page 12 together with the instructions written below 1 Follow the following precautions in order to maintain product performance over long periods of time Do not use the unit in areas with high temperatures or humidity for long periods of time Use in these areas ...

Page 16: ...ol or any other types of solvents or detergents Otherwise it may cause discoloration When using a chemical cloth for cleaning read the caution provided with the chemical cloth product 8 Cleaning stains from the unit Wipe stained areas with a damp soft cloth 9 Radio disturbance This unit uses the same high frequency signals as those used for amateur radio shortwave broadcasting aviation radio marin...

Page 17: ...y have been exposed to water or moisture 2 Do not install or use the unit near medical equipment High frequency signals emitted from the unit may affect the operation of medical equipment and cause malfunctions 3 Do not install or use the unit in the following locations Locations where it may get wet from rain or water splash including under the eaves etc Locations where a chemical agent is used s...

Page 18: ...ch thick area of the ceiling or wall such as a crossbeam otherwise the camera side unit may fall If there is no crossbeam place a board on the other side of the ceiling or wall to make sure the camera side unit is securely mounted When mounting a camera side unit on a concrete or mortar ceiling or wall use a drill and anchors locally procured body diameter 4 mm 3 16 inches and make holes using the...

Page 19: ... before making connections Insulation resistance value 1 M or more for DC 500 V Confirm the length of the coaxial cable see page 30 page 32 We recommend RG 6 U coaxial cable The performance of the coaxial cable may be affected if it is relayed Use only the following recommended BNC plug when connecting coaxial cables to the BNC connectors of the unit Applicable plug MIL C39012C MIL C39012 16F or B...

Page 20: ...such as an analog CCTV camera may cause damage to the connected device 9 Sulfurization caused by rubber products Do not store or install any rubber products such as gaskets or rubber feet that contain sulfer near or in the same container as this product Sulfuric compounds in the rubber product may cause sulfuric corrosion of this product s electrical components or terminals leading to malfunction ...

Page 21: ...side unit is connected to the camera side unit see page 24 Note The WJ PR204 is used as an example in some of the illustrations in this document Rear view WJ PR201 WJ PR201E A C B BNC connector Connects the receiver side unit to the camera side unit with a coaxial cable see page 37 Network connector Connects the receiver side unit to a network device with an Ethernet cable see page 38 DC IN Connec...

Page 22: ...de unit with a coaxial cable see page 37 Network connector Connects the receiver side unit to a network device with an Ethernet cable see page 38 DC IN Connects the receiver side unit to the power outlet with the included AC cord see page 39 22 Operating Instructions 2 Parts and functions ...

Page 23: ...connector Connects the camera side unit to a network camera with an Ethernet cable see page 34 BNC connector Connects the camera side unit to the receiver side unit with a coaxial cable see page 35 Rear view A Used when attaching the camera side unit to a ceiling or wall with screws see page 25 Operating Instructions 23 2 Parts and functions ...

Page 24: ...ff The power source is not supplied to the receiver side unit COAXIAL Green lit The camera side unit is connected to the receiver side unit through the coaxial cable Red lit The receiver side unit is malfunctioning Contact an authorized service center Off The receiver side unit is not receiving power or the coaxial cable or camera side unit is not connected Camera side unit Indicator Light Status ...

Page 25: ...cause transmission interference When mounting several camera side units in the same area mount them side by side each other The pull out strength of the installation area must be at least 294 N 66 1 lbf per screw 1 Mount the camera side unit on a durable part of a ceiling or wall using wood screws 4 20 mm 13 16 inches nominal diameter accessory Use the included wood screws to mount the unit onto a...

Page 26: ...nding on where the rack mount connecting fitting was purchased For U S and Canada BY HCA10A For Europe and other countries BY HCA10CE Mounting 3 or 4 receiver side units to a rack 1 Connect the receiver side units together using the BY HCA10A underside continuous connecting bracket with the screws included with the BY HCA10A Connecting 3 receiver side units Place a receiver side unit on both ends ...

Page 27: ... Keep the remaining parts Connecting 4 receiver side units Recommended torque 0 7 0 3 N m 0 52 0 22 lbf ft Flat head M3 6 mm 1 4 inches Rack mount connecting fitting accessory 16 Underside continuous connecting bracket Rack mount connecting fitting accessory Note The BY HCA10A rack mount bracket comes with 2 underside continuous connecting bracket and 32 screws flat head M3 6 mm 1 4 inches When co...

Page 28: ...fitting accessory 2 Mounting bracket Rack mount connecting fitting accessory Mounting bracket Rack mount connecting fitting accessory Screw M3 6 mm 1 4 inches Rack mount connecting fitting accessory 2 Note The BY HCA10A rack mount bracket comes with 6 screws M3 6 mm 1 4 inches Use 4 screws M3 6 mm 1 4 inches when mounting to sides of the connected receiver side units Keep the remaining parts 28 Op...

Page 29: ...ck mounting screw locally procured 4 When mounting to a rack we recommend that you attach a cooling fan or other device to keep the units cool IMPORTANT Take measures to ensure that the temperature in the rack does not exceed 50 C 122 F When mounting receiver side units to the rack leave 1U 44 mm 1 23 32 inches or more clearance above and below the receiver side units Operating Instructions 29 3 M...

Page 30: ...ble length Receiver side unit Ethernet cable length Compatible coaxial cable length AC adaptor PoE Max 50 m 164 feet Max 100 m 328 feet Max 200 m 656 feet PoE camera Max 300 m 984 feet Cameras recommended by Panasonic 1 PoE Max 100 m 328 feet Max 100 m 328 feet Max 300 m 984 feet PoE camera Max 500 m 1 640 feet Cameras recommended by Panasonic 1 External power supply Max 100 m 328 feet 3 Max 100 m...

Page 31: ... When connecting a PoE camera or PoE camera to an external power supply make sure to use the included PoE incompatible cable When the camera side unit can be installed near the camera connect the PoE incompatible cable directly to the camera When the camera side unit is installed far from the camera use the included cable coupler page 31 When a PoE incompatible cable is used power is not supplied ...

Page 32: ...m 1 640 feet Cameras recommended by Panasonic 1 External power supply Max 100 m 328 feet 3 Max 100 m 328 feet Max 500 m 1 640 feet PoE PoE Cannot be connected Cannot be connected Cannot be connected PoE 2 Cannot be connected Cannot be connected Cannot be connected External power supply Max 100 m 328 feet 3 Max 5 m 16 feet 4 27 32 inch es Max 500 m 1 640 feet 1 For information about network cameras...

Page 33: ... 8 wire 4 pair Ethernet cables Use an Ethernet cable to connect the camera directly to the camera side unit Do not connect a hub between the camera and the camera side unit When a PoE or PoE camera is powered by an external power supply use a PoE incompatible cable included with the camera side unit to connect the camera to the camera side unit After disconnecting an Ethernet cable wait at least 2...

Page 34: ...before finally connecting the AC adaptor s plug to the power outlet When using a PoE power supply device connect the PoE power supply device to the network connector of the receiver side with an Ethernet cable 1 Connect a ethernet cable Cat 5e or higher to the camera side unit and network camera Camera Ethernet cable Network connector Network connector Camera side unit When using an external power...

Page 35: ...cable Connecting the coaxial cable to the unit when there are other devices connected such as an analog CCTV camera may cause damage to the connected device When using existing coaxial cables disconnect other devices that are connected to the coaxial cable before connecting to the unit Measure the insulation resistance of the coaxial cable new or existing before making connections Insulation resis...

Page 36: ...he BNC connector cover caps accessory and pass the coaxial cables through the BNC connector cover When passing the coaxial cables through the BNC connector cover as shown in the figure next page and connecting the cables to the BNC connector terminals of the receiver side unit make sure that the coaxial cables are inserted straight into the BNC connector cover so that they do not become crossed in...

Page 37: ...nector cover cap accessory BNC connector cover Accessory of receiver side unit Coaxial cable The illustrations below show an example to establish the 2 channel connection to a 4 channel unit model The procedure is the same as for a 1 channel unit model Operating Instructions 37 4 Connecting the Unit ...

Page 38: ...2 kJf cm Screw body diameter 2 6 10 mm 3 8 inches accessory of receiver side unit BNC connector cover accessory of receiver side unit 6 Connect a ethernet cable Cat 5e or higher to the receiver side unit and network or PoE power supply device Network connector Network device Ethernet cable Network connector 38 Operating Instructions 4 Connecting the Unit ...

Page 39: ...receiver side unit When you operate the receiver side unit the power outlet should be near the receiver side unit and easily accessible To prevent the AC cord from being disconnected if it is pulled do not place objects near the power outlet 8 Turn the power on for the network cameras and network devices then check the indicators of the camera side unit and the receiver side units LINK indicator G...

Page 40: ...er the IP address of the camera and press the Enter key The live image of the connected camera is displayed on the PC screen If the factory default IP address of the camera is 192 168 0 10 Address to enter http 192 168 0 10 For the PC settings see the camera s Operating Instructions 40 Operating Instructions 4 Connecting the Unit ...

Page 41: ... setting PC see page 44 In order to access the coaxial LAN converter s maintenance screen you must temporarily change the IP address assigned to your computer Before you change the IP address of your computer note the IP address and network settings already assigned to your computer After you have finished using the maintenance screen restore the computer s IP address and network settings to their...

Page 42: ...PC in the Windows 7 system In Microsoft Windows 7 this procedure must be performed by either the Administrator user or a user assigned with administrator level privileges Refer to the help file included with the operating system for more information 1 Click Start Control Panel View network status and tasks 2 Click View your active networks Local Area Connection 3 Click Properties under Local Area ...

Page 43: ...ddress and other settings so that you can return the computer to those settings after you have connected and configured the unit 6 Click Close to exit the Local Area Connection Properties screen IMPORTANT The procedure for changing the IP address may change depending on whether the viewing method or Windows 7 is set to Large icons or Small icons Refer to the help file supplied with the operating s...

Page 44: ...with a coaxial cable and that the receiver side unit is turned on PC PC B A C C B A 2 Start the computer s web browser 3 Enter KWWS in the web browser s address bar 4 Enter the user name and password Default user name Model no Default password 999999 The screen shown here depicts the screen shown when using Windows 7 Model no User name Password WJ PR204 WJ PR204E WJ PR204 999999 WJ PR201 WJ PR201E...

Page 45: ...e screen and perform firmware updates etc The maintenance screen is displayed in English The display differs between the receiver side and the camera side units The upper picture shows the display screen of the receiver side unit The PLC link status and MAC address of the Master are only displayed on the screen of the camera side unit Operating Instructions 45 5 Maintenance Screen of coaxial LAN c...

Page 46: ...nected coaxial LAN converter is retained the maintenance screen may not be able to be opened Therefore we recommend restarting the computer before connecting it to another coaxial LAN converter and accessing its maintenance screen You may reset the computer s ARP table if you do not want to restart the computer Refer to the help file or operating instructions included with the operating system for...

Page 47: ...ess of the Master are displayed on the camera side unit s screen Items Description Boot version Displays the coaxial LAN converter s boot version Firmware version Displays the coaxial LAN converter s firmware version Operation mode Displays the coaxial LAN converter type receiver side unit or camera side unit Camera side units are displayed as Terminal and receiver side units are displayed as Mast...

Page 48: ...e unit and receiver side unit Connected is displayed when there is a connection and Disconnected is displayed when there is no connection MAC address of the Master only displayed for the camera side unit Displays the MAC address of the connected receiver side unit 48 Operating Instructions 5 Maintenance Screen of coaxial LAN converter ...

Page 49: ... will automatically restart After restarting the updated firmware is used IMPORTANT When you update the coaxial LAN converter firmware be sure to download the latest version of the coaxial LAN converter s firmware to the PC before changing the IP address of the PC You can download the firmware from the Panasonic support site http panasonic net pss security products coax index html Update the firmw...

Page 50: ...ed by the device that is to be connected to the camera side unit 1 Access the maintenance screen of the coaxial LAN converter 2 Click Option 3 Enter the desired IP address 4 Enter the subnet mask if necessary 5 Click OK then click OK when prompted 6 Click Restart The adapter will restart and the new settings will take effect The new IP address must be entered in the web browser s address bar in or...

Page 51: ...ndicator is not lit The coaxial cable is not connected Connect the coaxial cable see page 35 36 Confirm that the coaxial cable is not too long and is connected properly see page 30 32 34 Confirm that there are no connection problems such as damage or breaks in the cable The camera side unit s LINK indicator is lit red Data cannot be sent because the camera side unit may be malfunctioning Contact a...

Page 52: ... connection problems such as damage or breaks in the cable The camera side unit is not connected Connect the camera side unit and receiver side unit with a coaxial cable The receiver side unit s COAXIAL indicator is lit red Data cannot be sent because the receiver side unit may be malfunctioning Contact an authorized service center 6 2 Transmission Speed Problem Cause and Remedy The LINK indicator...

Page 53: ...en using a 4 channel receiver side unit there is a limit to the amount of power than can be supplied to PoE PoE cameras Confirm the total amount of power required by all cameras that will receive power from the receiver side unit If the ethernet cable was quickly disconnected and then reconnected the PoE PoE function may not be able to supply power Disconnect the ethernet cable and then reconnect ...

Page 54: ...out condensation Storage Environment Temperature 20 to 60 C 4 F to 140 F Humidity 10 to 95 without condensation Interfaces 10Base T 100Base TX 1 BNC connector 1 PR201 BNC connector 4 PR204 Dimensions W H D Width approx 105 mm 4 5 32 inches Height approx 44 mm 1 3 4 inches Depth approx 98 mm 3 7 8 inches When a BNC connector cover is mounted Width approx 105 mm 4 5 32 inches Height approx 44 mm 1 3...

Page 55: ...C connector cover is mounted Width approx 76 mm 3 inches Height approx 156 mm 6 5 32 inches Depth approx 36 mm 1 7 16 inches Mass Weight About 110 J 0 24 lb Finish Main unit PC ABS sail white BNC connector cover 1 ch ABS white Coaxial Interface Items Specifications Standard Panasonic original system Frequency Range 2 MHz 28 MHz Data Transfer Mode Wavelet OFDM Access Method CSMA CA Error Correction...

Page 56: ...combining cameras For more information see page 32 For information about the cameras specified by Panasonic visit our website http security panasonic com pss security support info html 2 The maximum distance that can be connected with a coaxial cable varies depending on the camera used For more information see page 30 32 For information about the cameras specified by Panasonic visit our website ht...

Page 57: ...feet Camera powered by an external power supply PR201 1 This value is the total value of the transmission speed between the receiver side and camera side unit The transmission speed when using an RG 6 U coaxial cable may very depending on factors such as the coaxial cable condition and network environment The values shown here measured in environments not affected by cable or network environment c...

Page 58: ...58 Operating Instructions Notes ...

Page 59: ...Operating Instructions 59 Notes ...

Page 60: ...cycling please contact your local municipality Penalties may be applicable for incorrect disposal of this waste in accordance with national legislation For U S and Canada Panasonic System Communications Company of North America Unit of Panasonic Corporation of North America www panasonic com business For customer support call 1 800 528 6747 Two Riverfront Plaza Newark NJ 07102 5490 Panasonic Canad...

Reviews: