13
Major operating controls and their functions
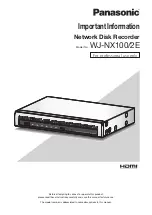
Front view
③
②
①
⑤
④
⑦
⑧
⑥
①
Copy port (USB3.0) [COPY]
Connect an external storage device (external Hard disk
drive, USB memory) to this port and copy images and
audio recorded on the hard disk drive.
* Mouse connection is also available.
Note:
• When inserting or removing the external storage device
(USB memory), hold down this product so that it does
not move or tip over.
②
Operation indicator [OPERATE]
Lights when the power is on.
③
Error indicator [ERROR]
Blinks when an error that can become a problem for the
recorder to run the system occurs.
Blinks red:
System error
Blinks orange:
Thermal error, cooling fan malfunction,
etc.
Shows a solid light when automatically reset from an
error status.
④
Alarm indicator [ALARM]
Blinks when an alarm occurs, and lights when the alarm
output stops. This indicator will go off when the [Reset]
button (
☞
Operating Instructions (PDF)) is clicked.
⑤
Recording indicator [REC]
Lights orange when recording is being performed.
⑥
[HDD1]/[HDD2] indicator
Indicates the operational status (access/failure) of the
respective hard disk drive.
Blinks green:
Indicates that the respective hard disk
drive is being accessed.
Lights red:
Indicates that a fault (or an error) has
occurred on a hard disk drive.
Off:
Indicates that the respective hard disk drive is not
being accessed.
⑦
Buzzer stop button [BUZZER STOP]
Press this button to stop the buzzer that started
sounding at an alarm/error occurrence. Refer to the
Operating Instructions (PDF) for further information about
alarms and errors.
⑧
Restart switch [RESTART]
Restarts the recorder. Insert a fine stick, like a paper clip
and keep pressing for more than 5 seconds.


