– 62 –
Chapter 6 Audio recording — Preparing for audio input
Preparing for audio input
Prepare the camera for connecting audio input devices.
Using front microphone
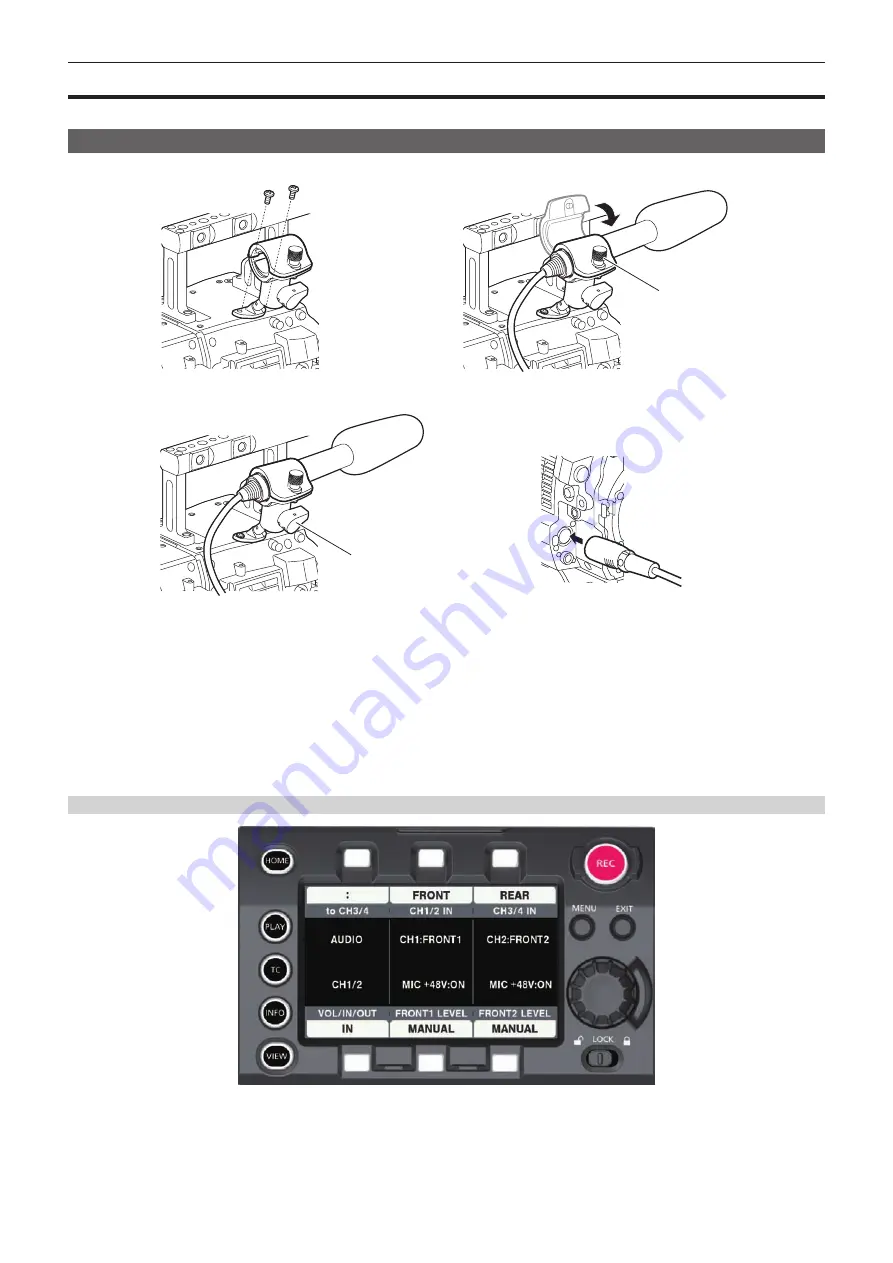
Microphones such as the stereo microphone kit AJ-MC900G (optional) can be mounted.
a
b
Fig. 1
Fig. 2
Fig. 3
Fig. 4
1
Remove the screws at the microphone holder mounting position and attach the microphone holder AJ-MH800G (optional). (Fig. 1)
2
Attach the microphone and tighten the clamping screw (a). (Fig. 2)
Mount with the UP indication on the microphone facing up.
3
Loosen the lock lever (b), adjust the angle of the microphone, and tighten the lock lever. (Fig. 3)
4
Connect the microphone cable to the <MIC IN> terminal on the camera module. (Fig. 4)
5
According to the audio channel to be recorded, select [FRONT] in control panel audio input.
Setting the audio input using the control panel
1
Press the <HOME> button to display the HOME screen.
2
From [SYSTEM]
→
[AUDIO], select [AUDIO IN].
3
Select [FRONT] in [CH1/2 IN].
[CH3/4 IN] is automatically set to [REAR].
Summary of Contents for Varicam 35
Page 1: ...35 Operating Guide Version 6 W1014HM6056 YI VQT5K88A 6 E ...
Page 5: ...Before using the camera read this chapter Chapter 1 Overview ...
Page 73: ...This chapter describes video output Chapter 8 Output and Screen Display ...
Page 162: ...Maintenance and warning system of the camera are described Chapter 14 Maintenance ...
Page 168: ...This chapter describes the specifications of this product Chapter 15 Specification ...
Page 174: ...Web Site http www panasonic com Panasonic Corporation 2014 ...


