


10.3.2.6. "R-LINEAR" adjustment
Push the "TV/AV" buttons, and select the "R-LINEAR".Push the "Volume up/down" buttons, and adjust the "R-LINEAR". (Refer to
Fig. C.)
10.3.2.7. "R-PIN (V)" adjustment
Push the "TV/AV" buttons, and select the "R-PIN".Push the "Channel up/down" buttons, and adjust the "R-PIN (V)". (Refer to Fig.
D.)
10.3.2.8. "R-PIN (H)" adjustment
Push the "TV/AV" buttons, and select the "R-PIN".Push the "Volume up/down" buttons, and adjust the "R-PIN (H)". (Refer to Fig.
E.)
10.3.2.9. "R-CORNER" adjustment
Push the "TV/AV" buttons, and select the "R-CORNER".Push the "Channel up/down" buttons, and adjust the "R-CORNER". (Refer
to Fig. F.)
10.3.2.10. "R-KEY" adjustment
Push the "TV/AV" buttons, and select the "R-KEY".Push the "Channel up/down" buttons, and adjust the "R-KEY". (Refer to Fig. G.)
10.3.2.11. "R-STATIC" adjustment
Push the "TV/AV" buttons, and select the "R-STATIC.Push the "Channel/Volume up/down" buttons, and adjust "R-STATIC" so that
Horizontal & Vertical Center line is aligned with the bump in the screen center mark. (Refer to Fig. H.)
10.3.3. Blue Coarse Convergence Adjustment
10.3.3.1. Reparation
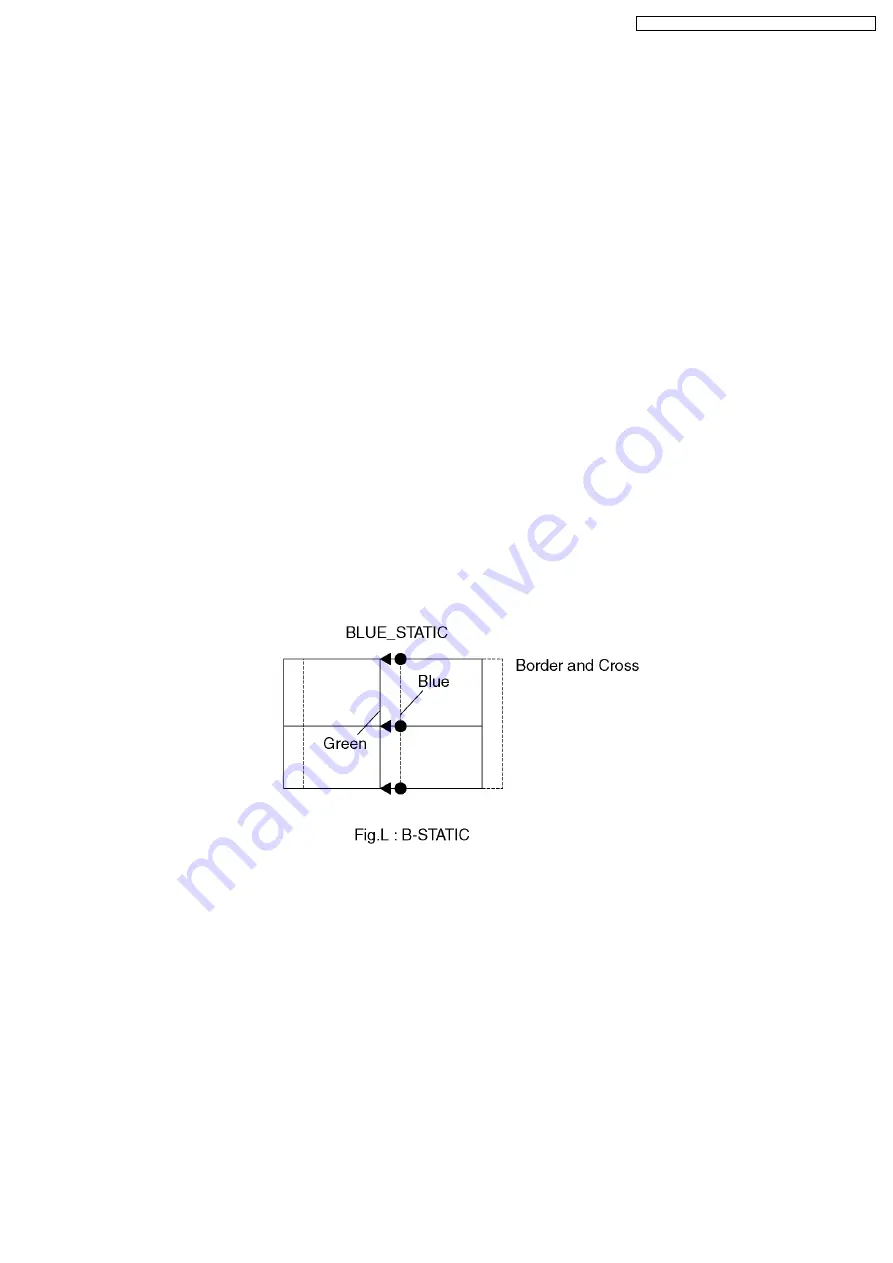
Push the "SURROUND" button, and select the Blue Adjustment mode.Push the "2" button, and select the "Border and Cross"
pattern.Push the "R-TUNE" button, and select the "Cyan" colour.Push the "POSITION" button, and adjust the "B-STATIC" so that
the Blue color of pattern is aligned with Green colour of pattern.
10.3.3.2. "B-SKEW (V)" adjustment
Push the "TV/AV" buttons, and select the "B-SKEW".Push the "Volume up/down" buttons, and adjust the reference line become
a vertical line. (Refer to Fig. J.)
10.3.3.3. "B-SKEW (H)" adjustment
Push the "TV/AV" buttons, and select the "B-SKEW".Push the "Channel up/down" buttons, and adjust reference line become a
horizontal line. (Refer to Fig.K.)
10.3.3.4. "B-SIZE (V)" adjustment
Push the "TV/AV" buttons, and select the "B-SIZE".Push the "Channel up/down" buttons, and adjust the upper and lower boarder
line of test pattern is aligned with the edge of the screen frame. (Refer to Fig. A.)
10.3.3.5. "B-SIZE (H)" adjustment
Push the "TV/AV" buttons, and select the "B-SIZE".Push the "Volume up/down" buttons, and adjust the boarder line on either side
of test pattern is aligned with the edge of the screen frame. (Refer to Fig. B.)
37
TX-51P950M / TX-51P950X / TX-43P950M / TX-43P950X
Summary of Contents for TX-51P950M
Page 16: ...16 TX 51P950M TX 51P950X TX 43P950M TX 43P950X...
Page 17: ...6 3 Option Descrition 17 TX 51P950M TX 51P950X TX 43P950M TX 43P950X...
Page 18: ...18 TX 51P950M TX 51P950X TX 43P950M TX 43P950X...
Page 19: ...19 TX 51P950M TX 51P950X TX 43P950M TX 43P950X...
Page 41: ...Fine Convergence Control Chart 41 TX 51P950M TX 51P950X TX 43P950M TX 43P950X...
Page 42: ...42 TX 51P950M TX 51P950X TX 43P950M TX 43P950X...
Page 47: ...12 Conductor Views 12 1 A Board TX 51P950M TX 51P950X TX 43P950M TX 43P950X 47...
Page 58: ...TX 51P950M TX 51P950X TX 43P950M TX 43P950X 58...
Page 78: ...TX 51P950M TX 51P950X TX 43P950M TX 43P950X 78...
Page 80: ...TX 51P950M TX 51P950X TX 43P950M TX 43P950X 80...
Page 81: ...15 Packing Exploded View 81 TX 51P950M TX 51P950X TX 43P950M TX 43P950X...
Page 82: ...82 TX 51P950M TX 51P950X TX 43P950M TX 43P950X...