19
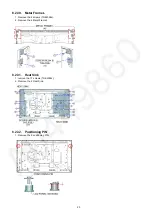
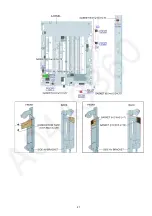
8.2.9.
WiFi Cable
1. Remove the screw (THEJ036J).
2. Remove the WiFi Cable.
8.2.10. P-Panel
1. Disconnect the connectors P2, P4 and P5.
2. Remove the 6 screws (THEJ036J).
3. Remove the P-Panel.
4. Remove the Barrier P-PCB.
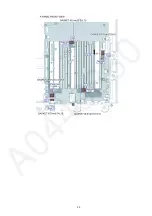
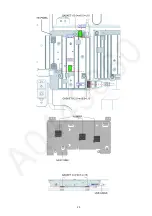
8.2.11. A-Panel
1. Remove the 3 screws (THEJ036J).
2. Remove the Side AV bracket.
3. Remove the Bottom AV bracket.
4. Disconnect the connectors A02, A10, A12, A20, A23,
A40, A41 and A43.
5. Disconnect the flexible cables A15 and A16.
6. Remove the 5 screws (THEJ036J).
7. Remove the A-Panel.
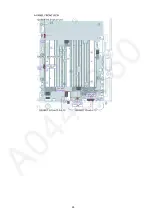
8.2.12. GK-Panel
1. Disconnect the connector GK4.
2. Remove the Key button bracket.
Summary of Contents for TC-58AX800U
Page 7: ...7 4 Specifications ...
Page 24: ...24 8 2 33 EMI processing ...
Page 25: ...25 ...
Page 26: ...26 ...
Page 27: ...27 ...
Page 28: ...28 ...
Page 29: ...29 ...
Page 30: ...30 ...
Page 31: ...31 ...
Page 32: ...32 ...
Page 33: ...33 ...
Page 34: ...34 ...
Page 35: ...35 ...
Page 42: ...42 11 3 Wiring 2 ...
Page 43: ...43 11 4 Wiring 3 ...

