background image

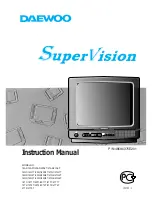
Summary of Contents for TC-21PM30R

Page 1: ... NTSC M JAPAN Measured diagonally 90 deflection 2 13 NTSC M U S A UHF 21 69 PAL G H I SECAM G K K1 28 69 PAL B AUST Audio Output 3 5W x 2 7W 13 57 PAL D K 13 62 NTSC M JAPAN 14 69 NTSC M U S A CATV S1 S41 OSCAR Dimensions Height 473 6 mm 1 125 U S A CATV Width 600 mm C13 C41 JAPAN Depth 484 4 mm S21 S41 HYPER Z1 Z37 CHINA Mass 23 4 kg Intermediate Frequency Video 38 0 MHz Specifications are subjec...

Page 2: ...nly and is not designed for use by the general public It does not contain warning cautions to advise non technical individuals of potential dangers in attempting to service a product Product powered by electricity should be serviced or repaired only by experienced professional technicians Any attempt to service or repair the product or products dealt with in this service literature by anyone else ...

Page 3: ...re handling the tube After servicing make the following leakage current checks to prevent the customer from being exposed to shock hazards Leakage Current Cold Check 1 Unplug the AC cord and connect a jumper between the two prongs on the plug 2 Turn on the receiver s power switch Measure the resistance value with an ohmmeter between the jumper AC plug and each exposed metal lic cabinet part on the...

Page 4: ...lly calibrated high voltage meter 1 Set the brightness to minimum 2 Use the remocon to get into Service Mode 3 Measure the EHT The meter reading should indicate 28 0 1 0 kV If the meter indication is out of tolerance immediate service and correction is required to prevent the possibility of premature component failure 4 To prevent the possibility X Radiation it is essential to use the specifield p...

Page 5: ......

Page 6: ...nt How To Set To set the Factory mode press Volume 0 dac on the TV and Timer Setting 30min on the remote control and press Volume Down button on the TV together press recall on the remote control CHK should appear on right of TV screen To move from CHK1 to CHK2 mode etc please follow below rotation To Set Self Check Press the volume down button on TV than press the off timer button on remote contr...

Page 7: ... 2 Adjust R CUT OFF so that X 0 235 0 01nit 3 Adjust G CUT OFF so that y 0 235 0 01nit Adjustment of High Light 1 Adjust Sub Bright so that Y 270 nit 2 Adjust R Drive so that X 0 265 0 01nit 3 Adjust B Drive so that y 0 265 0 01nit Adjustment for CRT CUT OFF Preparation 1 Connect ocilloscope probe to TPL7 2 Screen VR min 3 Set the data Sub Bright Bright 4 In service Mode at Bright dac press 5 in f...

Page 8: ...tage 1 Receive the crosshatch pattern 1 Connect a DC voltage meter to TPA 12 and confirm the B voltage is 141 2 0 8V 2 Set to 0 Beam 2 Connect a high frequency voltmeter to heater and Screen VR minimum confirm that voltage reads 6 3 0 24 VRMS Contrast minimum 3 Normalize the brightness and contrast Item Preparation Adjustment Produre Connect oscilloscope probe to TPA32 R OUT with 10Kohm series res...

Page 9: ...4 Connect TPA 10 to TPA 20 5 Set A to 2 3 0 2V by BRT CHK2 Fig 1 Adjustment 1 Connect oscilloscope probe to TPA 31 G OUT with 10k series resistor and adjust Contrast so that B as in Fig 1 is 2 8 0 1V 2 Adjust Sub Colour so that waveform as in Fig 1 1 2 55 0 1V 3 Connect oscilloscope probe to TPA 32 R OUT with 10k series resistor and confirm waveform as in Fig 2 is 2 2 7 0 4V Fig 1 Fig 2 B 1 A 2 A ...

Page 10: ...e A in Fig 24 and move the deflection yoke as close to the purity magnet as possible 8 Adjust the purity magnetic rings so that a vertical green field is obtained at the cntre of the screen Fig 22 4 Adjust Red and Blue with Green line at centre of the screen by rotating RB G static convergence magnetic rings 5 Lock convergence magnetic with silicne sealer 6 Remove the DY wedges and slightly tilt t...

Page 11: ...and set CY magnet primarily Fig 1 Purity magnet Set purity magnet that 2 magnet are TOP POSITION VRS magnet Set VRS magnet 2 magnet are HORIZONTAL POSITION 2 Adjustment a Receive that Cross Hatch pattern b Adjust V SHIFT 50Hz c Set 2 magnet of horizontal position to up and down equally so that center part of CRT FIG 2 ...

Page 12: ... from each other 3 Be certain that four wedges are firmly fixed and the Deflection Yoke is tightly clamped in place Otherwise the Deflection Yoke may shift its position and cause a loss of convergence and purity 25 3 mm R B Static Convergence Magnet Purity Magnet RB G Static Convergence Magnet Clamp for Convergence Purity Magnet Deflection Yoke ...

Page 13: ......

Page 14: ......

Page 15: ......

Page 16: ......

Page 17: ......

Page 18: ......

Page 19: ......

Page 20: ......

Page 21: ......

Page 22: ......

Page 23: ...ailable after production discontinuation of the complete set Abbreviation of part name and description 1 Resistor 2 Capacitor Example Example ERD25TJ104 C 100KOHM J 1 4W ECKF1H103ZF C 0 01UF Z 50V Type Allowance Type Allowance Type Allowance Type Allowance C Carbon F 1 C Carbon C 0 25pF F Fuse G 2 E Electrolytic D 0 5pF M Metal Oxide J 5 P Polyester F 1pF Metal Film K 10 Polypropylene G 3 S Solid ...

Page 24: ...EYJ102 M 1KOHM J 1 10W 21 TMM4G503 RUBBER WEDGE R139 ERJ6GEYJ333 M 33KOHM J 1 10W 22 TMZ4G9808 CHASSIS RAIL L R145 ERJ6GEYJ473 M 47KOHM J 1 10W NLA TNP4G136AG A BOARD R150 ERJ6GEYJ222 M 2 2KOHM J 1 10W S PORE ONLY R151 ERJ6GEYJ333 M 33KOHM J 1 10W NLA TNP4G136AF A BOARD R182 ERJ6GEYJ221 M 220OHM J 1 10W M EAST ONLY R185 ERJ6GEYJ103 M 10KOHM J 1 10W NLA TNP4G136BD A BOARD R351 ER0S2CKF1001 M 1KOHM ...

Page 25: ...HM J 1 10W R811 ERJ6GEYJ681 M 680OHM J 1 10W R605 ERJ6GEYJ101 M 100OHM J 1 10W R812 ERD75TAJ825 C 8 2MOHM J 3 4W R606 ERJ6GEYJ101 M 100OHM J 1 10W R814 ERJ6GEYJ332 M 3 3KOHM J 1 10W R607 ERJ6GEYJ103 M 10KOHM J 1 10W R815 ERJ6GEYJ102 M 1KOHM J 1 10W R608 ERJ6GEYJ332 M 3 3KOHM J 1 10W R817 ERG5FJ183H M 18KOHM J 5W R609 ERJ6GEYJ332 M 3 3KOHM J 1 10W R819 ERJ12YJ330U M 33OHM J 1 2W R610 ERJ6GEYJ103 M ...

Page 26: ...D331JBP C 330PF J 2KV R2405 ERJ6GEYJ684 M 680KOHM J 1 10W C562 ECKW3D471JBP C 470PF J 2KV R2406 ERJ6GEYJ334 M 330KOHM J 1 10W C563 ECWF2224JSR P 0 22UF J 250V R2407 ERJ6GEYJ333 M 33KOHM J 1 10W C565 ECQP1H183JZ P 0 018UF J 50V R2408 ERJ6GEYJ683 M 68KOHM J 1 10W C570 ECUX1H820JCX C 82PF J 50V R2410 ERJ6GEYJ473 M 47KOHM J 1 10W C601 ECEA1CKA101 E 100UF 16V R2411 ERJ6GEYJ563 M 56KOHM J 1 10W C602 ECU...

Page 27: ... 1UF Z 16V L551 TSK1045 BEAD CORE C852 ECKW3D101KBP C 100PF K 2KV L552 TSK1045 BEAD CORE C853 ECKR2H151KB5 C 150PF K 500V L620 TSK1045 BEAD CORE C854 ECQB1H104JM P 0 1UF 50V L701 ELC10D472E CHOKE COIL C855 ECJ2ZF1C105Z C 1UF Z 16V L801 ELF24V019A LINE FILTER C856 ECKR2H151KB5 C 150PF K 500V L802 EXCELDR35C BEAD CORE C857 EEUFC1C471LB E 470UF 16V L803 EXCELDR35C BEAD CORE C859 EEUFC1E222E E 2200UF ...

Page 28: ...STOR D855 D1FL20UF4063 DIODE Q2401 2SC2412KT TRANSISTOR D856 RN1ZLF A1 DIODE Q2402 2SC2412KT TRANSISTOR D857 D1FL20UF4063 DIODE Q2403 2SC2412KT TRANSISTOR D862 MTZJ6 2C ZENER DIODE Q2404 2SC2412KT TRANSISTOR D863 MTZJ18B ZENER DIODE Q2405 2SC2412KT TRANSISTOR D865 MTZJ24B ZENER DIODE Q2406 2SC2412KT TRANSISTOR D1101 MA152WKTX DIODE Q2407 2SC2412KT TRANSISTOR D1102 MTZJ5 6A ZENER DIODE OTHERS D1104...

Page 29: ...WITCH S1002 EVQ11G05R SWITCH S1003 EVQ11G05R SWITCH S1004 EVQ11G05R SWITCH S1005 EVQ11G05R SWITCH S1006 EVQ11G05R SWITCH TNR001 ENV59D82G3D TUNER X101 K7256M SAW FILTER X180 EFCS5M7MW3 CERAMIC FILTER X181 EFCS6R0MW5 CERAMIC FILTER X182 EFCS6R5MW5 CERAMIC FILTER X183 EFCS4R5MW5 CERAMIC FILTER X601 TSSA010 CRYSTAL OSCILLATOR X2201 SFSH6R0MDB CERAMIC FILTER X2202 EFCS5R5MS5 CERAMIC FILTER X2203 EFCS6...

Reviews: