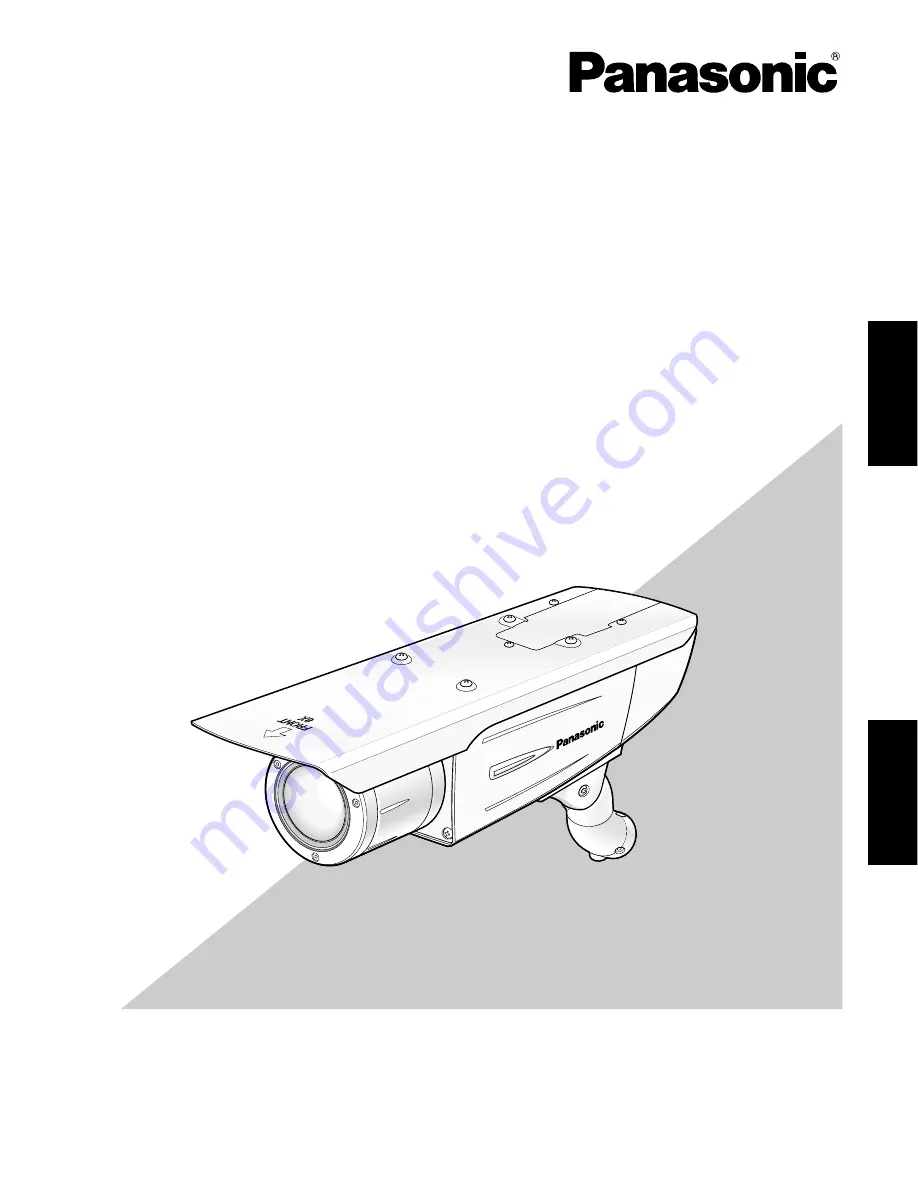
background image

Before attempting to connect or operate this product, 

please read these instructions carefully and save this manual for future use.

No model number suffix is shown in this manual.

Operating Instructions

Color CCTV Camera

Model No.  

WV-CW384

WV-CW384

ENGLISH

FRANÇAIS

Summary of Contents for Super Dynamic III WV-CW384

Page 1: ...r operate this product please read these instructions carefully and save this manual for future use No model number suffix is shown in this manual Operating Instructions Color CCTV Camera Model No WV CW384 WV CW384 ENGLISH FRANÇAIS ...

Page 2: ...flash with arrowhead symbol within an equilateral triangle is intended to alert the user to the presence of uninsulated dangerous voltage within the product s enclosure that may be of sufficient magni tude to constitute a risk of electric shock to persons CAUTION TO REDUCE THE RISK OF ELECTRIC SHOCK DO NOT REMOVE COVER OR BACK NO USER SERVICEABLE PARTS INSIDE REFER SERVICING TO QUALIFIED SERVICE P...

Page 3: ... ALC 24 3 Shutter Speed Setting SHUTTER 25 4 Gain Control Setting AGC 26 5 Electronic Sensitivity Enhancement SENS UP 26 6 Synchronization Setting SYNC 26 7 White Balance Setting WHITE BAL 27 8 Motion Detection Setting MOTION DET 27 9 Digital Noise Reduction Setting DNR 29 10 Resolution Setting RESOLUTION 29 11 Black and White Mode Setting BW MODE 29 12 Privacy Zone Setting PRIVACY ZONE 30 13 Elec...

Page 4: ...g has two blades and a third grounding prong The wide blade or the third prong are provided for your safety If the provided plug does not fit into your outlet consult an electrician for replacement of the obsolete outlet 9 Protect the power cord from being walked on or pinched particularly at plugs convenience receptacles and the point where they exit from the apparatus 10 Only use attachments acc...

Page 5: ...NOT LIMITED TO BELOW 1 ANY DAMAGE AND LOSS INCLUDING WITHOUT LIM ITATION DIRECT OR INDIRECT SPECIAL CONSE QUENTIAL OR EXEMPLARY ARISING OUT OF OR RELATING TO THE PRODUCT 2 PERSONAL INJURY OR ANY DAMAGE CAUSED BY INAPPROPRIATE USE OR NEGLIGENT OPERATION OF THE USER 3 UNAUTHORIZED DISASSEMBLE REPAIR OR MODIFI CATION OF THE PRODUCT BY THE USER 4 INCONVENIENCE OR ANY LOSS ARISING WHEN IMAGES ARE NOT D...

Page 6: ...on buttons on this unit and the setup menu The back focus can be remotely adjusted through the system controller option even after installation of this unit The auto back focus function also allows users to correct out of focus when changing between color and black and white images High sensitivity achieved thanks to noise reduction function The introduction of low noise circuit design has achieve...

Page 7: ...ong or abrasive detergents Use lens tissue or a cotton tipped applicator and ethanol Discoloration on the CCD color filter When continuously shooting a bright light source such as a spotlight the color filter of the CCD may have deteriorated and it may cause discoloration Even when changing the fixed shooting direction after con tinuously shooting a spotlight for a certain period the dis coloratio...

Page 8: ... or goes off depending on settings page 31 o Tilting lock screw Locks the tilt position page 15 0 Panning lock screw Locks the panning position page 15 1 Power cord Caution This cord supplies 12 V DC or 24 V AC from an external power source 2 Video output cable 3 Safety wire 4 Rear cover 5 Switch cover This cover is removed at operating the operation but tons After the button operation the fixing ...

Page 9: ...arly single colored When a subject is in the outdoors in the morning or evening or in the low illuminance state When a subject is in the atmosphere of extremely differ ent color temperature e g under color illumination Keep the video output cable away from the lighting cable Failure to observe this may cause noise Radio interference When this product is used near TV radio antenna strong electric f...

Page 10: ...e total weight the area shall be sufficiently reinforced When using the provided adapter box make sure that the drain slits do not face upward Camera installation zSecure the camera to the camera mount bracket The tilt angle is locked downward at shipment 1 Loosen the tilting lock screw approx 1 rotation and adjust the tilt angle of the camera to the horizontal position 2 Tighten the tilting lock ...

Page 11: ...hole screw holes and screws To install this product on a wall face the drain slit of the camera mount bracket downward Do not block the drain slit Do not waterproof the drain slit either Be sure to use the supplied waterproof tape at the connection parts of the power cord and video output cable to apply waterproof treatment How to wind the supplied waterproof tape Stretch the tape by approx twice ...

Page 12: ...ide by side is recommended as shown in the illustration at right for easy cable passing When the camera is installed on a wall using the adapter box 1 Use 4 screws locally procured to secure the adapter box to a wall or a junction box locally procured If a junction box is used putting the boxes side by side is recommended as shown in the illustration at right for easy cable passing 46 mm 1 13 16 2...

Page 13: ...cket covers to the camera mount bracket with the 2 mount bracket cover screws accessories Mount bracket cover screw x2 M3 x 6 accessories Camera mount bracket Mount bracket cover x2 Note The right or left hinges of the adapter box shall be selected so as to prevent the motion of the camera mount bracket from being interfered with by obstruc tions such as a wall when the camera mount bracket is con...

Page 14: ...THIS TO 24 V AC or 12 V DC CLASS 2 POWER SUPPLY To prevent fire or electric shock hazard the UL listed wire VW 1 style 1007 should be used for the cord for Input Terminals Do not use a transformer larger than 10 VA Wire Color 24 V AC 12 V DC Brown 24 V AC L Positive Blue 24 V AC N Negative Green Yellow To GND To GND Cord length and wire gauge 24 V AC The recommended cord length and copper wire siz...

Page 15: ... to adjust tilting 3 Tighten the panning lock screw and tilting lock screw after camera angle adjustment Fixing screw x4 Lens cover Monitor output jack ø3 5 mm mini jack monaural 9 mm or less 11 32 9 mm or less 11 32 Straight type L type Tilting lock screw Panning lock screw Important After camera angle adjustment the panning lock screw and tilting lock screw shall be securely tightened Recommende...

Page 16: ...focal depth of the lens In such a case open the aperture by darkening the subject as much as possible in the same way of taking picture and then adjust the focus Defocus can be prevented Use of ABF of BACK FOCUS SETUP in the setup menu page 31 allows users to adjust the focus optimally in the range of the capability to automatically follow the variation in illuminance Note The adjusted focal point...

Page 17: ...r switch cover and rear cover Important The tightening torque described below shall be followed for the 2 fixing screws of switch cover and the 4 fixing screws of lens cover Recommended tightening torque 0 59 N m 0 44 lbf ft Be sure to attach the desiccant accessory Refer to the instructions for the desiccant for how to attach it The tightening sequence of the 4 fixing screws of the lens cover sha...

Page 18: ...fixing screws from the camera body and remove the tripod head 2 Loosen the spacer fixing screw of the tripod head and remove the spacer Spacer Tripod head Tripod head fixing screw x4 Spacer fixing screw Spacer Fixing screw x1 Rear cover Switch cover Cable clamp 3 Loosen the fixing screw and remove the rear cover 4 Position the cable clamp topside to pass the video out put cable and power cord upwa...

Page 19: ...tripod socket x4 M3 x 8 accessories Camera main body 1 Remove the tripod head 7 Mount the sunshield on the camera body with the 4 sunshield mounting screws accessories after removing the sunshield backside 6 Secure the camera to the camera mount bracket with the 3 camera fixing screws accessories Pass the video output cable and power cord and safety wire through the camera mount bracket and secure...

Page 20: ...r to the instructions of the safety wire for the following steps Important Be sure to use the 4 mounting screws for tripod socket accessories Use of screws with inappropriate length may damage the unit The 4 screws removed from the tripod head cannot be used The camera mount brackets WV 831 and WV 7010A and the safety wires WV Q140 and WV Q141 are designed to be used indoors For outdoor installati...

Page 21: ...tion function RESOLUTION Select a horizontal resolution mode BW MODE Configure the settings relating to the BW mode such as the settings for switching between the color mode and the BW mode PRIVACY ZONE It is possible to mask a designated zone and as a privacy zone EL ZOOM Adjust the electronic zoom STABILIZER Select ON or OFF to determine whether or not to use the image stabilizer to pre vent sha...

Page 22: ...s played 5 Configure the settings for each item Select setup item Move the cursor by pressing the UP or DOWN button Change the parameter Press the LEFT or RIGHT button Display the detailed settings page of the setup item Press the SET button when the setup item with the O mark is selected Go back to the previous page Move the cursor onto RET and press the SET button Go back to the top page Move th...

Page 23: ...amera picture in the selected position Note If you change the language selection after the assignment of camera ID it will be erased CAMERA SETUP 1 2 CAMERA ID OFF ALC ALC SHUTTER OFF AGC ON HIGH SENS UP OFF SYNC INT WHITE BAL ATW1 MOTION DET OFF DNR HIGH RESOLUTION HIGH BW MODE LANGUAGE SETUP LANGUAGE ENGLISH SET RET TOP END 3 Repeat these procedures until all characters are entered To enter a bl...

Page 24: ...SUPER D3 In the SUPER D3 mode more photometric weight is given to the center of the screen than to the edge where a bright backlight would most likely be located SUPER D3 ON Enables SUPER D3 to compensate backlight automatically SUPER D3 OFF Enables manual setting to compensate backlight Notes When set to ON the available parameters for SHUTTER and SENS UP will be limited as shown on the next page...

Page 25: ...neously for 2 seconds or more 5 Repeat step 3 and 4 as necessary 3 Shutter Speed Setting SHUTTER Select a proper shutter speed when ALC is selected on the CAMERA SETUP menu Selecting a faster speed will reduce blurring when objects quickly move The default setting is OFF ALC CONT BACK LIGHT COMP SUPER D3 OFF MASK SET LEVEL I 128 RET TOP END Blinking Blinking White 6 Press the SET button for 2 seco...

Page 26: ...NS UP function is selected noise spots or a whitish phenomenon may appear in the picture when the sensi tivity of the camera is increased This is a normal phenomenon Only when OFF X2 FIX or X2 AUTO is selected for sensitivity enhancement SENS UP it is possible to perform ABF adjustment or to select AUTO for C L B W on the BACK FOCUS SETUP menu When a sensitivity rate other than X2 FIX or X2 AUTO i...

Page 27: ...peratures such as blue sky or sunset or the scene is dim When AWC is selected the AWC setting is required AWC Setting 1 Select AWC and press the LEFT button AWC will change to AWC PUSH SW 2 Press the SET button PUSH SW will be highlighted while the AWC setting is performed Note If the white balance is not set PUSH SW is being highlighted 3 Press the RIGHT button Manual Fine Adjustment Perform fine...

Page 28: ... terminal after detection The motion scene change detection is not specifically intended to prevent theft or fire Motion Detector The motion detector divides the screen into 48 blocks and monitors changes in the luminance in each block When it detects any change movement in the image it outputs an alarm signal When a change movement in the image is detected while in the auto mode the alarm signal ...

Page 29: ... mode to black and white OFF Sets the mode to color Notes There may be cases where AUTO1 or AUTO2 does not function well if the camera is aimed at subjects continuously moving or a scene filled with a single color such as a blue sky It is possible to set up the back focus mode to compensate for defocus liable to happen when the camera automatically switches between the color and black and white mo...

Page 30: ...FT RIGHT UP or DOWN button 7 To apply the settings move the cursor to SET and press the SET button The screen returns to the ZONE NUMBER selection menu To delete the settings select DEL and press the SET button 13 Electronic Zoom EL ZOOM 1 Move the cursor to EL ZOOM 2 Select ON or OFF by pressing LEFT and RIGHT buttons The default setting is OFF ON x2 electronic zoom is available with the ZOOM swi...

Page 31: ... for continuous or repetitive pur poses ex autofocus etc This function is to be used to cor rect defocus caused by switching between color and black and white when after installing the camera 1 Select BACK FOCUS on the top menu and press the SET button The BACK FOCUS SETUP menu opens 2 Select ABF and press the SET button Adjustment is automatically performed Notes Performing ABF will function to o...

Page 32: ...ndustrial Co Ltd shall not be responsible for any inconvenience damage or loss caused by or attribute to inappropriate settings for the ABF function 17 Special Menu SPECIAL SETUP Select SPECIAL on the top menu and press the SET button The SPECIAL SETUP menu opens 17 1 Chroma Level Setting CHROMA GAIN Move the I cursor to adjust the chroma level 17 2 Aperture Gain Setting AP GAIN Move the I cursor ...

Page 33: ...5 To cancel a registration select an asterisked number in the PIX OFF menu and press the SET button The PIX OFF assignment screen opens Hold down the the LEFT and RIGHT buttons simultaneously for 2 seconds or more The PIX OFF menu appears displaying the number without an asterisk if its registration has been cancelled 17 6 To reset to the default settings CAMERA RESET 1 Select CAMERA RESET The PUS...

Page 34: ...ropriate Is the lens of the camera soiled with dirt or dust Check whether the lens of the camera is clean Is the focus adjusted correctly Check if the focus is adjusted correctly 16 The power cord is damaged Use of the damaged cord may cause electric shock or fire Turn off the power immediately and request repair to your dealer Before asking for repairs check the symptoms with the following table ...

Page 35: ...rs marks Light control ALC Super Dynamic 3 ON OFF Electronic shutter speed OFF 1 60 1 100 1 250 1 500 1 1 000 1 2 000 1 4 000 1 10 000 Gain control ON HIGH ON MID ON LOW OFF Sensitivity up OFF X2 AUTO X4 AUTO X6 AUTO X10 AUTO X2 FIX X4 FIX X6 FIX X10 FIX X16 FIX X32 FIX Synchronization VD2 LL INT White balance ATW1 ATW2 AWC Video motion detection MODE1 MODE2 OFF Digital noise reduction HIGH LOW Re...

Page 36: ...t 510 g 1 12 lbs Finish Silver metallic coating Weights and dimensions indicated are approximate Standard Accessories Operating Instructions this document 1 pc Warranty Card 1 pc The following are for installation Camera mount bracket 1 pc Mount bracket cover 2 pcs Sunshield 1 pc Tripod socket 1 pc Adapter box 1 pc Camera fixing screws M4 x 8 4 pcs incl 1 spare screw Mount bracket cover screws M3 ...

Page 37: ...tion Le point d exclamation placé dans un triangle équilatéral sert à attirer l attention de l utilisateur sur des instructions de fonctionnement et d entretien de dépan nage à caractère important dans la brochure qui accompagne l appareil Le numéro de série de ce produit se trouve sur l appareil Nous vous conseillons de relever le numéro de série de votre appareil dans l espace réservé ci dessous...

Page 38: ...esse d obturation SHUTTER 61 4 Paramétrage de contrôle de gain CAG 62 5 Accroissement de la sensibilité électronique VISION NUIT 62 6 Réglage de synchronisation SYNC 62 7 Réglage de balance des blancs BAL BLC 63 8 Paramétrage de la détection de mouvement DÉTECT MVT 63 9 Paramétrage de la réduction de bruit numérique RÉDUCT BRUIT 65 10 Paramétrage de résolution RÉSOLUTION 65 11 Paramétrage du mode ...

Page 39: ...st large ou le troisième élément l ergot sont installés pour assurer votre sécurité Si la prise fournie ne s engage pas correctement dans votre prise veuillez consulter un électricien pour qu il effectue le remplacement de l ancienne prise de sortie secteur 9 Protéger le cordon d alimentation afin que personne ne puisse marcher dessus ni ne soit pincé notamment près des prises les prises pratiques...

Page 40: ...T MENTIONNÉ CI DESSOUS 1 TOUT DÉGÂT ET PERTE Y COMPRIS SANS LIMI TATION DIRECT OU INDIRECT SPÉCIAL IMPOR TANT OU EXEMPLAIRE SURVENANT OU CONCER NANT LE PRODUIT 2 BLESSURE PERSONNELLE OU TOUT DÉGÂT CAUSÉS PAR UN USAGE NON APPROPRIÉ OU UNE UTILISATION NÉGLIGENTE DE L UTILISATEUR 3 DÉMONTAGE RÉPARATION OU MODIFICATION NON AUTORISÉS DU PRODUIT EFFECTUÉS PAR L UTILISA TEUR 4 INCOMMODITÉ OU TOUTE PERTE ...

Page 41: ... arrière peut être exécuté à l aide des boutons de commande de cet appareil et du menu de configuration Le tirage arrière peut être ajusté à distance à partir du contrôleur de système en option même après l installation de cet appareil La fonction de réglage automatique de foyer arrière permet aux utilisateurs de corriger l écart de mise au point en changeant entre les images couleur et les images...

Page 42: ...pour nettoyer le coffret de l appareil Si les saletés sont particulièrement tenaces imbiber l étoffe d une solution détergente neutre et frotter délicatement Retirer ce qui reste de produit détergent avec un morceau de tissu sec Sinon cela risque de provoquer une décoloration Quand un tissu traité chimiquement conçu pour faire un nettoyage est utilisé lire attentivement les précautions indiquées q...

Page 43: ...ourant continu Utilisation à de basses températures Pour faire fonctionner la caméra vidéo à des températures de 10 C 14 F ou inférieures il faudra 30 minutes ou plus après l application de l alimentation électrique pour réchauffer la caméra vidéo Des images peuvent être perturbées parce que le chauffage incorporé est automatiquement basculé entre en marche et en arrêt à la suite d un changement d...

Page 44: ...ison Cale la position d inclinaison page 51 0 Vis de blocage de réglage panoramique Cale la position de balayage panoramique page 51 1 Cordon d alimentation Précaution Ce cordon fournit un courant d alimentation de 12 V de courant continu ou de 24 V de courant alternatif à partir d une source d alimentation extérieure 2 Câble de sortie vidéo 3 Câble de sécurité 4 Couvercle arrière 5 Couvercle de c...

Page 45: ...s d une couleur unique Quand un sujet est à l extérieur le matin ou en soirée ou dans des conditions de faible éclairement Quand un sujet est dans une atmosphère avec une température de couleur extrêmement différente par exemple sous un éclairement de couleur Conserver le câble de sortie vidéo loin d un câble d éclairage Le fait de ne pas respecter cette précaution risque de produire des parasites...

Page 46: ...é doit être suffisamment renforcé Lorsque le boîtier adaptateur fourni est utilisé s assurer que les fentes d écoulement ne sont pas dirigées vers le haut Installation de la caméra vidéo zFixer la caméra vidéo sur la platine de fixation de caméra vidéo L angle d inclinaison est calé vers le bas à l expédition 1 Desserrer la vis de blocage d inclinaison sur approximativement 1 rotation et régler l ...

Page 47: ...produit sur un mur diriger la fente d écoulement de la platine de fixation d installation de caméra vidéo vers le bas Ne jamais obturer la fente d écoulement Ne jamais non plus rendre étanche la fente d écoulement Faire en sorte d utiliser de la bande isolante imperméable à l eau fournie pour les pièces de raccordement du cordon d alimentation et du câble de sortie vidéo pour appliquer le traiteme...

Page 48: ... indications de l illustration à la droite pour effectuer facilement le passage de câble Quand la caméra vidéo est installée sur un mur en utilisant un boîtier d adaptation 1 Utiliser 4 vis procurées localement pour fixer le boîtier d adaptation sur le mur ou à une boîte de jonction procurée localement Si une boîte de jonction est utilisée la mise en place des boîtiers côte à côte est recommandée ...

Page 49: ...la pla tine de fixation d installation de caméra vidéo en utilisant les 2 vis de fixation de couvercle d installation en accessoires Vis de couvercle de platine de fixation x2 M3 x 6 accessoires Platine de fixation de caméra vidéo Couvercle de platine de fixation x2 Remarque Les charnières droites ou gauches du boîtier d adaptation seront sélectionnées afin d empêcher que le mouvement de la platin...

Page 50: ... risque d incendie ou d électrocution utiliser un câble VW 1 UL indiqué dans la liste de style 1007 comme câble pour bornes d entrée Ne pas se servir d un transformateur dont la puissance est supérieure à 10 VA Teinte de fil 24 V c a 12 V c c Marron 24 V c a L Positif Bleu 24 V c a N Négatif Vert et jaune À la borne GND À la borne GND Longueur de câble et calibre des fils 24 V c a La longueur reco...

Page 51: ...errer la vis de blocage de balayage panoramique et la vis de blocage d inclinaison après avoir fait le réglage d angle d orientation de la caméra vidéo Vis de fixation x4 Capuchon à objectif Prise de sortie moniteur vidéo mini prise ø3 5 mm monaurale 9 mm ou inférieure 11 32 9 mm ou inférieure 11 32 Type droit Type L Vis de blocage d inclinaison Vis de blocage de réglage panoramique Important Serr...

Page 52: ...le de l objectif Si toutefois c est le cas ouvrir le diaphragme pour assombrir le plus possible le sujet en procédant de la même manière que pour prendre une photo puis faire le réglage de la mise au point L écart de mise au point peut être ainsi être évité Le fait de se servir de ABF de BACK FOCUS AJUST dans le menu de configuration page 67 permet aux utilisateurs de régler la mise au point de fa...

Page 53: ...ur et le couvercle arrière Important Le couple de serrage décrit ci dessous sera suivi pour les 2 vis de fixation du couvercle de commutateur et les 4 vis de fixation du couvercle d objectif Couple de serrage recommandé 0 59 N m 0 44 lbf ft Ne pas oublier de fixer le déshydratant accessoire Se référer aux instructions d utilisation du déshydratant pour savoir comment le fixer La séquence de serrag...

Page 54: ...coffret de caméra vidéo et retirer la tête de trépied 2 Desserrer 1 vis de fixation d entre toise de la tête de trépied et retirer l entretoise Entretoise Tête de trépied Vis de fixation de tête de trépied x4 Vis de fixation d entretoise Entretoise Vis de fixation x1 Couvercle arrière Couvercle de commutateur Attache de câble 3 Desserrer la vis de fixation et retirer le couvercle arrière 4 Positio...

Page 55: ...trépied 7 Installer la visière pare soleil sur le coffret de caméra vidéo en utilisant les 4 vis de fixation de visière pare soleil en accessoires après avoir retiré la partie arrière de la visière pare soleil 6 Installer solidement la caméra vidéo sur la platine de fixation d installation de caméra vidéo en utilisant les 3 vis de fixation de caméra vidéo en accessoires Faire passer le câble de so...

Page 56: ... pour les étapes suivantes Important Faire en sorte d utiliser les 4 vis de fixation de douille de trépied accessoires L utilisation de vis ayant une longueur inadéquate peut endommager l appareil Les 4 vis retirées de la tête de trépied ne peuvent pas être utilisées Les platines de fixation d installation de caméra vidéo WV 831 et WV 7010A et les câbles de sécurité WV Q140 et WV Q141 sont conçus ...

Page 57: ...ion RÉDUCT BRUIT réduction de bruit numérique RÉSOLUTION Sélectionner un mode de résolution horizontale MODE NB Configurer les paramétrages relatifs au mode NB tels que les paramétrages de commutation entre les modes couleur et noir et blanc ZONE PRIVEE Il est possible de masquer une zone spécifiée en qualité de zone de confidentialité ZOOM ELEC Régler le zoom électronique STABILISATEUR Sélectionn...

Page 58: ...rique de configuration sélectionnée sera affichée 5 Configurer les paramétrages de chaque rubrique Sélectionner la rubrique de configuration Amener le curseur en appuyant sur le bouton Up ou Down Modifier le paramètre Appuyer sur le bouton LEFT ou RIGHT Affiche la page des paramétrages détaillés de chaque rubrique de configuration Appuyer sur le bouton SET lorsque la rubrique de configuration acco...

Page 59: ... Dans le menu CAMERA AJUST sélectionner OUI ou OFF pour le paramètre CAMERA ID et appuyer sur le bouton SET OUI Affiche l identification de la caméra vidéo qui a été saisie OFF N affiche pas l identification Le menu CAMERA ID s ouvre 2 Sélectionner un caractère dans la zone de sélection des caractères et appuyer sur le bouton SET Les caractères sélectionnés sont affichés dans la zone de modificati...

Page 60: ...ER D3 une plus grande pondération photométrique est accordée au centre de l écran que sur les bords là où un puissant éclairage en contre jour est le plus probable SUPER D3 OUI Valide la fonction SUPER D3 afin de compenser automatiquement un éclairage à contre jour SUPER D3 OFF Valide un paramétrage manuel afin de compenser un éclairage à contre jour Remarques Lorsque le paramétrage est fait sur O...

Page 61: ...aire les étapes 3 et 4 6 Maintenir le bouton SET pressé pendant au moins 2 secondes Le menu CONTRÔLE ALC apparaît 7 Ajuster le niveau de sortie vidéo NIVEAU en amenant le curseur sur I Remarque Lorsque l option OUI est sélectionnée pour SUPER D3 une ombre une ligne noire risque éventuellement d apparaître dans la zone limite entre les scènes lumineuses et sombres Ce phénomène est naturel et ne sig...

Page 62: ...F X2 FIXE ou X2 AUTO est sélectionnée pour un rehaussement de la sensibilité VISION NUIT il est possible d exécuter le paramétrage de ABF ou de sélectionner AUTO pour le paramètre COULEUR NB dans le menu BACK FOCUS AJUST Quand un taux de sensibilité autre que X2 FIXE ou X2 AUTO est sélectionné se servir de l option PREPO et FIXE pour le paramètre COULEUR NB dans le menu BACK FOCUS AJUST 6 Réglage ...

Page 63: ...ien la scène est sombre Lorsque BLANCS MEMO est sélectionné le paramétrage BLANCS MEMO est exigé Paramétrage de BLANCS MEMO 1 Sélectionner BLANCS MEMO et appuyer sur le bouton LEFT BLANCS MEMO se changera en AWC APP SET 2 Appuyer sur le bouton SET APP SET sera mis en surbrillance pendant l exécution du paramétrage de BLANCS MEMO Remarque Si toutefois le calage de la balance des blancs n est pas ef...

Page 64: ...on d un incendie Détecteur de mouvement Le détecteur de mouvement divise l écran en 48 blocs et contrôle les variations de luminance de chacun des blocs Quand il détecte le moindre changement un mouvement de l image il délivre un signal d alarme Quand un changement un mouvement se produisant dans l image est détecté pendant le mode automatique le signal d alarme est délivré et la caméra vidéo s ar...

Page 65: ...ètre le mode en monochromatique OFF Paramètre le mode en couleur Remarques Il peut apparaître des cas où AUTO1 ou bien AUTO2 ne réagit pas correctement si la caméra vidéo est dirigée vers des sujets se déplaçant en permanence ou quand une scène est remplie d une teinte unique comme cela se produit avec le ciel bleu Il est possible de paramétrer le mode de tirage arrière pour corriger l écart de mi...

Page 66: ...mener le curseur jusqu à SET et appuyer sur le bouton SET L écran revient en menu de sélection de NUMERO ZONE Pour supprimer les paramétrages sélectionner DEL et appuyer sur le bouton pour SET 13 Zoom électronique ZOOM ELEC 1 Amener le curseur sur ZOOM ELEC 2 Sélectionner OUI ou OFF et appuyer sur les boutons LEFT et RIGHT Le réglage implicite a été fait sur OFF OUI Un objectif zoom électronique 2...

Page 67: ...n continue ou répétée par expl pour la mise au point automatique etc Cette fonction peut être utilisée pour corriger l écart de mise au point en commandant une commutation entre la couleur et le noir et blanc comme cela est exécuté lors de l installation ou après l installation de la caméra vidéo 1 Sélectionner BACK FOCUS dans le menu d ouverture et appuyer sur le bouton SET Le menu BACK FOCUS AJU...

Page 68: ... la nuisance les dommages ou les pertes survenus qui sont dues ou attribuées à paramétrages inadaptés à la fonction ABF 17 Menu spécial AJUST SPECIAL Sélectionner SPECIAL dans le menu d ouverture et appuyer sur le bouton SET Le menu AJUST SPECIAL s ouvre 17 1 Réglage de niveau de chrominance GAIN CHROMA Amener le curseur I pour régler le niveau de chrominance 17 2 Réglage de gain d ouverture CONTO...

Page 69: ...numéro accompagné d un astérique dans le menu PIX OFF et appuyer sur le bouton SET L écran d attribution PIX OFF s ouvre Appuyer simultanément sur les boutons LEFT et RIGHT pendant au moins 2 secondes Le menu PIX OFF apparaît et affiche le numéro sans astérisque si son enregistrement a été annulé 17 6 Comment opérer la réinitialisation des réglages sur les réglages par défaut usine RESET CAMERA 1 ...

Page 70: ... Vérifier si l objectif de la caméra vidéo est propre La mise au point est elle ajustée correctement Vérifier si la mise au point est ajustée correctement 52 Le cordon d alimentation sont endommagés L utilisation d un cordon d alimentation endommagée risque de provoquer une décharge électrique voire un incendie Couper l alimentation et demander au distributeur de réparer Avant de faire une demande...

Page 71: ...ractères alphanumériques symboles Contrôle de lumière ALC Super Dynamic 3 OUI OFF Vitesse d obturation électronique OFF 1 60 1 100 1 250 1 500 1 1 000 1 2 000 1 4 000 1 10 000 Contrôle de gain OUI ÉLEVÉ OUI MOYEN OUI BAS OFF Accroissement de la sensibilité OFF X2 AUTO X4 AUTO X6 AUTO X10 AUTO X2 FIXE X4 FIXE X6 FIXE X10 FIXE X16 FIXE X32 FIXE Synchronisation VD2 SECTEUR INT Balance des blancs BAL ...

Page 72: ...ccessoires standard Instructions d utilisation présent document 1 él Carte de garantie 1 él Les éléments suivants sont destinés à l installation Platine de fixation de caméra vidéo 1 él Couvercle de platine de fixation 2 él Visière pare soleil 1 él Embase filetée de trépied 1 él Boîtier adaptateur 1 él Vis de fixation de caméra vidéo M4 x 8 4 él une vis de fixation supplémentaire fournie Vis de fi...

Page 73: ...73 ...

Page 74: ...New Jersey 07094 Panasonic Canada Inc 5770 Ambler Drive Mississauga Ontario L4W 2T3 Canada 905 624 5010 http www panasonic ca Printed in Japan 2008 Matsushita Electric Industrial Co Ltd All Rights Reserved NM0108 1038 3TR005460BAA Imprimé au Japon Panasonic Sales Company Division of Panasonic Puerto Rico Inc San Gabriel Industrial Park 65th Infantry Ave KM 9 5 Carolina P R 00985 809 750 4300 ...

Reviews: