


170
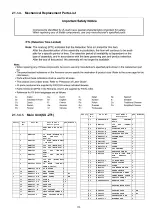
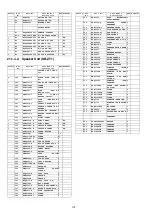
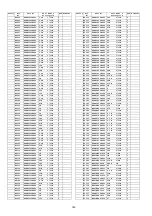
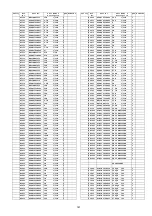
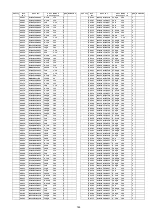
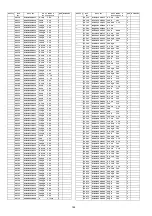
21 Exploded View and Replacement Parts List
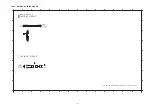
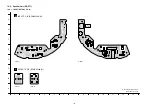
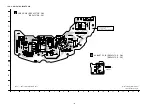
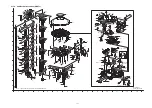
21.1. Exploded View and Mechanical Replacement Parts List
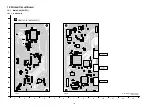
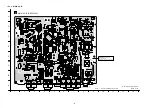
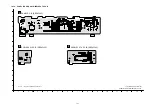
21.1.1. Cabinet Parts Location (SU-ZT1)
(WIRELESS TX
P.C.B.)
(TX MODULE P.C.B.)
(POWER SW P.C.B.)
(PANEL P.C.B.)
(MAIN P.C.B.)
(HDMI P.C.B.)
(DSP P.C.B.)
Z4601
VR4601
*TP4701
*TP4612
T5551
T5501
P5501
*JW4612
*JW4602
*JW4205
*JW1B
*JW1A
JK4611
JK4502 JK4501
JK4006
JK4005
JK4004
JK4003
JK4002
JK4001
JK2202
JK2201
JK2101
FL4601
E5503
E5502
E5501
F701
CN4703
CN4702
CN4701
CN4611
CN4601
CN4221
CN4204
CN4203
CN4106
CN4103
CN4102
CN4101
CN1001
CNB2201
CN2005
CN2004
CN2003
CN2002
CN2001
CN1003
CN1002
42
41
40
40
39
38
37
35
34
33
32
31
30
29
29
29
28
28
27
27
27
26
26
26
26
26
26
25
24
23
22
20
19
18
17
16
16
16
15
14
14
14
14
13
13
13
13 13
13 13
13
13
13
12
12
12
12
12
12
12
12
12
12
12
11
10
9
8
7
6
5
4
3
2
1
a
a
b
b
c
c
d
d
e
e
f
f
g
g
h
h
i
i
j
j
k
k
A
A
1
2
3
4
5
6
7
8
9
A
B
C
D
E
F
G
H
10
11
12
13
SU-ZT1GN/GS-K
CABINET DRAWINGS
NOTE: " * " REF IS FOR INDICATION ONLY.
Summary of Contents for SC-ZT1GN
Page 4: ...4 1 2 Caution for AC Mains Lead ...
Page 11: ...11 5 Location of Controls and Components 5 1 Main Unit SU ZT1 ...
Page 12: ...12 5 2 Speaker Unit SB ZT1 5 3 Remote Control ...
Page 13: ...13 6 Installation ...
Page 14: ...14 6 1 Basic Connections 6 1 1 Connecting equipment with HDMI terminal TV DVD recorder etc ...
Page 15: ...15 6 1 2 Connecting equipment without HDMI termial DVD player VCR etc ...
Page 16: ...16 6 1 3 Other connections ...
Page 17: ...17 6 2 AC mains lead connection ...
Page 18: ...18 7 Speaker setting SB ZT1 7 1 Setting the speakers ...
Page 19: ...19 ...
Page 27: ...27 9 2 2 Speaker Unit SB ZT1 ...
Page 28: ...28 9 2 3 Speaker Unit SB ZT1 Wireless Link ...
Page 29: ...29 ...
Page 31: ...31 ...
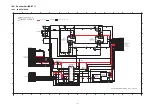
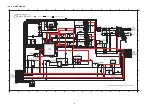
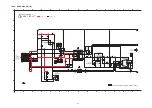
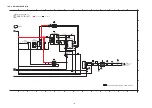
Page 32: ...32 10 2 Main Parts Location Diagram 10 2 1 Main Unit SU ZT1 ...
Page 33: ...33 10 2 2 Speaker Unit SB ZT1 ...
Page 35: ...35 10 3 2 Speaker Unit SB ZT1 ...
Page 48: ...48 Step 4 Remove the Weight ...
Page 49: ...49 Step 5 Remove 10 screws ...
Page 53: ...53 Step 11 Remove 2 screws Step 12 Lift up to remove Arm Cover A ...
Page 55: ...55 Step 14 Tilt the Woofer Block in order as arrows shown to detach it from the Tweeter Block ...
Page 66: ...66 Step 3 Remove the heatsink with the IC5701 ...
Page 67: ...67 Step 4 Remove 1 screw Step 5 Remove IC5701 from the heatsink ...
Page 69: ...69 Step 4 Place the heatsink with the IC5701 onto the SMPS P C B ...
Page 81: ...81 Step 4 Remove 3 screws Step 5 Remove the Power Button ...
Page 86: ...86 Step 3 Remove 4 screws Step 4 Lift up to remove Woofer Speaker SP1 ...
Page 110: ...110 Step 11 Remove 3 screws ...
Page 111: ...111 Step 12 Remove the Light Panel Step 13 Remove the Power Button ...
Page 129: ...129 14 Overall Simplified Block 14 1 Signal Flow SU ZT1 ...


