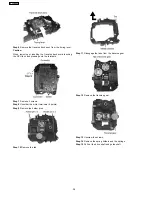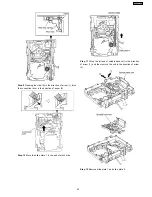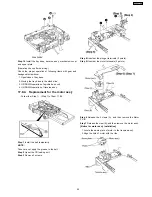
Step 6
Remove the traverse deck ass’y from the timing lever.
Caution:
When removing or inserting the traverse deck avoid touching
the OPU lens and pressing onto the turntable.
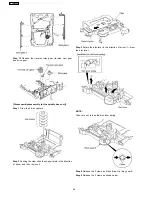
Step 7
Remove 3 screws.
Step 8
Unsolder the motor terminals (4 points).
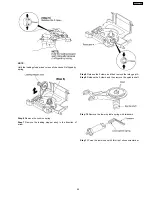
Step 9
Remove the holder pins.
Step 10
Remove the tab.
Step 11
Disengage the tabs from the traverse gear.
Step 12
Remove the traverse gear.
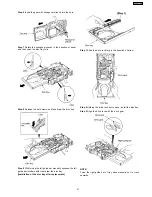
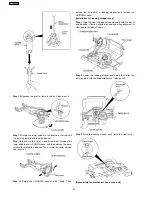
Step 13
Unscrew the screws.
Step 14
Remove the spring holders and the springs.
Step 15
Pull out the drive shaft and guide shaft.
38
SA-VK61DGS
Summary of Contents for SB-VK61
Page 10: ...10 Operation Procedures 10 SA VK61DGS ...
Page 11: ...11 SA VK61DGS ...
Page 12: ...11 Disc information 12 SA VK61DGS ...
Page 13: ...13 SA VK61DGS ...
Page 17: ...13 Procedure for repairing the set 17 SA VK61DGS ...
Page 57: ...18 3 1 Cassette Deck Section 18 3 2 Adjustment Point 18 3 Alignment Points 57 SA VK61DGS ...
Page 131: ...25 1 Deck Mechanism RAA3412 S 25 1 1 Deck Mechanism Parts Location 131 SA VK61DGS ...
Page 132: ...132 SA VK61DGS ...
Page 135: ...135 SA VK61DGS ...
Page 136: ...136 SA VK61DGS ...
Page 138: ...25 3 Cabinet 25 3 1 Cabinet Parts Location 138 SA VK61DGS ...
Page 139: ...139 SA VK61DGS ...
Page 140: ...140 SA VK61DGS ...
Page 155: ...25 6 Packaging 155 SA VK61DGS PRT0406 D K J N L ...
Page 156: ......


