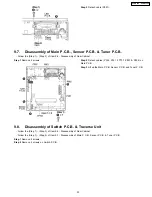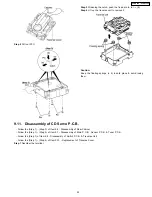
Step 2
Pull out FFC.
Step 1
Desolder the terminal.
Step 3
Widening the catch, push the fixed pin in. (a)
→
(b)
Step 4
Lift up the traverse unit to remove it.
Caution:
Keep the floating springs (x 4) in safe place & avoid losing
them.
9.11. Disassembly of CD Servo P.C.B.
·
Follow the (Step 1) - (Step 3) of Item 9.4 - Disassembly of Rear Cabinet
·
Follow the (Step 1) - (Step 2) of Item 9.7 - Disassembly of Main P.C.B. , Sensor P.C.B. & Tuner P.C.B.
·
Follow the (Step 1) of Item 9.8 - Disassembly of Switch P.C.B. & Traverse Unit
·
Follow the (Step 1) - (Step 4) of Item 9.10 - Replacement of Traverse Cover
25
SC-EN35P / SC-EN35PC
Summary of Contents for SA-EN35P-K
Page 10: ...6 Accessories Remote Control AC Cord FM AM Antenna 10 SC EN35P SC EN35PC ...
Page 12: ...7 3 Connection 12 SC EN35P SC EN35PC ...
Page 13: ...7 4 Using the XM Satellite Radio 13 SC EN35P SC EN35PC ...
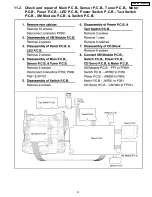
Page 32: ...11 1 Check and Repair of CD Servo P C B 32 SC EN35P SC EN35PC ...
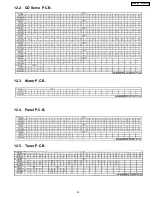
Page 35: ...12 2 CD Servo P C B 12 3 Motor P C B 12 4 Panel P C B 12 5 Tuner P C B 35 SC EN35P SC EN35PC ...
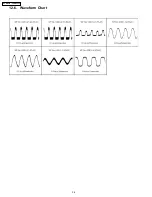
Page 36: ...12 6 Waveform Chart 36 SC EN35P SC EN35PC ...
Page 38: ...SC EN35P SC EN35PC 38 ...
Page 44: ...44 SC EN35P SC EN35PC ...
Page 54: ...SC EN35P SC EN35PC 54 ...
Page 61: ...20 Exploded Views 61 SC EN35P SC EN35PC ...
Page 62: ...62 SC EN35P SC EN35PC ...
Page 63: ...20 1 Cabinet Parts Location SC EN35P SC EN35PC 63 ...
Page 64: ...SC EN35P SC EN35PC 64 ...
Page 65: ...20 2 Packaging SC EN35P SC EN35PC 65 ...
Page 66: ...SC EN35P SC EN35PC 66 ...

