– 94 –
Chapter 4 Shooting — Handling setting data
3
Select [YES] and press the <SET> button (or the jog dial button).
The selected scene file is restored to the factory settings.
Changing the scene file title
1
Select the scene file to change the title in [FILE] in the [CAM02:SCENE FILE] screen of SmartUI and press the <SET> button (or
the jog dial button).
2
Select [NAME EDIT] in the main menu
→
[SCENE FILE].
The title entry screen and keyboard are displayed.
3
Enter the characters you want to set on the keyboard using cursor buttons (or the jog dial button).
4
Select [OK] and press the <SET> button (or the jog dial button).
The file name is updated.
How to restore the scene file or menu setting status to the factory settings
All the scene files and menu settings of the camera can be collectively restored to the factory settings.
1
Select [MENU INITIALIZE] in the main menu
→
[OTHER FUNCTIONS].
2
Select [EXECUTE] and press the <SET> button (or the jog dial button).
[SYSTEM RESTART] indication appears on the confirmation screen.
3
Select [YES] and press the <SET> button (or the jog dial button).
The camera is restarted and data are restored to the factory settings.
Saving to an SD memory card and loading saved data
Scene files and other setting values that you have set can be saved as a file, and up to 8 files can be saved on the SD memory card, and saved data
can be loaded.
f
For scene files, the current setting values are saved in the camera automatically, and you can write the saved data to an SD memory card. When they
are loaded from the SD memory card, the current setting values are overwritten as well as the data saved in the camera.
f
All scene files [F1:] to [F6:] are overwritten.
Saving scene files
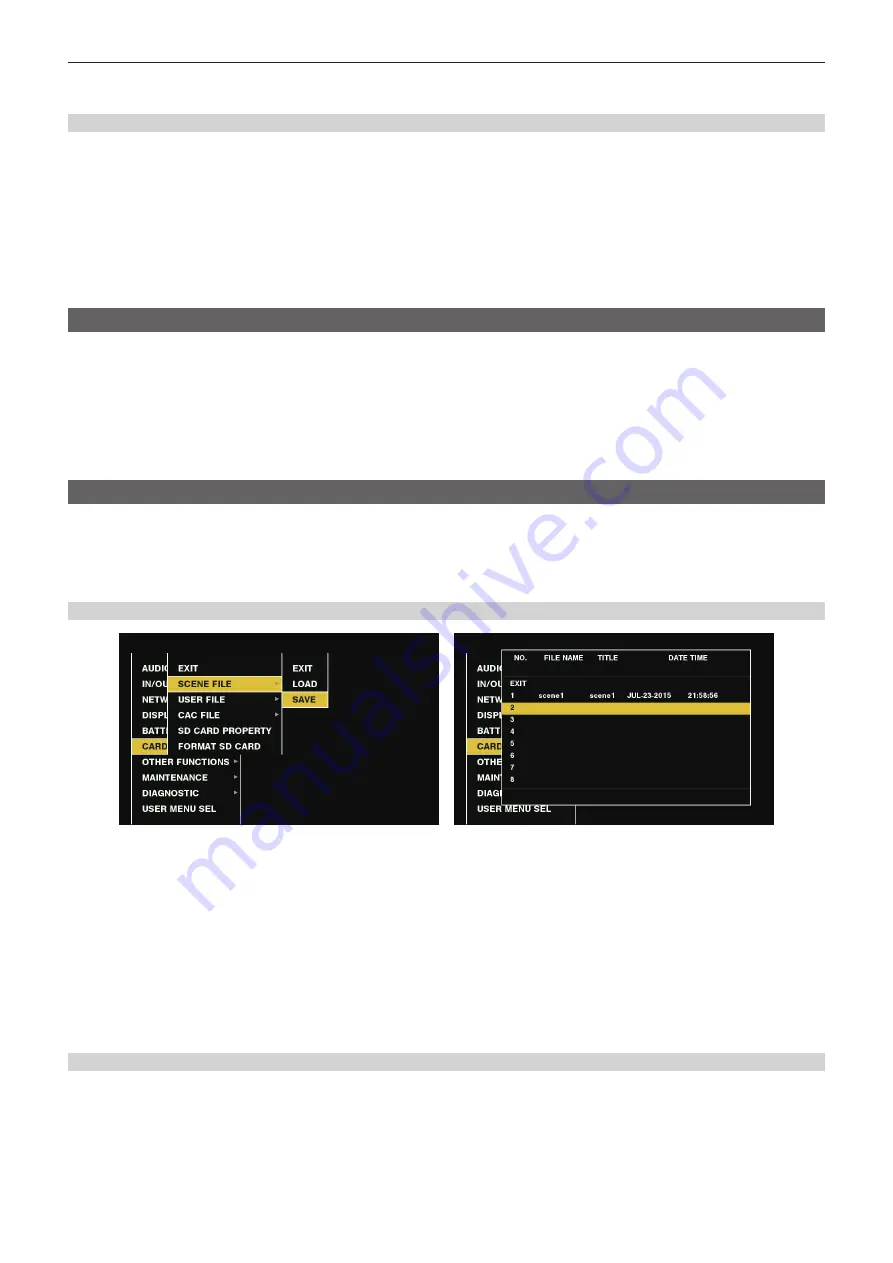
Fig. 1
Fig. 2
1
Select [SAVE] in the main menu
→
[CARD FUNCTIONS]
→
[SCENE FILE]. (Fig. 1)
2
Select the file number (1 to 8) and press the <SET> button (or the jog dial button). (Fig. 2)
The title entry screen and keyboard are displayed.
3
Enter desired characters using cursor buttons (or the jog dial button).
4
Select [OK] on the keyboard and press the <SET> button (or the jog dial button).
A confirmation screen is displayed.
5
Select [YES] and press the <SET> button (or the jog dial button).
The file is written with the entered title on the SD memory card, and the screen of Fig. 2 returns.
Loading scene files
1
Select [LOAD] in the main menu
→
[CARD FUNCTIONS]
→
[SCENE FILE].
2
Select the file number (1 to 8) and press the <SET> button (or the jog dial button).
A confirmation screen is displayed.
3
Select [YES] and press the <SET> button (or the jog dial button).
When loading is completed, [LOAD OK!] is displayed.
Summary of Contents for PX380G-BS300
Page 9: ...Before using the camera read this chapter Chapter 1 Overview ...
Page 165: ...Details displayed on the viewfinder are described Chapter 8 Display ...
Page 213: ...Maintenance and error messages of the camera are described Chapter 11 Maintenance ...
Page 219: ...This chapter describes the specifications of this product Chapter 12 Specification ...


