– 56 –
Chapter 4 Shooting — Basic procedures
Standard recording
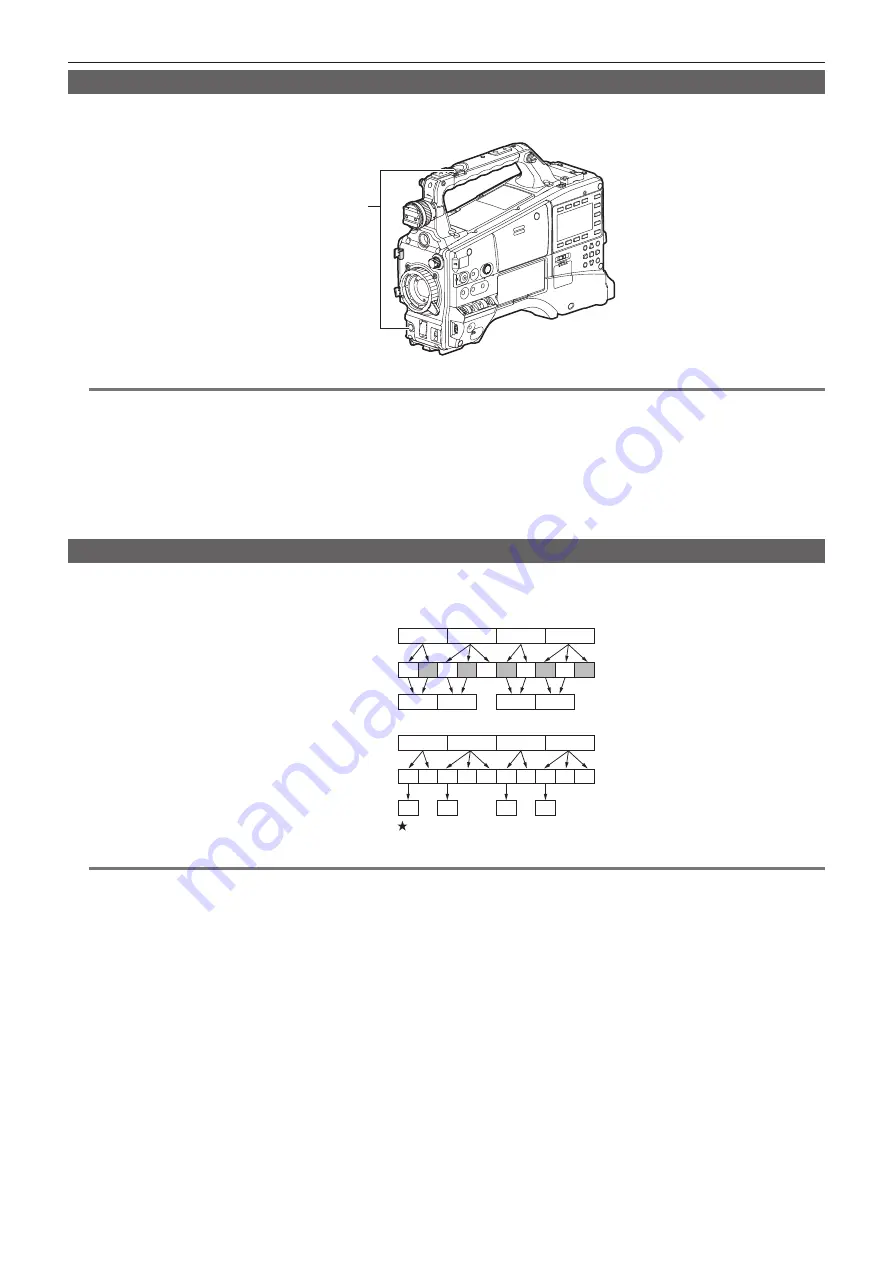
Press the <REC> button to start recording of video and audio on the P2 card.
Data consisting of video and audio (including additional information) generated by a single shooting action is called a “clip”.
<REC> button
@
@
NOTE
t
In the following cases, it may take time to complete writing to the P2 card.
- Stopping of short-term recording
- When stopping recording immediately after recording is performed on the second P2 card
t
If recording is not stopped even when the <REC> button is pressed, [REC PAUSE INVALID] is displayed at the center of the screen. Once stopping of
recording becomes possible, the message disappears.
t
Also immediately after inserting a P2 card or turning on the power, recording is started using the internal memory of the camera. In this case, recording
cannot be stopped until the P2 card has been recognized.
Push the <DISP/MODE CHK> switch towards the <CHK> side and check the P2 card status on the [SLOT1], [SLOT2], and [SLOT3] rows displayed in
the viewfinder.
Native recording
This recording method extracts and records valid frames at the shooting frame rates in 1080P recording and AVC-Intra recording in 720P.
With native recording, you can record longer than the normal recording time.
Even in native recording, the rate for outputting camera images and playback images is 59.94 frames or 50 frames that are pulled down.
A
Ao
A
B
Ae Bo Be Bo Ce Co De Do De
B
C
D
C
D
A
A
A B
B
B C
C D
A
B
C
D
D
D
B
C
D
Camera shooting
(720/24PN)
2:3 pull-down
Recording
Valid frames
Camera shooting
(1080/24PN)
2:3 pull-down
Recording
@
@
NOTE
t
Recording starts from the beginning of a 4-frame cycle for 24PN (native recording) and 2-frame cycle for 30PN of 720P (native recording). Therefore,
the time code may become non-continuous when clips are recorded continuously in system modes with different recording cycles.
t
Also immediately after inserting a P2 card or turning on the power, recording is started using the internal memory of the camera. In this case, recording
cannot be stopped until the P2 card has been recognized.
Push the <DISP/MODE CHK> switch towards the <CHK> side and check the P2 card status on the [SLOT1], [SLOT2], and [SLOT3] rows displayed in
the viewfinder.
Summary of Contents for PX380G-BS300
Page 9: ...Before using the camera read this chapter Chapter 1 Overview ...
Page 165: ...Details displayed on the viewfinder are described Chapter 8 Display ...
Page 213: ...Maintenance and error messages of the camera are described Chapter 11 Maintenance ...
Page 219: ...This chapter describes the specifications of this product Chapter 12 Specification ...


