


358
C
h
ap
te
r 7
C
ha
ng
ing
C
o
n
figu
ra
tion
7.5.3 Customizing Splash Screen (Update)
A splash screen of PV500 is the blue screen showing the product name and the version at startup. The screen
can be changed to another one. Changing the screen requires a SD memory card.
Preparing a File
1.
Prepare an image to display as a splash screen.
Modify and save the image file to meet the following conditions.
- 24-bit bitmap file
- Image size: Max. 1024 (w) x 768 (h) pixels
2.
Prepare a SD memory card and save the image to display as “Logo.bmp” in the path below.
Drive: ¥Panasonic MEW Vision¥PV500¥Logo
3.
Attach the SD memory card of the step 2 to the PV500.
Now you completed the preparation of the image file to use for a splash screen.
Changing Splash Screen
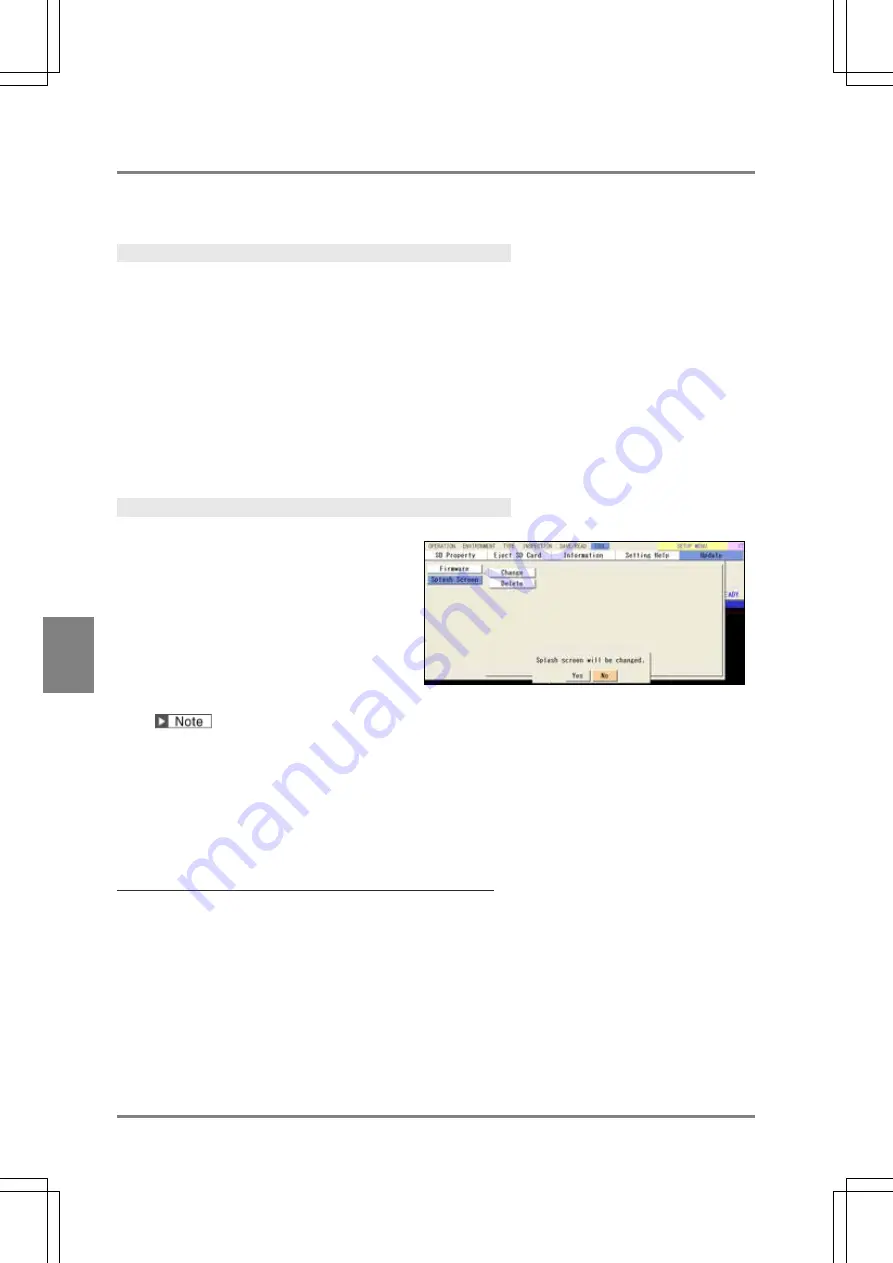
1
. Select "TOOL” > “Update” from the
menu bar.
Update window is displayed.
2
. Select “Splash Screen” > “Change”.
When the confirming message appears,
select “YES" to execute the change. After
the change is completed, a message is
displayed.
If you cannot change it, the following can be considered as reasons. Check the conditions.
-
A nonqualified file is saved. (A different file format or too large file size.)
-
The file is saved in the wrong place.
-
The file name is not “Logo.bmp”.
-
A SD memory card is not available.
3.
As the message appears telling that the change is completed, select “OK”.
The changed splash screen will be displayed after the next startup.
Initializing Splash Screen
Delete the custom splash screen and replace it with the original image.
1.
Select “Splash Screen” in “Update” window.
2.
Select "Delete".
When the confirmation message appears, select “YES" to start initializing.
3.
As the message appears telling that the process is completed, select “OK”.
The initial splash screen will be displayed after the next startup.
Summary of Contents for PV-500
Page 1: ......
Page 10: ......
Page 11: ...9 Names and Descriptions Chapter 1 INDEX Chapter 1 Names and Descriptions ...
Page 21: ...19 Installation and Wiring Chapter 2 INDEX Chapter 2 Installation and Wiring ...
Page 37: ...35 Basic Operation Chapter 3 INDEX Chapter 3 Basic Operation ...
Page 55: ...53 Setting Inspection Conditions Chapter 4 INDEX Chapter 4 Setting Inspection Conditions ...
Page 345: ...343 Chapter 7 Changing Configuration INDEX Chapter 7 Changing Configuration TOOL ...
Page 375: ...373 Operation and Data Output through I O Terminals Chapter 8 INDEX ...
Page 390: ......
Page 391: ...389 Control with Communication Port Chapter 9 INDEX Chapter 9 Control with Communication Port ...
Page 430: ......
Page 431: ...429 PVWIN Chapter 10 INDEX Chapter 10 PVWIN ...
Page 493: ......
Page 494: ......


